Sandtrap: Difference between revisions
From Halopedia, the Halo wiki
Thecairocat (talk | contribs) |
|||
| Line 86: | Line 86: | ||
==Alternate Sandtrap Map Variants== | ==Alternate Sandtrap Map Variants== | ||
===[[Sand Tarp (Level)|Sand Tarp]]=== | ===[[Sand Tarp (Level)|Sand Tarp]]=== | ||
The "Sand Tarp" variant is simply just a normal Sandtrap, which one major difference: The [[Elephant]]s on the map have been removed, and if Asymmetric gametypes are played on this map, the defender's base will no longer the large crypt near the [[Phantom]]crash site. Instead, attackers will spawn in the crypt, and defenders at the other "open-area" base. | The "Sand Tarp" variant is simply just a normal Sandtrap, which one major difference: The [[Elephant]]s on the map have been removed, and if Asymmetric gametypes are played on this map, the defender's base will no longer the large crypt near the [[Phantom]] crash site. Instead, attackers will spawn in the crypt, and defenders at the other "open-area" base. | ||
===Sandtrap Covies=== | ===Sandtrap Covies=== | ||
The "Sandtrap Covies" variant is mainly a Covenant-weaponry modified version of Sandtrap, with these changes: | The "Sandtrap Covies" variant is mainly a Covenant-weaponry modified version of Sandtrap, with these changes: | ||
Revision as of 23:09, September 20, 2008
Template:Multiplayer Map Infobox Template:Article Quote Sandtrap is a multiplayer map featured in Halo 3.[1]
Summary
Sandtrap is set in a vast desert (possibly situated on The Ark, as the nearby Albatross known as "03" was said to have crashed in the Ark's vicinity) with rolling sand dunes and some enigmatic structures, half buried in the desert. They have obviously been dulled and eroded by the sand to quite some extent, suggesting that the structures are much older than other Forerunner structures. That or they were built merely as temporary shelter or possibly bunker. The origin of these structures is unknown, but they bear certain similarities to the "temples" on Installation 05.
It features odd Forerunner constructs and is encircled with a minefield that features vertically-launching mines to prevent players from venturing beyond its boundaries. Six large towers surround the outer extremities of the map, all connected by a large wall. The purpose and origin of these structures is unknown. The September 07 EGM stated that this was the site of a Brute excavation and UNSC forces (deployed from the frigate Aegis Fate, which hovers in the sky above the map) came along and removed them. [2] It has a heavy emphasis on vehicular combat. All of the vehicles in the game are on this map - for example, the "bases" are a pair of UNSC Elephants at opposite ends of the recently unearthed Forerunner ruins. In this map there lie some very interesting sniper spots. For example, if you are inside of the Phantom, it is hard to see you and it gives you a very interesting view so you can take down some unsuspecting players.
History
It was first announced in the June 2007 issue of Gamepro. It may also be the "large map" Bungie sparsely talked about in one of their updates. This wasn't one of the three maps featured in the public Halo 3 Beta. This map was originally named Shrine, but was confirmed to have been renamed to Sandtrap in the July 13, 2007 Bungie Weekly Update.
Overview
The main spine of the level is where most battles take place, there is an underground part to this spine that comes out into a small "pit", or the ravine where most vehicle battles take place. The larger base also has an underground "cavern" to it, though unless you are just defending; it is an easy place to ambush. The destroyed Phantom is a great sniping spot. The "deck" on the side is also good cover from below, the smaller base has less hiding spots to it, but it is more open, better for explosives. The Albatross is not the best for attacking or defending.
Unusable Vehicles
- UNSC Aegis Fate (Hovering high in the background)
- Phantom (Crashed and destroyed near the Banshee spawn)
- Albatross Dropship (Crashed and buried near one of the Elephants)
Strategies
- In Multi-Flag CTF and Assault, a good strategy is to seize the enemy Elephant and bring it to your base in order to get repeatable captures the objective. In Neutral Assault, take the enemy Elephant to the very middle of the map and continuously grab and plant the bomb until victory. Beware; stealing an enemy Elephant is quite a task, so make sure to bring several teammates along with you.
- On several dunes to the side of the map where the sun is you can easily see the whole area of the map. Set up here and you can dominate. A common tactic is to take the sniper and use a Mongoose to drive over to the area and snipe. Good secondary weapons are Assault Rifles to dispatch enemies that attack you at close range and Spartan Lasers so any incoming vehicles can be eliminated, and the sniper can continue wreaking havoc from afar.
- Upon picking up the Spartan Laser at the beginning of the match, be ready to destroy the opposing Banshee, Chopper, Warthog and Mongoose, because more often than not, the enemy will most likely get it ahead of your teammates, and you can eliminate the threat immediately.
- If you are good at sniping, get the Sniper rifle or the Beam Rifle and kill any enemy team member that goes near the Banshee until one of your guys gets it or it is destroyed.
- If you start at the "Albatross" end of the map, if you are going for the Sniper Rifle, always keep an eye out for enemies camping up high on the other side, although a Bubble Shield is an easy way to get past this problem.
- If you are playing this level on multiplayer Infection, a good way to stay alive is for at least two people (non-zombies) to form an alliance and get to a Warthog or Elephant. Whoever is the better shot uses the turret and the driver continuously drives around the whole level on the path. As long as you have good reflexes and are a good shot you can usually kill the charging and incoming zombies before they reach the Warthog.
- Another good Infection strategy is to get a shotgun and a battle rifle, then quickly and inconspicuously move to an elephant. get into the drivers seat, but don't drive. Simply hide there until Zombies come. You can easily hide there for a very long time. However, this only works when zombies don't have anything other than energy swords.
- One great sniper spot is inside the crashed Phantom it provides excellent cover. Be sure though to carry another weapon that can help you for opponents can become aware of your position and attack, this also allows you to watch the Banshee.
- Another excellent sniper spot is the highest sand dune on the outer edge of the map. This area provides a spot where you can see the whole map. However, there is no cover and you can be easily detected. Also, it is usually the first guess as to where a Sniper is hiding, due to the relative popularity of the spot.
- Try and get a teammate to let you jump on his Banshee and go to the highest building and jump off with a long range weapon.
Forge
- There are two ways to "bridge the gap" between the big wall in the center. The first is a simple two-way teleport system, obviously both being on the same channel. This allows for infantry to cross, however vehicles can't go through teleporters. The way to fix that is to place two permanent Grav Lifts, one on either side, of the gap. This will allow most land-based vehicles going a decent rate of speed to cross, the only exceptions being Scorpions and Wraiths. Be cautious going towards the smaller base (with the Albatross), as you may go through the holes in the top, and flip your vehicle over.
- Another fun way to "bridge the gap" is to use the floating crate trick. This also gives you the opportunity to make a new focus point for sum of the attention if it is a flag, bomb, oddball respond point
- The map is obviously based on vehicular combat, so consider that when in Forge. Place vehicles like Hornets and Gauss Warthogs, and make Sniper Towers out of the pillars, adding Barricades for cover, and a Two-Way transporter from the top of the pillars to the bottoms. Add Missile Pods and Warthogs to the Elephants, setting both to automatic respawn.
- If your a sniper but get shot at constantly cause everyone knows where you are here's a tip. Go away as far as you can to one side without getting blown up by the mines and do the floating crate trick. Then set up some weapons that you like. Then If you want add a warthog or ghost or something beneath you to escape in if people find out where you are. But be advised you are only invisible to a player who doesn't have a scope pointing in your direction. Even at the far side of the map you are visible to a scope. To get to the spot add a teleporter in some secret spot or mabye you might be able to fly there in a Banshee or Hornet.
Alternate Sandtrap Map Variants
Sand Tarp
The "Sand Tarp" variant is simply just a normal Sandtrap, which one major difference: The Elephants on the map have been removed, and if Asymmetric gametypes are played on this map, the defender's base will no longer the large crypt near the Phantom crash site. Instead, attackers will spawn in the crypt, and defenders at the other "open-area" base.
Sandtrap Covies
The "Sandtrap Covies" variant is mainly a Covenant-weaponry modified version of Sandtrap, with these changes:
- All vehicles at each base, except the Mongooses inside the Elephants, are replaced by Ghosts and Wraiths. The Banshee in the map has been removed.
- The Missile pod near each base are replaced by Gravity Hammers. And Vice Versa, as the original Gravity Hammer spawn on the map is replaced by a Missile pod.
- The Sniper Rifle on the map is replaced by a Beam Rifle instead.
- A Rocket Launcher spawns at each base to compensate for the loss of the Missilepods.
And the original Rocket Launcher spawn on the map has been removed.
Sandtrap Heavy
The "Sandtrap Heavy" variant is mainly a more Vehicular insanity version of Sandtrap, with these changes:
- One Chaingun Warthog at each base is replaced by a Gauss Warthog.
- Another Banshee spawns opposite the Phantom crash site.
- Prowlers spawn at the opposite site of each base's Warthogs' spawn.
- In front and behind of each base's Elephant, Wraith and Scorpion Tanks spawn.
- In Addition, 2 additional Spartan Laser spawns ate found diagonal opposite the other 2 original Laser spawn points, which have been moved slightly farther away from each base.
- An addition Missile pod spawns in a small cave near the other Banshee spawn point on the map.
- The Shotgun spawn in a cave is replaced by a Rocket Launcher, while the one at original spawn point remains, and its respawn time decreased to a shorter time.
Trivia
- If the player manages to flip the Elephant, when approached, instead of the "Hold RB to flip [vehicle name]" message, the player will receive "Hold RB to flip... wait, what? How did you do that?"
- The codename for Sandtrap was "Shrine"
- If you go from the center of the map (the big gap between the sniper spawn and the 1 Flag CTF Base) to the Phantom to the Albatross, it resembles a 7, another reference.
- There are six very real easter eggs on this level. To find them, overload the map and venture past the invisible wall in theater mode. An egg is located at the top of each tower. They only appear when close to the player, and are covered in cryptic messages.
- This is the only map in the Halo Franchise to feature Elephants.
- GamePro has stated that Sandtrap "...has few ties to older Halo 2 maps, but its massive size recalls Relic."
- The metal ring around Sandtrap resembles the Halo logo.
- At E3, a map was shown on video. It was said by viewers to be called "Sand Trap" — in contrast to having been called "Shrine" before that point — and was labeled "... the largest map ever to be in Halo." The new name of Sandtrap was confirmed in the July 12 Bungie podcast.
- Hieroglyphics can be seen inside every structure on this map.
- Unlike other games, the UNSC Aegis Fate is part of the "floating bitmap in the sky." Its 'serial' number is FFG-307.
- You can go higher in actual gameplay in this map than you can in Theatre mode.
- A low textured Sentinel Beam (that normally stays at the spires but will rarely follow the player inside the map) is supposedly in control of when the Mines spawn. To best see this, drive a Hornet through the minefield, staying about 10 feet off the ground. When you see an orange-yellow laser beam, quit and go to Theater. In theater, follow the laser. You will see that the laser originates from the spire furthest away from you. The other end has been reported to set off mines; however, this does not always seem to be the case.
- Elements of Sandtrap seems to have been inspired from the Halo 3 Campaign mission, The Ark, and the Halo 2 multiplayer maps Relic and Burial Mounds.
- It appears that the farther out you go the deadlier the mines become, finally becoming "super-mines" when you leave the map, with one hit killing players and going off almost instantly.
- This is the only other map in the Halo franchise to contain an unusable Albatross dropship, the other one being Relic.
- This multiplayer map is the second largest in Halo 3, just behind the new DLC map Avalanche.
- In the Elephant, there is a screen near the Mongoose with description about the vehicle and the map itself.
- Sandtrap has the highest barrier in the game allowing pilots of a Hornet or Banshee to give the player the full experience of a war game.
- It is possible to overload the map just like you can on Snowbound and Avalanche with Trip Mines.
- Near the top of one of the temples there is an apparent "Black Hole" that absorbs any explosive attack, for example, if you shoot a rocket into it, it will go through the Black Hole and not explode.
- It is possible to go to the very top of the tower in normal gameplay by using the Banshee, but this is only recommended if you have a long range precision weapon, like the Sniper Rifle.
- It's possible to get on the outer ring around Sandtrap and not die, but some incidents result to Killed by Guardians.
Gallery
- Shrine.jpg
A Chopper battle on Sandtrap.
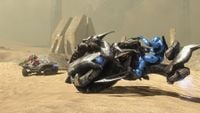
Chopper vs. Warthog.
- Unscfrieghtsandtrap.jpg
UNSC Frigate Aegis Fate
- UNSC Battle Cruiser 1.jpg
Chopper defeats Warthog.
- Elephantwr8.jpg
Battling the Elephant.
- Flying Elephant.jpg
A flying exploding Elephant.
- M808 Scorpion on Sandtrap.PNG
Scorpion vs. Wraith.
- H3 MP Sandtrap.jpg
Red team players.

Prowler defeats Prowler.


