Wizard: Difference between revisions
From Halopedia, the Halo wiki
(strategy, image...) |
(adding image) |
||
| Line 32: | Line 32: | ||
==Structure== | ==Structure== | ||
There are two bases at opposite ends, a fair distance apart. Directly ahead of each base is a small "platform", which contains the [[Needler]] and the [[Plasma Rifle]]. You can also get on the platform by climbing and ascending the ramp. Then, if you jump, there is a central platform which contains two flamethrower. Each flag is protected by a slab of stone. To the right and left of the circular platform, there is an [[active camo]], which is on the slab of stone, and an [[Overshield]], which is behind the slab. Next to each flag, right above the ladder, there is a health pack. Below each base and between the platform next to the base, there are four grenades, either [[Fragmentation Grenades]] or [[Plasma Grenades]], depending on the base. This map is generally considered the smallest map in Halo: PC. | There are two bases at opposite ends, a fair distance apart. Directly ahead of each base is a small "platform", which contains the [[Needler]] and the [[Plasma Rifle]]. You can also get on the platform by climbing and ascending the ramp. Then, if you jump, there is a central platform which contains two flamethrower. Each flag is protected by a slab of stone. To the right and left of the circular platform, there is an [[active camo]], which is on the slab of stone, and an [[Overshield]], which is behind the slab. Next to each flag, right above the ladder, there is a health pack. Below each base and between the platform next to the base, there are four grenades, either [[Fragmentation Grenades]] or [[Plasma Grenades]], depending on the base. This map is generally considered the smallest map in Halo: PC. | ||
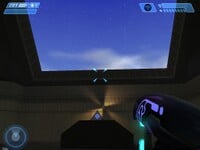
[[Image:ActiveWizard1.jpg|thumb|The [[Active Camouflage]]]] | |||
==Strategy== | ==Strategy== | ||
*If you have the enemy flag, the fastest way to get to the other base is to jump off the base, go towards the nearest teleporter (to your right) and emerge through the other end. Then, DON'T go on the ramp-that will expose you to enemy fire. Alternatively, go towards the place with the grenades, climb the ladder, and score! A counter-method of this is to simply guard the teleporters (aka camp). | *If you have the enemy flag, the fastest way to get to the other base is to jump off the base, go towards the nearest teleporter (to your right) and emerge through the other end. Then, DON'T go on the ramp-that will expose you to enemy fire. Alternatively, go towards the place with the grenades, climb the ladder, and score! A counter-method of this is to simply guard the teleporters (aka camp). | ||
Revision as of 14:43, June 26, 2008
Template:MpStub Template:Multiplayer Map Infobox
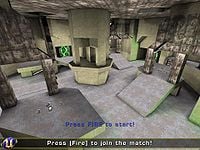
Wizard is a multiplayer map in Halo: Combat Evolved. It is most likely a Human structure due to the Human metal plates that make up the internal part of the base. It is also possible that is one of the Human camps that the survivors of the Pillar of Autumn built on Installation 04.
Wizard was remade as Warlock for Halo 2.
Structure
There are two bases at opposite ends, a fair distance apart. Directly ahead of each base is a small "platform", which contains the Needler and the Plasma Rifle. You can also get on the platform by climbing and ascending the ramp. Then, if you jump, there is a central platform which contains two flamethrower. Each flag is protected by a slab of stone. To the right and left of the circular platform, there is an active camo, which is on the slab of stone, and an Overshield, which is behind the slab. Next to each flag, right above the ladder, there is a health pack. Below each base and between the platform next to the base, there are four grenades, either Fragmentation Grenades or Plasma Grenades, depending on the base. This map is generally considered the smallest map in Halo: PC.
Strategy
- If you have the enemy flag, the fastest way to get to the other base is to jump off the base, go towards the nearest teleporter (to your right) and emerge through the other end. Then, DON'T go on the ramp-that will expose you to enemy fire. Alternatively, go towards the place with the grenades, climb the ladder, and score! A counter-method of this is to simply guard the teleporters (aka camp).
- NEVER set this map for heavy weapons mode only. Though it might be fun to a selected few, you will usually not be able to spawn. The moment they see you, they will fire a rocket.
- As with Prisoner, shotgun/no shields mode is considered the best (preferrably Oddball or Slayer). You require skill to kill someone before they kill you, due to the one-headshot-kill for shotguns.
- Always watch/take the weapons that are most dangerous in this small map: the flamethrower, the shotgun, and try to grab as many grenades as possible. Fragmentation are preferrable in this map due to it's hardness to dodge a nade of that big blast radius.
- In no shields mode, NEVER go to enemy base and stay there. Once they realize you're there, they will frag you until you either jump off or die of the explosions. Once you're off the high ground, it'll be simple work to finish you (ex. Kill you with overpowered weapons, nades). You're just giving them a free kill.
- You'll have a great view of everyone from the middle, but you can be surrounded from all sides.
- Try to get to a higher place than anyone else.
- There will probably be someone waiting for you above the ladder you're climbing.
- Watch your back.
- Teleporting won't do you a huge amount of favors on this map.
- On Halo PC, try to grab the flamethrower in the middle as fast as possible. Whoever has it will be able to dominate with ease.
- Try to get the Active Camo in the center, then run and kill as many other players as you can before it runs out.
- If playing without shields, the shotgun is the best weapon to choose, due to the small size of the map.
- Due to the close-quarters of the level, grenades and other explosives are useful.
- The Overshield and Active Camo spawn on all sides of this map. Try to have both at the same time and prevent other players from every grabbing the powerups. Remember, with an Overshield, you will almost always have the advantage in a 1-on-1 scenario (Unless the opponent is an extreme expert or has a overpowered weapon).

