
The Oracle: Difference between revisions
(removing "levelname" template) |
SpartanLeet (talk | contribs) No edit summary |
||
| (145 intermediate revisions by 50 users not shown) | |||
| Line 1: | Line 1: | ||
{{ | {{Status|Gameplay}} | ||
{{ | {{disambig header|the campaign level|the [[Forerunner]] [[monitor]]|343 Guilty Spark}} | ||
{{Level infobox | {{Level infobox | ||
|prev=''[[ | |pagegamelabel=H2 | ||
|next=''[[Delta Halo | |prev=''[[The Arbiter]]'' | ||
|next=''[[Delta Halo]]'' | |||
|name='''''The Oracle''''' | |name='''''The Oracle''''' | ||
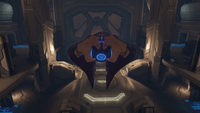
|image=[[File: | |image=[[File:H2A TheOracle Loadscreen.png|300px]] | ||
|player=[[ | |game=''[[Halo 2]]'' {{C|''[[Halo 2: Anniversary|Anniversary]]''}} | ||
|date= [[2552#October | |devname=<code>04b_floodlab</code>{{Ref/File|Id=H2EK|H2EK|H2EK\tags\scenarios\solo\04b_floodlab\04b_floodlab.scenario}} | ||
|place=[[Gas Mine]] | |player=[[Arbiter_(player_character)#Halo_2|Arbiter]] | ||
| | |date=[[2552#October|October 20, 2552]]<ref>[https://twitter.com/Halo/status/789270384793128960 '''Twitter''' - ''Halo'']</ref> | ||
|place=[[Threshold gas mine|Gas Mine]] inside [[Threshold]]'s atmosphere | |||
|objective=Pursue and kill the [[Sesa 'Refumee|Heretic Leader]] | |||
|partime=00:25:00 {{C|''Master Chief Collection''}} | |||
|parscore=16,000 {{C|''Master Chief Collection''}} | |||
}} | }} | ||
{{Article quote|Kill the [[Sesa 'Refumee|Heretic Leader]]. The [[Prophets]]' will be done.}} | |||
'''The Oracle''' is the seventh [[campaign]] level of ''[[Halo 2]]'', where the player plays as [[Thel 'Vadamee]]. Starting directly after Thel 'Vadamee lands the [[Banshee]] he was flying in the [[The Arbiter|previous level]], the opening cutscene has [[Rtas 'Vadumee]] comment on smelling a familiar [[Flood|stench]]. There are again [[Special Operations Sangheili]] and [[Special Operations Unggoy|Unggoy]] as allies and sometimes, an [[Unggoy Ultra]] is deployed to assist the player. | |||
This is the first level in ''Halo 2'' in which the player encounters the [[Flood]] and some of their new abilities, most notably the ability of [[pod infector]]s to revive fallen [[combat form]]s. | |||
The player goes down an elevator and up to the top of the [[Threshold gas mine|gas mine]] to cut three cables. They then must backtrack to the hangar of the previous structure, complete with another Banshee-flying section, where the Arbiter engages in combat with the [[Sesa 'Refumee|Heretic Leader]] to prevent him from escaping [[Threshold]] in a {{Pattern|Kai|Seraph}}. In the cutscene directly before the fight, it is shown that [[343 Guilty Spark]] had survived the destruction of [[Installation 04]] and was responsible for the "heresy" through his teachings. | |||
The player goes down an elevator and up to the top of the [[ | |||
==Transcript== | ==Transcript== | ||
[https://youtu.be/0e0xMaHxWSc '''{''Cutscene''}'''] | |||
[http://www.youtube.com/watch?v=kowrbyPd7mw '''{''Anniversary Cutscene''}'''] | |||
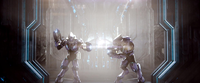
[ | [[File:H2A-Arbiter&Rtas-01.jpg|thumb|300px|Thel 'Vadamee and Rtas 'Vadumee enter the facility.]] | ||
''A door slides open. Two [[Special Operations Sangheili]] cover the entrance with {{Pattern|Okarda'phaa|plasma rifle}}s while [[Special Operations Unggoy]] file in. The [[Sangheili]] cautiously advance, followed by [[Rtas 'Vadum]]ee and [[Thel 'Vadam]]ee (who is armed with whatever weapon he had at the end of the previous level). Rtas 'Vadumee pauses and sniffs the air.'' | |||
''A door slides open. Two [[Special | |||
*'''Thel 'Vadamee''': "What is it?" | *'''Thel 'Vadamee''': "What is it?" | ||
*'''Rtas 'Vadumee''': "That stench...I've smelled it [[The Last Voyage of the Infinite Succor|before]]." | *'''Rtas 'Vadumee''': "That [[Flood|stench]]...I've smelled it [[The Last Voyage of the Infinite Succor|before]]." | ||
===Juggernaut=== | ===Juggernaut=== | ||
''The assault team proceeds through a small room, where a large tank containing some small, floating, fleshy lifeforms can be seen. The team approaches a doorway, and through the transparent floor of the next room below, they can see the shadows of [[Heretics]] and [[Combat Form|strange creatures]] battling. Eventually, all of the Heretics are killed. The victorious creatures have familiar screams...'' | |||
*'''Special Operations Sangheili 1''': "By the [[Halo Array|Rings]]. What is that?" | |||
*''' | |||
*''' | *'''Special Operations Unggoy 1 or 2''': ''(whimpers)'' | ||
*''' | *'''Special Operations Sangheili 1''': "Quiet." | ||
''The creatures all leave through another doorway.'' | ''The creatures all leave through another doorway.'' | ||
*''' | *'''Special Operations Sangheili 1''': "It's moved on. Quickly, before it returns, let's find the [[Sesa 'Refumee|Heretic Leader]] and finish him off." | ||
''The team moves into a laboratory, strewn with deformed corpses.'' | ''The team moves into a laboratory, strewn with deformed corpses.'' | ||
*''' | *'''Special Operations Sangheili 2''': "What happened here?" | ||
*''' | *'''Special Operations Unggoy 1''': "Me have bad feeling about this." | ||
*''' | *'''Special Operations Unggoy 2''': "You always have bad feeling! You had bad feeling about morning [[Feeding Nipple|food nipple]]!" | ||
*''' | *'''Special Operations Sangheili 2''': "Close your jaws, or I shall bind them shut!" | ||
''A [[holo-Drone|floating orb]] enters the room, and the image of the Heretic Leader appears in the air.'' | ''A [[holo-Drone|floating orb]] enters the room, and the image of the Heretic Leader appears in the air.'' | ||
*''' | *'''Special Operations Unggoy 1''': "See! Heretic!" | ||
''The | ''The Unggoy fires on the image, which quickly becomes apparent as a hologram and nothing more.'' | ||
*'''Rtas 'Vadumee''': "Hold your fire. Hold your fire!" | *'''Rtas 'Vadumee''': "Hold your fire. Hold your fire!" | ||
*'''[[Sesa 'Refumee]]''': "I wondered who the [[Prophets]] would send to silence me. An Arbiter... I'm flattered." | *'''[[Sesa 'Refumee]] (hologram)''': ''(Noticing 'Vadamee)'' "I wondered who the [[Hierarchs|Prophets]] would send to silence me. An [[Arbiter]]... I'm flattered." | ||
*'''Rtas 'Vadumee''': "He's using a holodrone. He must be close. Come out, so we may kill you." | *'''Rtas 'Vadumee''': "He's using a holodrone. He must be close. ''(to 'Refumee)'' Come out, so we may kill you." | ||
*'''Sesa 'Refumee''': ''(laughs)'' "Get in line." | *'''Sesa 'Refumee (hologram)''': ''(laughs)'' "Get in line." | ||
''The Heretic Leader vanishes | ''The Heretic Leader vanishes. Moments later, [[Pod infector|tiny bulbous creatures]] start to appear.'' | ||
*''' | *'''Special Operations Sangheili 1''': "Leader!" | ||
*'''Rtas 'Vadumee''': "Stand firm! The [[Flood]] is upon us!" | *'''Rtas 'Vadumee''': "Stand firm! The [[Flood]] is upon us!" | ||
''The team battles the oncoming | ''The team battles the oncoming Pod infectors. Unless the combat form corpses are destroyed, the Flood begin reanimating them.'' | ||
*''' | *'''Special Operations Sangheili 2''': "Heretic fools! What have they done?" | ||
''The Flood assault subsides, and a doorway opens out of the labs.'' | ''The Flood assault subsides, and a doorway opens out of the labs.'' | ||
| Line 97: | Line 87: | ||
*'''Rtas 'Vadumee''': "Go, Arbiter! I'll follow when our reinforcements arrive." | *'''Rtas 'Vadumee''': "Go, Arbiter! I'll follow when our reinforcements arrive." | ||
''The Arbiter and the Special Operations team exit the lab, and step out onto a massive elevator platform. Flood and [[Aggressor Sentinel|Sentinel]]s are battling each other all around.'' | |||
''' | *'''Special Operations Sangheili 1 or 2''': ''(whispers)'' "This place is filled with the parasite, not even Heretics deserve this!" | ||
'''Vadamee and the survivors ride the elevator down to the lower levels of the labs, fighting multiple waves of Flood and Sentinels along the way. They finally reach the bottom and enter a hallway strewn with corpses.'' | |||
'' | *'''Special Operations Sangheili 1 or 2''': "We should have brought weapons to burn these bodies. Every one is a (potential) vessel for the Flood." | ||
''The team advances into another lab where outnumbered Heretics attempt to use [[Shepsu-pattern plasma cannon|plasma turrets]] to hold back the Flood tide, which include [[Flood carrier form|bloated Flood incubators]].'' | |||
''' | *'''Special Operations Sangheili 1 or 2''': "Heretics! Above!" | ||
''The team is attacked by multiple waves of Flood and Heretics. Finally, a door opens and a group of Heretics enter the chamber. The Arbiter and any surviving Special Operations troops eliminate the Heretics and escape the chamber through the door. | |||
*'''Phantom Pilot (COM)''': "Leader, the storm is about to hit! We cannot maintain our position!" | *'''Phantom Pilot (COM)''': "Leader, the storm is about to hit! We cannot maintain our position!" | ||
*'''Rtas 'Vadumee (COM)''': "Bring the Phantoms closer to the mine. We're not leaving until the leader of these Heretics is dead. | *'''Rtas 'Vadumee (COM)''': "Bring the Phantoms closer to the mine. We're not leaving until the leader of these Heretics is dead." | ||
'' | ''Vadamee manages to press outside to the exterior of the station. He sees Flood battling more Heretics, and a friendly [[Kez'katu-pattern Phantom|Phantom]] swoops in to provide reinforcements and covering fire.'' | ||
*''' | ''If all four allies (2 Unggoy and 2 Sangheili) from the beginning of the mission survive with the player up until this point, the next line will not be said in gameplay, and no reinforcements will be dropped off:'' | ||
*'''Rtas 'Vadumee (COM)''': "Arbiter, the Flood have spread throughout the station! We don't have enough troops to manage such a large infestation. Find the leader of these Heretics, kill him now!" | |||
''<nowiki>'</nowiki>Vadamee and his troops advance into the heart of the installation, fighting past Heretics and Sentinels along the way. Inside the facility, they see the Heretic Leader fleeing.'' | |||
*'''Special Operations Unggoy 1''': "Heretic boss! You see, you see?" | |||
''Sesa 'Refumee takes cover behind a shielded door before 'Vadamee can catch him.''<br /> | ''Sesa 'Refumee takes cover behind a shielded door before 'Vadamee can catch him.''<br /> | ||
[http://www.youtube.com/watch?v= | [https://youtu.be/0e0xMaHxWSc?t=23 '''{''Cutscene''}'''] | ||
[http://www.youtube.com/watch?v=XQ2Eod2BGjc '''{''Anniversary Cutscene''}'''] | |||
*'''Sesa 'Refumee''': "This will save me from the storm, but you will be consumed." | *'''Sesa 'Refumee''': "This will save me from the storm, but you will be consumed." | ||
'''Vadamee pounds angrily on the | '''Vadamee pounds angrily on the [[shield door]], but cannot break through as the doors seal. The [[Special Operations Commander]] and his troops arrive.'' | ||
*'''Rtas 'Vadumee''': "Arbiter, where is he? Stinking Floodbait boxed himself in tight. We'll never break through this!" | *'''Rtas 'Vadumee''': "Arbiter, where is he? ''(sees the sealed doors after 'Vadamee nods toward it)'' Stinking Floodbait boxed himself in tight. We'll never break through this!" | ||
'''Vadamee notices a hologram of the station, and watches it thoughtfully.'' | |||
*'''Rtas 'Vadumee''': "How?" | *'''Thel 'Vadamee''': "Then we shall ''force'' him out." | ||
*'''Rtas 'Vadumee''': "How?" | |||
*'''Thel 'Vadamee''': "The cable. I'm going to cut it. ''(turns to Rtas 'Vadumee)'' Get everyone back to the ships!" | *'''Thel 'Vadamee''': "The cable. I'm going to cut it. ''(turns to Rtas 'Vadumee)'' Get everyone back to the ships!" | ||
''In the ''Anniversary'' version, 'Vadumee can briefly be seen nodding at his troops to do it.'' | |||
'''{''Gameplay''}''' | '''{''Gameplay''}''' | ||
*'''Rtas 'Vadumee''': "Warriors, return to the landing zone! The Arbiter is going to continue upward, cut this station loose, and scare the Heretic from his hole!" | *'''Rtas 'Vadumee''': "Warriors, return to the landing zone! The Arbiter is going to continue upward, cut this station loose, and scare the Heretic from his hole!" | ||
*''' | *'''Special Operations Sangheili 1''': "May our Lords guide your hand." | ||
*''' | *'''Special Operations Sangheili 2''': "We shall not forget your sacrifice." | ||
''If | ''If the player has an [[Type-1 energy sword|energy sword]] already:'' | ||
*'''Rtas 'Vadumee''': "Keep your blade handy. I doubt the cable can withstand its bite." | *'''Rtas 'Vadumee''': "Keep your blade handy. I doubt the cable can withstand its bite." | ||
''If | ''If the player does not have an energy sword:'' | ||
*'''Rtas 'Vadumee''': "Take my blade. I doubt the cable can withstand its bite." | *'''Rtas 'Vadumee''': "Take my blade. I doubt the cable can withstand its bite." | ||
''If 'Vadamee follows the Commander and his troops outside, he can see them board the Phantom through its [[gravity lift]].'' | |||
''Thel heads up a winding ramp towards an elevator. He battles Flood and Sentinels along the way. Eventually, he reaches the elevator and activates it.'' | |||
===Hey, Watch This!=== | ===Hey, Watch This!=== | ||
'''Vadamee rides the elevator to the upper level where the cable is located.'' | '''Vadamee rides the elevator to the upper level where the cable is located. Flood and Sentinels are fighting all around him.'' | ||
*'''Rtas 'Vadumee (COM)''': "All of my Phantoms are in the air, Arbiter. Go ahead, cut that cable!" | *'''Rtas 'Vadumee (COM)''': "All of my Phantoms are in the air, Arbiter. Go ahead, cut that cable!" | ||
''If | ''If the player spends too much time fighting:'' | ||
*'''Rtas 'Vadumee (COM)''': "Sever the cable at the points where it connects to the structure!" | *'''Rtas 'Vadumee (COM)''': "Sever the cable at the points where it connects to the structure!" | ||
''After cutting the first cable'' | ''After cutting the first cable:'' | ||
*'''Rtas 'Vadumee (COM)''': "That's one! By the Prophets, look at the station list!" | *'''Rtas 'Vadumee (COM)''': "That's one! By the Prophets, look at the station list!" | ||
''After cutting the second cable'' | ''After cutting the second cable:'' | ||
*'''Rtas 'Vadumee (COM)''': "One final cable, Arbiter!" | *'''Rtas 'Vadumee (COM)''': "One final cable, Arbiter!" | ||
'''Vadamee cuts the final cable, and the entire station groans with the stress. All the Flood and Sentinels present stop their fighting and look upward towards the cable. The top of the station tears away, and it plummets into the atmosphere. The remaining Sentinels, if any, | '''Vadamee cuts the final cable, and the entire station groans with the stress. All the Flood and Sentinels present stop their fighting and look upward towards the cable. The top of the station tears away, and it plummets into the atmosphere. The remaining Sentinels and Flood, if any, are swept out into the sky.'' | ||
*'''Rtas 'Vadumee (COM)''': "That did it! The station is in free fall! The Heretic Leader is on the move | *'''Rtas 'Vadumee (COM)''': "That did it! The station is in free fall! The Heretic Leader is on the move! Do not let him escape! We'll stay with you as long as we can!" | ||
''Thel 'Vadamee drops back down into the station | ''Thel 'Vadamee drops back down into the station, fights through more Flood, as well as a group of Heretics in the doorway where the Heretic Leader once stood.'' | ||
*'''Heretic | *'''Heretic Sangheili''': "Our lives for the truth, the truth and the Covenant!" | ||
'''Vadamee | '''Vadamee eventually clears the room, wiping out the Heretic Leader's rearguard and takes an elevator down to what looks like the main power generator for the station.'' | ||
*'''Rtas 'Vadumee (COM)''': "Are you still alive, Arbiter? We're keeping pace as best we can." | *'''Rtas 'Vadumee (COM)''': "Are you still alive, Arbiter? We're keeping pace as best we can." | ||
''The Heretic Leader | '''Vadamee continues to chase the Heretic Leader. A lance of Heretics, including a sword-wielding Heretic Sangheili charge at him.'' | ||
*'''Heretic Sangheili 2''': "The Oracle must be saved!" | |||
'''Vadamee kills the Heretics and heads through the door.'' | |||
[https://youtu.be/0e0xMaHxWSc?t=52 '''{''Cutscene''}'''] | |||
''The Heretic Leader gets into a [[Drailaac-pattern Banshee|Banshee]] and takes off. The Arbiter fires at the Heretic Leader's Banshee as it flies away, then dodges as the Banshee fires at him in return. The Heretic Leader's Banshee flies away. The Arbiter then dashes out, and gets inside another Banshee and pursues the Heretic Leader.'' | |||
---- | |||
[https://www.youtube.com/watch?v=aUPXPKoKTm0'''{''Anniversary-version Cutscene''}'''] | |||
''The Heretic Leader flees under Carbine fire from the pursuing Arbiter. He returns fire with his Plasma Rifle, then runs outside the station, where he boards a Banshee and takes off. The Arbiter runs outside and fires at the Leader's Banshee though it is protected by its [[energy shields]]. The Heretic Leader turns his Banshee around, and 'Vadamee's eyes widen in alarm. The Arbiter barrel rolls behind a parked Banshee just in time to avoid a barrage of plasma fire from the Heretic Leader. He returns fire with his Carbine, and the Heretic Leader's Banshee soon flees. The Arbiter gets into the parked Banshee and takes off in pursuit. | |||
---- | |||
'''{''Gameplay''}''' | |||
''The Arbiter's Banshee flies through the storm.'' | |||
*'''Rtas 'Vadumee (COM)''': "What lunacy! He'll never escape this maelstrom in a ''Banshee''! Wait! The hangar, there was a [[Seraph]] fighter inside! Arbiter, you know what to do!" | *'''Rtas 'Vadumee (COM)''': "What lunacy! He'll never escape this maelstrom in a ''Banshee''! Wait! The hangar, there was a [[Kai-pattern Seraph|Seraph]] fighter inside! Arbiter, you know what to do!" | ||
''The Arbiter's Banshee approaches the platform where the Heretic Leader landed.'' | |||
'' | [https://youtu.be/0e0xMaHxWSc?t=71 '''{''Cutscene''}'''] | ||
''The Arbiter's Banshee tries to land on the platform, but fails and crashes into it instead. The Arbiter holds on to the edge of the platform, raises himself up, and goes inside.'' | |||
''The Arbiter's Banshee tries to land on | ---- | ||
[http://www.youtube.com/watch?v=IGwZLzIAcxc'''{''Anniversary-version Cutscene''}'''] | |||
''The Arbiter's Banshee tries to land on the platform, but fails and crashes into it instead. The Arbiter is seen soon after climbing up to the edge of the platform and is heard grunting in frustration from the crash, before he raises himself up as he surveys the plummeting scenery behind him and runs inside, fully intent on catching the Heretic Leader.'' | |||
===Dead Or Alive...Actually, Just Dead=== | ===Dead Or Alive...Actually, Just Dead=== | ||
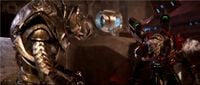
[[File:H2A - Spark, Thel, and Sesa.jpg|thumb|300px|The Arbiter meets 343 Guilty Spark, the alleged "Oracle" as he confronts 'Refumee.]] | |||
'''{''Gameplay''}''' | |||
[http://www.youtube.com/watch?v= | '''Vadamee fights through the first portion of the station, engaging large numbers of Flood forms as well as retreating Heretics and the station's few remaining Sentinels. He makes it into an open conveyor room where a large number of Heretics make a last stand against encroaching Flood forces to buy their leader time to escape. 'Vadamee breaks through this last line of defense and makes it to the hangar.'' | ||
[https://youtu.be/0e0xMaHxWSc?t=84 '''{''Cutscene''}'''] | |||
[http://www.youtube.com/watch?v=T4Y9GlJL5GM'''{''Anniversary Cutscene''}'''] | |||
''The Arbiter catches the Heretic Leader as he is about to board the Seraph. 'Vadamee points his weapon at the Heretic Leader in confrontation.'' | |||
*'''Thel 'Vadamee''': "Turn, heretic." | *'''Thel 'Vadamee''': "Turn, heretic." | ||
''The Heretic Leader turns to face the Arbiter'' | ''The Heretic Leader stops in his track, (grunts in the ''Anniversary'' version as if he recognizes whose voice he heard), before he turns to face the Arbiter.'' | ||
*'''Sesa 'Refumee''': "Arbiter. I would rather die by your hands than let the [[Prophets]] lead me to slaughter." | *'''Sesa 'Refumee''': "Arbiter. I would rather die by your hands than let the [[San'Shyuum|Prophets]] lead me to slaughter." | ||
*'''Thel 'Vadamee''': "Who has taught you these lies?" | *'''Thel 'Vadamee''': ''(Slowly advances toward him in ''Anniversary'')'' "Who has taught you these lies?" | ||
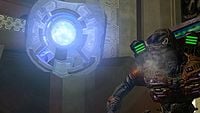
''A familiar humming is heard. The Arbiter looks up and sees [[343 Guilty Spark]] descending from above.'' | ''A familiar humming is heard. The Arbiter looks up and sees [[343 Guilty Spark]] descending from above.'' | ||
| Line 208: | Line 243: | ||
*'''Thel 'Vadamee''': ''(shocked)'' "The Oracle!" | *'''Thel 'Vadamee''': ''(shocked)'' "The Oracle!" | ||
*'''343 Guilty Spark''': "Hello! I am 343 Guilty Spark. I am the Monitor of [[Installation 04]]." | *'''[[343 Guilty Spark]]''': "Hello! I am 343 Guilty Spark. I am the Monitor of [[Installation 04]]." | ||
*'''Sesa 'Refumee''': "Ask the Oracle about [[Halo]]. How they would sacrifice us all for nothing!" | *'''Sesa 'Refumee''': "Ask the Oracle about [[Halo Array|Halo]]. How they would sacrifice us all for nothing!" | ||
*'''343 Guilty Spark''': "More questions? Splendid! I would be happy to assist you." | *'''343 Guilty Spark''': "More questions? Splendid! I would be happy to assist you." | ||
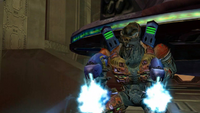
' | [[File:H2A-RefumeeRises.jpg|thumb|300px|'Refumee takes aim at the Arbiter in his attempt to escape.]] | ||
*'''Sesa 'Refumee''': "The Elites are blind, Arbiter ... but I (holds up two | ''While 'Vadamee stares in surprise at the Monitor, any questions are cut off as the Heretic Leader suddenly reaches for his twin Plasma Rifles and opens fire on 'Vadamee (who returns fire in the ''Anniversary'' version.) 'Vadamee falls back, taking cover while his shield generator recharges. As he does so, the Heretic Leader floats back toward the Seraph and pulls out two [[holo-drone]]s.'' | ||
*'''Sesa 'Refumee''': "The Elites are ''blind'', Arbiter... but ''I'' ''(holds up two holo-drones)'' ... will make them see." | |||
''The Heretic Leader releases the drones, which become copies of him. They turn to look at the Arbiter.'' | ''The Heretic Leader releases the drones, which become copies of him. They turn to look at the Arbiter.'' | ||
| Line 222: | Line 259: | ||
'''{''Gameplay''}''' | '''{''Gameplay''}''' | ||
'''Vadamee battles the Heretic Leader.'' | '''Vadamee battles the Heretic Leader and his holo-drones.'' | ||
'' | ''On Heroic and Legendary, whenever the Arbiter destroys the holo-drones, 'Refumee will retreat to one of the hangar's upper air vents and hide for a while before releasing two more holo-drones and emerging to resume the battle.'' | ||
''While in hiding, 'Refumee will speak to Thel 'Vadamee.'' | |||
'' | *'''Sesa 'Refumee''': "How did the Prophets buy your loyalty, Arbiter? With a new command, a new fleet,...or was it the promise ... their "[[Great Journey]]"?" | ||
---- | |||
''On Legendary only:'' | |||
*'''Sesa 'Refumee''': "Look around you, Arbiter. This facility and dozens like it resulted in the study of the Parasite, but where are the weapons, Arbiter? What was the result? All that time and effort and the best the [[Forerunners]] could do was put these foul creatures on ice." | *'''Sesa 'Refumee''': "Look around you, Arbiter. This facility and dozens like it resulted in the study of the Parasite, but where are the weapons, Arbiter? What was the result? All that time and effort and the best the [[Forerunners]] could do was put these foul creatures on ice." | ||
*'''Sesa 'Refumee''': "And now where are these "Gods" the Prophets would have us worship! Transcended? ''(laughs)''... Hardly. | *'''Sesa 'Refumee''': "And now where are these "Gods" the Prophets would have us worship! Transcended? ''(laughs)''... Hardly. Come, Arbiter. Let me show you where they went." | ||
---- | |||
'' | ''During the fight 'Refumee continues to taunt the Arbiter:'' | ||
:'''Sesa 'Refumee''': | |||
* "Arbiter! Show yourself!" | |||
* "Where have you gone, Arbiter?" | |||
* "Worthless toady!" | |||
* "Errand boy!" | |||
* "Fratricidal fool!" | |||
* "Curse you, Arbiter!" | |||
* "Come out, Arbiter. Let's end this!" | |||
* "I see the Prophets have chosen poorly, Arbiter!" | |||
* "You disappoint your blessed Hierarchs!" | |||
* "Seems the Hierarchs chose poorly." | |||
* "I'll give you a moment to rest. Then we begin again!" | |||
* "Who taught you how to fight?!" | |||
* "Would you like to practice and try again?" | |||
* "How did ''you'' ever make it past the Flood?!" | |||
* "Your skills are lacking!" | |||
* "Open your eyes!" | |||
* "See the truth!" | |||
* "Damn your stubborn ears!" | |||
* "You cannot hide from the truth!" | |||
* "By the Oracle's light!" | |||
* "I'll leave your body for the Flood!" | |||
* "I'll send your armor back in a box!" | |||
* "You have chosen your fate, Arbiter! Come meet it!" | |||
* "Accept defeat!" | |||
* "Burn! Burn and die!" | |||
* "I will be the end of you!" | |||
* "I expected more from you, Arbiter." | |||
* "Arbiter! The time has come for you to die!" | |||
''If | ---- | ||
''If Sesa 'Refumee kills the player, he may say one of the following lines:'' | |||
*'' | * "Come, Holy Oracle, we have much work to do." | ||
* "A pity you would not join me." | |||
* "That will send a message to the Prophets!" | |||
* "I take no pleasure in spilling a brother's blood." | |||
* "Now do you see? The truth hurts, doesn't it? Perhaps you should have listened." | |||
* "Into the ship, Oracle. I'm all done here." | |||
---- | |||
'' | ''343 Guilty Spark will also talk to Thel 'Vadamee throughout the battle.'' | ||
*''' | *'''343 Guilty Spark''': "This mining facility predates Installation Alpha by several hundred years. It was retrofitted to research possible offensive and defensive measures against the Flood. Indeed, I designed and oversaw the construction of this facility's various outbreak management systems." | ||
''If | ''If the player continues the fight long enough:'' | ||
*''' | *'''343 Guilty Spark''': "The tether connecting the mine to the high-altitude suspension grid was the primary failsafe. I am glad that someone was aware of the necessary protocols and severed the tether locally." | ||
'' | ''If the fight is drawn out even longer:'' | ||
[http://www.youtube.com/watch?v= | *'''343 Guilty Spark''': "The Flood will not survive once this mine enters the planet's liquid hydrogen core. Then again, neither will we. What a pity..." | ||
''The Arbiter finally kills the Heretic Leader.'' | |||
[https://youtu.be/0e0xMaHxWSc?t=152 '''{''Cutscene''}'''] | |||
[http://www.youtube.com/watch?v=NBe3bwiodGY'''{''Anniversary Cutscene''}'''] | |||
'''Vadamee has killed the Heretic Leader and is dragging his corpse to the hangar door.'' | '''Vadamee has killed the Heretic Leader and is dragging his corpse to the hangar door.'' | ||
| Line 265: | Line 343: | ||
*'''343 Guilty Spark''': "Oracle? Great Journey? Why do you meddlers insist on using such inaccurate verbiage-ohhhhh myyyyy!!!!!" | *'''343 Guilty Spark''': "Oracle? Great Journey? Why do you meddlers insist on using such inaccurate verbiage-ohhhhh myyyyy!!!!!" | ||
[[File:H2A - Tartarus and Spark.jpg|thumb|300px|Tartarus captures Guilty Spark before retrieving the Arbiter for departure.]] | |||
''343 Guilty Spark is snatched by an unseen force and pulled away. He is dragged through the air, directly to the top of the [[Fist of Rukt]], the gravity hammer of [[Tartarus]]. Tartarus, standing beneath a Phantom, pulls 343 Guilty Spark off the end of his hammer.'' | ''343 Guilty Spark is snatched by an unseen force and pulled away. He is dragged through the air, directly to the top of the [[Fist of Rukt]], the gravity hammer of [[Tartarus]]. Tartarus, standing beneath a Phantom, pulls 343 Guilty Spark off the end of his hammer.'' | ||
*'''Thel 'Vadamee''': ''( | *'''Thel 'Vadamee''': ''(outraged)'' "That... is the Oracle!" | ||
''Tartarus tosses 343 Guilty Spark into the [[ | ''Tartarus casually tosses 343 Guilty Spark into the [[gravity lift]].'' | ||
*'''Tartarus''': ''(indifferently)'' "So it is. Come, we are leaving this system." | *'''Tartarus''': ''(indifferently)'' "So it is. Come, we are leaving [[Soell system|this system]]." | ||
''Fades to black.'' | ''Fades to black.'' | ||
''Level ends.'' | ''Level ends.'' | ||
==Achievements== | |||
The following [[achievement]]s can be unlocked on ''The Oracle'' across the [[Halo 2 (Windows Vista)|Windows Vista]] and ''[[Halo: The Master Chief Collection]]'' editions of ''Halo 2: Anniversary''. The original [[Xbox]] release of ''Halo 2'' did not contain achievement unlocks. | |||
{| class="wikitable" | |||
|- | |||
! scope="col" style="width:135px;text-align:center;" |'''''Halo 2'' (Windows Vista)''' | |||
! scope="col" style="width:135px;text-align:center;" |'''''Halo: MCC'' (Xbox One, Xbox Series X|S)''' | |||
! scope="col" style="width:135px;text-align:center;" |'''''Halo: MCC'' (Steam)''' | |||
! scope="col" style="width:175px;height:20px;text-align:center;" |'''Title''' | |||
! scope="col" style="width:350px;height:20px;text-align:center;" |'''Unlock requirement''' | |||
! scope="col" style="width:200px;height:20px;text-align:center;" |'''Games''' | |||
|- | |||
|[[File:H2V Achievement Oracle.png|center|64px]] | |||
|[[File:HTMCC H2A Achievement Oracle.png|center|114px]] | |||
|[[File:HTMCC H2A Achievement Steam The Oracle.jpg|center|64px]] | |||
|<center>'''[[Oracle (achievement)|Oracle]]'''</center> | |||
|Beat The Oracle on any difficulty. | |||
|<center>[[Halo 2 (Windows Vista)|''Halo 2'' (Windows Vista)]]<br/>''[[Halo: The Master Chief Collection]]''</center> | |||
|- | |||
|<center>N/A</center> | |||
|[[File:HTMCC H2A Achievement ReedtheStrategy.png|center|114px]] | |||
|[[File:HTMCC H2A Achievement Steam ReedtheStrategy.jpg|center|64px]] | |||
|<center>'''[[Reed the Strategy]]'''</center> | |||
|Beat the par time on The Oracle. | |||
|<center>''[[Halo: The Master Chief Collection]]''</center> | |||
|- | |||
|<center>N/A</center> | |||
|[[File:HTMCC H2A Achievement LeaveNoneAlive.png|center|114px]] | |||
|[[File:HTMCC H2A Achievement Steam LeaveNoneAlive.jpg|center|64px]] | |||
|<center>'''[[Leave None Alive]]'''</center> | |||
|Beat the par score on The Oracle. | |||
|<center>''[[Halo: The Master Chief Collection]]''</center> | |||
|- | |||
|<center>N/A</center> | |||
|[[File:HTMCC H2A Achievement Fascinated.png|center|114px]] | |||
|[[File:HTMCC H2A Achievement Steam Fascinated.jpg|center|64px]] | |||
|<center>'''[[Fascinated]]'''</center> | |||
|Activate [[Terminal (Halo 2: Anniversary)|Terminal #5]] on The Oracle. | |||
|<center>''[[Halo: The Master Chief Collection]]''</center> | |||
|- | |||
|<center>N/A</center> | |||
|[[File:HTMCC H2A Achievement SkulltakerFamine.png|center|114px]] | |||
|[[File:HTMCC H2A Achievement Steam SkulltakerFamine.jpg|center|64px]] | |||
|<center>'''[[Skulltaker Halo 2: Famine]]'''</center> | |||
|Find and claim the [[Halo 2 skulls#Famine|Famine Skull]]. | |||
|<center>''[[Halo: The Master Chief Collection]]''</center> | |||
|- | |||
|<center>N/A</center> | |||
|[[File:HTMCC H2A Achievement DirtyBird.png|center|114px]] | |||
|[[File:HTMCC Achievement Dirty Bird Steam.jpg|center|64px]] | |||
|<center>'''[[Dirty Bird]]'''</center> | |||
|Fly the Heretic Banshee. | |||
|<center>''[[Halo: The Master Chief Collection]]''</center> | |||
|- | |||
|<center>N/A</center> | |||
|[[File:HTMCC H2A Achievement 10MinutesTooEarly.png|center|114px]] | |||
|[[File:HTMCC Achievement 10 Minutes Too Early Steam.jpg|center|64px]] | |||
|<center>'''[[10 Minutes Too Early]]'''</center> | |||
|In The Oracle, find the holo-drone before the Heretic Leader activates it. | |||
|<center>''[[Halo: The Master Chief Collection]]''</center> | |||
|- | |||
|} | |||
==Trivia== | ==Trivia== | ||
===Glitches=== | |||
=== | *When the [[Kez'katu-pattern Phantom|Phantom]] drops off surplus reinforcements, the player can move inside the structure and see the [[Heretic Leader]] starting to run away. If he is stuck with a grenade, he will drop the {{Pattern|Okarda'phaa|plasma rifle}} in his right hand, allowing the player to pick it up. | ||
*When the [[Phantom]] drops off surplus reinforcements, | *If the player melees the Heretic leader (when he is trying to escape, before the "cable" cutscene) in a certain position with a Carbine or an Energy Sword, or use another technique like grenades with [[Sputnik]] enabled, they can pass through the holo-door before Heretic Leader gets through, but will die instantly as soon as they go through. No matter what, one will always die when trying to get past the door, as a kill barrier is set on the other side of the door. | ||
*If | *If the player attacks the hologram of the Heretic Leader, it will make sounds as if it has been hurt. | ||
*If | *If the player follows the Spec-Ops Commander and the remaining Elites and Grunts after the Arbiter announces his plan to cut the station's cable, one can see them get back on their Phantom. If the two Grunts are still alive, they will usually try to board the Phantom at the same time. One of them will enter the ship but the other will get stuck and the Phantom will stay there, but if the Grunt is killed or stopped, it will fly away. | ||
*If | *When your allies are boarding the Phantom near the climax of the level, it is possible to knock them off the gravity lift. If one successfully pulls it off, one will see the ally fly off gravity lift, before quickly shrinking and eventually disappearing. This is due to a visual effect, as when boarding the Phantom, the allies use a shrinking effect to try to show distance. But since the ally was knocked off the Phantom, the animation continues playing, even without Phantom. | ||
*It is possible (with some practice) to reach the very bottom of the level by hopping on a Sentinel and slowly glide down while staying on it. Before | *It is possible (with some practice) to reach the very bottom of the level by hopping on a Sentinel and slowly glide down while staying on it. Before the player goes inside the building where the Heretic leader runs and hides in the energy shield-protected room, there will be some Sentinels off the edge of the building. The player must kill all enemies and allies around so they do not attack the Sentinels, then use their active camouflage, and jump on one of the Sentinels, keeping their eyes on their feet. Once they hit the bottom of the level, the player will slip off but will still be alive walking on the air. | ||
*If | *If the player tries to push [[Rtas 'Vadum|'Vadumee]] down the elevator so they can take him in other places it will not work; he will make strides to return to his default position, and if he is eventually pushed down to the elevator, he will automatically disappear and reappear to the room in which he originated from. | ||
*In co-op, | *A similar glitch can occur later in the level (before the cable sequence) with 'Vadumee. It is notably more difficult than the former, with the Spec-Ops leader consistently walking off the ledges and returning to the Phantom. But if one successfully gets 'Vadumee to hop on the elevator, he will instantly disappear once the checkpoint loads, as the Shipmaster is not programmed to join the Arbiter at anytime later in the level. | ||
*In the first room where | *In co-op, playing until the Arbiter says he is going to cut the cable can, with the proper steps, lead to the [[Oracle elevator glitch]]. | ||
*If the player presses the elevator button without standing on it and quickly goes around the switch and presses it again from underneath early enough, the descending elevator can launch the player up to the cable area. The player is then completely invulnerable for the rest of the mission. Additionally after cutting the cables if the player does not jump back into the elevator shaft a fake elevator platform appears which prevents the player from continuing the level. Once descended gravity will also not work properly until the player reaches the banshee cutscene, with the player floating in the air and only able to descend either by rapid crouching or by lunging at opponents below them using the energy sword. | |||
*In the first room where the player fights the Flood, if the two Grunts survive, sometimes no Flood combat forms will spawn in the next room. | |||
*In the room were the Arbiter must cut the cables, there is a way to fly out of the level. When the Arbiter finishes cutting all of the cables, running to the elevator then jumping when the station starts to fall will glitch the Arbiter out of the level. | |||
====Mistakes==== | ====Mistakes==== | ||
*In the cutscene at the beginning of the boss fight, the Seraph faces the hangar door instead of the elevator. | *In the cutscene at the beginning of the boss fight, the Seraph faces the hangar door instead of the elevator. | ||
*Throughout the level, all [[Flood | *Throughout the level, all [[Flood combat form]]s seem to be Minor Elites, despite the fact the majority of the Elites in the station are heretics and only a handful of Covenant Elites are seen in the level. Even then, the Elites are SpecOps Elites and Elite Minors do not even show up in the level. However, it could be argued or speculated that Truth had ordered Covenant strike teams to take out the Heretics prior to this event, and after having lost all contact with them because they were taken out by the Flood, decided the Arbiter and a SpecOps team were a more appropriate solution. Another explanation for the numerous Minor Elites could simply be due to graphic limitations since all of the Elite Combat Forms in the game are of Elite Minors. | ||
====[[Easter | ====[[Easter eggs]]==== | ||
*The [[Halo 2 | *The [[Halo 2 skulls#Famine|Famine Skull]] is found on this level. | ||
* The fifth terminal is a Forerunner terminal in the large room after exiting the large lift, behind the wall opposite to the exit door. | |||
===References=== | ===References=== | ||
*When | *When the player reaches the LZ that they took a Banshee from near the end of the previous level, the cut-scene will show the Arbiter crashing the Banshee into the wall below the LZ, before he climbs up and walks to the door. This is strikingly similar to what the [[John-117|Master Chief]] did at the beginning of ''[[The Maw]]''. | ||
*When | *When the SpecOps troops are about to encounter the Flood for the first time, an Unggoy soldier can be heard saying "Me have bad feeling about this..." This is similar to [[Private]] [[Manuel Mendoza]]'s words in ''[[Halo: Combat Evolved]]'', when the player first encounters the Flood. Likewise, the other Grunt's response "You always have bad feeling" mirrors Sergeant Johnson's response to Mendoza. | ||
===Miscellaneous=== | ===Miscellaneous=== | ||
* | *The level was known in development as "Flood Lab".<ref>'''EDGE''' magazine, October 2004, page 51</ref> | ||
*When | *When the Arbiter cuts the cables, the [[Flood]] will stop what they are doing and look up. The [[Sentinels]] will do the same. | ||
*Additionally, if | *Additionally, if the player quickly makes it back to the elevator after cutting the cables, the 'Hold X to activate elevator' text will not appear until the station is in free-fall. The player will fly up, caused by the station suddenly breaking loose from the cable; this effect will happen to all AI and the player regardless of location, but if done at the elevator while [[Oracle Super Jump|jumping]], the player will continue to fly upwards, eventually exiting the station. | ||
* | *Broken parts of the facility can be seen in the sky floating and getting blown away. These pieces are also seen when piloting a Banshee to reach the Seraph towards the end of the level. These pieces can destroy the Banshee if it is intercepted by one of them. | ||
*After | *After the Arbiter cuts the cable, the player can see a Heretic Elite fighting the Flood with a Needler in the same room where Sesa activated the holo-door. | ||
*In the room with the Heretic hologram, | *In the room with the Heretic hologram, one can jump back on to the second level, out of the way of the Flood. To do this the player needs to jump onto a little ledge on the side of the pillars near the corners of the elevated walkways. From there, crouch-jumping onto the walkways and staying up there will let 'Vadumee fight the Flood and take out the stragglers. | ||
* | *The cables can still be cut if the energy sword is out of energy. | ||
*The cables holding up the facility will not cut if the Commander is talking. | *The cables holding up the facility will not cut if the Commander is talking. | ||
*The cable will always cut in the same place no matter where | *The cable will always cut in the same place no matter where it is attacked. | ||
*At the part of the level where | *At the part of the level where the player flies a Banshee, dead enemies (and the player) will go up instead of down, because of the storm. The player will also die instantly if they get out. Any debris leftover from destroyed Banshees, weapons, or bodies will fly upwards and can be 'caught' by the station if they run into it. | ||
*At the beginning of the level, | *At the beginning of the level, one can see a sealed aquarium in the middle of the room with small Flood infection forms swimming freely in an unknown liquid. | ||
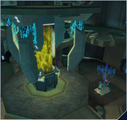
*Judging by the design of the large circular room entered prior to confronting the Heretic Leader, it appears that the turbines in the room's center are actually the complex's heating and cooling systems since structures of similar design to the one encountered can be found in other real-world facilities. | *Judging by the design of the large circular room entered prior to confronting the Heretic Leader, it appears that the turbines in the room's center are actually the complex's heating and cooling systems since structures of similar design to the one encountered can be found in other real-world facilities. | ||
*If the player manages to have both Grunts and both Elites survive from the beginning of the level up until when the Phantom arrives to normally drop-off reinforcements, the Phantom won't actually drop any reinforcements. The line from Rtas 'Vadumee about the Flood spreading throughout the station won't be said either. | |||
==Gallery== | |||
===Halo 2=== | |||
<gallery> | |||
File:H2 header - The Oracle.png|Preview of the level in ''Halo 2'' menu. | |||
File:Half-jaw.jpg|Rtas 'Vadumee stays behind and awaits reinforcement. | |||
File:Spec Ops Lance2.jpg|Covenant forces moving through the outdoor area of the gas mine. | |||
File:GS-Heretic.jpg|343 Guilty Spark with Sesa 'Refumee. | |||
File:Sesa Firing.png|'Refumee fires his weapons at 'Vadamee. | |||
File:Holodrones.jpg|'Refumee prepares his holo-drones. | |||
</gallery> | |||
===Halo 2: Anniversary=== | |||
<gallery> | |||
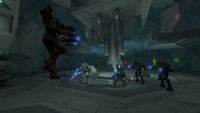
File:H2AMLGSpecopsElite&Friend.png|Two SpecOps Sangheili enter the Flood research facility. | |||
File:HTMCC-H2A Refumee Hologram.jpg|Sesa 'Refumee speaking through his holo-drone to the Covenant forces. | |||
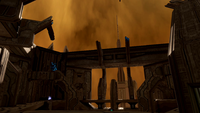
File:H2A-Gas mine free-fall.png|The gas mine's cable is cut, sending the station into free fall. | |||
File:H2ACampaign TheHereticSeraph.png|The Seraph fighter in the hangar bay. | |||
File:H2A-Arbiter&Sesa-02.jpg|Sesa 'Refumee reveals the presence of 343 Guilty Spark to Thel 'Vadamee. | |||
File:H2A - Holo-drones.jpg|'Refumee prepares his holo-drones. | |||
</gallery> | |||
==Sources== | |||
{{Ref/Sources}} | |||
{{succession box | before = ''[[The Arbiter (Level)|The Arbiter]]'' <br />| title = [[Halo 2 Campaign|''Halo 2'' Campaign Missions]] | years = '''''The Oracle''''' |after = ''[[Delta Halo]]''}} | |||
{{ | {{Levels|H2}} | ||
Latest revision as of 08:23, March 15, 2024
|
Prev: |
|
|
Next: |
|
| The Oracle | |
|---|---|

| |
|
Game: |
|
|
Map file name (?): |
|
|
Player: |
|
|
Date: |
|
|
Location: |
|
|
Objective(s): |
Pursue and kill the Heretic Leader |
|
Par Time: |
00:25:00 (Master Chief Collection) |
|
Par Score: |
16,000 (Master Chief Collection) |
 |
Halopedia has a walkthrough guide for this level; see The Oracle/Walkthrough. |
| “ | Kill the Heretic Leader. The Prophets' will be done. | ” |
The Oracle is the seventh campaign level of Halo 2, where the player plays as Thel 'Vadamee. Starting directly after Thel 'Vadamee lands the Banshee he was flying in the previous level, the opening cutscene has Rtas 'Vadumee comment on smelling a familiar stench. There are again Special Operations Sangheili and Unggoy as allies and sometimes, an Unggoy Ultra is deployed to assist the player.
This is the first level in Halo 2 in which the player encounters the Flood and some of their new abilities, most notably the ability of pod infectors to revive fallen combat forms.
The player goes down an elevator and up to the top of the gas mine to cut three cables. They then must backtrack to the hangar of the previous structure, complete with another Banshee-flying section, where the Arbiter engages in combat with the Heretic Leader to prevent him from escaping Threshold in a Kai-pattern Seraph. In the cutscene directly before the fight, it is shown that 343 Guilty Spark had survived the destruction of Installation 04 and was responsible for the "heresy" through his teachings.
TranscriptEdit
{Cutscene} {Anniversary Cutscene}

A door slides open. Two Special Operations Sangheili cover the entrance with Okarda'phaa-pattern plasma rifles while Special Operations Unggoy file in. The Sangheili cautiously advance, followed by Rtas 'Vadumee and Thel 'Vadamee (who is armed with whatever weapon he had at the end of the previous level). Rtas 'Vadumee pauses and sniffs the air.
- Thel 'Vadamee: "What is it?"
JuggernautEdit
The assault team proceeds through a small room, where a large tank containing some small, floating, fleshy lifeforms can be seen. The team approaches a doorway, and through the transparent floor of the next room below, they can see the shadows of Heretics and strange creatures battling. Eventually, all of the Heretics are killed. The victorious creatures have familiar screams...
- Special Operations Sangheili 1: "By the Rings. What is that?"
- Special Operations Unggoy 1 or 2: (whimpers)
- Special Operations Sangheili 1: "Quiet."
The creatures all leave through another doorway.
- Special Operations Sangheili 1: "It's moved on. Quickly, before it returns, let's find the Heretic Leader and finish him off."
The team moves into a laboratory, strewn with deformed corpses.
- Special Operations Sangheili 2: "What happened here?"
- Special Operations Unggoy 1: "Me have bad feeling about this."
- Special Operations Unggoy 2: "You always have bad feeling! You had bad feeling about morning food nipple!"
- Special Operations Sangheili 2: "Close your jaws, or I shall bind them shut!"
A floating orb enters the room, and the image of the Heretic Leader appears in the air.
- Special Operations Unggoy 1: "See! Heretic!"
The Unggoy fires on the image, which quickly becomes apparent as a hologram and nothing more.
- Rtas 'Vadumee: "Hold your fire. Hold your fire!"
- Sesa 'Refumee (hologram): (Noticing 'Vadamee) "I wondered who the Prophets would send to silence me. An Arbiter... I'm flattered."
- Rtas 'Vadumee: "He's using a holodrone. He must be close. (to 'Refumee) Come out, so we may kill you."
- Sesa 'Refumee (hologram): (laughs) "Get in line."
The Heretic Leader vanishes. Moments later, tiny bulbous creatures start to appear.
- Special Operations Sangheili 1: "Leader!"
- Rtas 'Vadumee: "Stand firm! The Flood is upon us!"
The team battles the oncoming Pod infectors. Unless the combat form corpses are destroyed, the Flood begin reanimating them.
- Special Operations Sangheili 2: "Heretic fools! What have they done?"
The Flood assault subsides, and a doorway opens out of the labs.
- Rtas 'Vadumee: "Go, Arbiter! I'll follow when our reinforcements arrive."
The Arbiter and the Special Operations team exit the lab, and step out onto a massive elevator platform. Flood and Sentinels are battling each other all around.
- Special Operations Sangheili 1 or 2: (whispers) "This place is filled with the parasite, not even Heretics deserve this!"
'Vadamee and the survivors ride the elevator down to the lower levels of the labs, fighting multiple waves of Flood and Sentinels along the way. They finally reach the bottom and enter a hallway strewn with corpses.
- Special Operations Sangheili 1 or 2: "We should have brought weapons to burn these bodies. Every one is a (potential) vessel for the Flood."
The team advances into another lab where outnumbered Heretics attempt to use plasma turrets to hold back the Flood tide, which include bloated Flood incubators.
- Special Operations Sangheili 1 or 2: "Heretics! Above!"
The team is attacked by multiple waves of Flood and Heretics. Finally, a door opens and a group of Heretics enter the chamber. The Arbiter and any surviving Special Operations troops eliminate the Heretics and escape the chamber through the door.
- Phantom Pilot (COM): "Leader, the storm is about to hit! We cannot maintain our position!"
- Rtas 'Vadumee (COM): "Bring the Phantoms closer to the mine. We're not leaving until the leader of these Heretics is dead."
Vadamee manages to press outside to the exterior of the station. He sees Flood battling more Heretics, and a friendly Phantom swoops in to provide reinforcements and covering fire.
If all four allies (2 Unggoy and 2 Sangheili) from the beginning of the mission survive with the player up until this point, the next line will not be said in gameplay, and no reinforcements will be dropped off:
- Rtas 'Vadumee (COM): "Arbiter, the Flood have spread throughout the station! We don't have enough troops to manage such a large infestation. Find the leader of these Heretics, kill him now!"
'Vadamee and his troops advance into the heart of the installation, fighting past Heretics and Sentinels along the way. Inside the facility, they see the Heretic Leader fleeing.
- Special Operations Unggoy 1: "Heretic boss! You see, you see?"
Sesa 'Refumee takes cover behind a shielded door before 'Vadamee can catch him.
{Cutscene} {Anniversary Cutscene}
- Sesa 'Refumee: "This will save me from the storm, but you will be consumed."
'Vadamee pounds angrily on the shield door, but cannot break through as the doors seal. The Special Operations Commander and his troops arrive.
- Rtas 'Vadumee: "Arbiter, where is he? (sees the sealed doors after 'Vadamee nods toward it) Stinking Floodbait boxed himself in tight. We'll never break through this!"
'Vadamee notices a hologram of the station, and watches it thoughtfully.
- Thel 'Vadamee: "Then we shall force him out."
- Rtas 'Vadumee: "How?"
- Thel 'Vadamee: "The cable. I'm going to cut it. (turns to Rtas 'Vadumee) Get everyone back to the ships!"
In the Anniversary version, 'Vadumee can briefly be seen nodding at his troops to do it.
{Gameplay}
- Rtas 'Vadumee: "Warriors, return to the landing zone! The Arbiter is going to continue upward, cut this station loose, and scare the Heretic from his hole!"
- Special Operations Sangheili 1: "May our Lords guide your hand."
- Special Operations Sangheili 2: "We shall not forget your sacrifice."
If the player has an energy sword already:
- Rtas 'Vadumee: "Keep your blade handy. I doubt the cable can withstand its bite."
If the player does not have an energy sword:
- Rtas 'Vadumee: "Take my blade. I doubt the cable can withstand its bite."
If 'Vadamee follows the Commander and his troops outside, he can see them board the Phantom through its gravity lift.
Thel heads up a winding ramp towards an elevator. He battles Flood and Sentinels along the way. Eventually, he reaches the elevator and activates it.
Hey, Watch This!Edit
'Vadamee rides the elevator to the upper level where the cable is located. Flood and Sentinels are fighting all around him.
- Rtas 'Vadumee (COM): "All of my Phantoms are in the air, Arbiter. Go ahead, cut that cable!"
If the player spends too much time fighting:
- Rtas 'Vadumee (COM): "Sever the cable at the points where it connects to the structure!"
After cutting the first cable:
- Rtas 'Vadumee (COM): "That's one! By the Prophets, look at the station list!"
After cutting the second cable:
- Rtas 'Vadumee (COM): "One final cable, Arbiter!"
'Vadamee cuts the final cable, and the entire station groans with the stress. All the Flood and Sentinels present stop their fighting and look upward towards the cable. The top of the station tears away, and it plummets into the atmosphere. The remaining Sentinels and Flood, if any, are swept out into the sky.
- Rtas 'Vadumee (COM): "That did it! The station is in free fall! The Heretic Leader is on the move! Do not let him escape! We'll stay with you as long as we can!"
Thel 'Vadamee drops back down into the station, fights through more Flood, as well as a group of Heretics in the doorway where the Heretic Leader once stood.
- Heretic Sangheili: "Our lives for the truth, the truth and the Covenant!"
'Vadamee eventually clears the room, wiping out the Heretic Leader's rearguard and takes an elevator down to what looks like the main power generator for the station.
- Rtas 'Vadumee (COM): "Are you still alive, Arbiter? We're keeping pace as best we can."
'Vadamee continues to chase the Heretic Leader. A lance of Heretics, including a sword-wielding Heretic Sangheili charge at him.
- Heretic Sangheili 2: "The Oracle must be saved!"
'Vadamee kills the Heretics and heads through the door.
The Heretic Leader gets into a Banshee and takes off. The Arbiter fires at the Heretic Leader's Banshee as it flies away, then dodges as the Banshee fires at him in return. The Heretic Leader's Banshee flies away. The Arbiter then dashes out, and gets inside another Banshee and pursues the Heretic Leader.
{Anniversary-version Cutscene}
The Heretic Leader flees under Carbine fire from the pursuing Arbiter. He returns fire with his Plasma Rifle, then runs outside the station, where he boards a Banshee and takes off. The Arbiter runs outside and fires at the Leader's Banshee though it is protected by its energy shields. The Heretic Leader turns his Banshee around, and 'Vadamee's eyes widen in alarm. The Arbiter barrel rolls behind a parked Banshee just in time to avoid a barrage of plasma fire from the Heretic Leader. He returns fire with his Carbine, and the Heretic Leader's Banshee soon flees. The Arbiter gets into the parked Banshee and takes off in pursuit.
{Gameplay}
The Arbiter's Banshee flies through the storm.
- Rtas 'Vadumee (COM): "What lunacy! He'll never escape this maelstrom in a Banshee! Wait! The hangar, there was a Seraph fighter inside! Arbiter, you know what to do!"
The Arbiter's Banshee approaches the platform where the Heretic Leader landed.
The Arbiter's Banshee tries to land on the platform, but fails and crashes into it instead. The Arbiter holds on to the edge of the platform, raises himself up, and goes inside.
{Anniversary-version Cutscene}
The Arbiter's Banshee tries to land on the platform, but fails and crashes into it instead. The Arbiter is seen soon after climbing up to the edge of the platform and is heard grunting in frustration from the crash, before he raises himself up as he surveys the plummeting scenery behind him and runs inside, fully intent on catching the Heretic Leader.
Dead Or Alive...Actually, Just DeadEdit

{Gameplay}
'Vadamee fights through the first portion of the station, engaging large numbers of Flood forms as well as retreating Heretics and the station's few remaining Sentinels. He makes it into an open conveyor room where a large number of Heretics make a last stand against encroaching Flood forces to buy their leader time to escape. 'Vadamee breaks through this last line of defense and makes it to the hangar.
{Cutscene} {Anniversary Cutscene}
The Arbiter catches the Heretic Leader as he is about to board the Seraph. 'Vadamee points his weapon at the Heretic Leader in confrontation.
- Thel 'Vadamee: "Turn, heretic."
The Heretic Leader stops in his track, (grunts in the Anniversary version as if he recognizes whose voice he heard), before he turns to face the Arbiter.
- Sesa 'Refumee: "Arbiter. I would rather die by your hands than let the Prophets lead me to slaughter."
- Thel 'Vadamee: (Slowly advances toward him in Anniversary) "Who has taught you these lies?"
A familiar humming is heard. The Arbiter looks up and sees 343 Guilty Spark descending from above.
- Thel 'Vadamee: (shocked) "The Oracle!"
- 343 Guilty Spark: "Hello! I am 343 Guilty Spark. I am the Monitor of Installation 04."
- Sesa 'Refumee: "Ask the Oracle about Halo. How they would sacrifice us all for nothing!"
- 343 Guilty Spark: "More questions? Splendid! I would be happy to assist you."

While 'Vadamee stares in surprise at the Monitor, any questions are cut off as the Heretic Leader suddenly reaches for his twin Plasma Rifles and opens fire on 'Vadamee (who returns fire in the Anniversary version.) 'Vadamee falls back, taking cover while his shield generator recharges. As he does so, the Heretic Leader floats back toward the Seraph and pulls out two holo-drones.
- Sesa 'Refumee: "The Elites are blind, Arbiter... but I (holds up two holo-drones) ... will make them see."
The Heretic Leader releases the drones, which become copies of him. They turn to look at the Arbiter.
{Gameplay}
'Vadamee battles the Heretic Leader and his holo-drones.
On Heroic and Legendary, whenever the Arbiter destroys the holo-drones, 'Refumee will retreat to one of the hangar's upper air vents and hide for a while before releasing two more holo-drones and emerging to resume the battle.
While in hiding, 'Refumee will speak to Thel 'Vadamee.
- Sesa 'Refumee: "How did the Prophets buy your loyalty, Arbiter? With a new command, a new fleet,...or was it the promise ... their "Great Journey"?"
On Legendary only:
- Sesa 'Refumee: "Look around you, Arbiter. This facility and dozens like it resulted in the study of the Parasite, but where are the weapons, Arbiter? What was the result? All that time and effort and the best the Forerunners could do was put these foul creatures on ice."
- Sesa 'Refumee: "And now where are these "Gods" the Prophets would have us worship! Transcended? (laughs)... Hardly. Come, Arbiter. Let me show you where they went."
During the fight 'Refumee continues to taunt the Arbiter:
- Sesa 'Refumee:
- "Arbiter! Show yourself!"
- "Where have you gone, Arbiter?"
- "Worthless toady!"
- "Errand boy!"
- "Fratricidal fool!"
- "Curse you, Arbiter!"
- "Come out, Arbiter. Let's end this!"
- "I see the Prophets have chosen poorly, Arbiter!"
- "You disappoint your blessed Hierarchs!"
- "Seems the Hierarchs chose poorly."
- "I'll give you a moment to rest. Then we begin again!"
- "Who taught you how to fight?!"
- "Would you like to practice and try again?"
- "How did you ever make it past the Flood?!"
- "Your skills are lacking!"
- "Open your eyes!"
- "See the truth!"
- "Damn your stubborn ears!"
- "You cannot hide from the truth!"
- "By the Oracle's light!"
- "I'll leave your body for the Flood!"
- "I'll send your armor back in a box!"
- "You have chosen your fate, Arbiter! Come meet it!"
- "Accept defeat!"
- "Burn! Burn and die!"
- "I will be the end of you!"
- "I expected more from you, Arbiter."
- "Arbiter! The time has come for you to die!"
If Sesa 'Refumee kills the player, he may say one of the following lines:
- "Come, Holy Oracle, we have much work to do."
- "A pity you would not join me."
- "That will send a message to the Prophets!"
- "I take no pleasure in spilling a brother's blood."
- "Now do you see? The truth hurts, doesn't it? Perhaps you should have listened."
- "Into the ship, Oracle. I'm all done here."
343 Guilty Spark will also talk to Thel 'Vadamee throughout the battle.
- 343 Guilty Spark: "This mining facility predates Installation Alpha by several hundred years. It was retrofitted to research possible offensive and defensive measures against the Flood. Indeed, I designed and oversaw the construction of this facility's various outbreak management systems."
If the player continues the fight long enough:
- 343 Guilty Spark: "The tether connecting the mine to the high-altitude suspension grid was the primary failsafe. I am glad that someone was aware of the necessary protocols and severed the tether locally."
If the fight is drawn out even longer:
- 343 Guilty Spark: "The Flood will not survive once this mine enters the planet's liquid hydrogen core. Then again, neither will we. What a pity..."
The Arbiter finally kills the Heretic Leader.
{Cutscene} {Anniversary Cutscene}
'Vadamee has killed the Heretic Leader and is dragging his corpse to the hangar door.
- 343 Guilty Spark: "Unfortunate. His edification was most enjoyable."
- Thel 'Vadamee: "I had no choice, Holy Oracle. This Heretic imperiled the Great Journey."
- 343 Guilty Spark: "Oracle? Great Journey? Why do you meddlers insist on using such inaccurate verbiage-ohhhhh myyyyy!!!!!"

343 Guilty Spark is snatched by an unseen force and pulled away. He is dragged through the air, directly to the top of the Fist of Rukt, the gravity hammer of Tartarus. Tartarus, standing beneath a Phantom, pulls 343 Guilty Spark off the end of his hammer.
- Thel 'Vadamee: (outraged) "That... is the Oracle!"
Tartarus casually tosses 343 Guilty Spark into the gravity lift.
- Tartarus: (indifferently) "So it is. Come, we are leaving this system."
Fades to black.
Level ends.
AchievementsEdit
The following achievements can be unlocked on The Oracle across the Windows Vista and Halo: The Master Chief Collection editions of Halo 2: Anniversary. The original Xbox release of Halo 2 did not contain achievement unlocks.
| Halo 2 (Windows Vista) | Halo: MCC (Xbox One, Xbox Series X|S) | Halo: MCC (Steam) | Title | Unlock requirement | Games |
|---|---|---|---|---|---|
 |
 |
 |
Beat The Oracle on any difficulty. | Halo: The Master Chief Collection | |
 |
 |
Beat the par time on The Oracle. | |||
 |
 |
Beat the par score on The Oracle. | |||
 |
 |
Activate Terminal #5 on The Oracle. | |||
 |
 |
Find and claim the Famine Skull. | |||
 |
 |
Fly the Heretic Banshee. | |||
 |
 |
In The Oracle, find the holo-drone before the Heretic Leader activates it. |
TriviaEdit
GlitchesEdit
- When the Phantom drops off surplus reinforcements, the player can move inside the structure and see the Heretic Leader starting to run away. If he is stuck with a grenade, he will drop the Okarda'phaa-pattern plasma rifle in his right hand, allowing the player to pick it up.
- If the player melees the Heretic leader (when he is trying to escape, before the "cable" cutscene) in a certain position with a Carbine or an Energy Sword, or use another technique like grenades with Sputnik enabled, they can pass through the holo-door before Heretic Leader gets through, but will die instantly as soon as they go through. No matter what, one will always die when trying to get past the door, as a kill barrier is set on the other side of the door.
- If the player attacks the hologram of the Heretic Leader, it will make sounds as if it has been hurt.
- If the player follows the Spec-Ops Commander and the remaining Elites and Grunts after the Arbiter announces his plan to cut the station's cable, one can see them get back on their Phantom. If the two Grunts are still alive, they will usually try to board the Phantom at the same time. One of them will enter the ship but the other will get stuck and the Phantom will stay there, but if the Grunt is killed or stopped, it will fly away.
- When your allies are boarding the Phantom near the climax of the level, it is possible to knock them off the gravity lift. If one successfully pulls it off, one will see the ally fly off gravity lift, before quickly shrinking and eventually disappearing. This is due to a visual effect, as when boarding the Phantom, the allies use a shrinking effect to try to show distance. But since the ally was knocked off the Phantom, the animation continues playing, even without Phantom.
- It is possible (with some practice) to reach the very bottom of the level by hopping on a Sentinel and slowly glide down while staying on it. Before the player goes inside the building where the Heretic leader runs and hides in the energy shield-protected room, there will be some Sentinels off the edge of the building. The player must kill all enemies and allies around so they do not attack the Sentinels, then use their active camouflage, and jump on one of the Sentinels, keeping their eyes on their feet. Once they hit the bottom of the level, the player will slip off but will still be alive walking on the air.
- If the player tries to push 'Vadumee down the elevator so they can take him in other places it will not work; he will make strides to return to his default position, and if he is eventually pushed down to the elevator, he will automatically disappear and reappear to the room in which he originated from.
- A similar glitch can occur later in the level (before the cable sequence) with 'Vadumee. It is notably more difficult than the former, with the Spec-Ops leader consistently walking off the ledges and returning to the Phantom. But if one successfully gets 'Vadumee to hop on the elevator, he will instantly disappear once the checkpoint loads, as the Shipmaster is not programmed to join the Arbiter at anytime later in the level.
- In co-op, playing until the Arbiter says he is going to cut the cable can, with the proper steps, lead to the Oracle elevator glitch.
- If the player presses the elevator button without standing on it and quickly goes around the switch and presses it again from underneath early enough, the descending elevator can launch the player up to the cable area. The player is then completely invulnerable for the rest of the mission. Additionally after cutting the cables if the player does not jump back into the elevator shaft a fake elevator platform appears which prevents the player from continuing the level. Once descended gravity will also not work properly until the player reaches the banshee cutscene, with the player floating in the air and only able to descend either by rapid crouching or by lunging at opponents below them using the energy sword.
- In the first room where the player fights the Flood, if the two Grunts survive, sometimes no Flood combat forms will spawn in the next room.
- In the room were the Arbiter must cut the cables, there is a way to fly out of the level. When the Arbiter finishes cutting all of the cables, running to the elevator then jumping when the station starts to fall will glitch the Arbiter out of the level.
MistakesEdit
- In the cutscene at the beginning of the boss fight, the Seraph faces the hangar door instead of the elevator.
- Throughout the level, all Flood combat forms seem to be Minor Elites, despite the fact the majority of the Elites in the station are heretics and only a handful of Covenant Elites are seen in the level. Even then, the Elites are SpecOps Elites and Elite Minors do not even show up in the level. However, it could be argued or speculated that Truth had ordered Covenant strike teams to take out the Heretics prior to this event, and after having lost all contact with them because they were taken out by the Flood, decided the Arbiter and a SpecOps team were a more appropriate solution. Another explanation for the numerous Minor Elites could simply be due to graphic limitations since all of the Elite Combat Forms in the game are of Elite Minors.
Easter eggsEdit
- The Famine Skull is found on this level.
- The fifth terminal is a Forerunner terminal in the large room after exiting the large lift, behind the wall opposite to the exit door.
ReferencesEdit
- When the player reaches the LZ that they took a Banshee from near the end of the previous level, the cut-scene will show the Arbiter crashing the Banshee into the wall below the LZ, before he climbs up and walks to the door. This is strikingly similar to what the Master Chief did at the beginning of The Maw.
- When the SpecOps troops are about to encounter the Flood for the first time, an Unggoy soldier can be heard saying "Me have bad feeling about this..." This is similar to Private Manuel Mendoza's words in Halo: Combat Evolved, when the player first encounters the Flood. Likewise, the other Grunt's response "You always have bad feeling" mirrors Sergeant Johnson's response to Mendoza.
MiscellaneousEdit
- The level was known in development as "Flood Lab".[3]
- When the Arbiter cuts the cables, the Flood will stop what they are doing and look up. The Sentinels will do the same.
- Additionally, if the player quickly makes it back to the elevator after cutting the cables, the 'Hold X to activate elevator' text will not appear until the station is in free-fall. The player will fly up, caused by the station suddenly breaking loose from the cable; this effect will happen to all AI and the player regardless of location, but if done at the elevator while jumping, the player will continue to fly upwards, eventually exiting the station.
- Broken parts of the facility can be seen in the sky floating and getting blown away. These pieces are also seen when piloting a Banshee to reach the Seraph towards the end of the level. These pieces can destroy the Banshee if it is intercepted by one of them.
- After the Arbiter cuts the cable, the player can see a Heretic Elite fighting the Flood with a Needler in the same room where Sesa activated the holo-door.
- In the room with the Heretic hologram, one can jump back on to the second level, out of the way of the Flood. To do this the player needs to jump onto a little ledge on the side of the pillars near the corners of the elevated walkways. From there, crouch-jumping onto the walkways and staying up there will let 'Vadumee fight the Flood and take out the stragglers.
- The cables can still be cut if the energy sword is out of energy.
- The cables holding up the facility will not cut if the Commander is talking.
- The cable will always cut in the same place no matter where it is attacked.
- At the part of the level where the player flies a Banshee, dead enemies (and the player) will go up instead of down, because of the storm. The player will also die instantly if they get out. Any debris leftover from destroyed Banshees, weapons, or bodies will fly upwards and can be 'caught' by the station if they run into it.
- At the beginning of the level, one can see a sealed aquarium in the middle of the room with small Flood infection forms swimming freely in an unknown liquid.
- Judging by the design of the large circular room entered prior to confronting the Heretic Leader, it appears that the turbines in the room's center are actually the complex's heating and cooling systems since structures of similar design to the one encountered can be found in other real-world facilities.
- If the player manages to have both Grunts and both Elites survive from the beginning of the level up until when the Phantom arrives to normally drop-off reinforcements, the Phantom won't actually drop any reinforcements. The line from Rtas 'Vadumee about the Flood spreading throughout the station won't be said either.
GalleryEdit
Halo 2Edit
Preview of the level in Halo 2 menu.
Rtas 'Vadumee stays behind and awaits reinforcement.
Covenant forces moving through the outdoor area of the gas mine.
343 Guilty Spark with Sesa 'Refumee.
'Refumee fires his weapons at 'Vadamee.

'Refumee prepares his holo-drones.


Halo 2: AnniversaryEdit
Two SpecOps Sangheili enter the Flood research facility.
Sesa 'Refumee speaking through his holo-drone to the Covenant forces.
The gas mine's cable is cut, sending the station into free fall.
The Seraph fighter in the hangar bay.
Sesa 'Refumee reveals the presence of 343 Guilty Spark to Thel 'Vadamee.

'Refumee prepares his holo-drones.


SourcesEdit
- ^ Halo 2 Editing Kit, game file
H2EK\tags\scenarios\solo\04b_floodlab\04b_floodlab.scenario - ^ Twitter - Halo
- ^ EDGE magazine, October 2004, page 51
| Preceded by The Arbiter |
Halo 2 Campaign Missions The Oracle |
Succeeded by Delta Halo |
| |||||||||||||||||||||||||||||||