Outskirts (Level): Difference between revisions
From Halopedia, the Halo wiki
m (→Usable Weapons) |
m (→Usable Weapons) |
||
| Line 47: | Line 47: | ||
*[[Plasma Turret]]s | *[[Plasma Turret]]s | ||
*[[Plasma Grenade]]s | *[[Plasma Grenade]]s | ||
==Available Skulls== | ==Available Skulls== | ||
Revision as of 21:11, December 17, 2008
|
Prev: |
|
|
Next: |
|
| Outskirts | |
|---|---|

| |
|
Game: |
|
|
Player: |
|
|
Date: |
|
|
Location: |
|
 |
Halopedia has a walkthrough guide for this level; see Outskirts (Level)/Walkthrough. |
Template:Article Quote Outskirts is a Halo 2 campaign level. As the Master Chief, you must battle your way through the streets of Old Mombasa (Earth) with Marines to reach the beach. From there you head to a Highway tunnel, which leads to the next level, Metropolis. This is also the first level in which you will encounter Jackals, Jackal Snipers, Hunters, and Phantom Dropships, as well as the first Halo 2 level in which you can drive vehicles. Outskirts is also the level in Halo 2 where there are the most snipers, an amazing 22 Jackal Snipers in all.
Usable Weapons
- Pistols
- SMGs
- Battle Rifles
- Sniper Rifles
- Rocket Launchers
- M41 Light Anti-Aircraft Guns
- Frag Grenades
- Plasma Pistols
- Plasma Rifles
- Needlers
- Beam Rifles
- Energy Swords
- Plasma Turrets
- Plasma Grenades
Available Skulls
- Blind Skull (All Difficulties)
- IWHBYD Skull (Legendary)
Vehicles
Cutscenes
- http://www.youtube.com/watch?v=J7ZzYQbIZ_M (They'll Regret That Too)
- http://www.youtube.com/watch?v=C6-xq4itvHs (Ladies like Superior Firepower)
Transcript
Outskirts
-Cutscene-


Three Pelicans rocket away from In Amber Clad, jet engines thundering, and spear out towards New Mombasa. The Assault Carrier hovers high over the city, Gravity Lift engaged.)
Cortana (O.S.): "The message just repeats. 'Regret, Regret, Regret.'"
The Master Chief watches from the stern of a Pelican as the clouds roll by below.
Commander Keyes (O.S.): "Catchy. Any idea what it means?"
A convoy of Warthogs are seen below the Pelicans flying above.
Sergeant Johnson (O.S.): "Dear Humanity ... we regret being alien bastards. We regret coming to Earth."
Inside the cockpit of the Pelican, Johnson leans against the bulkhead behind the two pilots.
Sergeant Johnson: "And we most definitely regret that the Corps just blew up our raggedy-ass fleet!"
Pilots (In Unison): "ooo-rah!"
Cortana (O.S.): "Regret is a name, Sergeant. The name of one of the Covenant's religious leaders. A Prophet. He's on that carrier, and he's calling for help."
A Marine Sniper scout team lies prone on a rooftop, and the Pelicans pass over their position.
Marine (O.S.): "Immediate; Grid kilo two-three is hot. Recommend mission abort."
Pilot (O.S.): "Roger, recon. (To Sergeant Johnson) It's your call, Sarge."
Sergeant Johnson: "We're going in. Get tactical, Marines!"
Cut to inside the Pelican. Two Marines load up their Battle Rifles, and one slots a magazine into his Sniper Rifle. Master Chief sits silently.
Lord Hood (O.S.): "Master Chief, get aboard that carrier, and secure the Prophet of Regret. This is the only place on Earth the Covenant decided to land. That Prophet is going to tell us why."
Pilot: "Thirty seconds out... stand by to... whoa...'
The pilot goes silent as a huge walking tank comes into view. Its leg spears a truck which explodes, then its main gun focuses and fires, hitting the lead Pelican. The two other Pelicans veer off, Plasma Turrets on the tank's back tracking them. Johnson's and the Chief's Pelican flips inverted, hits a building, and slides through a low brick wall, before blacking out the frame..
{Gameplay}
The Master Chief becomes conscious again.
- (Easy) "You all right Chief?'
- (Normal)(*Fakes tapping helmet*) "Hey, wake up."
- (Heroic) "Talk to me, should I start CPR? What's going on?"
- (Legendary) "Blink if you can hear me."
Sergeant Johnson: "Shake it off, Marines. Clear the crash site. Go, go, go!"
They'll Regret That Too

As the Chief and the rest of the team arrive at a bombed-out building and a firefight breaks out.
(If you switch weapons with Johnson)
Sergeant Johnson: "I thought we were friends!/What the-/That hurts,Chief,that hurts real bad!!/Why,I oughta.../You do know I was kicking ass with that."
Marine : "Secure this area!/Dig in fella's!/For now, this is home." (varies)
Marine: "Hoo-rah!'
Covenant Elites and Grunts appear in the area, and upon sighting the team they open fire.
Sergeant Johnson: "If they didn't know we're here before, they do now."
A few Covenant troops including Jackal Snipers appear on the rooftops.
Sergeant Johnson: "Yep. Here they come! Up high!"
Sergeant Johnson: 'I don't wanna kill ya, you're just too ugly to let live!'
After the first wave of Covenant forces are killed
Sergeant Johnson: "More on the street! Left side!"
After the second wave of Covenant are killed
Jackals and a Minor Elite appear through the path you came in.
Sergeant Johnson: "We got Jackals in the courtyard!"
Later, a group of Drones flies into the courtyard.
Sergeant Johnson: "Buggers, headin' over the rooftops!"
Another wave of Covenant attacks again.
Sergeant Johnson: "Across the street! Down low!"
Later, the sound of a Phantom dropship engines drifts over the rooftop.
Sergeant Johnson: "Eyes up! Phantom's back!"
Once the Phantom drops off the another wave of Covenant and they are killed, another Pelican arrives, hovering over the courtyard.
Pilot (O.S.): "My girl's a little big for that courtyard, Sergeant. I see a good LZ on the other side of these buildings. Meet you there, over."
Sergeant Johnson: "Copy that. Someone get a satchel on the gate!"
(A pair of Hunters soon breaks through the gate)
Cortana: "Hunters."
Sergeant Johnson: "Stand back, Marines. Let the Chief show you how it's done."
(Once the Hunters are down)
Cortana (O.S.): "Second squad, this is Cortana. What's your status, over?"
Gunnery Sergeant Pete Stacker (O.S.): "We're operational Ma'am, barely. Our pilots didn't make it."
Cortana (O.S.): "Find a hole, stay put. We'll come to you."
When the team reaches the second courtyard and they encounter another Jackal sniper with other Jackal ranks supporting it.
Marine: "The only thing worse than Jackals ... Jackals with sniper rifles!"(meaning 'Beam Rifles' as that's what Jackals carry)
When the team reaches the far courtyard, the Pelican drops off Marines.
Commander Keyes (O.S.): "Sergeant, I need you on that bird."
Sergeant Johnson (O.S.): "Ma'am?"
Commander Keyes (O.S.): "My Pelicans are going to start airlifting armor and reinforcements into the city. They'll need an escort that isn't afraid of a little hostile ground fire."
Sergeant Johnson (O.S.): "Understood. I'll keep an eye on 'em. Chief ... good luck.'
Sergeant Johnson climbs aboard the Pelican and dusts off.
Once the Chief and the marines reach the Second squad's position.
Sergeant Stacker : "Chief! Glad you could make it. Crash site's on the other side of this hotel, Chief. Covenant are crawling all over it. Follow me."
As the Sergeant and the Chief moves into the darkened hotel...
Sergeant Stacker : "Stay outta sight."
Grunts and Elites come through the dark corridors. Stacker and some Marines fire on them. Emerging from the Hotel, they spot a Phantom dropping off several Grunts.
Sergeant Stacker : "You make my mother-in-law look pretty!"
A couple of marines pulls up in a Warthog, honking the horn for the Chief.
Marine: "Special Delivery from Commander Keyes, Chief."
Cortana (O.S.): "The highest concentration of Covenant ground troops is directly below the carrier. I don't think they want you to get on board."
Cortana (O.S.): "That bridge is the most direct route to the city center.'
A Day at the Beach
Marine: "Oh man, I love the beach..."
Marine: "I hope you packed a suit, mate!"
Cortana (O.S.): "Cut the chatter... we got trouble."
As the Chief navigates the beaches.
Commander Keyes (O.S.): "Chief ... the carrier just launched a wave of pods. They're inbound on your position!"
Covenant Orbital Insertion Pods slam down on the beach all around you, and armed Elites spring from them.
Cortana: "This tunnel leads up to the bridge. It's full of rats, if you know what I mean, but it beats swimming."
As the Chief moves into the highway tunnel
Speed Zone Ahead
Cortana: "I've been analyzing the Covenant tactical chatter. They're surprised, confused... I don't think they expected us to be here. Not... you and me...all of us... humanity, on Earth. Odd, I know, but it does help explain why they came here with such a small fleet."
Throughout the tunnel the team of Warthog(s) encounter many Covenant positions consisting of Ghosts, Plasma Turrets and a few Battlefield Methane Tanks.
When the Chief comes across a group of Shadows in the inner tunnels.
Cortana: "The Covenant must be trying to regroup. Don't let them."
The Chief stops the Shadows, passes through another Covenant defensive position and approaches the exit of the tunnel.
Walkthroughs
Easy Walkthrough
Part 1: They'll Regret That Too
You'll start off with the SMG and the Battle Rifle. Switch to your SMG, then wait for Sergeant Johnson to get off the crashed Pelican. Swap your SMG for his Sniper Rifle. Now, switch back to your Battle Rifle and enter the doorway. There should be a Minor Grunt. Shoot him in the head with your Battle Rifle, and continue through the next doorway.
This doorway will lead you into the Courtyard. You'll see a few Jackals and a few Grunts. Take them out with a mixture of Fragmentation Grenades and Battle Rifle bursts. Continue into the room opposite from where you came from. Again, there should be a few Grunts and an Elite. The Elite will be Minor or Major, depending on chance. No fret, they are no threat on Easy. Take them all down with your Battle Rifle.
Continue up the stairs. They will lead you onto the middle level of the building. To your left, there will be the corpse of a fellow dead Marine, who had a lot of ammo with him. Strafe around the body to search for some Battle Rifle ammo. There will also be Sniper Rifle ammo as well. To your right, there should be a Major or Minor Elite, again, depending on chance. The Elite will be on the roof of one of the buildings. Switch to your Sniper Rifle and shoot him in the head. One headshot for a Minor Elite, two for a Major Elite.
Now, jump off the building, and you'll see a Lance of Elites and Grunts. Take them down with your Battle Rifle. After that is done, more Grunts will come out. Again, take them out with Grenade and your Battle Rifle. By now, your Battle Rifle would have lost quite a bit of ammo. Reload both your weapons (the Sniper Rifle and the Battle Rifle) and strafe to the left of the turret. There should be some Battle Rifle, Sniper Rifle and SMG ammo, however, we don't need the SMG ammo.
Some Jackals and a Minor Elite will appear out of the crashed Pelican site. Take them out with some Plasma Grenades and Battle Rifle bursts and melees. Swap your Battle Rifle for the dead Elites Plasma Rifle. Don't worry about zooming, we got the Sniper Rifle for that, and there is plenty of Sniper Rifle ammo in this level.
Afterwards, a small swarm of Drones will fly over. Use your Plasma Rifle to take care of that. Or for an even quicker and effective kill, use the Machine Gun Turret on the middle level of the building where you got a majority of your ammo from. But Be careful, the turret may not be able to turn all the way to face a few stragglers. Chances are your marines will get them. If not, hop out get it done yourself.
After the Drones are dead, a Phantom will appear. Hop onto the Machine Gun and shoot down its turrets. Then, kill the enemies that just dropped down with some Plasma Rifle bursts and some Sniper Rifle bullets if you wish to snipe. However, if you want to Snipe, it is recommended that you go to the upper level of the building.
Once they are all destroyed, another group of Jackals and an Elite will come down. Take the Elite down with your Sniper. The Elite may be a Minor or a Major this time, also depending on your chance. To kill the Jackals, use a mixture of Plasma Rifle bursts and fragmentation grenades. Swap your current Plasma Rifle for the dead Elite's Plasma Rifle.
Now, get back on the Machine Gun Turret, as two Hunters are about to burst out of a door opposite of you. As soon as the door opens, shoot for your life. The Hunters should walk a few meters out, then collapse dead, if you shoot correctly. Don't worry about aiming for the fleshy orange part, for some reason, this Machine Gun will kill a Hunter quickly, no matter where you shoot at him. This may not work for both Hunters when playing on legendary. Another way to kill the hunters is if you still have ammo on your sniper, be ready on the building waiting for the hunters to come out. You can then shoot them in their flesh. This is highly effective.
Alternatively, if you wish to practice your marksmanship, you can use the Sniper Rifle to kill them both as they stroll out of the wrecked door. This is very easy as they aren't in their protective combat stance yet as they are coming out, but if you don't land a solid hit on their orange bellies, your chance is gone, they will crouch and shield themselves, and they will be much harder to engage from that point on. If you do this correctly, you probably will kill both of them before Cortana can even acknowledge their presence.
Enter the door from where the Hunters came from and follow the pathway. Opposite you should be some Jackals and a Jackal Sniper above the Jackals. Zoom in with your Sniper Rifle and kill the Jackal Sniper. If the Jackal Sniper hits you 2-3 times, you're a goner, so, we should focus on him first.
Then, go to the other side and kill the shielded Jackals with your Plasma Rifle. Then, backtrack. You'll need more Sniper Rifle ammo. Jump on the boxes opposite from where you are fighting the Jackals; also, where you came from. Jump up again, and there will be the body of dead Marines and dead Grunts. Strafe over the bodies to find some Sniper Rifle ammo. Then, go back to where the Jackals are. By now, Sergeant Johnson would have left on his Pelican. Follow the pathway down, and it'll lead you into Sniper Alley. There are a load of Jackals and Drones here.
Kill all the Jackal Snipers with your Sniper Rifle, (if you need more sniper ammo go to the dead Jackal Sniper and take it's beam rifle) then take down the Drones and Jackals with your Plasma Rifle. Then, go ahead and follow your Marines into a pathway. A Sniper Jackal should come out. Stick it with a Plasma Grenade or snipe it. Take down all enemies here, there should be a few Jackal Snipers, few Grunts and a few Elites. Swap your Plasma Rifle for the dead Elites Plasma Rifle, as it should be running low on ammo by now. If you are playing on a harder difficulty such as Heroic or Legendary, try to be careful,as there are also hidden Jackals in the ruined buildings and on the rooftops. There will also be two Elites of higher ranks, one carries a sword and the other is invisible.
Once you're done, either go left or right to confront some Grunts & Elites in Hotel Zanzibar. Kill the Elite as he poses more of a threat with his turret, then kill the Grunts, who would all be Minor or Major.
Go inside the Hotel. An Elite will be shooting Plasma bursts at the wall. Throw a Fragmentation Grenade and use your Plasma Rifle to kill the rest of them. Swap your Plasma Rifle for the Plasma Rifle that used to belong to the dead Elite.
By now, a Phantom would be arriving. Take cover to hide from the turret bursts. Then, using your Sniper, take down all the enemies that come from the Phantom. Then, jump down and take the Warthog driver seat, or alternatively, hijack a Ghost that will attempt an attack on the Warthog. If the Ghost is destroyed before you can get to it, there is one by the crashed Pelican, guarded by an Elite and two Jackals.
Part 2: A Day At The Beach
Just destroy all your enemies until you reach the tunnel. There is a hidden Marine, Sniper Rifle and Rocket Launcher in this part. On the top of the building after a Phantom drops several Ghosts for the first time, there will be a lone Marine, Sniper Rifle ammo and a Rocket Launcher. Just take any, as we'll be spending the remainder of this level in a Ghost.
Kill the rest of your enemies and then go inside the tunnel. Dispatch all enemies, including Jackals, Grunts, Elites, and Drones. The Shadows will come up soon.
Part 3: Speed Zone Ahead
To destroy the Shadows, use continuous fire with the Ghost. It will be easier to boost up to the driver and shoot directly a him. If you are in a Warthog, don't bother even trying to kill it, as it will take a long time. You can use your Rocket Launcher to destroy the Shadows if you wish.
The last battle consists of fighting Ghosts, Shadows, Grunts and all kinds of turrets. Just destroy them with your Ghost, and proceed through the tunnel to finish the level.
Congratulations, you have finished Outskirts, the second level of Halo 2 on Easy! You still got a long way to go...
Normal Walkthrough
Starting Weapons: M7 Caseless Submachine Gun
BR55 Battle Rifle
Part 1: “They’ll Regret That Too”
You begin this mission by waking up to Cortana’s voice. Once you can move, follow Sergeant Johnson’s advice and secure the crash site. You can swap your BR55 Battle Rifle or M7 Caseless Submachine Gun for Sergeant Johnson’s S2 AM Sniper Rifle if you wish. Note however that he is immortal and always has infinite ammo. Whatever you do, head for the doorway next.It is suggested that you take the sniper as you need it when you are the in the alley for later(and of course now).
As you leave the landing zone, a single Grunt will approach you, whack him before he can alert his friends near the building on the other side of the courtyard. As you charge across the courtyard you will see a small group of Grunts and Jackals. Take them out with a quick grenade and some rifle shots.
You can jump onto the truck to your right to get to the upper level of the building. There's an Elite and some Grunts in the atrium of the ruin. Flank them while your Marines distract them. You might want to check out the ammo supply by the steps in the western part of the building.
After you've defeated the local Covenant force, you'll get a new Mission Objective. You need to defend the building from attacks until the Pelican arrives. Pay attention to Johnson's audio cues in the next part as they'll help you target and dispatch foes quickly and effectively.
- “Here they come. Up high!”
An Elite appears on the roof of the building on the other side of the street. The rest come through the two smaller lanes under it. (On higher difficulty levels, Jackal snipers appear as well and can kill you with one shot.)
- “More on the Street. Left Side.”
A Lance of Grunts and Elites will come around the corner of a building further up the street.
- “New Contact.” or “Across the Street, down low.”
Grunts and Elites will emerge from the two small alleys.
- “We got Jackals in the Courtyard!”
Jackals and at least one Elite will appear in alleyway leading from the crash site to the courtyard. A well aimed grenade should do the trick. You can also use the machine-gun mounted on the second floor.
“Buggers, heading in over the rooftops”
A swarm of Drones will fly in over the buildings. The machine-gun works wonders here,you can also use the machine gun turret as then you don't have to waste your machine gun bullets.
After several waves, an enemy Phantom will make an appearance. Take cover inside to evade its fire. (Or destroy the guns with your machine-gun.) After it's done deploying troops, greet them with grenades. Take care of the last patrol, wandering into the courtyard through the alleyway leading to the crash site, and a Pelican should appear.
The pilot will tell you the courtyard's too small and announces its intention to land on the other side of the buildings. After the Pelican flies away two Hunters will break through the metal gates. The easiest way of disposing them would be the machine-gun. Do note that it's now much harder to kill a Hunter by shooting its back than it was in Halo: CE. If you go for the machine-gun, take cover when the Hunter's weapons start to glow.
If you want, you can use/abuse Johnson's invincibility and force him over the edge; he'll then take out the Hunters, as he can't die. It is often entertaining to give him a Plasma Pistol and watch him take down the Hunters.
On the other side of the designated landing zone, Jackals await - and they have a sniper among their numbers. you'll find a welcome ammo supply in a niche and you'll discover a handy Sniper Rifle on the level above it. just jump on the boxes to reach it. You can take the jackals out with some grenades but your first priority should always be the sniper. Never underestimate them as not even the Master Chief can survive two well-aimed shots from a Beam Rifle.
At this point a Pelican picks up Sergeant Johnson, looks like you're on your own again.
The so-called "Sniper Alley" lies behind the next corner, and you'll soon appreciate the aptness of its name. Peer carefully around the corner and shoot the Jackal in the middle of the road. The Sniper Rifle would do well here in taking out the Jackals down the end of the road as well as those on the rooftops. There's an explosive barrel midway which, if blown up, helps greatly. In total there are six snipers; the one in the middle of the road, two in the ruins at the end of the street, one in the middle near the barrel and the remaining two can be found on the rooftops on either side of the alley. Be prepared to deal with a swarm of Drones as you move further down the alley. On higher difficulty levels (e.g. Heroic and Legendary), to make matters worse, there's a Stealth Elite wandering around as well. Be careful and take it slow. If you feel like being surrounded, take cover and let your shields recharge. Unless you're playing on Legendary this part shouldn't be such a problem, provided you always take out the snipers first.
To the left, you'll find a new alley with even more Jackals as well as two more Snipers. One of them at the back of the alley and one in the small overpass. Make sure to deal with them. A small alley that branches off to the left will lead you to an ammo cache with a Jackal sniper. If you continue down the alley you'll be greeted by a three different groups of Grunts, each led by an Elite. Dispatch of them as you see fit and watch out for the Jackal sniper on the rooftop to the left. It is advised that you use a Beam Rifle of your own. If you hit an Elite with a near-fatal hit, do not retreat or switch weapons to conserve ammo; Beam Rifles are discarded everywhere.
Once you're done, you can either go around the building, left or right, or you can jump on top of the green crate and jump from there on the roof to your right. There's a hole you can slip through. You'll emerge behind two Grunts. Whack them in the back and use your elevated position to slaughter the nasty aliens that threaten your Marine allies.
Head towards the back of the hotel. There will be a small fire fight between a group of Grunts being lead by an Elite. Usually the Elite is a Major. But occasionally it will be an Ultra, if it is it will be using a plasma turret. DON"T melee it in the back. It will pull out an sword and kill you if you do. After the loading message is done, throw a grenade towards the exit. You should be able to hit a group consisting of some Grunts and two Elites. Paste the walls with whoever escaped the blast. Once they're out of the way a Phantom will come to drop off reinforcements. If you still have your sniper rifle you can take out the enemy tangos from afar. If not, deal with them however you see fit.
After you've sent them to wherever aliens go in the afterlife, a Warthog will pull up nearby. Take whatever position you like. Or alternatively, hijack one of the Ghosts pursuing the Hog.
Part 2: A Day at the Beach.
(Note: You don't actually have to do this next part. If you want you can just get a Ghost or Hog, pedal to the metal and drive all the way to the highway tunnel. Theoretically you don't have to kill a single opponent after the Hunters to finish the level successfully. This is referred to as the "Path of Shame", as opposed to the "Path of Valor" that you follow by achieving every specified objective.)
Whatever you choose, head out to the beach when you're done. You'll notice a crashed Pelican to your right. Sometimes it'll be guarded by some Covenant while on other occasions there won't be an enemy in sight. From here you, drive down the beach past the first ramp. If you still have some sniper ammo left you can take out the snipers past the ramp. If not, drive in and let your passengers take care of them. You have to clear all enemies around the huge AA gun on the beach. After the first gun you'll find yourself breaking through a barrier, only to end up on another beach, with yet another gun.
Repeat and cleanse the area of hostiles. Once you're on the beach itself and have destroyed most of the occupying force, a Phantom will come help out your besieged enemies. He'll drop off a couple of Ghosts as well as provide covering fire with its own guns. After a while he'll fly away to the next beach and the next objective.
Once done, clear the ramp and you'll end up on the last beach before you get to the tunnel. Ghosts are hammering you Marine buddies while the Phantom once again provides covering fire. On top of the little building to your immediate left, you'll find not only a Sniper Rifle, but also a brand new Rocket Launcher for your use.
Dispatch of the Ghosts and the Phantom's guns. You can use your Sniper Rifle to take out the Jackal Sniper in the floating watchtower. Be wary of the Elites dropping in. Occasionally they'll try and attack you in the back by getting up on the roof. After you've annihilated them, you're free to walk towards the tunnel. Or so you thought. Once more Elites drop in to prevent you from doing so. And instantaneously Ghosts will appear as if from nowhere. Your Sniper Rifle and Rocket Launcher should suffice.
The tunnel is very long and a Ghost or Warthog(I suggest a Warthog as the machine gun is far better,plus you have somebody for company). Follow it until you reach the exit, occasionally driving into a parallel tunnel. The Covenant have constructed makeshift barricades, which you can either destroy or simply drive right past. Be wary of Drones hijacking your vehicle. They can't force you out but will inflict some serious damage(All they will do is perch themselves on the front[And sometimes back] of your ghost, and hit the crap out of you). At a certain point you'll encounter a convoy of three Shadows. Destroy them,the easiest way to destroy the Shadows are to go up to them,right in the face(so their plasma gun can't fire at you because of the angle)and let your gunner do all the rest(the Shadow also has a ghost attached to it). In the last hall before the end of the tunnel the Covenant have set-up the most challenging barricade of all, but it shouldn't be a real problem. A couple of Ghosts, a Shadow, and two stationary turrets will make a last attempt to stop you. Convince them otherwise, or simply drive past the Shadow and finish the level.
Speed Run Walkthrough
Note: This walkthrough require correct Grenade Jumping, precision in everything and... speed. This walkthrough is based on the current fastest Speed Run at High Speed Halo, Fully_Synthetic and Chad's 4:43 Legendary Co-Op run, with a bit of minor editing as I personally deem fit to allow for Single-Player use. It may be altered when faster runs emerge on the web.
Start moving towards the doorway. Jump onto the lamp in front, then onto the awning to the left. Turn back towards the hole you jumped up from and jump towards the pathway there. Throw a Frag Grenade as you fall and immediately jump again as you land so that you make use of the grenade's force in a Grenade Jump. Jump across the chasm to the building opposite. Throw a Frag Grenade at the wall of the building as you reach the top of the small slope and turn towards the building to the left, jumping as you reach the edge. Follow the path and jump down to the next area, then jump onto the pointed roof, then over the parapet. Follow the path in a straight line over to the next building, jumping as necessary. Throw a Frag Grenade shortly before you reach the small parapet and jump as you hit the parapet, letting the grenade blow you onto the next building. Continue walking in a straight line until you see the sign for Hotel Zanzibar. Jump over the gap between the building you are currently on and the next one, then head for the hotel and drop down. Go in and throw your currently last Frag Grenade at the Covenant in the hall, then hide to the left. Rush out and charge past the survivors, heading down to the beach. If you've been going fast enough, you should hear Miranda say "Sergeant, I need you on that bird" as you near a parked van. Find the crashed Pelican and the Ghost near it, then board it. "A Day At The Beach" will appear as you do so, as will a checkpoint.
Boost the Ghost past all resistance and head into the highway tunnel. You will get a checkpoint as you near the first turn. Once "Speed Zone Ahead" appears, get out of the Ghost and commandeer the Warthog that appears. Charge past the resistance. You will get a checkpoint as you pass the first group of Covenant, then a second near the little ramp.
Single-Player Speed Run Walkthrough
Note: The Sputnik skull is required for this run. This works on all difficulties.
Epeu - This level is one of the easiest and quickest levels to speed run. Have fun!
When the level starts, turn slightly right and head for the fiery, dirt area. Once you enter it, turn left and grenade jump onto the ledge. Turn right and jump onto the next building. Throw a grenade where the next building begins and jump. The grenade will propel you up onto the building. Turn slightly left and jump onto the gray square with the empty middle. Jump onto the bridge, and grenade jump onto the next building. Jump down to Hotel Zanzibar, and avoid the Major Elite with the Plasma Cannon. Proceed down the hall in the hotel and throw a grenade when you reach the end. Use your SMG to take out what the grenade didn't.
A Phantom should drop an Elite or two and a few Grunts onto the far end of the bridge. I recommend switching to your BR and sniping them out, although you could go in and whack them all. If you want to make a no-shot speed-run, you could just whack everybody where I told you to use the SMG, and whack everybody that the Phantom drops. After they're all gone, a Warthog will drive down the road under you. Jump down and get into the driver's seat. Let the other Marine get into the Passenger's seat, and A Day at the Beach should begin. Avoid the crashed Pelican and ride over the "bridge". Avoid the large messy battle and turn left at the end of the beach. Don't mind the Grunt and Elites waiting for you there. Turn down the hall and avoid the next large messy battle by driving across the beach and over the next "bridge".
Avoid the last large messy battle and turn left to enter the tunnel (the next part will begin here). Turn right and zoom through the tunnels, making the appropriate turns. I don't stop during the battles so my Marines can take them out. Go ahead and to that if you want to, but it will take a while. The Shadows will make no big threat to you even on Legendary as long as you just drive past them.
At the end of this part, just drive up the ramp and you're done.
Belgariad - Before going into the tunnels i suggest stopping at the building that the marines are defending and pick up the rocket launcher, then give it to your passenger in the warthog. this is helpful on legendary because he can take out a few enemies with one Rocket so you can pass without being killed.
Weapons Caches
- The first one is on the second story of the main structure in the first plaza. Get on the second story and check under the stairs. It contains a BR and Sniper ammo, a Magnum, and (interestingly) two SMGs that have a total of 430 rounds (80 rounds more than usual).
- Another one is found after you encounter the Hunters. Go through the doors and you'll reach two crates stacked on top of each other. Jump on top and turn right. You should see some bodies. Go towards them and you should see the ammo. There will be two dead Grunts, a Jackal and two dead Marines. There will be three Frag grenades, two fully loaded Plasma Pistols, a Sniper Rifle and two clips plus one Magnum.
- Another is very close to the above cache. When up by the bodies you should see a broken street light. Jump between it and the wall to get the ammo.
- If you go to the building with the two Jackals on the bottom floor there are several Sniper Rifle clips as well as a sniper rifle.
- A sniper rifle cache is found in a balcony. It contains four or five boxes of ammo and a sniper rifle. This balcony also has the IWHBYD Skull when you trigger the events on Legendary.
- Another is on the rooftops, if you go along the rooftops next to the sniper alley, you should find a house with a corner blown off. There is an energy sword inside.
- The last one is in the third beach area, in the open area building. If you park on the right side there is a ramp that leads up to the top floor. Here is the only Rocket Launcher in this level, plus a sniper rifle, BR ammo, and Sniper ammo. On the bottom floor is two Rocket ammo boxes. This area is useful for both sniping the Elites that come out of the drop-pods and destroying the many Ghosts that come at you.
- In part 1 They'll Regret That Too. Right after you kill the grunt that walks by, make your way to the machine gun turret and next to it is a battle rifle with a 114 ammo in it.
Base Defense
In the first part of the level, when you must defend the Marines until help arrives, try to defend your base a bit properly. In this case, your "Base" will be the large building in the center of this courtyard. This building was probably a small open area park of some sort. There are three levels and an atrium, with a tree taking up most of the space in the atrium.
A flight of stairs leads up to the second level, which is basically a large balcony (very vulnerable to Snipers) that has an MG turret in the center, with a separate stairwell leading up to the third level. Sgt. Johnson will take up position here, sniping any enemies he notices. The Marines will usually stay with you on the second level, but one might stray down to the courtyard and side street.
For your convenience, there are three ammo caches for you to feast upon. The first one is on the ground level, right in that little room in the doorway. There will be SMG and BR ammo. The 2nd and 3rd cache are on the 2nd level, one under the stairwell leading to the 3rd floor. This cache contains BR, SMG, and Sniper Rifle ammo, plus a Magnum. The third is situated in the center of the balcony, surrounding the Machine Gun turret. There are also some Frag Grenades in the courtyard.
The MG turret will be very useful in upcoming fights, but its firing path is only centered on the main courtyard. Keep that in mind.
On the right side of the balcony (facing outwards) there is a large hole you can drop through.
The 3rd level consists mostly of a glass sunroof that will break if you try and walk across it.
The ground floor's main entrance has no door to close, making it vulnerable to infiltration. Keep your enemies at bay with the MG to solve this problem.
There are many ways to get on and off and into your little fort. Two effective ways are the white and brown trucks that are around the side streets. Jump onto these trucks, and from there you can get to the balcony.
There are many crates in the courtyard for your enemies to hide behind. Try to take out them out before they can find cover.
Base defense tends to be a more effective tactic on Heroic and Legendary difficulty levels as it gives you a good fall back position and hiding spot to regenerate your shields. When playing on Normal or Easy you will probably find yourself on the street more often than not, retreating to the base occasionally to use the turret.
In co-op it might be better if one of you has the sniper and Battle Rifle, and the other should keep the SMG and Battle Rifle. The person with the sniper rifle should sit on top and snipe the Elites or Jackals while the other person cleans up the rest or washes out enemies from cover. The person without the sniper should also use the turret. The sniper can actually cover the entrance from the roof without giving away their cover.
Trivia
Glitches
- There is a glitch where a Jackal Sniper kills himself.
- In the tunnel, when the Scarab makes a hole in the roof and burns a Warthog, it is possible to jump through the hole and follow it.
- There is a way to get over the gate from were the drones come in. First you go were the first Grunt is, jump on one of the lights on top, then jump on the roof, after that you go to the building behind were the Pelican crashed then look to your left where there is an alley behind the gate.
- There is also a way to get on the other gate at the end of the alley on the other side. First again you jump on the light and then the roof but this time you have to go to the building in front were the phantom comes, grenade jump and then just head straight, you should see some other buildings with those bridge-like things. Then you just get on top of the building with bridge and just go more straight until you see the inside part, just head down and down to the ally and on this place you could see the gate that you went over.
- If you are on the broken bridge when the Pelican takes Johnson, you can jump on the Pelican and go with it but you will get pushed off by an invisible wall.
- A Tri gate can be found on this level though it may be a graphical error.
- You can get Sergeant Johnson to the end of the level by meleeing him away from the Pelican where he is picked up. At the chapter "A Day at the Beach" if you ram Johnson with a Ghost with boost he will scream and yell something about him not making a will and in denial of dying even though he is invincible. This trick is also handy for hard levels on outskirts because when you push the sergeant out into the enemy's fire, all enemies fire at Johnson leaving you free to attack them without fear of retaliation.
- It is possible to "kill" Sergeant Johnson by boosting into him and pushing him into a wall. he will disappear into the wall.Template:Fact
- If you go out of the map into the water at the end of the level and continue back you pass several structures going into the water, one of these has a black rectangle that produces water effects when shot.
- It is possible to get an Energy Sword on Easy. (not REX) by boarding an Ultra driving a Ghost and then get of the Ghost an attack it until it takes out the sword.
- There is a glitch in this level where you can kill both the Hunters with one shot of a Battle Rifle. When they break through the gates, stand on top of the building across from it, on the glass roof. When they come through the gate, aim for the Fuel Rod Gun on the second Hunter's arm. When it goes to shoot, hit it once, and if your in the right position, the explosion will kill them both.
Easter Eggs
- The Blind and I Would Have Been Your Daddy Skulls are found on this level.
- On the roofs there is a small room with an Energy Sword also known as the "REX" sword because of the rocks next to it.
- There is a Grunt that yells "I will bite your knee caps off". This is also said on the level The Silent Cartographer in Halo: Combat Evolved.
- The building with the Blind Skull has 4 grenades by the skull and a seeker’s scope.
- If you listen closely you can hear a man talking through a megaphone and if you are wondering where the guys voice is coming from you can find some megaphones on the walls of buildings and on the highway tunnel.
- There is an Invincible Warthog on this level.
- You can get a Scarab gun on this level.
Mistakes

- The exhaust effects on the Pelican dropships are different in this level and the ones in Another Day at the Beach.
- The Warthogs in the first cutscene have no drivers.
References
- In both the second levels of Halo: Combat Evolved and Halo 2, a UNSC ship ferrying Master Chief crashes. The Pelican that Master Chief rides on crashes, just like the lifeboat that he rode on in Halo: CE. However, unlike the latter, several Marines survive.
- Being a civilian area, Outskirts shows the player much of the culture of the 26th Century.
- There are 7 waves of elites if you get the IWHBYD skull. The 7 waves of Elites most likely comes from Bungie's obsession for 7 references.
- The beginning of the beginning cutscene was used in a spoof Gieco commercial.
Miscellaneous
- This level was originally going to be entirely in New Mombasa, and there were not going to be any Scarabs. A gameplay video of the old version can be found on the bonus DVD to the Halo: Original Soundtrack.
- This is one of only two maps in the Halo 2 Campaign that features ladders.
- At the start of the level if you get the Sniper Rifle from Johnson and jump up to the building you would normally ride the Phantom you will have a great sniping position.
- On all but three of the glass panels (at the start of the level on building in the courtyard) you will fall through unless you are running.
- It is possible to complete this level on all difficulties without having to shoot your hand held weapon once. Immediately, go out into the courtyard, go to the left down the street, into an alley, and hop on the roofs. Jump from roof to roof until you reach the Zanzibar hotel. Then, go in and let your marines take out the grunts and elites. Whoever they don't kill you can beat down. Then, get in a Ghost or 'Hog and drive through the rest of the level without getting out.
- All the fires on this level won't harm you even if you are unshielded.
- A good way to finish the first part on harder difficulties is to give Johnson a strong weapon and let him do all the fighting. It may take some time but you'll last a lot longer.
- This is the only level in all three games where there are Shadows.
- There is a hidden sniper on the building where two Jackals appear after Johnson leaves.
- It is possible to save up to six Warthogs on this level if they come out.
- If you get lost outside the map or just fall down, Bungie put a lot of crates for you to get back on track.
- The bridge in Metropolis is visible when on the beachhead.
- Also the bridge where the Scarab Gun is located can be seen on the beach on this level.
- You can get on top of most buildings with the Sputnik Skull turned on.
- You can get on top of the second Phantom with a grenade jump with the Sputnik Skull turned on.
- If you have the Sputnik skull on and you get to the part where you go into the tunnel if you do a frag grenade jump on top of the tunnel now go explore!
- There are hidden snipers in the building where the IWHBYD Skull is found.
- The pictures where they show Master Chief in turret killing Grunts and the picture of a jester-like-person are found in human-like maps for multiplayer.
- If you get on top of the tunnel there is a wall with flames painted on it.
- This level shows the first appearance of the Scarab.
- In the beginning of the level, you can trap the Hunters that break through the gate. To do this, you must completely block the gate off with the white overturned truck and every other container you find. If the Sputnik Skull is turned on, it will make the process a lot easier and faster. Also, it is a good idea to have the Thunderstorm Skull on as well. It makes every Elite an Ultra so you can have swords to beat the truck around with.
- The Warthog that drops down from the Scarab made a hole is a Gauss Hog.
- In the same area as stated above, there is a squad of Marines with a turret.
- This is the first level in Halo 2 that has Hunters.
- The crashed Pelican first seen when arriving at the beach is the same one that crashed in, Another Day at the Beach.
'*To get the secret Energy Sword follow these steps: When You First enter the level to go down to the Path where you go to snipe the hunters. Instead of going down there, there is 2 ledgers instead, crouch jump onto one and then crouch jump up the top. Once There, jump over to the other part of the roof. Once there grenade jump on the top bit on the right of screen. Then jump over the platform above the alleyway. If you can't there you can again grenade jump, keep following the corners and In a small corner on the top of the building there will be an energy sword with full ammo.'
Related Articles
Images
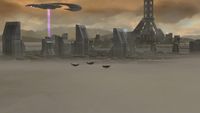
Pelican Dropships flying to New Mombasa. Regret's Ship is in the background with its gravlift engaged

| Preceded by Cairo Station |
Halo 2 Campaign Missions Outskirts |
Succeeded by Metropolis |


