Narrows
From Halopedia, the Halo wiki
Template:Multiplayer Map Infobox
Narrows[1] is a Halo 3 multiplayer map.
Discovery
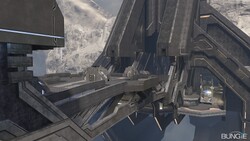
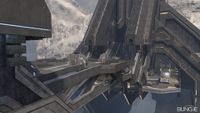
It was first discovered in the third Bungie Podcast of Summer 2007, and was listed as having a "very special weapon in the middle". It was further detailed in a Bungie Humpday Challenge as a long Forerunner outpost set in a snowy and cold environment, and was revealed to be the external bridge level featured in one of the Halo 3 video documentaries. It was known by the codename "Chill" during Spring 2007, and was discovered in the hexadecimal code of the Halo 3 Beta, and was later it was relabeled as "Long and Lean" [2]. However, it has been finally confirmed by IGN and Bungie Studios to be known as "Narrows".
Layout
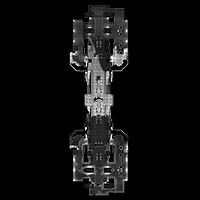
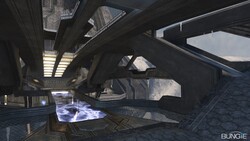
"Narrows" is a fully symmetrical map, with two opposing bases on each end connected by a Forerunner Causeway. The weapons in each base are identical, with a few minor changes. A Man Cannon exists on one side of each base, and propels the player to the opposing base on the other side of the canyon. If players are to enter opposing man cannons at roughly the same time they will collide in mid-air and both fall to their death. The main bridge features two different levels for players to combat each other. The upper level is more vast allowing players to be hit from multiple sides and angles. The lower level, connected by a "lean" Energy Bridge is more discrete, and often less hazardous.
Base Spawns
Each team spawns at opposite sides of the map, and must cross the bridge or jump through the Man Cannon to engage the enemy team. The two bases have been nicknamed "Blue Base," and "Yellow Base" by players, due to the blue and yellow tinting of each base. From Blue Base, players can access the Man Cannon to their right, while Yellow Base players will find the Man Cannon to their left.
Each base features identical weapon spawns and placement. The main differences in each base are due to aesthetics, equipment, and power-ups. Blue Base players have a Power Drainer placed in front of their Man Cannon, and Yellow Base players have a Bubble Shield. Each base features a low point, which is even lower than the "Low Bridge." Blue Base players have an Overshield power-up available, and Yellow Base players can find Active Camouflage. In addition, this low point contains a Brute Shot (available on each side).
Upper Bridge
This bridge connects the two bases, and is generally the area where most of the fighting occurs. The upper bridge features a lot of open areas and not a lot of room for cover. The M41 Rocket Launcher can be found at the center of this level, which is the object of much contest. Players can also find a Radar Jammer next to the Rocket Launcher to aid in the confusion of the enemy team. Separated from the top, but accessible via ramps on the four corners of the bridge, you can find the lower bridge.
Lower Bridge
This lower bridge offers more protection than the upper level. A Shotgun spawns in the center of the Energy Bridge, which connects the two bases. Players can also find the SRS99D-S2_AM_Sniper_Rifle on each side of the bridge. Taking the lower bridge may be a safer and quicker route to each base, but can leave the player vulnerable to shotgun or sniper fire. It is also possible to fall off the bridge and land on the cooling core below. You can not stay here for long though, as you will suicide after 5 seconds.
Inspiration
The map's design is similar to the outdoors bridges on the Halo: Combat Evolved campaign levels Assault on the Control Room, Two Betrayals and the multiplayer map Gephyrophobia.
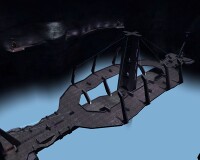
See Forerunner Bridges for more info.
Gallery
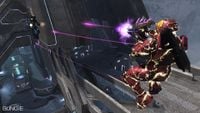
- NarrowsBattle1.jpg
A battle on Narrows. Note the Mauler, Spiker and Plasma Rifle.
Trivia
- It is possible to get outside the map. In Forge, you can place teleporters on top of Narrows. It helps to put a sniper on, too. Also, you can't jump because you are too high. If you go too far forward, you won't be able to go back.
- It is possible to survive for a brief period of time on the lower structure. After mis-jumping off the side and falling onto the conveyor belt-like area. After a undetermined period of time and for reasons unknown you expire, testing continues to see if it relates to the motion of the conveyor.
- If you fall off the side after being hit by an enemy, land on the conveyor belt-like area, and don't want to give the other team the kill; don't just stand there and wait to die. Instead, jump, wait a half a second, then jump again. You will most likely remain alive just long enough so it counts as a suicide, thus not giving your opponent a point, but taking one from you.
- There have been rumors of ghost sightings similar to the reported ones on Lockout
- If you look off to the side, you can see another bridge exactly like Narrows.
Matchmaking Adjustments
For reasons not yet disclosed by Bungie, this map has been slightly altered when playing in Matchmaking playlists.
As of the December 11, 2007 update, two of the Maulers that spawned along the top of the bridge (one on each side) have been removed. The remaining Mauler on each side was re-positioned centrally and slightly back from the original locations, behind a wall offering cover from the M41 Rocket Launcher spawn location. In addition, the Radar Jammer has also been removed, though this happened in an earlier Matchmaking update.
It is believed that this change was caused by near-constant complaints regarding the large number of Maulers in many levels combined with the Mauler's ability to nearly-instantly kill an opponent at very close range. Many people felt that the weapon was unbalanced because of the close-quarters prowess of the Mauler, especially in CQB-style levels; this is a misconception.
The problem was a combination of the somewhat large number of Mauler spawn locations, the fast respawn time on a lethal close-combat weapon (usually only 45 seconds), and players not changing their play style to compensate for a number of camping and / or charging Mauler wielders.
Related Links
Videos
References
