The Covenant (level)
From Halopedia, the Halo wiki
|
Prev: |
|
|
Next: |
|
| The Covenant | |
|---|---|

| |
|
Game: |
|
|
Player: |
|
|
Date: |
|
|
Location: |
|
 |
Halopedia has a walkthrough guide for this level; see The Covenant (level)/Walkthrough. |
The Covenant[1] is the title of the Eighth campaign mission of Halo 3.
The mission takes place on The Ark. In this level, you must deactivate the shield protecting the Prophet of Truth. Before reaching Truth, the UNSC and Covenant Separatist forces must deactivate three towers powering the Prophet's citadel and face off against a massive vehicular Covenant force, including two Scarabs. Finally, united by the common purpose of stopping the rings, Master Chief and the Arbiter Thel 'Vadam unite with the Flood, only to be betrayed when the threat, ultimate destruction by Truth, has been dealt with.
Upon completing it on the Normal, Heroic, or Legendary difficulties, the player will earn the "Last Stand" achievement and 40 Gamerscore. Earning over 50,000 points in the campaign meta-game on this level will give the player the Vanguard achievement and 10 Gamerscore. It is the longest level in Halo 3 and the last level in which you fight the Covenant (excluding the Final Grunt.). This level is significant as it is the Covenant's last stand. After the Covenant have been defeated, there is only one last threat the UNSC have to deal with: The Flood, and later on the Sentinels.
The IWHBYD Skull is found on this level, as well as the Thunderstorm Skull. (Click here for more details on how to acquire them).
This is the last stand of the Covenant Loyalists against the UNSC and the Covenant Separatists. This is one of the hardest levels of the game.
Starting Weapons
| Player V Starting Point > |
Mission Start | Rally Point Alpha | Rally Point Bravo |
| Master Chief Primary Weapon Solo |
Weapon/Anti-Vehicle Model-6 Grindell/Galilean Nonlinear Rifle (Spartan Laser) | MA5C Assault Rifle | MA5C Assault Rifle |
| Master Chief Secondary Weapon Solo |
BR55HB SR Battle Rifle | M6G Magnum | M6G Magnum |
| Master Chief Primary Weapon Co-op |
Weapon/Anti-Vehicle Model-6 Grindell/Galilean Nonlinear Rifle (Spartan Laser) | MA5C Assault Rifle | MA5C Assault Rifle |
| Master Chief Secondary Weapon Co-op |
BR55HB SR Battle Rifle | M6G Magnum | M6G Magnum |
| Thel 'Vadam/N'tho 'Sraom/Usze 'Taham Primary Weapon | Type-50 Sniper Rifle System | Type-51 Carbine | Type-51 Carbine |
| Thel 'Vadam/N'tho 'Sraom/Usze 'Taham Secondary Weapon | Type-51 Carbine | Type-25 Directed Energy Rifle | Type-25 Directed Energy Rifle |
Cutscenes
Transcript
Trident
Three teams. Three towers.
{Cut scene}
Five Pelicans fly in. They are followed by two Separatist Phantoms. Behind them is the carrier Shadow of Intent. The view changes to a large energy barrier surrounded by Covenant Loyalists
- Commander Keyes (COM): "We hit these three generators, and the barrier will fall?"
- 343 Guilty Spark (COM): "A small section, yes."
A Grunt spots the flight formation as it approaches the mainland, jumps, and cowers.
Miranda Keyes (COM): Good enough. Johnson, drop the Chief at the first generator, then head to the third. The Elites will punch right down the middle."
- Sergeant Johnson (COM): "Roger that."
The Pelicans and Phantoms break formation. Two Pelicans, including Hocus' bird carrying the Chief, head towards Tower 1. Anti-Air fire erupts around them.
- Hocus (COM): "Charlie Foxtrot! Tower One approach has active Triple-A!"
Gunfire hits one of the engines of the following Pelican, forcing it to collide into Hocus' Pelican, tossing the Warthog it carried out onto the ground. The second Pelican swerves out of control.
- Damaged Pelican Pilot (COM): "MAYDAY! I can't control her!" (Pelican drops out of sight, followed by the sound of a crash and a muffled explosion)
- Hocus (COM): "Pelican down, Pelican down!"
- ODST Sergeant (Stacker) (COM) "Brace yourselves; we're going in a little hot!"
Chief grabs a Spartan Laser and jumps off the Pelican with the ODSTs
{Game play}
- Gunnery Sergeant Pete Stacker: "Pile out! Go go go!
- ODST Sergeant (Reynolds): "Up the beach! Kill that Wraith!
or
- ODST Sergeant (Stacker): "Alright, up the beach! Take out that Wraith!
- Commander Keyes (COM): "Roger that, Hocus. Get out of there!"
The Master Chief and his Squad secure the beach, and destroy the Anti-Air Wraith
- ODST (COM): "Beach head secure, Commander. Hostile Anti-Air has been neutralized."
- Miranda Keyes (COM): "Understood. I'm on my way. Shipmaster, begin diversionary bombardment."
- Shipmaster Rtas 'Vadum (COM): "I will beat the Prophet's shield like a drum. By the time the barrier falls, he will beg for mercy."
A Pelican drops off a Mongoose and Warthog for the Chief and his Squad.
- Commander Keyes (COM): "Spark believes Truth can activate the rings at anytime. If he does, Earth... every being in the Galaxy... Halo will kill them all."
They mount up and head off for the first tower.
- Commander Keyes (COM): "Get to the first tower. Shut it down."
As the Chief drives up the hill towards the 1st generator, he sees the Separatists' Phantoms battling with the other Loyalists' Phantoms on tower 2.
- Sergeant Johnson (COM): "Ma'am, we're on the ground. Third Tower in sight."
Commander Keyes (Radio): "Good. The Arbiter and the Elites have touched down in No. 2." -(Co-op change) Commander Keyes (COM): "Good. The Elites have touched down in No. 2."
- ODST: "Objective in sight! Watch for heavy armor!"
Prowlers, Ghosts, a Wraith and a Shade turret stand in the Chief and his squad's way, but the squad eventually clears the armor and other resistance on the perimeter of the tower
- Commander Keyes (COM): "Chief. You've got to offline that tower."
Keyes' Pelican drops off weapons.
- Commander Keyes (COM): "Get inside that tower. Take it down!"
- ODST: "Perimeter secure. Get inside that tower! Stick together! Check your corners!"
Master Chief gets inside and secures the bottom floor. The ODST and/or Marines hold while the Chief secures the top floor and deactivates the tower. The Chief secures the top floor, after an encounter with a Brute Chieftain with a Gravity Hammer and its Brute Bodyguards.
- Commander Keyes (COM): "Chief, find the control panel, and shut it down!"
The Master Chief deactivates Tower 1.
{Cutscene}
- Commander Keyes (COM): "Good work, Chief! That's one. The Arbiter should be just about to..."
-(Co-op change) Commander Keyes (COM): "Good work, Chief! That's one. The Elites should be just about to..."
Tower 2 shuts down.
- Commander Keyes (COM): "...that's two! It's all up to Johnson's team now."
Chief and Commander Keyes watch Tower 3 for a moment. It remains active.
- Commander Keyes (COM): "Get back outside, Chief. Wait for transport."
{Gameplay}
- Miranda Keyes (COM): "Johnson, come in... Over."
- Johnson (COM): "Brute reinforcements, ma'am (static)! We're pinned down!"
- Miranda Keyes (COM): "I'm on my way!"
- Sergeant Johnson (Radio): "Negative! Fire's too heavy! (to his squad) Everyone fall back! Now! (Static and cut-off)"
- Commander Keyes (COM): "Sergeant Major!"
No response.
- Commander Keyes (COM): "Johnson! Can you hear me?! (No response) Chief, you need to link up with the Arbiter and proceed directly to the Third Tower. Make your way back to the beach."
-(Co-op change) Commander Keyes (COM): "Chief, you need to link up with the Elites and proceed directly to the Third Tower. Make your way back to the beach."
The Chief hurries back to the elevator, and heads back down. After clearing another of group of Jackals and Grunts attacking the Marines holding the lower floor, the Chief and his squad get back outside to their vehicles, or meet up with transport if they have no vehicles left.
- Marine Driver: "Get in, sir. We gotta get back to the beach."
The Chief and the Marines head back to the beach.
If You Want It Done Right...
Close air support.
- Hocus (COM): "Sir, I've got a flock of birds that need an escort. Take a Hornet; get those Pelicans safely to the Third Tower."
The Chief and his accompanying soldiers meet up with the Hornets and other Marines who held the beach. The Chief gets in a Hornet and the other Hornets assist to clear the airspace of Tower 2.
If the Chief tries to land the Hornet on the Second Tower.
- Thel 'Vadam (COM): "Second Tower is clear, Spartan, no need to land. Let us hasten to the Third Tower."
They proceed to Tower 3. They reach Tower 3 Airspace, with heavy resistance both in the air and on the ground.
- Pelican Pilot (COM): "Objective in sight, Commander...no sign of Johnson or his team."
- Commander Keyes (COM): "Understood. Chief, clear an LZ then get inside the tower."
After the UNSC airborne forces take out the Wraiths, the Separatist Phantoms arrive and drop off Thel 'Vadam and his Elites and assault the tower's entrance. The Chief assists the Elites, securing the outside of remaining armour and infantry. The Chief lands the Hornet and joins the Elites on the ground. The Marines from Pelicans and Hornets follow up, and secure the perimeter. They push on inside the tower, encountering a swarm of Drones, a pair of Hunters and a large pack of Brutes and their Grunt and Jackal subordinates. The Chief, 'Vadam and their allies overcome this defence and secure the bottom floor and the elevator.
- Thel 'Vadam: "Darken this tower and the barrier will fall. Go, Spartan! We have no time to waste."
'Vadam and Elites hold the lower level while the Master Chief heads up. The Chief secures the top floor, after encountering another Brute Chieftain with Brute Stalkers.
- Commander Keyes (COM): "Hit the switch, Chief, and the barrier will fall!"
The Chief deactivates the Third Tower.
{Cutscene}
The barrier falls. The Shadow of Intent advances.
- Ship master Rtas 'Vadum (COM): "Now, Prophet... your end has come."
A Slipspace rupture suddenly appears. High Charity emerges and plummets down to the Ark.
- Ship master Rtas 'Vadum (COM): "High Charity...?! By the Gods, Brace for impact!"
Debris from High Charity strikes right through the Shadow of Intent's hull. A Flood-rock then breaks apart in midair. Part of the rock crashes through the window right above the Chief. It stops as it hits the elevator window, glowing eerily. The Chief raises his rifle and prepares to engage the enemy he knew too well.
{Game play}
The Chief quickly manages to eliminate the few hostiles that arrived in the rock.
- Commander Keyes (COM): "Shipmaster, what's your status?"
- Ship master Rtas 'Vadum (COM): "Significant damage! Weapon systems disabled!"
- Commander Keyes (COM): "Move to a safe distance! Stay away from the Flood."
- Ship master Rtas 'Vadum (COM): "Why would the Parasite come here?!"
- 343 Guilty Spark (COM): "The Ark is out of range, of all the active installations! Priority: We must contain this outbreak before-"
Keyes interrupts Guilty Spark.
- Commander Keyes (COM): "No! First, we stop Truth! Then we deal with the Flood."
The Chief links up with the Elites and the Arbiter under attack. After eliminating the Flood in the tower, they get outside to meet Marines engaged in combat with the Flood, and assist. A Separatist Phantom arrives to pick up Thel 'Vadam.
- 343 Guilty Spark: "Quickly, I must see the point of impact; assess the damage done to the Ark."
- Thel 'Vadam: "To the top of these hills, Oracle, no further! We cannot risk your capture by the Flood."
'Vadam takes 343 Guilty Spark with him. The Pelicans dropped a M12G1 LAAV Warthog, a Mongoose, and a Scorpion for the assault on the Citadel. The Chief, Marines, and still present Elites mount up.
- Commander Keyes (COM): "Shipmaster's Carrier is out of commission, Chief. I need you to take down Truth. The Flood's just going to put pressure on him and accelerate his plans. Punch through the cliffs! Get inside that Citadel!"
Journey's End
Storm the Citadel.
The Assault Team gets through the snowy cliffs, where they first encounter few small Covenant emplacements.
- Pelican Pilot (COM): "Citadel in sight! Brutes are mobilizing everything they got."
The Assault Team clears the cliff, facing Ghosts, Shade turrets and Prowlers. Once then, a Wraith is the only thing standing in their path, and once taken out they meet with Hornet Gunships near the route down into the clearing.
- Marine Sergeant (Stacker) (COM): "Hornets inbound!"
Depending on choice, the Master Chief takes a Hornet and makes his way to the Citadel, when two Scarabs drop down from above.
- Pelican Pilot (COM) "I count two Scarabs! Repeat: TWO Scarabs!"
With the choice Chief chooses, the Assault Team backs him up: The Scorpion Tank fires from a far range, the Warthog and Mongoose move about under the Scarabs to assist Chief in taking their "legs" down, and the Hornets engage the Scarab from the air. But some Ghosts, Banshees and another Prowler help to defend the Scarabs.
The Chief takes out the first Scarab.
- Commander Keyes (COM): "First Scarab's down! All units, concentrate your fire on number two."
The Chief takes out the second Scarab.
- Miranda Keyes (COM): "Both Scarabs down, well done."
If any minor Covenant resistance is left.
- Miranda Keyes (COM): "Marines! Kill the stragglers!"
A Separatist Phantom arrives at the Platform leading to the entrance of the Citadel, dropping off Thel 'Vadam and 343 Guilty Spark (firing its main weapon at any remaining hostiles).
If the Chief isn't there when 'Vadam lands.
- Thel 'Vadam (COM): "Spartan, come to me. This platform hides a path!"
- Commander Keyes (COM): "Spark has found a way into the Citadel. He's waiting for you on the platform, Chief. Go!"
The Chief lands and meets 'Vadam and 343 Guilty Spark at the top of the Platform.
- Thel 'Vadam: "The Flood scales the citadel's far wall. Activate this bridge, Oracle! (Turning to the Chief) The Prophet will die by my hands, not theirs."
- 343 Guilty Spark: "Calamity! If only we had more time!"
The Chief and 'Vadam enter alone. The door they entered through closes and bolts up. The entrance is a large hallway with screens mounted along the walls.
- Cortana (Cortana Moment): "It asked, and I answered. (Her tone turns bitter) For a moment of safety, I risked damnation upon the stars."
(During The Cortana moment if you look at the screens on the walls you will see Cortana pop up on the screens.)
- Prophet of Truth: "My faithful... stand firm..."
<youtube width="400" height="400">QupkaTJakgs</youtube>
{Cutscene}
The screens light up. The Prophet of Truth is seen making another speech. The Chief and 'Vadam hurry to find a way up.
- Prophet of Truth: "Though our enemies crowd around us, we tread the blessed path! In a moment I will light the rings and all who believe... shall be saved."
Master Chief and 'Vadam discover an elevator, with a screen in front of it, showing Johnson behind Truth, held aloft by a Brute. Johnson punches the Brute in the face to no effect.
- Commander Keyes (COM): "Chief, how close are you?"
They look up. The height is phenomenal.
- Master Chief: "Not close enough."
The view changes to the Control Centre with Truth.
- Sergeant Johnson: "That the best you got?"
A Brute Chieftain gives him an amused growl, then picks him up around the neck and begins to strangle him.
- Sergeant Johnson: "Oh, come on. Impress me!"
- Prophet of Truth: "Stop, you imbecile! He wants you to kill him. (He turns back to The Ark's console) I would prefer that you did not."
- Sergeant Johnson: "What's the matter, big shot? Can't start your own party?"
- Prophet of Truth: "I admit, I need your help. (A Pelican appears on screen behind them, unnoticed and rapidly approaching the large window) But that secret dies with all the rest."
The Pelican breaks through the window and crashes onto the ledge next to them, crushing a Brute, sending his Spiker flying. Truth is thrown off-screen. (If you look carefully you can see Truth landing about the same spot as the Brute's Spiker)
A Brute Captain gets up, but Keyes blasts it with her Shotgun.
- Commander Keyes: "Johnson! (she ejects a shell from her shotgun) Sound off!"
- Sergeant Johnson: "(Coughing) Get out of here!"
- Commander Keyes: "Not without you!"
Brutes surround Miranda and Johnson. Miranda fires away at the Brutes with a Shotgun. Their armour spark from the shots, but the short-range weapon does not do severe damage to them, and they remain on their feet.
- Prophet of Truth: "You delay the inevitable. One of you will light the rings."
Miranda Keyes draws a Pistol and aims her weapons both ways.
- Prophet of Truth: "You cannot hope to kill them all!"
Keyes pauses and lowers her weapons. She looks at her pistol.
- Commander Keyes: "You're right..."
She reluctantly the pistol at Johnson.
- Sergeant Johnson: "Do it. Me...then you..."
Keyes hesitates, lowering her pistol slightly with sadness on her face.
- Sergeant Johnson: (urgently) "Now!"
Keyes straightens up and aims. Several spiker shots are heard. Keyes gasps in pain and drops her weapons. Johnson starts to run to her aid.
- Sergeant Johnson: "NO!"
A Brute Captain restrains Johnson, who still struggles, horrified. Miranda Keyes collapses and dies, with seven glowing spikes in her back. Truth walks on screen, a Spiker in hand.
- Prophet of Truth: "Your forefathers wisely set aside their compassion..."
He looks down at Miranda and tosses the Spiker away, and shakes a fist to emphasize his speech.
- Prophet of Truth: "...steeled themselves for what needed to be done."
Truth walks up to Johnson.
- Prophet of Truth: "I see now why they left you behind."
Sergeant Johnson is brought up to the control panel.
- Prophet of Truth: "You were weak - and gods must be strong."
He forces Johnson's hand down on the panel with a smug look. Johnson, still overcome with grief and shock, doesn't resist. Instantly the Control Terminal begins to change and heighten. Six out of Seven Holographic Halo Rings light up one by one (Excluding Installation 04). At the end of the corridor, the Chief and Thel 'Vadam emerge from the lift. Two Pure Flood Tank Forms drop from above. The Master Chief draws his Assault Rifle and aims, and 'Vadam activates his Energy Sword.
- Gravemind (speaking through the Pure Flood Tank Forms): "Do not shoot, but listen! Let me lead you safely to our foe. Only you can halt, what he has set in motion!"
They lower their weapons cautiously. Several Infection Forms scurry between their feet as the Master Chief and 'Vadam look at each other, obviously not trusting the Flood but knowing they had no other choice.
Revelation
{Game play}
Master Chief, 'Vadam, and the Flood begin the assault on the Covenant. After crossing a bridge guarded by heavy weapons, they reach a room with holograms of Truth in the Forerunner systems.
- Prophet of Truth: "How could I have known the Parasite would follow?! Undoubtedly this is the Heretics' doing! A final, bitter curse. Clear evidence of treachery long hidden!"
At the second bridge, the Covenant forces make their final resistance. At the second room, Truth holograms make a final message.
- Prophet of Truth: "So far are we along the path, that I must strain to hear the clumsy patter of their pursuit. Know this my brothers. They may foul the way with their charred and broken bones, but they will not stop the Journey."
The resistance on the third bridge has already been decimated by the Flood. A light bridge is all that remains to reach Truth.
{Cut scene}
The Chief and Thel 'Vadam cross the light bridge, and come across Johnson, who is resting the dead Miranda Keyes on his lap by her head next to the Pelican. The pair stare into Miranda's empty eyes, until Johnson closes them gently.
- Sergeant Johnson: "Stop the rings. Save the rest."
The Chief continues to stare at Miranda while 'Vadam approaches the crawling form of Truth, his Energy Sword turned off but at the ready. He grabs Truth by his robes and points his currently harmless sword in his face.
- Prophet of Truth: (Weakly) "Can you see, Arbiter? The moment of salvation is at hand."
- Thel 'Vadam: (grabbing Truth by the throat) "It will not last."
- Prophet of Truth: "Your kind ... never believed in the promise of the sacred rings."
- Gravemind: (Speaking through Truth): "Lies for the weak. Beacons for the deluded."
At this moment, 'Vadam draws his Energy Sword back and activates it, ready to kill his former leader. The Master Chief points his Assault Rifle at Truth, in case he is completely taken by the Flood.
- Thel 'Vadam: "I will have my revenge, on a Prophet, not a plague."
- Prophet of Truth: "My feet tread the path. I shall become a god!"
Tentacles begin to sprout on Truth as the Flood takes him.
- Gravemind: (Speaking through Truth): "You will be food - nothing more."
The Chief approaches the Ark's Control Panel, ready to deactivate it.
- Truth: (Realizing what the Chief is about to do) "NO!"
Chief deactivates the Ark. The Seven Holographic Halo Rings dim. A Flood body begins to stir.
- Prophet of Truth: (Now being held aloft by 'Vadam) "I - am - Truth! The voice of the Covenant!"
'Vadam turns Truth away from him and grabs his neck viciously. Truth's crown falls off as he pitifully gasps for air, trying to grab 'Vadam's hands.
- Thel 'Vadam: "And so, you must be silenced."
'Vadam stabs his sword through Truth's back. It goes clean through him; the two points of the Energy Sword poke through his chest as he writhes and screams in pain. Flood spores shoot out of his mouth.
'Vadam lets Truth's corpse fall to the floor. 'Vadam lets out a roar of triumph and deactivates his sword. The Chief looks at him and nods, acknowledging him for ending the life of the Prophet who declared war on humanity; they then turn to see Johnson carrying Miranda's body into the Pelican. Suddenly, the ground begins to tremble, and tentacles rise up out of the ground around them. Chief wields his Assault Rifle and 'Vadam reactivates his sword. They both stare up at the tentacles, which are now reaching high above them. The Gravemind laughs maniacally.
Johnson leaps into the Pelican cockpit and starts to take off. The Chief climbs onto the Control Panel of the Ark and jumps onto the Pelican's landing gear. Thel 'Vadam grabs the Chief's hand and just before the Pelican is out of the hole in the Control Room window that Miranda made, both are knocked off by the tentacles, sending the Pelican spiraling out of control. On the ring, the tentacles swerve around them and multiple Flood forms appear.
- Gravemind: "Now the gate has been unlatched, headstones pushed aside, corpses shift and offer room, a fate you must abide!"
Vadam holds his sword at the ready, and the Chief takes aim. They come back to back.
- Thel 'Vadam: (almost exasperated) "We trade one villain for another."
The tentacles retreat and Combat Forms come up from the control panel.
{Game play}
- Sergeant Johnson (COM): "I can barely keep hold of her, Chief! No way I can pick you up! Head back to the lift... find a way down!"
Both heroes fight their way through hordes of Flood, which have now betrayed them now that the Halo rings have been deactivated.
- Cortana (Cortana Moment): "I'm a thief... but I keep what I steal."
Master Chief and Thel 'Vadam make it back. The lift is not working, so they jump down a shaft at the back of the room.
{Cut scene}
The Chief lands at the bottom of the shaft, landing in a room not unlike the entrances to the 3 Shield Towers. He looks beside him as the Arbiter comes down, and then stands up. A flickering, spooky image of Cortana appears in the hallway, running. She starts to turn the corner and disappears, after a split second. The Chief casually walks around the corner as though amused by Cortana's antics, but 'Vadam is confused.
- Thel 'Vadam: "What do you see?"
With 'Vadam trailing far behind, the Chief looks around the corner. He sees a control panel. Cortana appears a second time, again for only a second, walking loftily (and spookily) towards it. She stops at the panel and disappears. The Master Chief goes to the panel and activates it.
A view screen slides open, the Chief and 'Vadam step out onto a balcony to watch as a massive structure rises up out of thick fog. It's a Halo Ring, incomplete, rising from inside the Ark's Core. Cortana's plan is becoming clear.
'Vadam turns and looks at the Chief.
- Thel 'Vadam: "A replacement. For the ring you destroyed."
- Master Chief: (To a blue glow behind him) "When did you know?"
Spark hovers up from behind the Chief and 'Vadam and comes up to the Chief.
- 343 Guilty Spark: (sounding, true to his name, guilty) "Just now - but... I had my hopes. What will you do?"
- Master Chief: "Light it."
- 343 Guilty Spark: "...Then we are agreed! A tactical pulse will completely eradicate the local infestation! I will personally oversee the final preparations."
He flies enthusiastically around the Chief and 'Vadam, who look at each other, and then flies off toward his new Halo, now talking to himself.
- 343 Guilty Spark: "Though it will take time to fabricate an activation index, I will see to the latter too..." (he becomes too far away and you can no longer hear him)
- Thel 'Vadam: "How will you light it?"
They both turn to look at High Charity, knowing that Cortana still has the Halo Index required to activate Installation-04.
Walkthrough
The recommended active skulls for this mission are Tough Luck, Fog, Famine, Tilt and Thunderstorm. The inconvenience Tough Luck causes is a small price to pay for the 1.5 multiplier. You should always go through this level at least twice before considering to activate the Fog skull, the opening battle and indoor fire fight could be irritating, since the chance of being flanked is high. With Famine activated, you should always plan forward before deciding on how to handle your ammo. It makes the second tower definitely harder, but its worth the multiplier. Thunderstorm is a good choice for skilled players, it may slow your progress with the number of promoted opponents, but the additional points are more than a reasonable compensation. Tilt is normally an irritator during head-on battles, but if you use Plasma Pistols or Needlers against Brutes, and Beam Rifles against the first two Chieftains, you'll barely notice that the skull is active.
Beginning of the Mission
Beachhead
Clearing this first area is a matter of planning your attack methodically, and attacking with the correct weaponry. There are Grunts that attack from the right as soon as you touch down, and there may also be some on your left. Throw a Fragmentation Grenade at the party in front of you, then kill any on your left with your Battle Rifle. The objective here is to rapidly thin their numbers so your allies can engage the other infantry units.
Edge out to the left end of the rock cover until the first of the two shade turrets. Destroy it with your Spartan Laser, then walk further the left to get a clear shot at the second turret. Speed is crucial here if your allies are to survive.
Return to your starting position. Your allies should be combating a band of Grunts and a Brute armed with a Brute Shot. You can use your Battle Rifle to get rid of the latter, using a Plasma Pistol or Needler is easier. You should find some among the corpses to you right.
Run around the rocks to the right and clear out any surviving Grunts once in cover. Then dispatch any others in the distance with your Battle Rifle. Don't move up the hill ahead. A Chieftain wielding a Fuel Rod Gun will be waiting for you. if he fires, duck back into cover without hesitation.
Take out the two Brute bodyguards with your Battle Rifle, then head to the cliff wall to the far right. Carefully climb the slope, and choose a spot in which you can get a full view of the Chieftain. Eliminate him with your Spartan Laser. If he has yet to notice you, score a shot to his head without difficulty. If he is alert of your presence, you'll generally have to dodge incoming Fuel Rod Gun missiles as you aim and charge up the laser beam. It is vital that you have at least one remaining shot. Keep a close eye on the Anti-Air Wraith, you'll have to immediately duck back into cover if it fires.
The Covenant tank should be your final target. Sneak over carefully, board it from behind and pummel it with melee attacks. Don't bother risking a frontal charge, or engaging the attention of the driver, it is rare the one survives a barrage of those lethal green blasts.
A Pelican will drop a Warthog and a few Marines. Give the Marine riding Shotgun the Spartan Laser and Marine riding pillion on the Mongoose the Fuel Rod Gun. Your passenger now carries a lethal chaotic weapon with unlimited ammo in the hands of an ally. Drive forward to trigger the arrival of Banshees, then immediately retreat along the beach so your passenger can blast these in turn with his Spartan Laser. This neutralizes the danger of being hit by plasma fire and mortar blasts from above.
As you push forward towards the bottom of the slope ahead, Ghosts will move in to attack. Again, reverse and let your passenger with the Spartan Laser skewer them. When the path splits in two, take the route to your left. Park at the spot where the two paths meet, and let your Marine have a clear shot at the Shade emplacement. Drive up and let your turret operator mow down the infantry. They should also be easy work for the Marine wielding the Fuel Rod Gun.
Left Tower
As you reach the high pass above the entrance to the Forerunner building, you will encounter two Grunts. One on a Ghost, one on foot. Neutralize them both without moving any further along the path. This is a battle in which you'll really begin to appreciate the help that your passenger provides. The Wraith will bombard your position with its main cannon as soon as it notices your arrival. Carefully drive off the edge and give your passenger a clear shot at the Wraith. Keep in mind that landing your Warthog upside down could end in it being blown up. A few direct hits should destroy the tank, but having the luxury of being able to sit there and watch your allies do all the work is a rare opportunity. You'll have to drive fast and precisely to dodge incoming mortars, but still give your passenger a clear view of the Wraith.
After reducing the tank to a wreckage, remain parked at the edge of the cliff, and your heavily armed companion will diligently blast the Shade turret and surrounding infantry on the rock outcrop in the distance, even if the trees are blocking your view of them. When he stops firing, make your way down the slope. Awaiting you will be a Shade turret and additional Ghosts, so proceed with caution.
The trickiest part of the battle is luring the two Prowlers into the open, then escaping before your Warthog is cut into shreds. The safest way of eliminating them is to drive up the slope near the entrance, and collect a Beam Rifle at the dispenser. Make sure you park your vehicle where your Marines could get a clear shot. If necessary, use a Beam Rifle to eliminate the turret operators. If you had spent some of the Beam Rifle's battery, pick up another one at the same dispenser. Once the Brute turret operators are dead, the Prowlers should be easy work for your allies. There is a Shade turret and a large group of enemy infantry inside the tower entrance, your passenger should be able to destroy the turret and your turret operator would take care of everything else.
A Pelican will drop off a few pods, collect Battle Rifle ammunition from them. And make sure you have full battery for the Beam Rifle before continuing. A cloaking device is situated to the left of the entrance. Collect it before entering the building.
Expect multiple Grunts and Jackals in the next room, so use your Battle Rifle ammunition wisely. Take cover behind the screen, then pick off the nearest Grunts. Pull out your Beam Rifle and land a headshot on the Brute before he retreats. If you fail, use grenades to flush him out from cover. You should aim to kill all adversaries in sight, including those on the upper walkway. When the area is visually clear, take the left route. Two Jackals armed with carbines will be situated at the opposite end. Other remaining infantry will usually be congregated around the doorway. Toss a grenade into their midst and finish off any survivors with the Battle Rifle. You should be running low on bullets now, so replace your Battle Rifle with a Carbine, and collect all the ammo you can before proceeding past the doorway.
Cautiously walk up the slope, there are Grunts and Jackals awaiting your arrival. There is also a further group that attacks from the floor level above. Hang back around the corner and shoot targets in the immediate vicinity first. Disable the Brute, or at the very least, his armor, with the Beam Rifle, but choose your shots carefully, you need to save this weapon's very limited battery supply for the next battle. If the opportunity arises, blow the Fusion Cores on each levels to take out multiple enemies at once.
Jump past the elevator and into the room containing the terminal. Collect more Carbine ammo and access the terminal. Remember, it isn't fully accessed until the screen turns red. Get on the elevator, and ride up.
Guarding the control console will be several Brutes and a Chieftain wielding a Gravity Hammer. Sounds hazardous, but you'd be well equipped for the situation. Take cover behind the transparent barrier and snipe the first few Brutes who rush in the attack. If you're not confident in your sniper skills, shoot their bodies before finishing them off with the Carbine.
Before the last few Brutes attack, cautiously inch out and snipe the Chieftain. He'll usually stay in plain sight and not charge until all his allies have been slaughtered, so it's pretty easy to kill him from range. If he runs at you, use the Cloaking device to evade him and execute a melee strike to his back.
On the way out of the building, you'll find Marines combating a small Covenant force by the exit. Shoot these from above as your elevator descends. Your allies tend to struggle more against Jackals, so a good idea would be to eliminate those first. Don't risk throwing grenades, though, the Marines may get caught in the blast. Then collect the Power Drain beside the Terminal you accessed earlier. Also, swap your used Beam Rifle with a fresh one on the dispenser before returning to the beach.
RALLY POINT ALPHA
Aerial Battle
There are two Hornets that land on the beach, enter one, and ascend into the battle. But making it to the third tower alive really is a matter of taking a patient approach. Accelerating into the fray too enthusiastically makes you easy prey for Banshees.
From takeoff, ascend to maximum height straight away, it's hard to see, let alone shoot, Banshees operating at a high level when you make a low level approach. Also, high flying removes the threat of the Anti-Air Wraith and the Brutes situated on the small island below. Deal with those once the initial squad of Banshees has been shot down.As you engage, saturate enemies with fire by holding down RT and pressing LT every three seconds, even if they are out of range, you can still damage enemies.
The second tower you encounter contains both a Terminal and the Thunderstorm skull. Make sure you collect these before moving on, because once you've made it to the next area, there's no going back....literally. Around the cliff corner, yet another small force of Banshees will engage you. Remain out of their attack range, only coming closer to fire your rockets, but retreating when your foes decide to make an attack run. Once all the major aerial threats have been neutralized, destroy the Phantom, before bombarding the land-based force protecting the third tower.
The three Wraiths should be your top priority, most notably the Anti-Air one. Make sure you continue strafing when in combat with it. Always keep on the move, it's embarrassing to be destroy by a normal Wraith's main cannon because you stayed in one position for too long. You don't actually need the automatic lock-on feature of your Hornet's rockets, they stay in one position, so manual aiming will suffice.
With the artillery out of commission, engage the individual Brutes and Shade turrets. Despite the presence of a Chieftain armed with a Fuel Rod Gun, you can actually move closer at this point. Make use of both the rockets and the machine guns to mow down all ground infantry. Aim to do this before they withdraw into cover. The rockets won't home in on them, but their destructive power is enough to blow them sky-high.
When only a few Brutes remain, a group of Elites will land and engage them on solid ground. When firing, be careful not to accidentally hit them, and refrain from launching any rockets, the chances of friendly fire are very high.
After landing, swap your Beam Rifle for the Chieftain's Fuel Rod Gun. Try to remember the weapons' location, since you'll come back later to reclaim the Beam Rifle.
Right Tower
The U-shaped corridor that leads to the structure's entrance is usually home to the Brute stragglers that survived your massacre, you can deal with these from a safe distance, but the Elites generally are happy to take them out for you. As you approach the door, a large force of Brutes will burst out. If the Elites are not in the area yet, deploy the Power Drain you collected earlier to deprive them of their shields, then pull back and finish them with headshots as they emerge.
The first room is identical to that of the Left Tower. In fact, all but one of the towers are completely the same. But in the next battle, cover is more crucial than ever. Hunters and Drones are both very lethal and hard to defeat. A battle with Drones requires reliable cover to evade the many projectiles they'll fire at you. A battle with Hunters requires dodging their powerful beam and keeping your distance so they don't bludgeon you to death with their shields. The room in front of you contains both, and so anything but an incredibly careful approach will get you killed. But there is a way of dealing with the threat effectively. The Drones don't actually spill out until you move too far forward, and they are deadly against your Elite allies so it's wise to stay put behind the screen unless for good reason.
Switch to your Fuel Rod Gun and send a barrage of missiles at the nearest Hunter as you dash from behind the barrier and take cover behind one of the two walls. You should have enough ammunition to kill one Hunter and severely weaken the other. Finish it off with grenades before it reaches your allies. Keeping them alive is a sole responsibility, they'll be a big help later. Losing their support straight away is a terrible loss.
As soon as the final Drones retreat, go outside and retrieve your Beam Rifle before moving on. Trade your other weapon (which should be either a Carbine or Battle Rifle) for a Needler, and make sure you collect as much of its ammunition as you can.
On your way to the elevator, a fairly large force of Brutes will attempt to stop you in your tracks. The advance party will consist of three or four of them. The others will be waiting through the next door. Welcome the initial attack force with a grenade, then finish them off with barrages of needles. The survivors (if any), will retreat back up the walkway. Stay at the bottom of the slope until your adversary decides to rush you again. Remind him of why that is a bad idea. It seems the best way to tell him is through a grenade explosion. Use the Spike variety is you have any, since the corpses of the Brutes are likely to leave replacements.
Replenish your supply of Needler ammo if required (gaining the maximum amount of needles should be easy). As you approach the elevator, a swarm of Drones will try to surprise and slaughter you. Dive into the alcove to the right as your position, and pick the off at will. The Elites should be able to effectively dispatch the group Drone and finish off the attack force within seconds. The Needler is a hopeless weapon against Drones, so it is a good idea to backtrack and pick up the Battle Rifle (or Carbine) that you set aside earlier, prior to ascending the elevator shaft. Note that a terminal will be where it was in the first tower, on the opposite side of the elevator.
The following battle is similar to that in the first tower. Pull out your Beam Rifle as your short elevator journey has finished, then land three headshots on the Chieftain to eliminate him. This one carries a Plasma Cannon turret, so it may be a little more difficult to get a clear shot without much disturbance. Stay behind the transparent barrier, and wait patiently as each Brute Stalker moves into the open. In this light, they're actually quite easy to see, so pick them off with your Beam Rifle.
Make sure you grab two Maulers to dual wield at the weapons dispenser before you deactivate the shield barrier.
As soon as the cutscene ends, temporarily drop one of the Maulers and grab the Plasma Cannon dropped by the Chieftain. Constantly fire as Combat Forms charge at you. This will be especially useful when encountering the shielded variety. It may be difficult to handle the Infection Forms as you concentrate on the more deadly targets, so expect them to reanimate the corpses of the Brute you dispatched earlier. Once the area is visually clear, pick up your second Mauler and head towards the elevator. Be cautious, there may be more Combat Forms hidden out of sight.
When your descent is complete, you'll see the Arbiter and any surviving Elites fighting several Combat Forms (and any Covenant stragglers you may have missed). Immediately rush down to offer your assistance. The battle won't be too intense, the amount of assailants may vary, but it shouldn't be too much of a problem. Make sure all the Flood bodies are smashed before you continue.
Be wary as you approach the door; the two Carrier Forms outside can sometimes be lurking directly behind it. A large group of Combat Forms and Infection Forms will attack here, but with Elite assistance, these should pose little trouble. After all the Flood are dead, take your time and police the bodies for weapons and ammo, then head to the front of the tower.
The Arbiter and his Elites will board their Phantoms and cloak, while Pelicans drop off a Warthog, Mongoose, and a Scorpion tank. Obviously, the Scorpion is an obvious choice, but choosing a Warthog or Mongoose will make the upcoming encounter much more challenging due to your lack or firepower. Once you pick your vehicle, proceed up the path and through the small cave. Soon you'll exit out into a snow filled canyon and see a Brute, who runs for an small outpost around the corner.
This outpost has a Prowler, plasma turrets and a sniper platform, with several small plasma cores near the base of the platform. There are also several Brutes here, including one that has a Fuel Rod Launcher. Take out the Prowler and then aim for the plasma cores to take out the rest of the enemies quickly then proceed through the canyon. The Prowler has three Brutes in it and taking it out with the Scorpion is the easiest way to get the Used Car Salesman achievement.
The Citadel
Exiting out of the canyon you'll see another sniper platform a short distance down the path. Take it down and eliminate the defenders around it. There is a turret on the other side of a rocky outcropping, so take it out before you move onwards. As you round the corner, the Brutes will start several Ghosts and Prowlers at you and firing at you from yet another turret/platform area. There is a small boulder near the edge of the path that can shield you from distant fire so make use of it and deal with the enemy vehicles as they approach. Afterwards, inch out and you can see the tell-tale glow of a plasma core near the base of the platform. Shoot it for a quick kill or take out the turret and platform seperately. Proceed down the path.
At the next Brute checkpoint, there will be a Wraith. This is obviously your priority. Take it out and focus on the turret and any stragglers. Ironically, though this area has the most powerful usable Covenant vehicle, it is the easiest to take out. Proceed down the path to where two Hornets are taking up position.
Here you will be faced with a choice. You can either stay in your Scorpion (or chosen vehicle) or get out and commandeer or ride one of the Hornets. Two Scarabs will drop out of the sky shortly followed by two Ghosts as support, so you'll be forced to decide quickly.
If you stay in the Scorpion, you trade firepower for mobility and may have to find a new ride after you take the first Scarab down due to all the enemy fire you'll be taking. If you drive the Hornet, you'll be in the same predicament, since the Hornet will almost always be destroyed after the first Scarab goes down (since you have to land on or close to the upper deck to successfully board it, meaning the enemy fire will cripple it or it will be destroyed in the Scarab explosion).
Riding as a passenger in one of the Hornets will have better results, as the pilots will take you directly to one of the Scarabs and allow you to board the vehicle. Head for the control room and destroy the core, then run back up to the upper deck. In most cases, the Hornet will be there waiting for you while firing on the enemy still alive on the Scarab. Quickly attempt to board as a passenger and the pilot will take you away from the doomed Scarab to the remaining one.
Simply jump off as you pass over the upper deck and proceed to the core room, blow the core, and run. Afterwards there should be very minor resistance that you will have to clean up in order to proceed. While the Marine AI will have taken out a Ghost or two, it is usually up to you to finish off the other two. Either hijack, destroy, or snipe the Grunts.
You'll get a navpoint up the short flight of stairs in front of the Citadel, where the Arbiter and 343 Guilty Spark are disembarking. Spark will activate a energy bridge to the main structure, run across it and enter through the door, where you will receive a Cortana Moment before a cutscene.
Citadel Interior
At the end of the scene you'll be tasked with crossing a long, segmented platform filled with the last Covenant forces in the game. Dozens of Brutes, Grunts, and a handful of Jackels. You'll have Flood Combat, Pure, and Infection forms along with the Arbiter to help you. You can usually just let the Flood do all the work, as the Pure forms can take alot of damage before dying, and the Infection forms can infect any Brutes they kill. However, it is up to you how to proceed. As this is the last fight in the game where you battle non-Flood enemies, you may want to charge in and do the dirty work yourself.
Regardless, this first area is filled with Brutes, Grunts, and Jackals, mostly concentrated near the far door around supply pods. There will be two Grunts that have Fuel Rod Cannons and a Brute Cheiftain with a Gravity Hammer, so approach with caution or snipe from afar with a ranged weapon while the Flood take the hits. When all enemies are dead, police for ammo and weapons, then pass through the door and small chamber to the next area.
This area is dominated by Brutes, and while crossing the area you'll be hit by a squad of Brute with jetpacks and Carbines which will make covering your flank while watching your front difficult. Try to take the jetpack Brutes out before engaging with the grounded ones with ranged weapons (for distance attacks and sniping) or heavy, close combat weapons for power attacks when the Brutes land. Once finished with them, focus on the rest. Near the door there is a Brute who (on varying difficulties) will either be a Zealot (gold armor) with a plasma turret, or a chieftain with another hammer. If it is a turret Brute, attempt to kill him with grenades. Failing that, it will force him to head for cover, giving you a small window to run up and get within close-combat/melee range. With the chieftain, use grenades and long ranged fire to stay away from the hammer. When he is dead, proceed through to the final area.
There are no enemies here, just corpses. If you want, you can police the bodies for ammo and weapons, as well as destroy and Flood corpses you can find. If possible, knock the Brute corpses off the platform. Or you can run up to the small console and activate the energy bridge to the last platform. About halfway across it, a cutscene will occur.
When the cutscene ends, aim for the two Combat Forms on the dais above. Remember to aim for the Infection form in their chests for quick takedowns. Proceed across the energy bridge and engage the Flood. Infection forms will swarm the area so if you have a assualt rifle or fast firing weapon, let the Arbiter draw their fire and attention for the moment and proceed to kill as many as you can. Switch back to a powerful, accurate weapon and engage the Flood, aiming for the Ifection form in their chest and make sure to keep on the lookout for mobile Infectors reviving dead Combat forms. Proceed through the door and into the small chamber, where you will receive a Cortana Moment.
Sentinels will appear at the midway mark and take down a large chunk of the Flood forces here, though you'll have to take down any Flood that leaped past them towards you. Once you clean up here, proceed through the chamber and onto the last area. Flood Pure forms are here, so stay close to the Arbiter and concentrate your fire on the mouth area. Afterwards, run back up to the elevator and go past it to a ventilation shaft.
Jump down it and the level ends with a cutscene.
Cooperative Walkthrough (Including Terminal locations)
Normal Well, that landing was a lot less friendly than your previous one. Before we begin, let's go through three things. One, this will be your last level facing the Covenant, so make the most of it. Two, the terminals are relatively easy to find, so if you don't understand my meaning, you shouldn't have too much trouble. And three, Player 1 should be mindful there are Shades over the hill, and use the Spartan Laser!.
Master Chief should switch to his Battle Rifle, and headshot some Grunts, while Arbiter uses his Beam Rifle to snipe some Brutes. Take down the first flank, and move on. Chief, it's a good idea to laser those turrets, while Arbiter does some more sniping on the bigger guys. When you're done with the laser, give it to Stacker, he loves it. There should be a new one by the crashed Pelican. Waste the other enemies, and the Chief should take the AA Wraith (I explained how in the previous level) while Arbiter drives the Warthog Hocus gives to you. Give the dead Brute's Fuel Rod to a Marine too, and let's roll!
When you move up, make sure all vehicles stay behind the Wraith, because its fire can be lethal. The enemies shouldn't be too hard to kill. When you reach the tower, wipe out the Wraith first, then aim for the Prowlers and Ghosts. Give that Shade a taste of Fuel Rods, and clear the infantry at the entrance with some more. Get out of the Wraith (for some reason the explosion doesn't hurt you), and let's go in. Arbiter should grab that cloaking, you'll see why later. Move up. I like to take a Brute Shot, since it is a lethal weapon, especially on higher difficulties but since it is scarce on ammo, go back for your weapon after you're done with it.
Fourth terminal: When you reach the elevator, just to the other side. Walk to your right slightly, and the terminal should open up.
When you reach the top, Chief should laser the Chieftain. Arbiter should grab the Hammer and turn on Cloaking. The Brutes will now face a nasty death with some unhealthy anti-gravity. Chief should distract them in case Arbiter accidentally brushes one of them.
Deactivate the tower, and leave. At this point, Chief should have a Battle Rifle with about 48 rounds, and a Spartan Laser with 80% energy. Arbiter should have a full Carbine (there was ammo at the terminal) and a Gravity Hammer varying energy.
When you get back outside, Chief should get everyone to pile into the TT Warthog, and Arbiter should drive a Mongoose in case there isn't space, or if there are stragglers. When you return to the beach, two Hornets will land. Both players take one. Each player should have either the laser Marine or the Fuel Rod Marine on board respectively. Let's move out.
Fifth terminal: When you see the second tower, land and then walk into the hall. The terminal will open up. NOTE: If you are playing on Normal or higher, the Thunderstorm skull can be found at the top of the conning tower overlooking the landing spot.
Destroy the Banshees, and shoot off the Phantom's turret (you may want to destroy it for fun or points). Clear the skies, and pilot to the third tower. Take out the Wraiths and turrets, and there should be a Brute with a Fuel Rod at the top of the conning tower. He can destroy your Hornet unless you do something. After you cleared as many enemies as you can, land the Hornet, and get out. Chief should give a Marine his Laser to hold on to temporarily and take a dead Brute's Fuel Rod. Reload it and grab some ammo.
When you enter the room, a pair of Hunters will attack you. Chief should use his Fuel Rod to take them out, and return them to the Marine for his Laser.
Oh shit, drones. Semi-automatic weapons are best for these guys, so use your Battle Rifle/Carbine, and get some headshots. Move up a level, and you should see a big stack of plasma batteries. Fire a single shot at one, and there'll be an explosion that would take out the enemies on your floor.
Chuck some grenades at the enemies above, and jump up the ledge. Stick the Brute, and the rest will fall apart easily. Go up another floor, and you'll find more Brutes to kill. When those are gone, more drones come. Stick a couple for fun, and shoot the rest.
Sixth terminal: Same as the fourth, except on your left. Go up the elevator, and Arbiter should go on ahead. Hammer them, ActiveCam isn't that hard to see through glass, they will be a white outline.
Now kill the guy with the Plasma Cannon, since he can take down your shields very quickly (sticking him would be ideal), and deactivate the tower. Watch the cutscene, where 'Vadum is about to kill Truth, but High Charity arrives. He yells "Brace for impact!", while it flies over him (I thought he looked rather stupid before I realized a rock zoomed through the ship). A chunk of it smashes through the Chief's window (where the hell is Arbiter?), and the Flood, appear, once again.
Grab the Plasma Cannon, and hose them down. Break apart the bodies so they can't be re-used, and move down the elevator.
Once again, enemies appear in your absence, but this time they are Flood. They should be easy to kill, but more will appear. Aim for the Carriers, and it will make a nice explosion. Head back outside.
Chief should drive the Scorpion, and Arbiter the Warthog. Get as many Elites on board as you can, and drive off.
Now that the barrier is down, the Covenant will now be on the defensive, and will "mobilize everything they've got". The 90mm and tungsten and the Gauss turret should easily take that down. If Arbiter is running low on Gravity Hammer energy, there is a cargo container under a tunnel with 20 shots of Fuel Rod. When the Hornets arrive, it's time to make the second air battle of the Ark.
Truth's last two Scarabs are deployed, protected by Banshees, Ghosts, and Choppers. It's going to be tough.
Each player should aim for one Scarab respectively. Continuously shoot one leg until it's down, and missile the power core. Fly away from the dual explosions, and fly for the ramp. Wave goodbye to the nice humans and Elites, who the Chief will never fight alongside again, and cross the bridge Spark just activated. Watch the sad cutscene, and prepare to take revenge on the enemy who took the life of a young commander.
Odd, isn't it? Being helped by Flood? When you face Brutes, take down their armor and let the infection forms crawl all over it. Headshot the Grunts and Jackals, and move into the next room.
This would be an excellent opportunity for Arbiter to Fuel Rod large groups of Brutes, seeing as there are so many. Switch to your battle weapons, and headshot those Fuel Rod Grunts at the end.
The Chief still has 4 shots for the laser, and he should use one on the Chieftain. Move into the empty room, and activate the bridge.
Several things will now happen. The Ark will be deactivated, Truth will face the death he so rightly deserves, your alliance with the Flood will now turn sour, and the Gravemind will show you what treachery he is capable of. Run for the elevator. Shit, it doesn't work. The Gravemind deactivated it, thinking you trapped. Prove him wrong by jumping down the shaft.
The Covenant has been defeated, the Human-Covenant war has ended. Now there will be only one more threat to be dealt with before Giong home: The Flood.
Glitches and Easter Eggs
- On this level goto rally point Bravo and jump on a mongoose before the name of the level disappears and ride to where a marine says "citadel in sight!" and then jump off. If the glitch is done right then you will lose your cross-hairs for your weapons and the weapon and your hands will dissappear, though the shots will still be visible, and if you look completely down, your character will be holding an invisible weapon with infinite ammo.
- It is possible in this level to have two live Arbiters standing right next to each other, just after you kill the two Scarabs. Get up to the point where the Covenant Separatist Phantom flies low to collect the Arbiter and 343 Guilty Spark (this is just after you shut down the third tower). Use the Scorpion, the Gauss Turret on the Warthog, or any weapons you have to take down the Phantom. Make sure the Arbiter is in it when you do it. Then, grab the Gauss and drive up near the Arbiter, and he should get in. After this, continue through the level, making sure the Arbiter stays safe. After you finish off the two Scarabs, drive the Arbiter up to the spot where he is usually dropped off. The same Phantom you destroyed will drop down and drop off another Arbiter and Monitor. Keep an eye on the Arbiter you took through the level. He has an amazing ability to completely disappear. Unfortunately, he can't be taken through into the Citadel building. This technique is not the only one. You can get two Arbiters by using a glitch in the third tower.
- There is an interesting glitch on this level in the area with the two Scarabs. First, make sure you have a loaded shotgun. Then jump into a hornet and fly straight towards the Scarab on the left. Get next to it so that when you get out you will disembark towards it. As soon as it stops with the whole nose-in-the-air thing, jump off and run towards the control organisms. Blast away with the shotgun. You should be thrown very far in a random direction if you kill the Scarab in time. It is possible to get the 'Revelation' checkpoint if you are flung to the top of the Citadel. This can also be done if you land on it right away and blast it while it is still getting up.
- At the end of the third tower (the one that Johnson needs to disable), the Arbiter will go to the Phantom dropship but if you hurry and get the tank and destroy the Phantom, the Arbiter will fall down. When he gets back up, you can have him get in your Mongoose, Warthog or Scorpion. He will help you take down the Scarabs.
- As soon as the Arbiter boards the Phantom, it's possible to board with him. You will remain on the ship only for a few seconds before the ship disappears and you plunge into the water below.
- If you board the Phantom with the Arbiter, it is not possible to drop out of the hole through which troops are deployed. If you move as close as possible to that hole, then the Phantom (now with camo enabled) will take you to the edge of the map. Then you will sink at constant speed into the water (and your death).
- When you fight the first normal Wraith, climb up the tower that you are supposed to go under and then you will find a rift of snow where you can see your buddy on co-op.
- Only in co-op, at the first tower, get a Ghost. Once there are no enemies, go up the hill that leads to the Shade. Have one player pilot the Ghost, and the other stand on top. Ease the Ghost against the cliff wall, and the use the boosters to propel you to the ledge of the tower. The player on top should jump when closest to the tower, if done right, the player will land on top. He/she should travel to the next ledge and grenade jump up. The Ghost pilot should kill themselves to spawn with the other character. When they get to the point were they cannot go any farther, jump to the right and you will land on a invisible wall. You will still look like you are jumping, but you can float the snowy cliff. Keep going and the game will freeze, and you should be teleported to the other side of the barrier. Where you will be at the location of the double Scarab battle. (But, there are no enemies. Now, you may explore). There will be limits where if you cross you will die. The entire process can take a lot of practice. An easier way to do this is to keep the normal Wraith alive so you can drive it. When you have killed all the enemies in the area, park the Wraith on the same hill right on top of where the Shade used to be. Get out and do a grenade jump off the Wraith onto the tower. Continue as you normally would. When you get to the "Tripping Out Mirror", don't touch it. Go to the corner of the tower where the snow first meets the tower (away from the mirror). Walk into the little crack between them. If you did it right, it will freeze for a second as normally, only this time you will be transported behind the tower. You know your in the right place if you can walk on air, and see the "Tripping Out Mirror". You can still walk to the normal area where you fight the two Scarabs, but you will not be able to return to the other side.
- There is a second way to get two Arbiters, although it sometimes does not work and it happens before you activate the bridge to the Prophet of Truth. When Spark is opening the bridge for you and the Arbiter to enter the Citadel, push the Arbiter off of the bridge. Before he can get back up, enter the Citadel and enter the cutscene. The Arbiter will be fighting with you normally, but when you reach the place where you activate the bridge and enter the cutscene where Truth is killed, push the Arbiter off. Although it does not work all the time, sometimes the Arbiter will respawn with the Arbiter you pushed off the bridge before you entered the Citadel.
- When you pass the 2nd tower, go to the ledge when you're facing it to the bottom left ledges, and get out of the Hornet. Walk to the left and look into the crack at the end of the ledge, you will see blurred mirror images or what your co-op partner is doing. For more info got to Mirror, Mirror on the wall.
- If you T-bag Truth when he is dead he will fall trough the floor. It kinda looks like he has a coffin!
Achievement Help
Too Close to the Sun: At the beginning of the level, don't use up your Spartan Laser. Once you destroy the Anti Air Wraith, look up and you will see several banshees. Destroy one of these with the laser and you've got your achievement.
Used Car Salesman: When you reach the part where you get a Scorpion, drive this towards the citadel. You will encounter several encampments on the way, and along these will be a few prowlers. If you can hit these correctly with the scorpion gun and destroy the whole vehicle and all 3 enemies, this achievement is easy.
Trivia
- There is a small secret room on this level. But to get there you must get out of the level with a Hornet, which can be found in here.
- When the Arbiter gets on the Phantom with 343 Guilty Spark, if you look at him closely he will only have one arm or he will have his arm twisted touching his lower back.
- At the very end of the level (right after Truth gets killed by the Arbiter) if you turn around and look above the glass that got broken, there is a prominent Marathon symbol.
- There is a second Spartan Laser near the crashed Pelican but it is only there when you are playing on Easy or Normal.
- Bungie said it for themselves that this is the longest level in the whole Halo Trilogy, partially because it is the Covenant's last stand against Humanity. It is also the only Campaign level with a drivable Hornet.
- If you manage to successfully execute the Anti-Air Wraith glitch after killing the Chieftain, progressing up to the first tower is a lot easier, and you can bombard the Covenant hiding in the hallway just before the door into the tower. The video can be found here: AA Wraith Glitch
- During the beginning of the cut scene showing Johnson being held by a Brute, he is being held by a Brute Minor on the screen, but when it cuts to him, it is a Chieftain that throws him to the ground, no Minor in sight.
- At the point where you reunite with the Arbiter and 343 Guilty Spark after defeating the Scarabs, if there are any surviving Covenant nearby, 343 Guilty Spark will use the same energy beam he uses against you in the control room later to take them out.
- Throughout the level there are several cut scene subtitle spelling errors.
- In the part when you have to shut down the first and third towers to deactivate the barrier, the Marathon symbol is in the middle of the elevator control panel that takes you up to the Chieftain and other Brutes.
- This level is the first and only level in the Halo Trilogy where you get Flood allies, just before you stop Truth.
- This is the last level in the Halo Trilogy that you fight Covenant enemies (If you don't count the Final Grunt).
- When the Prophet of Truth is killed by the Arbiter, he loses his Crown. However, when the game play resumes and Truth is dead on the floor, he is still wearing his Crown.
- When you deactivate the shield in the third tower where Johnson failed to do so, you are attacked by Flood who come crashing through a window. However, when you go outside (in the area with the 2 Scarabs), the glass is not broken and is intact.
- The beginning of the level is named "Trident". This relates to the fact that you have to deactivate 3 towers. There are 3 spikes on a trident. The handle that the spikes lead up to on the trident relates to the place where Truth is hiding.
- When you fight the two Scarabs, if you look at the ground where the Scarabs land, you can see the two big, gray circles that are caused of the impact of their landing, even though the Scarabs are still in the air.
- The Siege of Madrigal song and Easter egg can be heard on this level.
- This is the only level in which friendly Drop-ships can be completely destroyed. The two Separatist Phantoms that appear outside the third tower can be destroyed. Their door-mounted Plasma Cannons can also be blown off from the ground, and are very useful against the Drones inside.
- After exiting the third tower, try and jump aboard the Phantom that Spark gets into. After a couple of seconds, the Phantom will become camouflaged, but you will also fall through it and to your death. You could, however, kill the Elite manning the Plasma Turret and quickly man it. The Phantom will fly away, cloak (cloaking you as well) and stop in the air a distance away. Once you unman the turret or remove it, you will de-cloak and fall to your death.
- At the beginning of the level, of the ODSTs that join Master Chief in battle, one of which is usually Sergeant Stacker.
- This is the only level in the Halo trilogy that features two functioning Scarabs you have to fight at once.
- If you kill the Arbiter (on single player) just before the cut scene where Truth is killed, there will be two Arbiters after the cut scene. (One will have a way-point, the other won't)
- It is possible that some Covenant forces may have survived in the end and fled to their home planets or other strongholds, despite theories of complete annihilation and the Shipmaster's claim of decimating the Covenant fleet; two Scarabs are orbitally dropped onto the battleground from orbiting Covenant ships, presumably Assault Carriers. This may also explain the Final Grunt and the weapons on Halo.
- If you get to the texture fault where the hidden marine is, you can see the other players screen. Also if you drive into it, you will be erased out of the map.
- It is possible to get a Mongoose or a Warthog onto the one of the Scarabs in the Scarab fight. Bungie has conveniently placed ramps leading up to both scarabs as soon as they land. Grab a Mongoose or a Warthog and just line up the Scarab when you jump. This is one of the most fun ways to take down a Scarab and is great to use on Legendary.
- Also during the Scarab battle, 3 Hornets will fly around the area, but they are too far up in the air to receive damage. Very occasionally, a glitch will activate, letting the player fly a Hornet or Banshee up to these Hornets. At this close distance, the Hornets have noticeably less detail and are slightly two-dimensional.
- If you activate an Auto Turret during the Flood Alliance, the Flood and the Auto Turret will try to kill each other.
- During the Cortana moment when you enter the Citadel, if you look at the screens on either side of the walkway, you can see them playing out the very same Cortana Moment you are experiencing.
- The beginning of the level is very similar to the beginning of the Silent Cartographer in Halo: CE.
- The entire platform, where Truth, Johnson, and Keyes were could be a large marathon symbol, due to the break in the large platform in the front, and the smaller circle in the center.
- The Pelican that crashes at the start flies past the wreckage and lands at the waterfall, it doesn't land where it's crash site was positioned. Sometimes, the 2 Marine pilots can be found in or around the water below the waterfall.
- If you look closely at the activation panel of the elevators leading to the tops of the towers, you can make out the Marathon symbol.
- When in the third tower that Johnson's team was to deactivate, if you listen where the pack of Brute Stalkers are, one can hear the same biblical chanting one could hear in Halo 2 from cut scenes in High Charity.
- The Cortana Moment "I'm not a thief. But I keep what I steal" is a reference to the Activation Index of Installation 04, and gives a hint to what the next level will be about.
- After the Scarab battle, when Guilty Spark opens the energy bridge, you can rush through the gate and leave the Arbiter behind. The door will close and you will be walking on the hallway alone. However, when the Cortana moment starts playing, the Arbiter will suddenly fade in behind you.
- This is only level in Halo 3 when you fight Banshees in a dogfight.
- This is the only level in the Halo trilogy where you may see a live Brute become infected by the Flood.
- Right before "Revelation", when Gravemind is speaking through the Tank Forms, if subtitles are active on your screen, it will say that the Gravemind is saying "Only you can stop what he has set in motion", when he actually says "Only you can halt what he has set in motion."
- Sometimes, when dogfighting with the Banshees, the Brute pilots will be wielding Battle Rifles. This is the only time in Halo 3 when Brutes wield UNSC weapons other than Flood infected ones.
- It is possible, that in the last cut-scene of this level, Mendicant Bias may have used a hologram of Cortana to show the Master Chief the controls of the newly constructed Halo Ring. This would make sense since Mendicant Bias would have control over the Ark's systems to generate a hologram and Cortana would not. Furthermore, it is also possible that Mendicant Bias may have also been simply reminding the Chief that he will need Cortana to activate the Halo Ring. Which is why Cortana is seen walking up to the pedestal when the ring is later activated.
Images
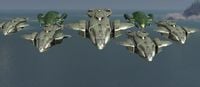
The UNSC and their Elite allies attack the Prophet of Truth
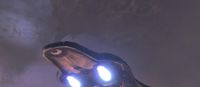
High Charity Comes To The Ark
- Arbiter.jpg
The Arbiter seeks victory on the Ark


| Preceded by The Ark |
Halo 3 Campaign Missions The Covenant |
Succeeded by Cortana |


