Sandtrap: Difference between revisions
From Halopedia, the Halo wiki
Thecairocat (talk | contribs) |
mNo edit summary |
||
| (461 intermediate revisions by more than 100 users not shown) | |||
| Line 1: | Line 1: | ||
{{ | {{Status|Gameplay}} | ||
{{ | {{Multiplayer map infobox | ||
|pagegamelabel=H3 | |||
|name=Sandtrap | |name=Sandtrap | ||
|image=[[ | |image=[[File:H3 Sandtrap.jpg|300px]] | ||
|game=''[[Halo 3]]'' | |game=''[[Halo 3]]'' | ||
| | |devname=<code>shrine</code> | ||
| | |map= | ||
| | |location=[[Installation 00]]{{Ref/Reuse|postmortem}}<ref group="Note" name="waypoint"/> | ||
|terrain=[[Forerunner]] ruins, desert sand | |||
|symmetry= | |||
|playernumber=6-16 | |||
| | |||
| | |||
|gametypes=*[[Team Slayer|Big Team Slayer]] | |gametypes=*[[Team Slayer|Big Team Slayer]] | ||
*[[ | *[[Multi Flag CTF]] | ||
*[[Assault]] | *[[Assault]] | ||
*[[Territories]] | *[[Territories]] | ||
*[[ | *[[VIP]] | ||
}} | }} | ||
{{Article | {{Article quote|Although the [[Jiralhanae|Brute]] occupiers have been driven from this ancient structure, they left plenty to remember them by.}} | ||
'''Sandtrap''' is a [[multiplayer]] map featured in ''[[Halo 3]]''. | '''Sandtrap''' is a [[multiplayer]] map featured in ''[[Halo 3]]'' and ''[[Halo Online]]''. The map is set in a vast desert with rolling sand dunes and some enigmatic half-buried structures. | ||
== | |||
Sandtrap is set in a | ==Universe and lore== | ||
[[File:H3 Sandtrap ElephantScreen 2.png|thumb|left|250px||A UNSC tactical environmental analysis of Sandtrap's atmosphere and composition.]] | |||
Sandtrap is set in a desert wasteland on [[Installation 00|The Ark]].{{Ref/Site|Id=postmortem|URL=https://halo.bungie.net/News/content.aspx?type=topnews&link=Sandtrap_Postmortem|Site=Bungie.net|Page=Sense of Scale - Postmortem|D=13|M=10|Y=2014|Archive=https://web.archive.org/web/20141013171640/https://halo.bungie.net/News/content.aspx?type=topnews&link=Sandtrap_Postmortem}}<ref group="Note" name="waypoint">In Bungie's [https://halo.bungie.net/News/content.aspx?type=topnews&link=Sandtrap_Postmortem Sandtrap postmortem], a section of Sandtrap's design document reads ''"Deep within the boundless dune-fields of Waypoint, the high tech Forerunner structure encases the remnants of even older Forerunner stonework."''. During development of ''Halo 3'', "Waypoint" was the name given for the structure that would come to be known as The Ark.</ref> The primary focus of the map is a series of ancient [[Forerunner]] stone structures, buried in the desert sands. Surrounding the site is a circular Forerunner wall, lined with six [[Shrine defender|massive Forerunner towers]]. The stone ruins extend off to both sides of the map, though those in the center have been partially excavated by persons unknown.{{Ref/Map|Id=Sandtrap|H3|Sandtrap}} | |||
At some point during or after the [[Battle of Installation 00]], the area came under the occupation of the [[Jiralhanae]],{{Ref/Map|Id=Description|H3|Sandtrap|Detail=map description}} who fortified the site with [[Brute landmine|landmines]] and at least one {{Pattern|Ru'swum|Phantom}}.{{Ref/Reuse|Sandtrap}} However, the Jiralhanae were driven from the ruins either by UNSC forces or another party,{{Ref/Reuse|Description}} such as [[Sentinel]]s. UNSC forces deployed from {{UNSCShip|Aegis Fate}} took control of the area, utilizing [[D96-TCE Albatross]] ''[[03]]'' and two [[M313 Elephant]]s, named "Behemoth" and "Leviathan."{{Ref/Reuse|Sandtrap}} An analysis of the region's atmosphere by the UNSC showed its atmospheric composition to be the following: | |||
*'''Carbon dioxide''': 82.7%{{Ref/Reuse|elephant}} | |||
*'''Nitrogen''': 7.5%{{Ref/Reuse|elephant}} | |||
*'''Hydrogen''': 4.7%{{Ref/Reuse|elephant}} | |||
*'''Argon''': 2.5%{{Ref/Reuse|elephant}} | |||
The region's surface composition was revealed consist of Carbon, Silicon, Sodium, Titanium, Nitrogen, Zinc, Calcium, and other trace elements.{{Ref/Reuse|elephant}}<ref group="Note" name="elements">The Elephant [[:File:H3 Sandtrap ElephantScreen 2.png|readount]] lists what appear to be these elements. However, many are too blurry to make out properly. An identical label can be found on the ''Halo 3: ODST'' map [[Windward]], though in higher resolution.</ref> In addition, the composition of the structures is presently unknown, and life signs in the region are minimal.<ref name="elephant">[[:File:H3 Sandtrap ElephantScreen 2.png|Elephant analysis screens]] on the map.</ref> | |||
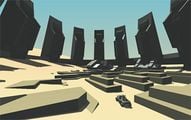
[[File:H3 Sandtrap Numbered.jpg|thumb|200px|1) The main base with the "cavern" below, 2) The destroyed Phantom, 3) The main "spine" of the level, 4) The upper "deck", 5) Smaller base, 6) The buried Albatross.]] | |||
==Overview== | |||
===Layout=== | |||
[[File:H3 Sandtrap Crypt.png|thumb|left|The "crypt" area.]] | |||
The structures on Sandtrap are symmetrical along the map's long axis, with two different [[base]]s at either end - one by the UNSC encampment by the Albatross and another by the Phantom. Each base has access to an Elephant, a [[Chopper]], a [[Mongoose]] and two [[M12 Chaingun Warthog|Warthog]]s. However, one side of the map's symmetry is fully unearthed by the excavations while the other largely still buried in the sand, adding some slight asymmetry to the map's layout. The central "spine" of the map is a two-floor triangular structure running through the middle of the map, acting as a ramp for vehicles on top and having a small infantry corridor running through the structure. One side of the spine has two small buildings with [[gravity lift]]s connected by bridges, and a vehicle-access underpass beneath the bridges. | |||
The base near the Albatross is fairly open, while the base on the other side of the map is a multi-level structure with the bottom floor comparable to a crypt, while the top floor resembles the top of the aforementioned central spine. The downed Phantom off to the side of the map has a [[Banshee]] next to it. Sandtrap features odd Forerunner constructs (called Shrine Defenders in the ''Halo 3'' files) and is encircled with a "minefield" that features vertically launching mines to prevent players from venturing beyond its boundaries. The outer skybox of the map features a full model of a {{Class|Charon|light frigate}}, the UNSC ''Aegis Fate''. | |||
The map has a heavy emphasis on vehicular combat. All the Forgeable vehicles available at the time in the game are on this map - for example, the "bases" are a pair of [[Elephant]]s at opposite ends of the recently unearthed Forerunner ruins. There are also some very interesting sniper spots. For example, if you are inside the crashed Phantom, it will be hard for other players to see you and the location gives you a very interesting view to take down some unsuspecting players. Also, a large hill gives you a good view over the field from overhead. | |||
<gallery> | |||
File:HMCC H3 Sandtrap Map.png|Sandtrap Map. | |||
</gallery> | |||
== Strategies == | ===Strategies=== | ||
[[File:H3 Sandtrap Underpass.png|thumb|A Mongoose driving in the "underpass" area.]] | |||
<!--This is STRATEGIES, not Trivia, only strategies belong here, please put trivia below in the Trivia section--> | <!--This is STRATEGIES, not Trivia, only strategies belong here, please put trivia below in the Trivia section--> | ||
*In Multi-Flag CTF and Assault, a good strategy is to seize the enemy | *In Multi-Flag [[Capture The Flag|CTF]] and [[Assault]], a good strategy is to seize the enemy Elephant and bring it to your base in order to repetitively capture the objective. In Neutral Assault, take the enemy Elephant to the very middle of the map and continuously grab and plant the bomb until victory. Beware; stealing an enemy Elephant is quite a task, so make sure to bring several teammates along with you. | ||
*On several dunes to the side of the map where the sun is you can easily see the whole area of the map. Set up here and you can dominate. | *The [[Brute Shot]] is useful for flipping runaway [[M12 Warthog|Warthogs]] and [[Mongoose]]s. | ||
*Upon picking up the | *[[TR/9 trip mine|Trip mine]]s are near impossible to spot in the orange sand color. Try throwing one in the center, near the [[sniper]] spawn for best results. | ||
*If you are good at sniping, get the [[ | *The [[Chopper]] is valuable on this map, it is a great secondary option to eliminate enemy Warthogs, and sometimes you can splatter a [[Banshee]] with it. | ||
*If you start at the | *On several dunes to the side of the map where the sun is, you can easily see the whole area of the map. Set up here and you can dominate. A common tactic is to take the sniper and use a Mongoose to drive over to the area and snipe. Good secondary weapons are [[MA5C assault rifle|assault rifles]] to dispatch enemies that attack you at close range and [[Spartan Laser]]s, so any incoming [[vehicle]]s can be eliminated, and the sniper can continue wreaking havoc from afar. | ||
* | *In CTF games, try to sneak up on the flag with a partner. Take the flag from the Elephant and steal the enemy's Mongoose that spawns on the Elephant's lower level. Your opponents will think that when you steal a flag, you will be easy to kill. But you will be long gone by then. | ||
*You don't always have to run through the map with the flag, if you are in a Mongoose, you can drive through the minefield with ease. | |||
*One great sniper spot is inside the crashed | *If you eliminate the enemy wielding the Spartan Laser, your team can temporarily claim it taking the biggest threat to your team's vehicles | ||
*Another excellent sniper spot is the highest sand dune on the outer edge of the map. This area provides a spot where you can see the whole map. However, there is no cover and you can be easily detected. Also, it is usually the first guess as to where a | *Upon picking up the Spartan Laser at the beginning of the match, be ready to destroy the opposing Banshee, Chopper, Warthog or Mongoose, because more often than not, the enemy will most likely get it ahead of your teammates, and you can eliminate the threat immediately. | ||
*Try and get a teammate to let you jump on his | *If you are good at sniping, get the [[sniper rifle]] and kill any enemy player that goes near the Banshee until one of your teammates gets it, or it is destroyed. | ||
*If you start at the Albatross end of the map, and if you are going for the sniper rifle, then always keep an eye out for enemies camping up high on the other side, although a [[Z-4190 bubble shield|bubble shield]] is an easy way to get past this problem. | |||
*Unless the enemy vehicles are seldom in movement, the Rocket Launcher is better off destroying vehicles up close or when you have an element of surprise. | |||
*If you are driving a Warthog, stick to the other Warthog until most threats are eliminated, that way, at least one of you can kill the enemy. It also ensures a victory over a lone enemy Warthog or Brute Chopper, provided that both gunners are paying attention to it. | |||
*One great sniper spot is inside the crashed Phantom, as it provides excellent cover and allows you to watch the Banshee. Be sure though to carry another weapon that can help you because opponents can become aware of your position and attack. | |||
*Another excellent sniper spot is the highest sand dune on the outer edge of the map. This area provides a spot where you can see the whole map. However, there is no cover and you can be easily detected. Also, it is usually the first guess as to where a sniper is hiding, due to the relative popularity of the spot. | |||
*Try and get a teammate to let you jump on his Banshee and go to the highest building and jump off with a long-range weapon. | |||
*Slip a trip mine under enemy vehicles. | |||
*You can jump on the treads of the Elephant, allowing a fast and surprising attack on your opponent's base. | |||
*On the Phantom side, you can jump over the center dune with a Warthog and wipe out the enemy's Warthog station, as well as steal the Spartan Laser. | |||
*Have your VIP jump on top of your Banshee, then gently ease up to the large towers, by crouching and on the far side of the map, it is difficult for enemies to kill the VIP, the biggest threats are the Banshee, Laser, rockets, sniper rifle and occasionally, [[Anskum-pattern plasma grenade|plasma grenades]] thrown long distances | |||
*When playing [[Slayer]] gametypes, the Warthog is undoubtedly one of the most important things to get kills with. Have a driver drive the gunner along the paths of the map and eliminate any foot soldiers. Beware of the Chopper, Spartan Laser, and other Warthogs, as they are the biggest threat to your Warthog. | |||
*The Mongoose is a great vehicle for getting to the combat zone fast. Coupled with a passenger on the back and the ability to drive in the minefield, it can be a fast moving offensive weapon. | |||
*If you can't get the Spartan Laser before a teammate, try going for the missile pod. | |||
*The [[Gravity hammer (fiction)|gravity hammer]] can easily send enemy Warthogs and Mongoose flying into the air, which allows teammates to easily pick them off. | |||
*On Sandtrap heavy tanks are strong weapons and should be used. Tanks will usually survive a Spartan Laser hit, so you are relatively safe inside. Just keep driving around the bases, do not go into the middle of the map because A: mines are usually planted there and B: enemies could jump on the tank and easily hijack it or plant grenades on it. | |||
*An effective position for enemy snipers is at the top of the tall towers (Phantom End). They get there by ditching a Banshee aircraft just above the tower tops, landing safely on top. The enemy will have prepared by gathering weapons and equipment such as bubble shields, [[flare]]s, Spartan Lasers and of course the sniper rifle. There is a 360 degree view of Sandtrap from the top of the towers and ground forces won't be looking up A good way to determine whether there is an enemy situated at the top of the towers is to look for an abandoned Banshee near the Elephant or in the vicinity of the towers. A wise enemy will, however, always destroy the Banshee once it has done its job. | |||
*Have your allies man the turrets inside the elephant while you drive, so you'll have a basically indestructible mobile fortress. If an opposing player tries to kill the driver, the other players manning the turrets can take them out and the driver can continue driving. | |||
==Variant== | |||
===Sand Tarp=== | |||
[[File:H3 SandTarp.png|thumb|Sand Tarp.]] | |||
{{Article quote|Something feels wrong. Like... like something is missing...}} | |||
'''Sand Tarp''' is a map variant released to improve the gameplay balance in any team-based gametype. It was due to be released on September 16, 2008, but was delayed until the 23rd. It is included by default as a built-in map variant in ''[[Halo: The Master Chief Collection]]''. The following is a list of changes made; | |||
*The [[Elephant]]s have been removed. | |||
*If asymmetric gametypes are played on this map, the defender's base will no longer be the large crypt near the [[Phantom]] crash site. Instead, attackers will spawn in the crypt, and defenders at the other "open-area" base. In other words, the attacker's and defender's bases are switched, and the defenders are at the Albatross so that the attackers do not have to pull the flag out from the "impenetrable" crypt. | |||
*One [[Qavardu Workshop Prowler|Prowler]] replaces a Warthog at each base. | |||
*An additional [[AIE-486H machine gun|machine gun turret]] has been placed near each base. | |||
==Forge== | |||
[[File:H3 Sandtrap RocketLauncher.png|thumb|The rocket launcher spawn on the map.]] | |||
{{main|Forge}} | |||
<!--This section is for Forge tips, do not put things like "Add a Brute Shot, it's more fun" Give good reasons WHY and WHERE to add the object(s), like "Adding shield doors in the main hallway will change the flow of battle to the sides of it, allowing for more heated firefights in the side allies." Thank you for keeping Halopedia neat--> | |||
*The crashed Phantom is a good place to hide weapons. It can also be used to hide [[teleporter]]s that lead to safe zones during infection games. | |||
*There are two ways to "bridge the gap" between the big wall in the center. The first is a simple two-way teleport system, obviously both being on the same channel. This allows for infantry to cross; however, vehicles can't go through teleporters. The way to fix that is to place two permanent [[Gravity lift|grav lift]]s, one on either side, of the gap. This will allow most land-based vehicles going a decent rate of speed to cross, the only exceptions being [[Scorpion]]s and [[Wraith]]s. Be cautious going towards the smaller base (with the Albatross), as you may go through the holes in the top, and flip your vehicle over. | |||
*Another fun way to "bridge the gap" is to use the [[Floating Forge Items]] trick on Crates. This also gives you the opportunity to make a new focus point for some attention if it is a [[Flag]], [[Bomb]] or [[Oddball]] spawn point. | |||
*Similarly, Crates, Radio Antennae, and similar objects are useful when constructing floating bases using the Floating Forge Items glitch. | |||
*The map is obviously based on vehicular combat, so consider that when in Forge. Place vehicles like [[Hornet]]s and [[M12G1 Gauss Warthog|Gauss Warthogs]], and make sniper towers out of the pillars, adding Barricades for cover, and a Two-Way Node from the top of the pillars to the bottoms. | |||
*It is possible to make the Elephant fly while in Forge. Place all the map's explosives ([[fusion coil]]s and [[Plasma battery|plasma batteries]]) in the Elephant and set the run time minimum to the highest number. Then, spawn a Hornet. Get into the Hornet and fire missiles at the explosives. The Elephant will do flips and get off the ground. It causes lots of lag and noise, but it is still fun to watch. | |||
*There is a way to indirectly pick up the Elephant in Forge, though it will not spawn where you place it. Spawn a Scorpion tank and slip it inside horizontally from behind the Elephant. You will see hook-like attachments on top of the Elephant. Slip the Scorpion under that and lift. It will rise a little, then the tank will slip out from under it eventually. | |||
*Another way to pick up the Elephant is to spawn a closed Drop Pod and move it into the cockpit. Then, you just move the Drop Pod and the Elephant will come too. | |||
==Production notes== | |||
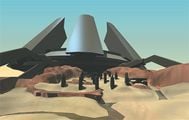
[[File:H3 Sandtrap Concept.jpg|thumb|200px|Concept art for Sandtrap.]] | |||
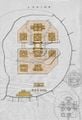
[[File:H3 Sandtrap Initial Layout.jpg|thumb|200px|The initial layout idea for Sandtrap, with attackers pressing into the "bowl".]] | |||
Sandtrap, known in development as "Shrine", started development in [[2005 (real world)|2005]]. Developer [[Justin Hayward]]'s goals for the map initially were to make "the ultimate warthog map" and to make the map friendly for both infantry and vehicles. The initial concept was extremely large, but scaled down during development, with the initial idea intending to be an a sequential objective map (similar to the [[Warfare (game variant)|Warfare]] mode previously-cut from ''[[Halo: Combat Evolved]]'' and ''[[Halo 2]]'' and the [[Invasion]] and [[Warzone Assault]] modes later featured in ''[[Halo: Reach]]'' and ''[[Halo 5: Guardians]]'', respectively), where the attacking team would assault a section of the map that would lead into the "bowl" that would later become the setting of Sandtrap. This initial opening section was also massive, and was "a second Sandtrap right next to the one you know.”.{{Ref/Reuse|postmortem}} | |||
At the time of the map's conception, the only solid detail of the map's setting was to be set in miscellaneous Forerunner structures, with the official design documentation later adding ''"Deep within the boundless dune-fields of Waypoint, the high tech Forerunner structure encases the remnants of even older Forerunner stonework."''. Hayward chose sandstone as the map's primary structural element as it provided a more "human scale" element, with the intent of being more mysterious. There was internal debate at Bungie with some developers opposing the idea of using sandstone Forerunner structures, while Hayward wanted to use the external metal guardian towers to feel like they were containing something on the map.{{Ref/Reuse|postmortem}} Originally, there would have been a dozen or so towers around the map. | |||
Two notes on Sandtrap's concept sheet in early development were “Crater at center accessible by tunnels that radiate out from the pit” and “Drivable beach area extends all the way around the island.” - although these concepts would make their way onto the map, it was decided that the map was too large for capture and hold-style progression, as at the time the team was still trying to figure out what ''Halo 3''s multiplayer would be. Hayworth began 3D blockouts to ascertain a sense of scale, and realised the map fit a good spot currently absent in the sandbox; a large map with an asymmetric objective and layout.{{Ref/Reuse|postmortem}} | |||
At this time, the game's sandbox of weapons and vehicles (including the [[AV-14 Hornet|Hornet]], [[M6 Spartan Laser|Spartan Laser]] and [[LAU-65D/SGM-151 missile pod|missile pod]]) was beginning to take shape, which fit well with the need to make the vehicle offerings on the map a bit less dominant. The addition of larger vehicle routes, however, was done to allow light vehicles to escape grenades and regular gunfire. Hayworth then left to work on [[Snowbound]] while designer [[Chris Carney]] jumped on Sandtrap and began architecting and layout sketches.{{Ref/Reuse|postmortem}} | |||
The landmines littering the perimeter originated as laser beams fired from the guardian towers similar to the ones later implemented on [[Sandbox]]. During development, the team implemented the landmines as a test of a separate system and did intend on reversing the change back to the lasers, but were unable to do so before the game shipped.{{Ref/Reuse|postmortem}} | |||
The | |||
During the later [[Development of Halo 4|development]] of ''[[Halo 4]]'', Sandtrap was reused by [[343 Industries]] to [[Cut Halo 4 levels|test out]] the game's vehicle sandbox.{{Ref/Twitter|___Gal4xy___|1431671182772908033|Galaxy|Quote=A shame they never considered releasing Sandtrap as an official map for Halo 4, But it is neat to know that they used it to test out the vehicle sandbox during development.|D=04|M=9|Y=2021}} | |||
== Trivia == | ==Trivia== | ||
<!--This is TRIVIA, not Strategies, only trivia belongs here, please put strategies below in the Strategies section--> | <!--This is TRIVIA, not Strategies, only trivia belongs here, please put strategies below in the Strategies section--> | ||
[[ | *The architecture of the [[Forerunner]] structures on both ''Sandtrap'' and [[Sandbox]] share a striking resemblance to the architectural design encountered on Lh'owon in ''[[Marathon (Video Game Series)|Marathon]]''. | ||
*Sandtrap was recreated in the [[Halo Mash-Up: Minecraft Evolved]].<ref>[https://blogs.halowaypoint.com/en-us/blogs/waypoint/posts/more-master-chief-and-minecraft '''Halo Waypoint -''' ''More Master Chief and Minecraft'']</ref> | |||
* | *This multiplayer map is one of the largest maps in Custom Games, just behind the DLC maps [[Avalanche (level)|Avalanche]] and [[Sandbox (level)|Sandbox]]. | ||
*Sandtrap has the highest height barrier in the game. Measured by a sniper rifle's scope, the map's barrier is over 127 meters (416 feet) at its highest point. | |||
*Near the top of one of the temples there is an apparent "Black Hole" that absorbs any explosive attack, for example, if you shoot a rocket into it, it will go through the "Black Hole" and not explode. If the "Black hole" is looked through at a certain angle in Forge mode, the player can see what one of the opposing players sees, similar to the blue room in Avalanche and the freezer room on Longshore (the black hole was thought to be a glitch by most players). | |||
*This is the | *The Obelisk pieces in Sandbox are scaled-down versions of the towers at each base of Sandtrap. Upon further investigation, other objects on Sandbox can be found in their scaled-up versions on Sandtrap, such as the Stone Bridge, Small Wedge, Tunnel Ramp, and Huge Wedge. | ||
*If over loading the map in Forge, in the middle "ravine," (between the two "bases") be careful of a Mongoose randomly spawning from high up, and landing on a pile of highly dangerous mines placed together. This happens usually when you have overloaded the map or just before. | |||
* | *The little lightbulbs that line the minefield can stop vehicles in their tracks. | ||
* | |||
===Secrets of Sandtrap=== | |||
* | [[File:H3 Sandtrap DaVinci 2.jpg|thumb|One of the Da Vinci objects on the map.]] | ||
* | The "Secret of Sandtrap" is a community-generated idea that Sandtrap has a large secret, and was the subject of community speculation for many years.{{Ref/Reuse|postmortem}} As such, players have spent countless hours poring over Sandtrap's details, attempting to uncode the "secrets" behind the following map production objects; | ||
[[ | *Each tower is paired with a [[Da Vinci Code objects|low-poly sphere using a default texture]]. These spheres fire faint beams that strike near the player, spawning the [[brute landmine]]s that pop out of the ground in the minefield. | ||
*The two wind tunnels or air lifts are powered by a green square object. There are only two of these objects hidden underneath each of the tunnels or lifts. To see them, you must get under the map in [[Theater]] and fly to them. Another way to view them is by [[modding]] a map to have them on the surface. | |||
*There are several hidden shapes within the walls of Sandtrap. Most of these shapes are just different types of parallelograms, the most common kind being squares. | |||
* | *There are several secret rooms on Sandtrap. The most popular one is the one inside the ceiling of one of the bases. The other secret rooms are all within the walls of the long, narrow hallway in the middle of the map. | ||
* | *There is a small hole within a small gap on Sandtrap where all weapons fire will just simply go through and disappear. If you look through it, the [[Mirror, Mirror on the Wall|Hall of Mirrors]] effect may occur if you are playing in splitscreen mode with at least one guest controller. It will not work on Xbox Live. | ||
* | *The playable size of Sandtrap can be doubled by going outside the map, where there is more playing space. The explosions of the mines can simply be countered in [[Forge]] by placing large piles of every possible type of [[grenade]]s. These grenades will negate all explosions, even though it seems like the explosions are still happening. However, this will only work in Forge and not Custom Games. The reason why is currently unknown. | ||
* | *There is a mistake in the central hall where the boxes are labeled "USNC" instead of "UNSC". | ||
*Sandtrap | *There is a symbol inside the "crypt" of Sandtrap which is the same symbol inside the crypt of [[Sandbox]], and they are crossed on the hologram on the ceiling and on the double block, stone platform, so they may have a lot in common. | ||
In an interview later conducted in 2010, however, Justin Hayworth did indicate that Sandtrap does have a secret involving the script found on the metal panels in the stone structures, the script being identical to that found on [[Epitaph]].{{Ref/Reuse|postmortem}} Hayworth had the following to say; | |||
{{Article quote|There are tons of strips of metal littered throughout Sandtrap that have weird digital writing on them and I wanted those to have meaning. My hope was that people would pour over the script and try to figure it out. It’s actually the same ‘text’ that appears on Epitaph.}} | |||
Hayworth later professed to not remembering if he definitely did place a "secret" on Sandtrap, and what it was.{{Ref/Reuse|postmortem}} A thread further detailing the cipher can be found [https://www.reddit.com/r/gamedetectives/comments/58dynk/the_secret_of_sandtrap_unsolved_bungie_cipher/ here]. | |||
{{Clear}} | |||
== Gallery == | ==Gallery== | ||
{{Linkbox|gallery=yes}} | |||
<gallery> | <gallery> | ||
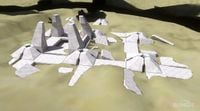
File:H3_Sandtrap_ManyTowers.jpg|Initial blockout of Sandtrap with close to a dozen towers. | |||
File:H3_Early_Sandtrap_1.jpg|An early massout of Sandtrap. | |||
File:H3_Early_Sandtrap_2.jpg|An early version of Sandtrap, with a structure that looks very similar to a [[Library]]. | |||
File:H3_Early_Sandtrap_Sketch.jpg|Chris Carney's sketch of Sandtrap's layout. | |||
File:H3_Early_Sandtrap_3.jpg|A screenshot of Sandtrap, close to the end of pre-production.{{Ref/Twitter|MaxHoberman|1645953703621578752|Max Hoberman|Quote=Yes, this is Sandtrap. At the end of prepro it was called Shrine, however.|D=12|M=04|Y=2023}} | |||
File:H3_AegisFate_Front.jpg|The UNSC ''Aegis Fate''. | |||
File:H3_Elephant_Battle.jpg|Battling the Elephant. | |||
File:H3_Sandtrap_OutOfBounds.jpg|Outside view of Sandtrap. | |||
File:H3_Sandtrap_DaVinci_1.jpg|One of the two green square objects under Sandtrap. | |||
File:H3 Sandtrap Battle.jpg|Reds and Blues fighting on the map. | |||
File:H3_Sandtrap_Phantom.png|The destroyed Phantom. | |||
File:H3_Sandtrap_Tower.png|One of the many towers surrounding the map. | |||
File:H4 Sandtrap.png|Sandtrap in the ''Halo 4'' tags build. | |||
</gallery> | </gallery> | ||
==Notes== | |||
<references group="Note"/> | |||
==Sources== | |||
{{Ref/Sources}} | |||
== | {{levels|H3|mode=yes}} | ||
{{Levels|HO|mode=yes}} | |||
Latest revision as of 20:05, April 8, 2024
| Sandtrap | |
|---|---|

| |
| Map overview | |
|
Game: |
|
|
Map file name (?): |
|
| Lore information | |
|
Location: |
|
| Gameplay overview | |
|
Terrain: |
Forerunner ruins, desert sand |
|
Recommended number of players: |
6-16 |
|
Recommended gametype(s): |
|
| “ | Although the Brute occupiers have been driven from this ancient structure, they left plenty to remember them by. | ” |
Sandtrap is a multiplayer map featured in Halo 3 and Halo Online. The map is set in a vast desert with rolling sand dunes and some enigmatic half-buried structures.
Universe and lore[edit]

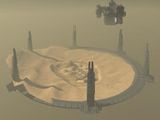
Sandtrap is set in a desert wasteland on The Ark.[1][Note 1] The primary focus of the map is a series of ancient Forerunner stone structures, buried in the desert sands. Surrounding the site is a circular Forerunner wall, lined with six massive Forerunner towers. The stone ruins extend off to both sides of the map, though those in the center have been partially excavated by persons unknown.[2]
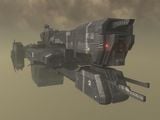
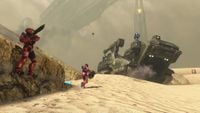
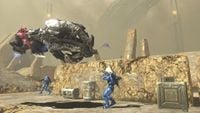
At some point during or after the Battle of Installation 00, the area came under the occupation of the Jiralhanae,[3] who fortified the site with landmines and at least one Ru'swum-pattern Phantom.[2] However, the Jiralhanae were driven from the ruins either by UNSC forces or another party,[3] such as Sentinels. UNSC forces deployed from UNSC Aegis Fate took control of the area, utilizing D96-TCE Albatross 03 and two M313 Elephants, named "Behemoth" and "Leviathan."[2] An analysis of the region's atmosphere by the UNSC showed its atmospheric composition to be the following:
The region's surface composition was revealed consist of Carbon, Silicon, Sodium, Titanium, Nitrogen, Zinc, Calcium, and other trace elements.[4][Note 2] In addition, the composition of the structures is presently unknown, and life signs in the region are minimal.[4]

Overview[edit]
Layout[edit]

The structures on Sandtrap are symmetrical along the map's long axis, with two different bases at either end - one by the UNSC encampment by the Albatross and another by the Phantom. Each base has access to an Elephant, a Chopper, a Mongoose and two Warthogs. However, one side of the map's symmetry is fully unearthed by the excavations while the other largely still buried in the sand, adding some slight asymmetry to the map's layout. The central "spine" of the map is a two-floor triangular structure running through the middle of the map, acting as a ramp for vehicles on top and having a small infantry corridor running through the structure. One side of the spine has two small buildings with gravity lifts connected by bridges, and a vehicle-access underpass beneath the bridges.
The base near the Albatross is fairly open, while the base on the other side of the map is a multi-level structure with the bottom floor comparable to a crypt, while the top floor resembles the top of the aforementioned central spine. The downed Phantom off to the side of the map has a Banshee next to it. Sandtrap features odd Forerunner constructs (called Shrine Defenders in the Halo 3 files) and is encircled with a "minefield" that features vertically launching mines to prevent players from venturing beyond its boundaries. The outer skybox of the map features a full model of a Charon-class light frigate, the UNSC Aegis Fate.
The map has a heavy emphasis on vehicular combat. All the Forgeable vehicles available at the time in the game are on this map - for example, the "bases" are a pair of Elephants at opposite ends of the recently unearthed Forerunner ruins. There are also some very interesting sniper spots. For example, if you are inside the crashed Phantom, it will be hard for other players to see you and the location gives you a very interesting view to take down some unsuspecting players. Also, a large hill gives you a good view over the field from overhead.

Sandtrap Map.

Strategies[edit]

- In Multi-Flag CTF and Assault, a good strategy is to seize the enemy Elephant and bring it to your base in order to repetitively capture the objective. In Neutral Assault, take the enemy Elephant to the very middle of the map and continuously grab and plant the bomb until victory. Beware; stealing an enemy Elephant is quite a task, so make sure to bring several teammates along with you.
- The Brute Shot is useful for flipping runaway Warthogs and Mongooses.
- Trip mines are near impossible to spot in the orange sand color. Try throwing one in the center, near the sniper spawn for best results.
- The Chopper is valuable on this map, it is a great secondary option to eliminate enemy Warthogs, and sometimes you can splatter a Banshee with it.
- On several dunes to the side of the map where the sun is, you can easily see the whole area of the map. Set up here and you can dominate. A common tactic is to take the sniper and use a Mongoose to drive over to the area and snipe. Good secondary weapons are assault rifles to dispatch enemies that attack you at close range and Spartan Lasers, so any incoming vehicles can be eliminated, and the sniper can continue wreaking havoc from afar.
- In CTF games, try to sneak up on the flag with a partner. Take the flag from the Elephant and steal the enemy's Mongoose that spawns on the Elephant's lower level. Your opponents will think that when you steal a flag, you will be easy to kill. But you will be long gone by then.
- You don't always have to run through the map with the flag, if you are in a Mongoose, you can drive through the minefield with ease.
- If you eliminate the enemy wielding the Spartan Laser, your team can temporarily claim it taking the biggest threat to your team's vehicles
- Upon picking up the Spartan Laser at the beginning of the match, be ready to destroy the opposing Banshee, Chopper, Warthog or Mongoose, because more often than not, the enemy will most likely get it ahead of your teammates, and you can eliminate the threat immediately.
- If you are good at sniping, get the sniper rifle and kill any enemy player that goes near the Banshee until one of your teammates gets it, or it is destroyed.
- If you start at the Albatross end of the map, and if you are going for the sniper rifle, then always keep an eye out for enemies camping up high on the other side, although a bubble shield is an easy way to get past this problem.
- Unless the enemy vehicles are seldom in movement, the Rocket Launcher is better off destroying vehicles up close or when you have an element of surprise.
- If you are driving a Warthog, stick to the other Warthog until most threats are eliminated, that way, at least one of you can kill the enemy. It also ensures a victory over a lone enemy Warthog or Brute Chopper, provided that both gunners are paying attention to it.
- One great sniper spot is inside the crashed Phantom, as it provides excellent cover and allows you to watch the Banshee. Be sure though to carry another weapon that can help you because opponents can become aware of your position and attack.
- Another excellent sniper spot is the highest sand dune on the outer edge of the map. This area provides a spot where you can see the whole map. However, there is no cover and you can be easily detected. Also, it is usually the first guess as to where a sniper is hiding, due to the relative popularity of the spot.
- Try and get a teammate to let you jump on his Banshee and go to the highest building and jump off with a long-range weapon.
- Slip a trip mine under enemy vehicles.
- You can jump on the treads of the Elephant, allowing a fast and surprising attack on your opponent's base.
- On the Phantom side, you can jump over the center dune with a Warthog and wipe out the enemy's Warthog station, as well as steal the Spartan Laser.
- Have your VIP jump on top of your Banshee, then gently ease up to the large towers, by crouching and on the far side of the map, it is difficult for enemies to kill the VIP, the biggest threats are the Banshee, Laser, rockets, sniper rifle and occasionally, plasma grenades thrown long distances
- When playing Slayer gametypes, the Warthog is undoubtedly one of the most important things to get kills with. Have a driver drive the gunner along the paths of the map and eliminate any foot soldiers. Beware of the Chopper, Spartan Laser, and other Warthogs, as they are the biggest threat to your Warthog.
- The Mongoose is a great vehicle for getting to the combat zone fast. Coupled with a passenger on the back and the ability to drive in the minefield, it can be a fast moving offensive weapon.
- If you can't get the Spartan Laser before a teammate, try going for the missile pod.
- The gravity hammer can easily send enemy Warthogs and Mongoose flying into the air, which allows teammates to easily pick them off.
- On Sandtrap heavy tanks are strong weapons and should be used. Tanks will usually survive a Spartan Laser hit, so you are relatively safe inside. Just keep driving around the bases, do not go into the middle of the map because A: mines are usually planted there and B: enemies could jump on the tank and easily hijack it or plant grenades on it.
- An effective position for enemy snipers is at the top of the tall towers (Phantom End). They get there by ditching a Banshee aircraft just above the tower tops, landing safely on top. The enemy will have prepared by gathering weapons and equipment such as bubble shields, flares, Spartan Lasers and of course the sniper rifle. There is a 360 degree view of Sandtrap from the top of the towers and ground forces won't be looking up A good way to determine whether there is an enemy situated at the top of the towers is to look for an abandoned Banshee near the Elephant or in the vicinity of the towers. A wise enemy will, however, always destroy the Banshee once it has done its job.
- Have your allies man the turrets inside the elephant while you drive, so you'll have a basically indestructible mobile fortress. If an opposing player tries to kill the driver, the other players manning the turrets can take them out and the driver can continue driving.
Variant[edit]
Sand Tarp[edit]

| “ | Something feels wrong. Like... like something is missing... | ” |
Sand Tarp is a map variant released to improve the gameplay balance in any team-based gametype. It was due to be released on September 16, 2008, but was delayed until the 23rd. It is included by default as a built-in map variant in Halo: The Master Chief Collection. The following is a list of changes made;
- The Elephants have been removed.
- If asymmetric gametypes are played on this map, the defender's base will no longer be the large crypt near the Phantom crash site. Instead, attackers will spawn in the crypt, and defenders at the other "open-area" base. In other words, the attacker's and defender's bases are switched, and the defenders are at the Albatross so that the attackers do not have to pull the flag out from the "impenetrable" crypt.
- One Prowler replaces a Warthog at each base.
- An additional machine gun turret has been placed near each base.
Forge[edit]

- Main article: Forge
- The crashed Phantom is a good place to hide weapons. It can also be used to hide teleporters that lead to safe zones during infection games.
- There are two ways to "bridge the gap" between the big wall in the center. The first is a simple two-way teleport system, obviously both being on the same channel. This allows for infantry to cross; however, vehicles can't go through teleporters. The way to fix that is to place two permanent grav lifts, one on either side, of the gap. This will allow most land-based vehicles going a decent rate of speed to cross, the only exceptions being Scorpions and Wraiths. Be cautious going towards the smaller base (with the Albatross), as you may go through the holes in the top, and flip your vehicle over.
- Another fun way to "bridge the gap" is to use the Floating Forge Items trick on Crates. This also gives you the opportunity to make a new focus point for some attention if it is a Flag, Bomb or Oddball spawn point.
- Similarly, Crates, Radio Antennae, and similar objects are useful when constructing floating bases using the Floating Forge Items glitch.
- The map is obviously based on vehicular combat, so consider that when in Forge. Place vehicles like Hornets and Gauss Warthogs, and make sniper towers out of the pillars, adding Barricades for cover, and a Two-Way Node from the top of the pillars to the bottoms.
- It is possible to make the Elephant fly while in Forge. Place all the map's explosives (fusion coils and plasma batteries) in the Elephant and set the run time minimum to the highest number. Then, spawn a Hornet. Get into the Hornet and fire missiles at the explosives. The Elephant will do flips and get off the ground. It causes lots of lag and noise, but it is still fun to watch.
- There is a way to indirectly pick up the Elephant in Forge, though it will not spawn where you place it. Spawn a Scorpion tank and slip it inside horizontally from behind the Elephant. You will see hook-like attachments on top of the Elephant. Slip the Scorpion under that and lift. It will rise a little, then the tank will slip out from under it eventually.
- Another way to pick up the Elephant is to spawn a closed Drop Pod and move it into the cockpit. Then, you just move the Drop Pod and the Elephant will come too.
Production notes[edit]


Sandtrap, known in development as "Shrine", started development in 2005. Developer Justin Hayward's goals for the map initially were to make "the ultimate warthog map" and to make the map friendly for both infantry and vehicles. The initial concept was extremely large, but scaled down during development, with the initial idea intending to be an a sequential objective map (similar to the Warfare mode previously-cut from Halo: Combat Evolved and Halo 2 and the Invasion and Warzone Assault modes later featured in Halo: Reach and Halo 5: Guardians, respectively), where the attacking team would assault a section of the map that would lead into the "bowl" that would later become the setting of Sandtrap. This initial opening section was also massive, and was "a second Sandtrap right next to the one you know.”.[1]
At the time of the map's conception, the only solid detail of the map's setting was to be set in miscellaneous Forerunner structures, with the official design documentation later adding "Deep within the boundless dune-fields of Waypoint, the high tech Forerunner structure encases the remnants of even older Forerunner stonework.". Hayward chose sandstone as the map's primary structural element as it provided a more "human scale" element, with the intent of being more mysterious. There was internal debate at Bungie with some developers opposing the idea of using sandstone Forerunner structures, while Hayward wanted to use the external metal guardian towers to feel like they were containing something on the map.[1] Originally, there would have been a dozen or so towers around the map.
Two notes on Sandtrap's concept sheet in early development were “Crater at center accessible by tunnels that radiate out from the pit” and “Drivable beach area extends all the way around the island.” - although these concepts would make their way onto the map, it was decided that the map was too large for capture and hold-style progression, as at the time the team was still trying to figure out what Halo 3s multiplayer would be. Hayworth began 3D blockouts to ascertain a sense of scale, and realised the map fit a good spot currently absent in the sandbox; a large map with an asymmetric objective and layout.[1]
At this time, the game's sandbox of weapons and vehicles (including the Hornet, Spartan Laser and missile pod) was beginning to take shape, which fit well with the need to make the vehicle offerings on the map a bit less dominant. The addition of larger vehicle routes, however, was done to allow light vehicles to escape grenades and regular gunfire. Hayworth then left to work on Snowbound while designer Chris Carney jumped on Sandtrap and began architecting and layout sketches.[1]
The landmines littering the perimeter originated as laser beams fired from the guardian towers similar to the ones later implemented on Sandbox. During development, the team implemented the landmines as a test of a separate system and did intend on reversing the change back to the lasers, but were unable to do so before the game shipped.[1]
During the later development of Halo 4, Sandtrap was reused by 343 Industries to test out the game's vehicle sandbox.[5]
Trivia[edit]
- The architecture of the Forerunner structures on both Sandtrap and Sandbox share a striking resemblance to the architectural design encountered on Lh'owon in Marathon.
- Sandtrap was recreated in the Halo Mash-Up: Minecraft Evolved.[6]
- This multiplayer map is one of the largest maps in Custom Games, just behind the DLC maps Avalanche and Sandbox.
- Sandtrap has the highest height barrier in the game. Measured by a sniper rifle's scope, the map's barrier is over 127 meters (416 feet) at its highest point.
- Near the top of one of the temples there is an apparent "Black Hole" that absorbs any explosive attack, for example, if you shoot a rocket into it, it will go through the "Black Hole" and not explode. If the "Black hole" is looked through at a certain angle in Forge mode, the player can see what one of the opposing players sees, similar to the blue room in Avalanche and the freezer room on Longshore (the black hole was thought to be a glitch by most players).
- The Obelisk pieces in Sandbox are scaled-down versions of the towers at each base of Sandtrap. Upon further investigation, other objects on Sandbox can be found in their scaled-up versions on Sandtrap, such as the Stone Bridge, Small Wedge, Tunnel Ramp, and Huge Wedge.
- If over loading the map in Forge, in the middle "ravine," (between the two "bases") be careful of a Mongoose randomly spawning from high up, and landing on a pile of highly dangerous mines placed together. This happens usually when you have overloaded the map or just before.
- The little lightbulbs that line the minefield can stop vehicles in their tracks.
Secrets of Sandtrap[edit]

The "Secret of Sandtrap" is a community-generated idea that Sandtrap has a large secret, and was the subject of community speculation for many years.[1] As such, players have spent countless hours poring over Sandtrap's details, attempting to uncode the "secrets" behind the following map production objects;
- Each tower is paired with a low-poly sphere using a default texture. These spheres fire faint beams that strike near the player, spawning the brute landmines that pop out of the ground in the minefield.
- The two wind tunnels or air lifts are powered by a green square object. There are only two of these objects hidden underneath each of the tunnels or lifts. To see them, you must get under the map in Theater and fly to them. Another way to view them is by modding a map to have them on the surface.
- There are several hidden shapes within the walls of Sandtrap. Most of these shapes are just different types of parallelograms, the most common kind being squares.
- There are several secret rooms on Sandtrap. The most popular one is the one inside the ceiling of one of the bases. The other secret rooms are all within the walls of the long, narrow hallway in the middle of the map.
- There is a small hole within a small gap on Sandtrap where all weapons fire will just simply go through and disappear. If you look through it, the Hall of Mirrors effect may occur if you are playing in splitscreen mode with at least one guest controller. It will not work on Xbox Live.
- The playable size of Sandtrap can be doubled by going outside the map, where there is more playing space. The explosions of the mines can simply be countered in Forge by placing large piles of every possible type of grenades. These grenades will negate all explosions, even though it seems like the explosions are still happening. However, this will only work in Forge and not Custom Games. The reason why is currently unknown.
- There is a mistake in the central hall where the boxes are labeled "USNC" instead of "UNSC".
- There is a symbol inside the "crypt" of Sandtrap which is the same symbol inside the crypt of Sandbox, and they are crossed on the hologram on the ceiling and on the double block, stone platform, so they may have a lot in common.
In an interview later conducted in 2010, however, Justin Hayworth did indicate that Sandtrap does have a secret involving the script found on the metal panels in the stone structures, the script being identical to that found on Epitaph.[1] Hayworth had the following to say;
| “ | There are tons of strips of metal littered throughout Sandtrap that have weird digital writing on them and I wanted those to have meaning. My hope was that people would pour over the script and try to figure it out. It’s actually the same ‘text’ that appears on Epitaph. | ” |
Hayworth later professed to not remembering if he definitely did place a "secret" on Sandtrap, and what it was.[1] A thread further detailing the cipher can be found here.
Gallery[edit]

|
Browse more images in this article's gallery page. |
Initial blockout of Sandtrap with close to a dozen towers.
An early massout of Sandtrap.
An early version of Sandtrap, with a structure that looks very similar to a Library.
Chris Carney's sketch of Sandtrap's layout.
![A screenshot of Sandtrap, close to the end of pre-production.[7]](https://halo.wiki.gallery/images/thumb/a/a2/H3_Early_Sandtrap_3.jpg/200px-H3_Early_Sandtrap_3.jpg)
A screenshot of Sandtrap, close to the end of pre-production.[7]
The UNSC Aegis Fate.
Battling the Elephant.
Outside view of Sandtrap.
One of the two green square objects under Sandtrap.
Reds and Blues fighting on the map.
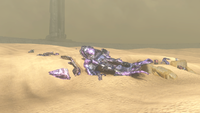
The destroyed Phantom.

One of the many towers surrounding the map.

Sandtrap in the Halo 4 tags build.


![A screenshot of Sandtrap, close to the end of pre-production.[7]](/File:H3_Early_Sandtrap_3.jpg)


Notes[edit]
- ^ a b In Bungie's Sandtrap postmortem, a section of Sandtrap's design document reads "Deep within the boundless dune-fields of Waypoint, the high tech Forerunner structure encases the remnants of even older Forerunner stonework.". During development of Halo 3, "Waypoint" was the name given for the structure that would come to be known as The Ark.
- ^ The Elephant readount lists what appear to be these elements. However, many are too blurry to make out properly. An identical label can be found on the Halo 3: ODST map Windward, though in higher resolution.
Sources[edit]
- ^ a b c d e f g h i j Bungie.net, Sense of Scale - Postmortem (Retrieved on Oct 13, 2014) [archive]
- ^ a b c Halo 3, multiplayer map Sandtrap
- ^ a b Halo 3, multiplayer map Sandtrap: map description
- ^ a b c d e f Elephant analysis screens on the map.
- ^ Twitter, Galaxy (@___Gal4xy___): "A shame they never considered releasing Sandtrap as an official map for Halo 4, But it is neat to know that they used it to test out the vehicle sandbox during development." (Retrieved on Sep 4, 2021) [archive]
- ^ Halo Waypoint - More Master Chief and Minecraft
- ^ Twitter, Max Hoberman (@MaxHoberman): "Yes, this is Sandtrap. At the end of prepro it was called Shrine, however." (Retrieved on Apr 12, 2023) [archive]
| ||||||||||||||||||||||||||||||||||||||||
| ||||||||||||||||||||


