The Maw: Difference between revisions
From Halopedia, the Halo wiki
m (1 revision(s)) |
SpartanLeet (talk | contribs) No edit summary |
||
| (232 intermediate revisions by 89 users not shown) | |||
| Line 1: | Line 1: | ||
== | {{Status|Gameplay}} | ||
[[ | {{disambig header|campaign level|other uses of "The Maw"|The Maw (disambiguation)}} | ||
The | {{Level infobox | ||
|pagegamelabel=CE | |||
|prev=''[[Keyes]]'' | |||
|concurrent=''[[Last Stand (Halo: Fireteam Raven level)|Last Stand]]'' <br>(chronologically {{C|''[[Halo: Fireteam Raven]]''}}) | |||
|next=*''[[Halo: Combat Evolved credits]]'' <br>{{C|''[[Halo: Combat Evolved]]''}} {{C|''[[Halo PC credits|PC]]''}} {{C|''[[Halo: Combat Evolved Anniversary credits|Anniversary]]''}} | |||
*''[[The Heretic]]'' {{C|''[[Halo: The Master Chief Collection|MCC]]''}} | |||
|name='''''The Maw''''' | |||
|image=[[File:HCEA TheMaw Loadscreen.png|300px]] | |||
|game=''[[Halo: Combat Evolved]]'' {{C|''[[Halo: Combat Evolved Anniversary|Anniversary]]''}} | |||
|devname=<code>d40</code>{{Ref/File|Id=HCEEK|HCEEK|HCEEK\tags\levels\d40\d40.scenario}} | |||
|player=[[Master_Chief_(gameplay)#Halo:_Combat_Evolved|Master Chief]] | |||
|date= [[2552#September 20, 2552|September 22, 2552]] | |||
|place=Inside the crash site of the {{UNSCShip|Pillar of Autumn}} | |||
|objective=Destroy and escape from the ''Pillar of Autumn'' | |||
|partime=00:15:00 {{C|''Master Chief Collection''-only}} | |||
|parscore=18,000 {{C|''Master Chief Collection''-only}} | |||
}} | |||
{{Article quote|Destroy Halo before Halo destroys all life in the galaxy.}} | |||
'''The Maw''' is the tenth and final level in ''[[Halo: Combat Evolved]]''. | |||
The [[John-117|Master Chief]] makes his way through the {{UNSCShip|Pillar of Autumn}}'s wreck in order to detonate the ship's [[Fusion drive|fusion reactors]] and destroy Halo, the [[Flood]], and the [[Covenant Empire|Covenant]] armada, thus preventing the destruction of humans and potentially, all sentient life in the galaxy. Just like the previous two levels, the player has no allies. | |||
== | ==Transcripts== | ||
===...And the Horse You Rode In On=== | |||
[http://www.youtube.com/watch?v=2Bpf96l71GE '''{''Original Cutscene''}'''] | |||
[http://www.youtube.com/watch?v=OUbKN7g9Dyw '''{Anniversary ''Cutscene''}'''] | |||
*[[ | |||
*[[ | ''The view skims low over a large body of water, tinted gold by an oncoming sunrise.'' | ||
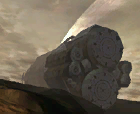
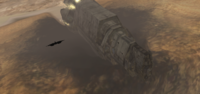
*[[ | ''View slowly pans up as it flies over the sand, revealing a burnt coastline, and a giant gouge where the terrain has been ripped away and the sea has flooded into the newly-formed canyon. At the top of that canyon rises the massive stern of the {{UNSCShip|Pillar of Autumn}}, relatively intact.'' | ||
''View circles around the side and front of her, revealing that her nose is hanging just slightly off a massive cliff; the antennae along the bow have been bent and torn away. The entire bow has been severely burnt; the metal is badly scarred. As the view circles around to reveal the ship's starboard side, a damaged and smoking [[Type-26 Banshee|Banshee]] drifts into view.'' | |||
''Cuts to a view of the ship's exterior through one of the empty [[Bumblebee]] airlocks. The damaged Banshee comes into the frame and veers wildly towards the'' Autumn. | |||
*'''[[Cortana]]''': "This thing is falling apart!" | |||
*'''[[Master Chief Petty Officer]] [[John-117]]''': "It'll hold." | |||
*'''Cortana''': "We're not gonna make it!" | |||
*'''John-117''': "We'll make it." | |||
*'''Cortana''': "Pull up! ''Pull up!''" | |||
''The Banshee drops just before reaching the Bumblebee slip and smashes into the side of the ''Pillar of Autumn'', sending debris and fire hurling out madly.'' | |||
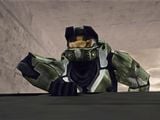
[[File:BansheeCrashCEA.jpg|300px|thumb|Master Chief climbing into a Bumblebee port.]] | |||
*'''Cortana''': "You did that ''on purpose'', didn't you?" | |||
''The Master Chief's hand appears from below and grips the edge of the ship, and he looks around the interior before pulling himself up and onto the ''Pillar of Autumn''.'' | |||
'''{''Gameplay''}''' | |||
== | *'''Cortana''': "We need to get to the bridge. From there, we can use the [[Jacob Keyes|Captain]]'s neural implants to initiate an overload of the ship's fusion engines. The explosion should damage enough systems below it to destroy the [[Installation 04|ring]]." | ||
''As the Master Chief heads for the bridge, he is forced to engage Covenant, Flood, and Sentinels as they battle throughout the corridors. The ''Pillar of Autumn's'' mess hall is occupied by a [[Covenant Special Operations]] team. The Chief kills all enemies present and eventually, he reaches the bridge.'' | |||
*'''Cortana''': "The bridge. We made it. Let's get to work." | |||
''The Master Chief clears out another Covenant Special Operations team guarding the bridge.'' | |||
*'''Cortana''': "I need you to upload me into the control systems. The terminal is located next to the main view screen." | |||
[http://www.youtube.com/watch?v=_imCZ-b1--U '''{''Original Cutscene''}'''] | |||
[http://www.youtube.com/watch?v=QNfE0FRSpD4 '''{Anniversary ''Cutscene''}'''] | |||
[[File:MawCountdownCEA.png|thumb|300px|Cortana starts the countdown as the Chief looks on.]] | |||
''The Master Chief takes Cortana's chip from his helmet and inserts it into the cylindrical terminal near the front of the bridge. Cortana's avatar appears above it. She looks around.'' | |||
*'''Cortana''': "I leave home for a few days, and look what happens. This won't take long." | |||
''She concentrates for a moment, and the main screen flickers to life.'' | |||
<tt>'''SELF-DESTRUCT SEQUENCE INITIATED'''</tt> | |||
<tt>'''''Security protocols met. Begin evac procedures. All secondary and redundant systems shut down effective immediately.'''''</tt> | |||
''A countdown begins from a random starting point between five and twenty minutes.'' | |||
*'''Cortana''': "There. That should give us enough time to make it to a lifeboat and put some distance between ourselves and Halo before the detonation." | |||
''The Master Chief moves to unplug Cortana from the terminal, but stops abruptly when he hears an all-too-familiar voice.'' | |||
*'''[[343 Guilty Spark]] (COM)''': "I'm afraid that's out of the question, really." | |||
'' | *'''Cortana''': "''Oh, hell!''" | ||
'' | *'''343 Guilty Spark (COM)''': "Ridiculous! That you would imbue a warship's AI with such a wealth of knowledge! Weren't you worried it might be captured? Or destroyed?" | ||
'' | ''Cortana concentrates once more.'' | ||
''' | *'''Cortana''': "He's in my data arrays, a local tap!" | ||
'' | ''Cuts to 343 Guilty Spark in the engine room. He is scanning a computer console.'' | ||
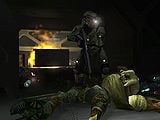
''' | *'''343 Guilty Spark''': "You can't imagine how exciting this is! To have a record of all of our lost time! Human history, is it? Fascinating." | ||
''' | ''343 Guilty Spark flutters around Engineering, as groups of [[Sentinel]]s hover around in the background, and scans another console.'' | ||
''' | [[File:Interfacing.jpg|300px|thumb|343 Guilty Spark collects information from the ''Pillar of Autumn's'' systems.]] | ||
' | *'''343 Guilty Spark:''' "Oh, how I will enjoy every moment of its categorization! And to think that you would destroy this installation, as well as this record... I ''am'' shocked. Almost too shocked for words." | ||
''' | |||
'' | ''Cuts back to the bridge. A tone sounds over the ship's speakers. The countdown timer freezes.'' | ||
''' | <tt>'''SELF-DESTRUCT SEQUENCE ABORTED'''</tt> | ||
'' | <tt>'''''Security protocols restored. Return to duty stations. All systems reset.'''''</tt> | ||
'''Cortana | *'''Cortana''': "He stopped the self-destruct sequence..." | ||
'' | ''The Master Chief surveys the bridge carefully with his [[MA5B assault rifle|Assault Rifle]], never missing a beat.'' | ||
''' | *'''343 Guilty Spark (COM)''': "Why do you continue to fight us, [[Reclaimer]]? You cannot win! Give us the construct, and I will endeavor to make your death relatively painless, and -" | ||
'' | ''He is cut off as another tone sounds.'' | ||
'''Cortana | *'''Cortana''': "At least I still have control over the comm channels." | ||
'' | *'''John-117''': "Where is he?" | ||
'''Cortana | *'''Cortana''': "I'm detecting taps throughout the ship - Sentinels, most likely. As for the [[Monitor]]... He's in Engineering. He must be trying to take the core offline! Even if I could get the countdown restarted... I don't know what to do." | ||
'' | ''Cortana shrugs her arms in desperation.'' | ||
''' | *'''John-117''': "How much firepower would you need to crack one of the engine's shields?" | ||
'''Cortana | *'''Cortana''': "Not much. A well-placed grenade perhaps, but why-" | ||
[[File:GrenadeTossCEA.jpg|300px|thumb|The Chief proposes using explosives to destabilize the reactors.]] | |||
'' | ''Cortana turns to see the Master Chief, who is calmly tossing a [[M9 fragmentation grenade|fragmentation grenade]] up and down. She nods reluctantly.'' | ||
'' | *'''Cortana''': "Okay, I'm coming with you." | ||
'' | ''The Chief reaches for Cortana just as a squad of [[Aggressor Sentinel]]s descend from above and take position along the shattered windows of the bridge.'' | ||
'' | *'''Cortana''': "Chief! Sentinels!" | ||
''' | ''The Sentinels open fire, shattering the main display and dealing a glancing blow to the Chief's shields. The Chief quickly drops behind cover, removes Cortana from the terminal and places her into his helmet, and raises his rifle.'' | ||
''{ | '''{''Gameplay''}''' | ||
' | |||
'' | ''The Chief dispatches the Sentinels and leaves the bridge.'' | ||
'''Cortana | *'''Cortana''': "The ship was heavily damaged when it crashed. Head to the cryo chamber. We should be able to get to the engine room through there." | ||
'' | ''The Chief heads for Engineering, fighting through a mass of Flood, as well as more Covenant and Sentinels. Eventually he reaches a corridor lined with [[stationary shield generator]]s where a Covenant Special Operations team augmented by a [[Mgalekgolo]] pair hold off against waves of Sentinels and later, Flood. After eliminating all combatants, the Chief makes a brief detour to the ship's Armory to stock up on weapons. Inside the Armory, he is ambushed by a group of Flood, including several cloaked Combat Forms (presumably infected [[Stealth Sangheili]]). He defeats these enemies and hurries to Engineering.'' | ||
''' | ===Light Fuse, Run Away=== | ||
*'''Cortana''': "Engine room located. We're here." | |||
'' | ''The Chief enters Engineering, which is crawling with Flood and Sentinels. 343 Guilty Spark is also present.'' | ||
'''Cortana:''' | *'''Cortana''': "Alert! The Monitor has disabled all command access. We can't restart the countdown. The only remaining option is to detonate the ship's fusion reactors. That should do enough damage to destroy Halo. Don't worry; I have access to all of the reactor schematics and procedures. I'll walk you through it. First, we need to pull back the exhaust couplings. That will expose a shaft that leads to the primary fusion drive core." | ||
'' | ''Throughout the firefight, 343 Guilty Spark repeatedly attempts to convince the Chief to spare his Installation:'' | ||
*"You would destroy this installation, as well as this fascinating record?" | |||
*"Do you require medical attention?" | |||
*"Your behavior is not in accordance with established protocols." | |||
*"Oh, how touching." | |||
*"Detaching the fail-safe just now?" | |||
*"Please. Surrender the construct and I will endeavor to make the necessary repairs as quickly as possible." | |||
*"The Flood continue to multiply, Reclaimer!" | |||
*"Why do you continue to ignore your task?" | |||
*"Are you perhaps ill?" | |||
*"Why do you continue to resist us, Reclaimer?" | |||
*"Inconsistent!" | |||
*"Inadequate safeguards." | |||
*"This AI construct possesses far too much data." | |||
*"Weren't you worried it might be compromised?" | |||
*"Unacceptable, Reclaimer!" | |||
*"Not acceptable, Reclaimer. You must surrender the construct, so that we may return to our appointed task." | |||
*"Your behavior necessitates repair and revision." | |||
*"Surrender the construct to me, or I will be forced to take you offline permanently." | |||
'' | ''The Chief opens one of the manifolds.'' | ||
''' | *'''Cortana''': "Good, step one complete! We have a straight shot into the fusion reactor! We need a catalyst explosion to destabilize the magnetic containment field surrounding the fusion cells. Use an explosive. I recommend a grenade or a [[M41 SPNKR|rocket]]. If you run out of explosives, there is an armory station located near the engine room's entrance." | ||
'' | ''The Chief knocks out the first reactor.'' | ||
'''Cortana | *'''Cortana''': "Analyzing. Fusion reactor number one destabilizing. Use explosives on the other three reactors. That should be enough to trigger a wildcat explosion of the engines." | ||
'' | ''The Chief destroys two more reactors, leaving only one left.'' | ||
'''Cortana | *'''Cortana''': "Keep it up! Only one more fusion reactor to go!" | ||
'' | ''The Chief takes out the final reactor.'' | ||
'' | *'''Cortana''': "That did it! The engine's gone critical! Based on the current rate of decay, we should have fifteen minutes to get off the ship; we don't have much time! We should move outside and signal for evac. Accessing schematics... There's a service lift at the top of the engine room! It leads to a [[Class Seven service corridor]] that runs along the ship's dorsal structure. Hurry!" | ||
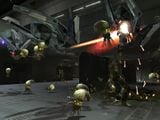
[[File:HCE Zuka Screenshot 6.jpg|thumb|250px|Zuka 'Zamamee and his Unggoy support.]] | |||
''The Chief reaches the elevator. A [[Covenant Special Operations]] team, led by [[Zuka 'Zamamee]], descends to meet him. He defeats the Covenant and starts the long ride up.'' | |||
'''Cortana | *'''Cortana (COM)''': "Cortana to ''[[Echo 419]]'': come in, ''Echo 419''!" | ||
''' | *'''Flight Captain [[Carol Rawley]] (COM)''': "Roger, Cortana. I read you, 5 by 5." | ||
*'''Cortana (COM)''': "The ''Pillar of Autumn''<nowiki>'</nowiki>s engines are going critical, Foe Hammer! Request immediate extraction! Approach the crash site and be ready to pick us up at external access Junction 4C as soon as you get my signal!" | |||
''' | *'''Rawley (COM)''': "Affirmative. ''Echo 419'' going on station." | ||
'' | ''Explosions continue to rock the elevator shaft.'' | ||
''' | *'''Rawley (COM)''': "''Echo 419'' to Cortana. Things are gettin' noisy down there. Everything okay?" | ||
'' | *'''Cortana (COM)''': "Negative, negative! We have a wildcat destabilization of the ship's fusion drive core. The engines must have sustained more damage than we thought!" | ||
''The Chief reaches the top of the elevator.'' | |||
'' | ===Warning: Hitchhikers May Be Escaping Convicts=== | ||
''The Chief enters a [[M12 Warthog|Warthog]] garage.'' | |||
'''Cortana | *'''Cortana''': "Analyzing... We have six/five minutes before the fusion drives detonate. We need to evac, ''now''!" | ||
'' | ''A six-minute countdown (five minutes on Legendary) begins.'' | ||
'''Cortana | *'''Cortana''': "Activating final countdown timer. When it reaches zero, the engines will detonate. The explosion will generate a temperature of almost 100 ''million'' degrees. ''Don't'' be here when it blows." | ||
'' | ''If the Chief leaves the Warthog station on foot:'' | ||
'''Cortana | *'''Cortana''': "We can't make it on foot, we need a vehicle!" | ||
'' | ''If the Chief continues to leave on foot:'' | ||
'''Cortana | *'''Cortana''': "Alert: we need to keep moving! Get back in the Warthog." | ||
'' | ''The Chief drives down the corridor. Flood, Covenant, and Sentinels are fighting all around him. Eventually he nears the site where Foehammer is supposed to extract him. A Spirit flies over and lands.'' | ||
'''Cortana ( | *'''Cortana (COM)''': "Cortana to ''Echo 419''! Request extraction ''now'', on the double!" | ||
''' | *'''Rawley (COM)''': "Affirmative, Cortana. Foe Hammer inbound." | ||
'' | ''The Chief arrives at a wide open platform.'' | ||
''' | *'''Cortana''': "Wait, stop! This is where Foe Hammer is coming to pick us up. Hold position here." | ||
'' | ''If the Chief waits for Rawley:'' | ||
''' | ''The countdown timer freezes. ''Echo 419'' appears around the hull of the ''Pillar of Autumn'', listing badly and flaming at the engines. A pair of [[Type-26 Banshee|Banshees]] close in on the [[D77-TC Pelican|Pelican]].'' | ||
'''Cortana ( | *'''Cortana (COM)''': "Cortana to ''Echo 419''! Two Covenant Banshees are approaching on your six! Evade! Say again, evade!" | ||
'' | ''An explosion lurches the Pelican. The starboard wing dips, ablaze, and Rawley yells into the speaker as she passes under the platform.'' | ||
*'''Rawley (COM)''': "''I'm hit!'' Mayday! Mayday! Airfoil structures have been shot to hell! I can't hold her! I can't hold her!" | |||
'''Cortana:''' | *'''Cortana (COM)''': "''Echo 419''!" | ||
'' | '''''NOTE''': In the Anniversary subtitles, Cortana says, "Echo 419: Destroyed. That was our only way off the ship."'' | ||
''' | ''Rawley continues to yell into the speaker, her words becoming inaudible as the roar of the damaged engines are heard in the background. She loses control of the Pelican and crashes into the ''Autumn's'' hull, showering the air with debris.'' | ||
''' | *'''Cortana''': "She's gone... Calculating alternate escape route." | ||
'' | ''The countdown timer resumes.'' | ||
'''Cortana:''' | *'''Cortana''': "The ship's inventory shows one [[GA-TL1 Longsword|Longsword]] fighter still docked in [[Launch Bay 7]]. If we move ''now'', we can make it!" | ||
'' | ''If the Chief hurries past the platform, Cortana's message is cut short.'' | ||
'' | ''If the Chief enters one of the maintenance tunnels, he will find [[Thirsty Grunt|a lone Covenant soldier]]:'' | ||
''' | *'''Thirsty Grunt''': "Ugh... Good thing that food nipple's waiting for me at the starship, cause man; have I worked up a big - grunty - thirst!" | ||
'' | ''The Chief comes around the final S-curve in the corridor.'' | ||
'' | *'''Cortana''': "Chief, up ahead there's a gap in the trench. At top speed, we ''should'' be able to clear it!" | ||
'' | ''The Chief clears the massive gap, and proceeds to his destination. In Launch Bay 7, Flood and Covenant remnants fight for supremacy. The Longsword fighter is docked at the bay's far end. A barricade forces the Chief to dismount from the Warthog and finish the journey on foot.'' | ||
'' | *'''Cortana''': "That's the ship! ''Move''! We need to get aboard, ''now''!" | ||
''' | [[File:PoADestructionCEA.jpg|thumb|300px|The ''Autumn's'' engines detonate.]] | ||
---- | |||
'' | ''If the timer runs out before the Chief reaches the Longsword:'' | ||
''' | [http://www.youtube.com/watch?v=WsQLPunqvkU '''{''Original Cutscene''}'''] | ||
[http://www.youtube.com/watch?v=e5tDQGiTd8o '''{''Anniversary Cutscene''}'''] | |||
'' | ''Fades to an exterior shot of the ''Autumn'' as it explodes.'' | ||
---- | |||
'' | ''If the Chief makes it to the Longsword:'' | ||
''' | [http://www.youtube.com/watch?v=nl_gByN6zSw '''{''Original Cutscene''}'''] | ||
[http://www.youtube.com/watch?v=RSxFKf7kugQ '''{Anniversary ''Cutscene''}'''] | |||
[[File:AutumnCriticalCEA.png|thumb|300px|The Chief's Longsword speeds away as the ''Autumn's'' engines go critical.]] | |||
'' | ''The Chief, with no weapon in hand, makes a break across the platform for the Longsword, masses of Flood combat forms closing in behind him. He makes it through the open door just before them, and slams the hatch shut.'' | ||
'' | *'''Cortana''': "We're cutting it close!" | ||
'' | ''The Chief sprints for the cockpit. He braces himself against a wall as an explosion occurs, shaking his head. He reaches the cockpit, jumps into the seat, quickly punches a series of buttons, and takes the controls.'' | ||
''' | *'''John-117''': "Here we go." | ||
''The Longsword rises above the platform slowly, turning to face the open end of the bay, and lights its engines, rocketing away from the exploding ship.'' | |||
'' | ''On all difficulties other than Legendary:'' | ||
''' | ''Cuts to an exterior view of the ''Pillar of Autumn'', as it burns and explosions flare all along its length. A horde of Flood stumble slowly towards it, and the Longsword arrows from the starboard side of the ship away into the sky. The view cuts to follow the Longsword, looking back towards the ''Pillar of Autumn'' as the explosions intensify.'' | ||
'' | ---- | ||
''On Legendary difficulty:'' | |||
[http://www.youtube.com/watch?v=Pm2a-xxpou0 '''{''Original Legendary Cutscene''}'''] | |||
[http://www.youtube.com/watch?v=RLz8yIe8zW0 '''{Anniversary ''Legendary Cutscene''}'''] | |||
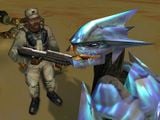
'' | [[File:HCEA Hugging Elite Grope Shock.jpg|300px|thumb|Johnson embraces the [[Hugging Elite]] as the ''Autumn'' explodes.]] | ||
''[[Staff Sergeant]] [[Avery Junior Johnson|Johnson]] struggles with an uncloaked Stealth Sangheili ([[Sangheili Zealot]] in ''Anniversary'') for an assault rifle. A multitude of dead Flood forms surround them, with the ''Pillar of Autumn'' in the background.'' | |||
'' | *'''Staff Sergeant Avery Junior Johnson''': "C'mere you motherf-! I'm gonna... Grrr... ah." | ||
''' | ''They suddenly stop and turn to see the ship exploding in the distance. The Sangheili lets go of the rifle.'' | ||
''' | *'''Johnson''': "Oh, shi..." | ||
'' | ''Johnson turns to the Sangheili (dropping his assault rifle on the ground in ''Anniversary'').'' | ||
*'''Johnson''': "This is it, baby. ''(affectionately)'' ''Hold me''." | |||
*'''[[Hugging Elite]]''': "...mmf." | |||
''The two embrace and the Sangheili additionally places his right hand on Johnson's bottom. In ''Anniversary'', Johnson places his left hand on the Sangheili's bottom, and the Sangheili reacts uncomfortably.'' | |||
---- | |||
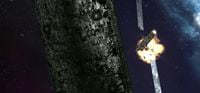
[[File:HaloDestructionCEA.png|thumb|300px|The ''Pillar of Autumn'' explodes. Halo is destroyed.]] | |||
''The Longsword clears the atmosphere, flying away from Halo. The Master Chief stares straight ahead, piloting the fighter as quickly as he can.'' | |||
As | ''As the Longsword sweeps past the view, the distant side of Halo is drowned out in a blinding explosion as the ''Pillar of Autumn's'' engines detonate. A massive shockwave sweeps through the Installation. With its structural integrity compromised, the rotating ringworld begins to fragment. An alarm in the Longsword goes off.'' | ||
<tt>'''ENGINE TEMP CRITICAL'''</tt> | |||
*'''Cortana''': "Shut them down, we'll need them later." | |||
''The Chief flips a few switches. The Longsword's engines shut down, leaving it drifting. Debris from the blast hurtles past it, still glowing.'' | |||
*'''Cortana''': "Fancy a look?" | |||
The | ''The Master Chief rises from his chair and moves to one of the Longsword's windows. Halo has broken into a few dozen large fragments, all of which are slowly spinning away from each other. As the Chief watches, one massive fragment comes swiftly from the far side of the ring and collides with another, closer one, splitting it in half, and the two go spinning off in a giant gout of fire and debris. Silent explosions spread throughout Halo's remains. The ring has been destroyed.'' | ||
*'''John-117''': "Did anyone else make it?" | |||
*'''Cortana''': "Scanning." ''(pause)'' "Just...dust and echoes. We're all that's left." | |||
''The Master Chief shakes his head and moves back to his seat.'' | |||
*'''Cortana''': "We did what we had to do...for [[Earth]]. An [[Fleet of Particular Justice|entire Covenant armada]] obliterated, and the ''Flood''... We had no choice. Halo...it's finished." | |||
*'''John-117''': "No... I think we're just getting started." | |||
''The Chief removes his helmet, but the cockpit's frame blocks the view of his head. The view tracks the Longsword for a few a moments, [[Basis]] looming large in the background, before panning to focus on a large spiral galaxy hanging in the sky, an ornament emblazoned across the heavens.'' | |||
''Fades to black.'' | |||
''[[Halo: Combat Evolved credits|Credits]] roll.'' | |||
''Cut back to the vast reaches of space; a blue light speeds towards the screen. As it closes in, it is revealed to be the Monitor, having somehow survived Halo's destruction. His blue floods the view as the entire screen fades to white.'' | |||
''Game ends.'' | |||
==Achievements== | |||
[[ | The following [[achievement]]s can be unlocked on ''The Maw'' across the [[Xbox 360]] and ''[[Halo: The Master Chief Collection]]'' editions of ''Halo: Combat Evolved Anniversary''. The original [[Xbox]] and [[Halo: Combat Evolved (PC port)|PC]] and [[Halo: Combat Evolved for Macintosh|Macintosh]] releases of ''Halo: Combat Evolved'' did not contain achievement unlocks. | ||
{| class="wikitable" | |||
|- | |||
! scope="col" style="width:135px;text-align:center;" |'''''Halo: Combat Evolved Anniversary'' (Xbox 360)''' | |||
! scope="col" style="width:135px;text-align:center;" |'''''Halo: MCC'' (Xbox One, Xbox Series X|S)''' | |||
! scope="col" style="width:135px;text-align:center;" |'''''Halo: MCC'' (Steam)''' | |||
! scope="col" style="width:175px;height:20px;text-align:center;" |'''Title''' | |||
! scope="col" style="width:350px;height:20px;text-align:center;" |'''Unlock requirement''' | |||
! scope="col" style="width:200px;height:20px;text-align:center;" |'''Games''' | |||
|- | |||
|[[File:HCEA Achievement The Maw.png|center|64px]] | |||
|[[File:HTMCC HCEA Achievement TheMaw.png|center|114px]] | |||
|[[File:HTMCC HCEA Achievement Steam TheMaw.jpg|center|64px]] | |||
|<center>'''[[The Maw (achievement)|The Maw]]'''</center> | |||
|Complete The Maw on any difficulty. | |||
|<center>''[[Halo: Combat Evolved Anniversary]]''<br/>''[[Halo: The Master Chief Collection]]''</center> | |||
|- | |||
|[[File:ACH36.png|center|64px]] | |||
|<center>[[File:HTMCC HCEA Achievement ThisSideUp.png|center|114px]]</center> | |||
|<center>[[File:HTMCC Achievement ThisSideUp Steam.jpg|center|64px]]</center> | |||
|<center>'''[[This Side Up]]'''</center> | |||
|Complete the Warthog ride of The Maw without being forcibly ejected from the vehicle. | |||
|<center>''[[Halo: Combat Evolved Anniversary]]''<br/>''[[Halo: The Master Chief Collection]]''</center> | |||
|- | |||
|[[File:ACH37.png|center|64px]] | |||
|<center>N/A</center> | |||
|<center>N/A</center> | |||
|<center>'''[[Never Tell Me the Odds]]'''</center> | |||
|Complete the Warthog ride on the level "The Maw" on Legendary difficulty with at least a minute remaining on the countdown. | |||
|<center>''[[Halo: Combat Evolved Anniversary]]''</center> | |||
|- | |||
|<center>N/A</center> | |||
|[[File:HTMCC HCEA Achievement AllYouCanEat.png|center|114px]] | |||
|[[File:HTMCC HCEA Achievement Steam AllYouCanEat.jpg|center|64px]] | |||
|<center>'''[[All You Can Eat]]'''</center> | |||
|Beat the par time on The Maw. | |||
|<center>''[[Halo: The Master Chief Collection]]''</center> | |||
|- | |||
|<center>N/A</center> | |||
|[[File:HTMCC HCEA Achievement ConsumptionJunction.png|center|114px]] | |||
|[[File:HTMCC HCEA Achievement Steam ConsumptionJunction.jpg|center|64px]] | |||
|<center>'''[[Consumption Junction]]'''</center> | |||
|Beat the par score on The Maw. | |||
|<center>''[[Halo: The Master Chief Collection]]''</center> | |||
|- | |||
|<center>N/A</center> | |||
|[[File:HTMCC HCEA Achievement KilotonsofFun.png|center|114px]] | |||
|[[File:HTMCC HCEA Achievement Steam KilotonsofFun.jpg|center|64px]] | |||
|<center>'''[[Kilotons of Fun]]'''</center> | |||
|Find the [[Terminal (Halo: Combat Evolved Anniversary)|Terminal]] on The Maw. | |||
|<center>''[[Halo: The Master Chief Collection]]''</center> | |||
|- | |||
|<center>N/A</center> | |||
|[[File:HTMCC HCEA Achievement SkulltakerGruntBirthdayParty.png|center|114px]] | |||
|[[File:HTMCC HCEA Achievement Steam SkulltakerGruntBirthdayParty.jpg|center|64px]] | |||
|<center>'''[[Skulltaker Halo: CE: Grunt Birthday Party]]'''</center> | |||
|Find the [[Halo: Combat Evolved Anniversary skulls#Grunt Birthday Party|Grunt Birthday Party Skull]] on The Maw. | |||
|<center>''[[Halo: The Master Chief Collection]]''</center> | |||
|- | |||
|<center>N/A</center> | |||
|[[File:HTMCC HCEA Achievement T-Rex.png|center|114px]] | |||
|[[File:HTMCC HCEA Achievement Steam T-Rex.jpg|center|64px]] | |||
|<center>'''[[T-Rex]]'''</center> | |||
|Find the hidden Rex sign on The Maw. | |||
|<center>''[[Halo: The Master Chief Collection]]''</center> | |||
|- | |||
|<center>N/A</center> | |||
|[[File:HTMCC HCEA Achievement ThirstyGrunt.png|center|114px]] | |||
|[[File:HTMCC Achievement Thirsty Grunt Steam.jpg|center|64px]] | |||
|<center>'''[[Thirsty Grunt (achievement)|Thirsty Grunt]]'''</center> | |||
|Listen to the Thirsty Grunt talk about his eating habits. | |||
|<center>''[[Halo: The Master Chief Collection]]''</center> | |||
|} | |||
==Production notes== | |||
{{Main|Development of Halo: Combat Evolved}} | |||
''The Maw'' was primarily designed by [[Bungie]] designer [[Tyson Green]]. ''The Maw'' reuses some of the level geometry from the first level ''[[The Pillar of Autumn (Halo: Combat Evolved level)|The Pillar of Autumn]]'', though the ship has noticeably deteriorated after crash-landing on the ring. Early in development, the ship interiors would have been tilted at an angle. However, doing so would have necessitated additional changes to trigger volumes and scripting in the level design, so the ship was ultimately left upright rather than tilted.{{Ref/YouTube|Id=IGN|9ndZbg8Mr-Q|IGN|Halo: Combat Evolved Devs React to Speedrun (Martin O’Donnell, Marcus Lehto)|D=8|M=5|Y=2021}} | |||
The Warthogs in the Warthog Run have modified gameplay traits, resembling the Warthogs from an earlier build of ''Halo: Combat Evolved''. This was the result of designer [[Jaime Griesemer]] rebalancing the Warthog after the level geometry was already completed, which made it impossible for Warthogs to climb the steep ramps. Subsequently, the Warthogs in the Warthog Run were granted higher acceleration and speed to make it possible to complete the run.{{Ref/Reuse|IGN}} | |||
Artist [[Paul Russel]] described the Warthog Run as the "''Pillar of Autumn'' Conundrum."{{Ref/Reuse|IGN}} The ''Pillar of Autumn'' has been established as approximately 1.17 km long. This, however, contradicts this level where the player must drive along a 3.5 km long service corridor that supposedly runs the length of the ship. | |||
Cinematic Artists Steve Abeyta animated John-117 stumbling on the Longsword.{{Ref/Film|Id=Commentary|[[Halo 3 Legendary Edition|''Halo 3'' Legendary Edition]], Halo: Combat Evolved developer commentary}} Art Director [[Marcus Lehto]] animated Installation 04's destruction,{{Ref/Reuse|IGN}} supposedly over the course of one night.{{Ref/Reuse|Commentary}} The scene was recreated during a flashback scene in the ''[[Halo 2]]'' campaign level ''[[The Heretic]]''. | |||
The | The events of the level were later expanded in the novel ''[[Halo: The Flood]]'': | ||
[[ | *The unloaded Assault Rifles and Shotguns in the first armory were referenced in ''Halo: The Flood'', in which the surviving Marine forces returned to the ''Autumn's'' wreckage to recover most of its ordnance. | ||
The | *The [[Special Operations Sangheili]] commanding the squad of [[Special Operations Unggoy]] in Maintenance Elevator 07 would be [[Zuka 'Zamamee]]. 'Zamamee was pursuing John-117 during almost the entire duration that he was on Installation 04. However, depending on the level of difficulty, there can be more than one SpecOps Sangheili in the elevator. Unlike in ''Halo: The Flood'', Zuka 'Zamamee is not manning a {{Pattern|Mamua'uda|Shade}} nor is there one nearby. | ||
The | The events of this level occurs concurrently with the ''[[Halo: Fireteam Raven]]'' level ''[[Last Stand (Halo: Fireteam Raven level)|Last Stand]]'', which takes place near the crash site. John-117 makes a brief cameo on ''Last Stand'', in which his Banshee flew over [[Fireteam Raven]] while being pursued by a {{Pattern|Deutoros|Scarab}}. | ||
==Trivia== | |||
===Glitches=== | |||
*During the cinematic onboard the bridge, when the Sentinel Aggressors fire at John-117, his right arm straightened out to the side unnaturally. This was the result of the character model taking damage when playing a custom animation.{{Ref/Reuse|Commentary}} | |||
*If the player opens the exhaust vent and jump inside it before firing the rocket, the vent will close on the player. The player will take damage and die from the heat. This is easier on co-op, when the second player can fire the rocket. | |||
*During the Warthog escape on co-op, the weight of the second player manning the turret can cause difficulties making jumps on the large ramps, causing the Warthog to flip over backwards in the air. Having the second player in the passenger seat, however, will keep the Warthog balanced. | |||
*If the player continues driving after the pick up point where ''Echo 419'' is shot down by Banshees, Cortana will say her line even if Rawley hasn't crashed yet (this is actually a time-saving strategy, but one won't get a checkpoint). | |||
The | ===Mistakes=== | ||
*The Banshees that attack and follow ''Echo 419'' have open cockpits so they look like no one is piloting them. The Banshees do not actually fire shots that destroy ''Echo 419''. If the player fires at the Banshees, they will not receive any damage and cannot be destroyed until after ''Echo 419'' has passed over the extraction point. | |||
*In ''Halo: The Master Chief Collection'', after completing the level the carnage report will show that 4 Brutes were killed. This is because the engines that the player destroys are actually invisible AI that can only be "killed" by explosives. This is how the game detects that an explosive was used and triggers the resulting explosion. The game doesn't know what to classify the AI as in the carnage report, so Brutes are chosen. This may be due to the fact that Brutes are first in an alphabetical list of enemies, so they are chosen by default. | |||
*The warthog run is far longer than the actual ship, stretching nearly 3 km as opposed to the Autumn's canonical 1.17 km. | |||
*The bridge at External Access Junction 4C has long been a point of contention among Halo fans due to its perceived role of holding the front and back of the ship. | |||
The | ===Easter eggs=== | ||
*The [[Thirsty Grunt]] appears in this level at one of the tunnels close to the Longsword fighter. | |||
*In the level's Warthog Run, there is a room under one of the runways that has the word "[[Rex|REX]]" written in [[human]] blood splatters and bullet holes. | |||
*In ''Halo: Combat Evolved Anniversary'', the [[Terminal (Halo: Combat Evolved Anniversary)#Terminal 10|tenth and final terminal]] can be found in the Cryo Bay's second floor, where Sentinels are fighting a large Flood force. The terminal is a computer screen on the wall, similar to the first terminal. | |||
*The [[Halo: Combat Evolved Anniversary skulls#Grunt Birthday skull|Grunt Birthday Party skull]] in ''Anniversary'' can be found on one of the pipes in the area where ''Echo 419'' was shot down. The pipe is on the side which the player needs to continue on, and is on the right side. The player is required to use the Warthog as a support to jump on to the pipe so they can reach the end of the pipe. | |||
===References=== | |||
*The definition of a "maw" is "the throat, jaws, and gullet of a flesh-eating animal." This is a possible reference to either the Flood or the adage: "Victory from the jaws of defeat." | |||
*In the beginning cutscene, Master Chief crashes his Banshee into the wall and climbs up into the ship. This was referenced in a scene in the ''[[Halo 2]]'' level ''[[The Oracle]]'', where the [[Thel 'Vadam|Arbiter]] crashes a [[Heretic Banshee]] into the wall before climbing it and re-entering the [[Gas Mine]]. | |||
*Part of the opening dialog in which Cortana says "We're not going to make it!" which the Chief replies with "We'll make it" is repeated in the end cutscene of the level ''[[Halo (Halo 3 level)|Halo]]'' in ''[[Halo 3]]''. | |||
*When the player has destroyed the engines, Cortana will say, "it leads to a class '''[[Seven|7]]'''-service corridor that runs along the ship's dorsal structure." | |||
*Foe Hammer responds to Cortana's transmission with "Roger, Cortana. I read you, 5 by 5." Five by Five is one of 25 military responses, indicating that radio communications are the best possible. Five by Five in mathematical terms is 5 x 5 which is 25, and 2+5='''7'''. | |||
*During the elevator ride, just before the Warthog run, Cortana instructs Foe Hammer to pick the Chief up at "External Access Junction 4-C." Considering that C is the third letter of the alphabet, 4C is another reference to '''7'''. | |||
*The final chapter of the level, "Warning: Hitchhikers May Be Escaping Convicts", is referenced in the ''Halo 3'' level ''[[Tsavo Highway]]'' as "Warning: Hitchhikers May Have Jetpacks." It's also referenced by [[Vergil]], who repeats the line as "Warning: Hitchhikers may be escaped convicts" in the ''[[Halo 3: ODST]]'' level ''[[Data Hive]]''. | |||
*The dialogue of Cortana where she warns the player about the gap in the trench starts when the player is exactly [[Seven|700]] meters away from [[Launch Bay 7]]. | |||
*This is the only level that has a time limit in the ''[[Halo]]'' first-person games, although when the Warthog Run was remade in ''Halo 3'', the player will die if they linger for too long in an area. | |||
*What looks like an approaching Flood army in the final cutscene was revealed to be '''seven''' Flood forms in the ''Halo 3'' Legendary Edition DVD cutscene commentary. | |||
===Miscellaneous=== | |||
[[File:FFUUUU ending.jpg|thumb|200px|A second helmet underneath John-117's helmet at the end of the game.]] | |||
*In the cutscene where the Chief takes off his helmet, he actually has a second helmet on underneath, because [[Bungie]] didn't model a face for him. This can only be seen with the proper modding tools required to alter cutscenes. This was also revealed in the ''[[Halo 3]]'' Legendary Edition bonus disc. | |||
*If one skips the bridge cutscene before the Sentinels shatter the main display, the display will not be shattered when gameplay resumes, and will not shatter no matter how long the Sentinels or the player shoots at it. This can actually be quite advantageous as it provides the player with additional cover when fighting the Sentinels. If the Sentinels kill the player, the glass may reappear when they respawn. | |||
*This is the only level where Sangheili Combat Forms will use [[Active Camouflage]]. They will come in from the locked door in the armory, along with several regular Combat Forms. There will sometimes also be several human Combat Forms that have Active Camouflage activated, although there is no known reason for this. Since feral Flood are non-sentient, it is unlikely that they share equipment. The Sangheili Combat Forms are referenced as "floodcombat elite stealth unarmed" in the code, and can be seen in HMT, and with the default tagset of the Halo Editing Kit, and states that these are likely infected Stealth Sangheili. | |||
*When Halo explodes, it sometimes makes the same gurgling noise made by Flood Combat Forms. | |||
*Apart from the Legendary ending, the only way one can actually see the ''Pillar of Autumn'' explode is to let the timer run down to zero. A cutscene will show it exploding. | |||
*Aggressor Sentinels will start coming through Bumblebee airlocks if the player hangs around the airlocks long enough at the beginning of the level. | |||
==Gallery== | |||
===Halo: Combat Evolved=== | |||
<gallery> | |||
File:HCE Menu 10 The Maw.png|Preview of the level in ''Halo: Combat Evolved'' menu. | |||
File:crashlanding.jpg|John-117 climbing into a Bumblebee port. | |||
File:grenadetoss.jpg|John-117 holding a fragmentation grenade. | |||
File:Floodandcover.jpg|John-117 fighting his way through the wreckage. | |||
File:HCE TheMaw EngineRoomChaos.jpg|Aggressor Sentinels battling the Flood in Cryo B. | |||
File:Lightfuseandcrouch.jpg|John-117 destroys one of the fusion cells. | |||
File:Catch.jpg|A SpecOps Sangheili throws a grenade at the Flood. | |||
File:Landing Warthog.jpg|The Warthog speeds down one of the ramps during John's escape. | |||
File:Ship20.jpg|Echo 419 gets shot down by a pair of [[Banshees]]. | |||
File:HaloCE-Maw-PoA-Critical.png|John-117 flies a Longsword away from the ''Autumn''. | |||
File:HCE Legendary Ending 1.jpg|[[Avery Junior Johnson|Johnson]] and the [[Hugging Elite]]. | |||
File:HCE-AlphaHalo-Destruction-screen.jpg|Installation 04 is destroyed. | |||
</gallery> | |||
===Halo: Combat Evolved Anniversary=== | |||
<gallery> | |||
File:HCEA_TheMaw_Hangar_Concept.jpg|Concept art for the Longsword hangar bay. | |||
File:HCEA_TheMaw_Pillars_Concept.jpg|Concept art for the various ramps and pillars in the Warthog run. | |||
File:HTMCC HCEA Achievement DearDiary.png|Another concept art of the crashed ship. | |||
File:CEAJC.jpg|John-117 and Cortana in the bridge. | |||
File:HCEA-Concept-Maw-WarthogRun.jpg|Concept art of the Warthog Run. | |||
File:HCEA LegendaryEnding.jpg|Johnson prepares to hug the Zealot in the Legendary ending. | |||
</gallery> | |||
==Sources== | |||
{{Ref/Sources}} | |||
{{level}} | {{Succession box | before = ''[[Keyes (level)|Keyes]]'' <br />| title = [[Halo: Combat Evolved#Campaign|''Halo CE'' Campaign Missions]] | years = '''''The Maw''''' |after = ''[[Halo: Combat Evolved Credits|Halo CE Credits]]''<br>''[[The Heretic]]'' {{C|''[[Halo: The Master Chief Collection|MCC]]''}} }} | ||
{{Levels|H1}} | |||
Latest revision as of 05:23, March 13, 2024
|
Prev: |
|
|
Concurrent: |
Last Stand |
|
Next: |
|
| The Maw | |
|---|---|

| |
|
Game: |
|
|
Map file name (?): |
|
|
Player: |
|
|
Date: |
|
|
Location: |
Inside the crash site of the UNSC Pillar of Autumn |
|
Objective(s): |
Destroy and escape from the Pillar of Autumn |
|
Par Time: |
00:15:00 (Master Chief Collection-only) |
|
Par Score: |
18,000 (Master Chief Collection-only) |
 |
Halopedia has a walkthrough guide for this level; see The Maw/Walkthrough. |
| “ | Destroy Halo before Halo destroys all life in the galaxy. | ” |
The Maw is the tenth and final level in Halo: Combat Evolved.
The Master Chief makes his way through the UNSC Pillar of Autumn's wreck in order to detonate the ship's fusion reactors and destroy Halo, the Flood, and the Covenant armada, thus preventing the destruction of humans and potentially, all sentient life in the galaxy. Just like the previous two levels, the player has no allies.
Transcripts[edit]
...And the Horse You Rode In On[edit]
{Original Cutscene} {Anniversary Cutscene}
The view skims low over a large body of water, tinted gold by an oncoming sunrise.
View slowly pans up as it flies over the sand, revealing a burnt coastline, and a giant gouge where the terrain has been ripped away and the sea has flooded into the newly-formed canyon. At the top of that canyon rises the massive stern of the UNSC Pillar of Autumn, relatively intact.
View circles around the side and front of her, revealing that her nose is hanging just slightly off a massive cliff; the antennae along the bow have been bent and torn away. The entire bow has been severely burnt; the metal is badly scarred. As the view circles around to reveal the ship's starboard side, a damaged and smoking Banshee drifts into view.
Cuts to a view of the ship's exterior through one of the empty Bumblebee airlocks. The damaged Banshee comes into the frame and veers wildly towards the Autumn.
- Cortana: "This thing is falling apart!"
- Master Chief Petty Officer John-117: "It'll hold."
- Cortana: "We're not gonna make it!"
- John-117: "We'll make it."
- Cortana: "Pull up! Pull up!"
The Banshee drops just before reaching the Bumblebee slip and smashes into the side of the Pillar of Autumn, sending debris and fire hurling out madly.

- Cortana: "You did that on purpose, didn't you?"
The Master Chief's hand appears from below and grips the edge of the ship, and he looks around the interior before pulling himself up and onto the Pillar of Autumn.
{Gameplay}
- Cortana: "We need to get to the bridge. From there, we can use the Captain's neural implants to initiate an overload of the ship's fusion engines. The explosion should damage enough systems below it to destroy the ring."
As the Master Chief heads for the bridge, he is forced to engage Covenant, Flood, and Sentinels as they battle throughout the corridors. The Pillar of Autumn's mess hall is occupied by a Covenant Special Operations team. The Chief kills all enemies present and eventually, he reaches the bridge.
- Cortana: "The bridge. We made it. Let's get to work."
The Master Chief clears out another Covenant Special Operations team guarding the bridge.
- Cortana: "I need you to upload me into the control systems. The terminal is located next to the main view screen."
{Original Cutscene} {Anniversary Cutscene}

The Master Chief takes Cortana's chip from his helmet and inserts it into the cylindrical terminal near the front of the bridge. Cortana's avatar appears above it. She looks around.
- Cortana: "I leave home for a few days, and look what happens. This won't take long."
She concentrates for a moment, and the main screen flickers to life.
SELF-DESTRUCT SEQUENCE INITIATED
Security protocols met. Begin evac procedures. All secondary and redundant systems shut down effective immediately.
A countdown begins from a random starting point between five and twenty minutes.
- Cortana: "There. That should give us enough time to make it to a lifeboat and put some distance between ourselves and Halo before the detonation."
The Master Chief moves to unplug Cortana from the terminal, but stops abruptly when he hears an all-too-familiar voice.
- 343 Guilty Spark (COM): "I'm afraid that's out of the question, really."
- Cortana: "Oh, hell!"
- 343 Guilty Spark (COM): "Ridiculous! That you would imbue a warship's AI with such a wealth of knowledge! Weren't you worried it might be captured? Or destroyed?"
Cortana concentrates once more.
- Cortana: "He's in my data arrays, a local tap!"
Cuts to 343 Guilty Spark in the engine room. He is scanning a computer console.
- 343 Guilty Spark: "You can't imagine how exciting this is! To have a record of all of our lost time! Human history, is it? Fascinating."
343 Guilty Spark flutters around Engineering, as groups of Sentinels hover around in the background, and scans another console.

- 343 Guilty Spark: "Oh, how I will enjoy every moment of its categorization! And to think that you would destroy this installation, as well as this record... I am shocked. Almost too shocked for words."
Cuts back to the bridge. A tone sounds over the ship's speakers. The countdown timer freezes.
SELF-DESTRUCT SEQUENCE ABORTED
Security protocols restored. Return to duty stations. All systems reset.
- Cortana: "He stopped the self-destruct sequence..."
The Master Chief surveys the bridge carefully with his Assault Rifle, never missing a beat.
- 343 Guilty Spark (COM): "Why do you continue to fight us, Reclaimer? You cannot win! Give us the construct, and I will endeavor to make your death relatively painless, and -"
He is cut off as another tone sounds.
- Cortana: "At least I still have control over the comm channels."
- John-117: "Where is he?"
- Cortana: "I'm detecting taps throughout the ship - Sentinels, most likely. As for the Monitor... He's in Engineering. He must be trying to take the core offline! Even if I could get the countdown restarted... I don't know what to do."
Cortana shrugs her arms in desperation.
- John-117: "How much firepower would you need to crack one of the engine's shields?"
- Cortana: "Not much. A well-placed grenade perhaps, but why-"

Cortana turns to see the Master Chief, who is calmly tossing a fragmentation grenade up and down. She nods reluctantly.
- Cortana: "Okay, I'm coming with you."
The Chief reaches for Cortana just as a squad of Aggressor Sentinels descend from above and take position along the shattered windows of the bridge.
- Cortana: "Chief! Sentinels!"
The Sentinels open fire, shattering the main display and dealing a glancing blow to the Chief's shields. The Chief quickly drops behind cover, removes Cortana from the terminal and places her into his helmet, and raises his rifle.
{Gameplay}
The Chief dispatches the Sentinels and leaves the bridge.
- Cortana: "The ship was heavily damaged when it crashed. Head to the cryo chamber. We should be able to get to the engine room through there."
The Chief heads for Engineering, fighting through a mass of Flood, as well as more Covenant and Sentinels. Eventually he reaches a corridor lined with stationary shield generators where a Covenant Special Operations team augmented by a Mgalekgolo pair hold off against waves of Sentinels and later, Flood. After eliminating all combatants, the Chief makes a brief detour to the ship's Armory to stock up on weapons. Inside the Armory, he is ambushed by a group of Flood, including several cloaked Combat Forms (presumably infected Stealth Sangheili). He defeats these enemies and hurries to Engineering.
Light Fuse, Run Away[edit]
- Cortana: "Engine room located. We're here."
The Chief enters Engineering, which is crawling with Flood and Sentinels. 343 Guilty Spark is also present.
- Cortana: "Alert! The Monitor has disabled all command access. We can't restart the countdown. The only remaining option is to detonate the ship's fusion reactors. That should do enough damage to destroy Halo. Don't worry; I have access to all of the reactor schematics and procedures. I'll walk you through it. First, we need to pull back the exhaust couplings. That will expose a shaft that leads to the primary fusion drive core."
Throughout the firefight, 343 Guilty Spark repeatedly attempts to convince the Chief to spare his Installation:
- "You would destroy this installation, as well as this fascinating record?"
- "Do you require medical attention?"
- "Your behavior is not in accordance with established protocols."
- "Oh, how touching."
- "Detaching the fail-safe just now?"
- "Please. Surrender the construct and I will endeavor to make the necessary repairs as quickly as possible."
- "The Flood continue to multiply, Reclaimer!"
- "Why do you continue to ignore your task?"
- "Are you perhaps ill?"
- "Why do you continue to resist us, Reclaimer?"
- "Inconsistent!"
- "Inadequate safeguards."
- "This AI construct possesses far too much data."
- "Weren't you worried it might be compromised?"
- "Unacceptable, Reclaimer!"
- "Not acceptable, Reclaimer. You must surrender the construct, so that we may return to our appointed task."
- "Your behavior necessitates repair and revision."
- "Surrender the construct to me, or I will be forced to take you offline permanently."
The Chief opens one of the manifolds.
- Cortana: "Good, step one complete! We have a straight shot into the fusion reactor! We need a catalyst explosion to destabilize the magnetic containment field surrounding the fusion cells. Use an explosive. I recommend a grenade or a rocket. If you run out of explosives, there is an armory station located near the engine room's entrance."
The Chief knocks out the first reactor.
- Cortana: "Analyzing. Fusion reactor number one destabilizing. Use explosives on the other three reactors. That should be enough to trigger a wildcat explosion of the engines."
The Chief destroys two more reactors, leaving only one left.
- Cortana: "Keep it up! Only one more fusion reactor to go!"
The Chief takes out the final reactor.
- Cortana: "That did it! The engine's gone critical! Based on the current rate of decay, we should have fifteen minutes to get off the ship; we don't have much time! We should move outside and signal for evac. Accessing schematics... There's a service lift at the top of the engine room! It leads to a Class Seven service corridor that runs along the ship's dorsal structure. Hurry!"

The Chief reaches the elevator. A Covenant Special Operations team, led by Zuka 'Zamamee, descends to meet him. He defeats the Covenant and starts the long ride up.
- Cortana (COM): "Cortana to Echo 419: come in, Echo 419!"
- Flight Captain Carol Rawley (COM): "Roger, Cortana. I read you, 5 by 5."
- Cortana (COM): "The Pillar of Autumn's engines are going critical, Foe Hammer! Request immediate extraction! Approach the crash site and be ready to pick us up at external access Junction 4C as soon as you get my signal!"
- Rawley (COM): "Affirmative. Echo 419 going on station."
Explosions continue to rock the elevator shaft.
- Rawley (COM): "Echo 419 to Cortana. Things are gettin' noisy down there. Everything okay?"
- Cortana (COM): "Negative, negative! We have a wildcat destabilization of the ship's fusion drive core. The engines must have sustained more damage than we thought!"
The Chief reaches the top of the elevator.
Warning: Hitchhikers May Be Escaping Convicts[edit]
The Chief enters a Warthog garage.
- Cortana: "Analyzing... We have six/five minutes before the fusion drives detonate. We need to evac, now!"
A six-minute countdown (five minutes on Legendary) begins.
- Cortana: "Activating final countdown timer. When it reaches zero, the engines will detonate. The explosion will generate a temperature of almost 100 million degrees. Don't be here when it blows."
If the Chief leaves the Warthog station on foot:
- Cortana: "We can't make it on foot, we need a vehicle!"
If the Chief continues to leave on foot:
- Cortana: "Alert: we need to keep moving! Get back in the Warthog."
The Chief drives down the corridor. Flood, Covenant, and Sentinels are fighting all around him. Eventually he nears the site where Foehammer is supposed to extract him. A Spirit flies over and lands.
- Cortana (COM): "Cortana to Echo 419! Request extraction now, on the double!"
- Rawley (COM): "Affirmative, Cortana. Foe Hammer inbound."
The Chief arrives at a wide open platform.
- Cortana: "Wait, stop! This is where Foe Hammer is coming to pick us up. Hold position here."
If the Chief waits for Rawley:
The countdown timer freezes. Echo 419 appears around the hull of the Pillar of Autumn, listing badly and flaming at the engines. A pair of Banshees close in on the Pelican.
- Cortana (COM): "Cortana to Echo 419! Two Covenant Banshees are approaching on your six! Evade! Say again, evade!"
An explosion lurches the Pelican. The starboard wing dips, ablaze, and Rawley yells into the speaker as she passes under the platform.
- Rawley (COM): "I'm hit! Mayday! Mayday! Airfoil structures have been shot to hell! I can't hold her! I can't hold her!"
- Cortana (COM): "Echo 419!"
NOTE: In the Anniversary subtitles, Cortana says, "Echo 419: Destroyed. That was our only way off the ship."
Rawley continues to yell into the speaker, her words becoming inaudible as the roar of the damaged engines are heard in the background. She loses control of the Pelican and crashes into the Autumn's hull, showering the air with debris.
- Cortana: "She's gone... Calculating alternate escape route."
The countdown timer resumes.
- Cortana: "The ship's inventory shows one Longsword fighter still docked in Launch Bay 7. If we move now, we can make it!"
If the Chief hurries past the platform, Cortana's message is cut short.
If the Chief enters one of the maintenance tunnels, he will find a lone Covenant soldier:
- Thirsty Grunt: "Ugh... Good thing that food nipple's waiting for me at the starship, cause man; have I worked up a big - grunty - thirst!"
The Chief comes around the final S-curve in the corridor.
- Cortana: "Chief, up ahead there's a gap in the trench. At top speed, we should be able to clear it!"
The Chief clears the massive gap, and proceeds to his destination. In Launch Bay 7, Flood and Covenant remnants fight for supremacy. The Longsword fighter is docked at the bay's far end. A barricade forces the Chief to dismount from the Warthog and finish the journey on foot.
- Cortana: "That's the ship! Move! We need to get aboard, now!"

If the timer runs out before the Chief reaches the Longsword:
{Original Cutscene} {Anniversary Cutscene}
Fades to an exterior shot of the Autumn as it explodes.
If the Chief makes it to the Longsword:
{Original Cutscene} {Anniversary Cutscene}

The Chief, with no weapon in hand, makes a break across the platform for the Longsword, masses of Flood combat forms closing in behind him. He makes it through the open door just before them, and slams the hatch shut.
- Cortana: "We're cutting it close!"
The Chief sprints for the cockpit. He braces himself against a wall as an explosion occurs, shaking his head. He reaches the cockpit, jumps into the seat, quickly punches a series of buttons, and takes the controls.
- John-117: "Here we go."
The Longsword rises above the platform slowly, turning to face the open end of the bay, and lights its engines, rocketing away from the exploding ship.
On all difficulties other than Legendary:
Cuts to an exterior view of the Pillar of Autumn, as it burns and explosions flare all along its length. A horde of Flood stumble slowly towards it, and the Longsword arrows from the starboard side of the ship away into the sky. The view cuts to follow the Longsword, looking back towards the Pillar of Autumn as the explosions intensify.
On Legendary difficulty:
{Original Legendary Cutscene} {Anniversary Legendary Cutscene}

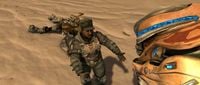
Staff Sergeant Johnson struggles with an uncloaked Stealth Sangheili (Sangheili Zealot in Anniversary) for an assault rifle. A multitude of dead Flood forms surround them, with the Pillar of Autumn in the background.
- Staff Sergeant Avery Junior Johnson: "C'mere you motherf-! I'm gonna... Grrr... ah."
They suddenly stop and turn to see the ship exploding in the distance. The Sangheili lets go of the rifle.
- Johnson: "Oh, shi..."
Johnson turns to the Sangheili (dropping his assault rifle on the ground in Anniversary).
- Johnson: "This is it, baby. (affectionately) Hold me."
- Hugging Elite: "...mmf."
The two embrace and the Sangheili additionally places his right hand on Johnson's bottom. In Anniversary, Johnson places his left hand on the Sangheili's bottom, and the Sangheili reacts uncomfortably.

The Longsword clears the atmosphere, flying away from Halo. The Master Chief stares straight ahead, piloting the fighter as quickly as he can.
As the Longsword sweeps past the view, the distant side of Halo is drowned out in a blinding explosion as the Pillar of Autumn's engines detonate. A massive shockwave sweeps through the Installation. With its structural integrity compromised, the rotating ringworld begins to fragment. An alarm in the Longsword goes off.
ENGINE TEMP CRITICAL
- Cortana: "Shut them down, we'll need them later."
The Chief flips a few switches. The Longsword's engines shut down, leaving it drifting. Debris from the blast hurtles past it, still glowing.
- Cortana: "Fancy a look?"
The Master Chief rises from his chair and moves to one of the Longsword's windows. Halo has broken into a few dozen large fragments, all of which are slowly spinning away from each other. As the Chief watches, one massive fragment comes swiftly from the far side of the ring and collides with another, closer one, splitting it in half, and the two go spinning off in a giant gout of fire and debris. Silent explosions spread throughout Halo's remains. The ring has been destroyed.
- John-117: "Did anyone else make it?"
- Cortana: "Scanning." (pause) "Just...dust and echoes. We're all that's left."
The Master Chief shakes his head and moves back to his seat.
- Cortana: "We did what we had to do...for Earth. An entire Covenant armada obliterated, and the Flood... We had no choice. Halo...it's finished."
- John-117: "No... I think we're just getting started."
The Chief removes his helmet, but the cockpit's frame blocks the view of his head. The view tracks the Longsword for a few a moments, Basis looming large in the background, before panning to focus on a large spiral galaxy hanging in the sky, an ornament emblazoned across the heavens.
Fades to black.
Credits roll.
Cut back to the vast reaches of space; a blue light speeds towards the screen. As it closes in, it is revealed to be the Monitor, having somehow survived Halo's destruction. His blue floods the view as the entire screen fades to white.
Game ends.
Achievements[edit]
The following achievements can be unlocked on The Maw across the Xbox 360 and Halo: The Master Chief Collection editions of Halo: Combat Evolved Anniversary. The original Xbox and PC and Macintosh releases of Halo: Combat Evolved did not contain achievement unlocks.
| Halo: Combat Evolved Anniversary (Xbox 360) | Halo: MCC (Xbox One, Xbox Series X|S) | Halo: MCC (Steam) | Title | Unlock requirement | Games |
|---|---|---|---|---|---|
 |
 |
 |
Complete The Maw on any difficulty. | Halo: The Master Chief Collection | |
 |
 |
 |
Complete the Warthog ride of The Maw without being forcibly ejected from the vehicle. | Halo: The Master Chief Collection | |
 |
Complete the Warthog ride on the level "The Maw" on Legendary difficulty with at least a minute remaining on the countdown. | ||||
 |
 |
Beat the par time on The Maw. | |||
 |
 |
Beat the par score on The Maw. | |||
 |
 |
Find the Terminal on The Maw. | |||
 |
 |
Find the Grunt Birthday Party Skull on The Maw. | |||
 |
 |
Find the hidden Rex sign on The Maw. | |||
 |
 |
Listen to the Thirsty Grunt talk about his eating habits. |
Production notes[edit]
- Main article: Development of Halo: Combat Evolved
The Maw was primarily designed by Bungie designer Tyson Green. The Maw reuses some of the level geometry from the first level The Pillar of Autumn, though the ship has noticeably deteriorated after crash-landing on the ring. Early in development, the ship interiors would have been tilted at an angle. However, doing so would have necessitated additional changes to trigger volumes and scripting in the level design, so the ship was ultimately left upright rather than tilted.[2]
The Warthogs in the Warthog Run have modified gameplay traits, resembling the Warthogs from an earlier build of Halo: Combat Evolved. This was the result of designer Jaime Griesemer rebalancing the Warthog after the level geometry was already completed, which made it impossible for Warthogs to climb the steep ramps. Subsequently, the Warthogs in the Warthog Run were granted higher acceleration and speed to make it possible to complete the run.[2]
Artist Paul Russel described the Warthog Run as the "Pillar of Autumn Conundrum."[2] The Pillar of Autumn has been established as approximately 1.17 km long. This, however, contradicts this level where the player must drive along a 3.5 km long service corridor that supposedly runs the length of the ship.
Cinematic Artists Steve Abeyta animated John-117 stumbling on the Longsword.[3] Art Director Marcus Lehto animated Installation 04's destruction,[2] supposedly over the course of one night.[3] The scene was recreated during a flashback scene in the Halo 2 campaign level The Heretic.
The events of the level were later expanded in the novel Halo: The Flood:
- The unloaded Assault Rifles and Shotguns in the first armory were referenced in Halo: The Flood, in which the surviving Marine forces returned to the Autumn's wreckage to recover most of its ordnance.
- The Special Operations Sangheili commanding the squad of Special Operations Unggoy in Maintenance Elevator 07 would be Zuka 'Zamamee. 'Zamamee was pursuing John-117 during almost the entire duration that he was on Installation 04. However, depending on the level of difficulty, there can be more than one SpecOps Sangheili in the elevator. Unlike in Halo: The Flood, Zuka 'Zamamee is not manning a Mamua'uda-pattern Shade nor is there one nearby.
The events of this level occurs concurrently with the Halo: Fireteam Raven level Last Stand, which takes place near the crash site. John-117 makes a brief cameo on Last Stand, in which his Banshee flew over Fireteam Raven while being pursued by a Deutoros-pattern Scarab.
Trivia[edit]
Glitches[edit]
- During the cinematic onboard the bridge, when the Sentinel Aggressors fire at John-117, his right arm straightened out to the side unnaturally. This was the result of the character model taking damage when playing a custom animation.[3]
- If the player opens the exhaust vent and jump inside it before firing the rocket, the vent will close on the player. The player will take damage and die from the heat. This is easier on co-op, when the second player can fire the rocket.
- During the Warthog escape on co-op, the weight of the second player manning the turret can cause difficulties making jumps on the large ramps, causing the Warthog to flip over backwards in the air. Having the second player in the passenger seat, however, will keep the Warthog balanced.
- If the player continues driving after the pick up point where Echo 419 is shot down by Banshees, Cortana will say her line even if Rawley hasn't crashed yet (this is actually a time-saving strategy, but one won't get a checkpoint).
Mistakes[edit]
- The Banshees that attack and follow Echo 419 have open cockpits so they look like no one is piloting them. The Banshees do not actually fire shots that destroy Echo 419. If the player fires at the Banshees, they will not receive any damage and cannot be destroyed until after Echo 419 has passed over the extraction point.
- In Halo: The Master Chief Collection, after completing the level the carnage report will show that 4 Brutes were killed. This is because the engines that the player destroys are actually invisible AI that can only be "killed" by explosives. This is how the game detects that an explosive was used and triggers the resulting explosion. The game doesn't know what to classify the AI as in the carnage report, so Brutes are chosen. This may be due to the fact that Brutes are first in an alphabetical list of enemies, so they are chosen by default.
- The warthog run is far longer than the actual ship, stretching nearly 3 km as opposed to the Autumn's canonical 1.17 km.
- The bridge at External Access Junction 4C has long been a point of contention among Halo fans due to its perceived role of holding the front and back of the ship.
Easter eggs[edit]
- The Thirsty Grunt appears in this level at one of the tunnels close to the Longsword fighter.
- In the level's Warthog Run, there is a room under one of the runways that has the word "REX" written in human blood splatters and bullet holes.
- In Halo: Combat Evolved Anniversary, the tenth and final terminal can be found in the Cryo Bay's second floor, where Sentinels are fighting a large Flood force. The terminal is a computer screen on the wall, similar to the first terminal.
- The Grunt Birthday Party skull in Anniversary can be found on one of the pipes in the area where Echo 419 was shot down. The pipe is on the side which the player needs to continue on, and is on the right side. The player is required to use the Warthog as a support to jump on to the pipe so they can reach the end of the pipe.
References[edit]
- The definition of a "maw" is "the throat, jaws, and gullet of a flesh-eating animal." This is a possible reference to either the Flood or the adage: "Victory from the jaws of defeat."
- In the beginning cutscene, Master Chief crashes his Banshee into the wall and climbs up into the ship. This was referenced in a scene in the Halo 2 level The Oracle, where the Arbiter crashes a Heretic Banshee into the wall before climbing it and re-entering the Gas Mine.
- Part of the opening dialog in which Cortana says "We're not going to make it!" which the Chief replies with "We'll make it" is repeated in the end cutscene of the level Halo in Halo 3.
- When the player has destroyed the engines, Cortana will say, "it leads to a class 7-service corridor that runs along the ship's dorsal structure."
- Foe Hammer responds to Cortana's transmission with "Roger, Cortana. I read you, 5 by 5." Five by Five is one of 25 military responses, indicating that radio communications are the best possible. Five by Five in mathematical terms is 5 x 5 which is 25, and 2+5=7.
- During the elevator ride, just before the Warthog run, Cortana instructs Foe Hammer to pick the Chief up at "External Access Junction 4-C." Considering that C is the third letter of the alphabet, 4C is another reference to 7.
- The final chapter of the level, "Warning: Hitchhikers May Be Escaping Convicts", is referenced in the Halo 3 level Tsavo Highway as "Warning: Hitchhikers May Have Jetpacks." It's also referenced by Vergil, who repeats the line as "Warning: Hitchhikers may be escaped convicts" in the Halo 3: ODST level Data Hive.
- The dialogue of Cortana where she warns the player about the gap in the trench starts when the player is exactly 700 meters away from Launch Bay 7.
- This is the only level that has a time limit in the Halo first-person games, although when the Warthog Run was remade in Halo 3, the player will die if they linger for too long in an area.
- What looks like an approaching Flood army in the final cutscene was revealed to be seven Flood forms in the Halo 3 Legendary Edition DVD cutscene commentary.
Miscellaneous[edit]

- In the cutscene where the Chief takes off his helmet, he actually has a second helmet on underneath, because Bungie didn't model a face for him. This can only be seen with the proper modding tools required to alter cutscenes. This was also revealed in the Halo 3 Legendary Edition bonus disc.
- If one skips the bridge cutscene before the Sentinels shatter the main display, the display will not be shattered when gameplay resumes, and will not shatter no matter how long the Sentinels or the player shoots at it. This can actually be quite advantageous as it provides the player with additional cover when fighting the Sentinels. If the Sentinels kill the player, the glass may reappear when they respawn.
- This is the only level where Sangheili Combat Forms will use Active Camouflage. They will come in from the locked door in the armory, along with several regular Combat Forms. There will sometimes also be several human Combat Forms that have Active Camouflage activated, although there is no known reason for this. Since feral Flood are non-sentient, it is unlikely that they share equipment. The Sangheili Combat Forms are referenced as "floodcombat elite stealth unarmed" in the code, and can be seen in HMT, and with the default tagset of the Halo Editing Kit, and states that these are likely infected Stealth Sangheili.
- When Halo explodes, it sometimes makes the same gurgling noise made by Flood Combat Forms.
- Apart from the Legendary ending, the only way one can actually see the Pillar of Autumn explode is to let the timer run down to zero. A cutscene will show it exploding.
- Aggressor Sentinels will start coming through Bumblebee airlocks if the player hangs around the airlocks long enough at the beginning of the level.
Gallery[edit]
Halo: Combat Evolved[edit]
Preview of the level in Halo: Combat Evolved menu.
John-117 climbing into a Bumblebee port.

John-117 holding a fragmentation grenade.
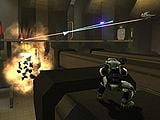
John-117 fighting his way through the wreckage.
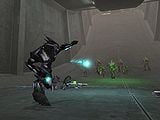
Aggressor Sentinels battling the Flood in Cryo B.
John-117 destroys one of the fusion cells.
A SpecOps Sangheili throws a grenade at the Flood.
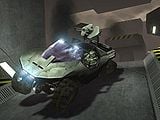
The Warthog speeds down one of the ramps during John's escape.
Echo 419 gets shot down by a pair of Banshees.
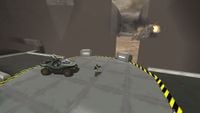
John-117 flies a Longsword away from the Autumn.
Johnson and the Hugging Elite.
Installation 04 is destroyed.


Halo: Combat Evolved Anniversary[edit]
Concept art for the Longsword hangar bay.
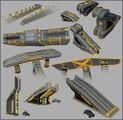
Concept art for the various ramps and pillars in the Warthog run.
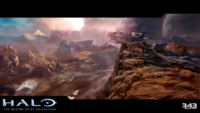
Another concept art of the crashed ship.
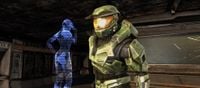
John-117 and Cortana in the bridge.
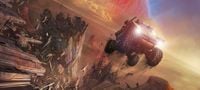
Concept art of the Warthog Run.
Johnson prepares to hug the Zealot in the Legendary ending.


Sources[edit]
- ^ Halo: Combat Evolved Editing Kit, game file
HCEEK\tags\levels\d40\d40.scenario - ^ a b c d YouTube - IGN, Halo: Combat Evolved Devs React to Speedrun (Martin O’Donnell, Marcus Lehto) (Retrieved on May 8, 2021)
- ^ a b c Halo 3 Legendary Edition, Halo: Combat Evolved developer commentary
| Preceded by Keyes |
Halo CE Campaign Missions The Maw |
Succeeded by Halo CE Credits The Heretic (MCC) |
| |||||||||||||||||||||||


