H3ODST:Tayari Plaza
From Halopedia, the Halo wiki
|
Concurrent: |
|
| Tayari Plaza | |
|---|---|

| |
|
Game: |
|
|
File name (?): |
|
|
Player: |
|
|
Date: |
October 20, 2552, 1606 hours |
|
Location: |
|
|
Objective(s): |
Get to Dare's crash site before the Covenant does. |
|
Par Time: |
00:03:00 (Master Chief Collection) |
|
Par Score: |
8,000 (Master Chief Collection) |
 |
Halopedia has a walkthrough guide for this level; see H3ODST:Tayari Plaza/Walkthrough. |
| “ | Beat the Covenant to Dare's crash site. | ” |
Tayari Plaza is a Halo 3: ODST campaign level. It is the first level to be played from Buck's point of view, and also the first flashback level in the game.
Completing this level on Normal or above unlocks the Edward Buck character for Firefight mode.
The Firefight level Crater is based on the end of this level.
Summary[edit]
Directly after the drop, with the aftereffects of the in-atmosphere Slipspace rupture washing over the city, Buck survives a rough landing and moves toward Dare's crash site in Tayari Plaza through hordes of Covenant. Scattered Marines provide limited assistance. When he arrives, Dare is nowhere to be found. Instead, Buck is confronted by a Covenant Engineer holding the charred remains of her helmet. Romeo appears and kills the creature, and the resulting explosion propels the helmet into a nearby building for the Rookie to eventually find. Unsure of Dare's fate, Buck and Romeo decide to scrap the mission, find their squad, and get out of the city.
Transcript[edit]
BUCK
Tayari Plaza
Immediately after drop
The sound of the Slipspace rupture opening can be heard.
View opens on one of the Superintendent's cameras (location labeled as Lumumba) just as the shockwave from the Slipspace rupture passes through the city. The screen adjusts to the brightness, and the air is still full of blue particles from the rupture. From a camera below the Superintendent watches two SOEIVs drop in, one of them bounces off a building, deflects into a second and crashes upside down, the other pod goes straight behind the second building. The Superintendent zooms in on the first pod, its avatar showing a sad face.
- Captain Veronica Dare (COM): "Squad, what's your status? You still with me, Buck?"
- Gunnery Sergeant Edward Buck: "Yeah. Give me a sec."
- Dare (COM): "I hit pretty hard. My hatch won't open. How about yours?"
Buck's hatch opens and he falls out of his pod.
- Buck: "Ungh! (sarcastically) Works great."
- Dare (COM): "Right. When you get done fooling around, I could use some help."
Buck picks himself up, depolarizing his helmet. He begins to search his SOEIV.
- Buck: "Did I...do something wrong? Because the only thing I regret about you and me? Not knowing you were a spook when we first met. I would have been a lot less charming."
- Dare (COM): "That's what I miss most about you, Buck. The way your mouth was always a little faster than your brain. Look, don't start about my job. We both agreed to end it."
Buck retrieves his silenced pistol and holsters it. He then tries to take out his assault rifle, but it is stuck.
- Buck: "That was years ago, Veronica! I'm (grunt) a little (grunt) fuzzy (grunt) on the..."
He finally gets his assault rifle out.
- Buck: "...details. Must have met a lot of other saps since then. Why pick me for this safari?"
- Dare (COM): "First, you're the best soldier I know, and second... You don't really remember, that night? What you asked me in the morning?"
A Phantom flies overhead. Buck looks up.
- Buck: "I remember not getting an answer..."
- Dare (COM): "Say again, Buck? You're breaking up."
- Buck: "I said stay put! I'm on my way!"
Buck polarizes his helmet and begins to move.
{Gameplay}
Another Phantom arrives in front of the plinth that Buck is currently on, and begins to descend.
- Dare (COM): "We missed our LZ. This grid is packed with Covenant. Be careful."
- Buck: "I appreciate the concern."
Buck cocks his assault rifle.
- Dare (COM): "Won't be much of a rescue if you're dead."
The Phantom deploys a group of Covenant consisting of a large number of Unggoy and a pair of Jiralhanae. They soon notice the lone ODST and open fire. Buck soon eliminates the Covenant present. Advancing around a building, Buck comes across two Marines behind a destroyed Warthog.
- Private First Class Chips Dubbo: "Trooper! Over here!"
- Dubbo: "I saw your pod hit... You're one lucky S.O.B."
- Buck: "See any more come down?"
- Dubbo: "Nah, negative! But I didn't see much of anything after that flash. Uh, but listen! Some of these buildings are open. Should be able to get inside, flank the Covenant on the streets."
- Buck: "Roger that, thanks!"
In the corridors and balconies of the nearby building, Buck finds the corpses of many Covenant soldiers, namely Sangheili and Jiralhanae. Blood splatters, Spiker rounds and plasma scoring cover the walls and floors.
- Superintendent: "SCHOOL ZONE. PLEASE, SLOW DOWN."
- Buck: "What the hell happened here?"
- Superintendent: "FINAL NOTICE. BILL PAST DUE."

Using the advantage of elevation, and with support of the Marines, Buck surprises a patrolling Jiralhanae pack and neutralizes them. More Unggoy and Jiralhanae with support from an Unggoy Heavy operating a plasma cannon attempt to stop the humans but they too fall. Buck moves up to an intersection with several roadblocks. More corpses of Sangheili and Jiralhanae litter the area.
- Buck: "Veronica, what's with all the dead Elites?"
- Dare (COM): "What do you mean?"
- Buck: "It's like a family feud, like they were killed by Brutes. Is there something I should know?"
- Dare (COM): "It's classified."
- Buck: "Huh, some things never change."
Buck comes across a Covenant watchtower with a large number of Unggoy and Kig-Yar troops clustered around it.
- Buck: "Got a little Jackal problem!"
- Dare (COM): "An overcharged plasma pistol shot will neutralize their shields, should also take down a Brute's armor."
- Buck: "Oh yeah? Where were you a minute ago?"
- Dare (COM): (irritated) "Still trapped inside my pod."
The Covenant troops soon fall. If the player lingers around the door without opening it:
- Buck: "Gotta get through this door. Should be a switch around here somewhere."

After opening the door Buck finds a group of Marines armed with silenced SMGs around a destroyed Warthog, taking fire from a large number of Covenant, including a number of Kig-Yar Snipers, soon getting killed.
If Buck goes left to the building, he will find a female Marine taking cover.
- Female Marine: "Trooper, we're pinned down! Flank through this building, hit 'em from behind!"
- Dare (COM): "Buck, location?"
- Buck: "Almost there! What's wrong?"
- Dare (COM): "Multiple hostiles closing in on my position. Listen carefully, if I don't make it..."
- Buck: "Whoa! Hang on, I'll be right there!"
- Dare (COM): "Too late, they spotted me!"
- Buck: "Damn it, no! Veronica? Talk to me! Don't move! I'm coming, you hear?"
After a protracted battle in which Buck defeats a large number of Unggoy, Kig-Yar and Jiralhanae infantry, the ODST approaches a blast door on the other side of the area. Before he reaches it, the door opens and a pair of hulking Mgalekgolo charge through.
- Buck: "Hunters?! No, I do not have time for this! Turn around you bastards, let me shoot you in the back."
After a struggle, Buck manages to defeat the Mgalekgolo pair and he leaves through the now-opened blast doors. He arrives at Dare's location.
- Superintendent: "ATTENTION TRAVELER! LOST ITEM CAN BE CLAIMED ON... LOWER LEVELS."
or
- Superintendent: "PAGING PARTY OF... ONE. COME IMMEDIATELY TO... LOST AND FOUND, LOWER LEVEL."
Dare's SOEIV comes into view, under attack from a trio of Unggoy.
- Buck: "There's her pod, now I just need to find a way down..."
After dispatching the Unggoy, he approaches her pod and tries to open the door.
- Buck: "Arrgh! I'm here...I got ya..."
Buck manages to shove the hatch off the pod, but it is empty. Suddenly, a Huragok pops out of the ground near Buck.
- Buck: "Aw, nuts."

The tentacled alien gets closer to Buck, who falls over backwards, and a blue light appears from its helmet.
- Buck: "Whoa, whoa!"
Buck sees Dare's damaged helmet in one of its tentacles.
- Buck: "Whoa!"
A sniper rifle goes off, the Engineer dies, spraying Buck with bluish blood. Kojo Agu (Romeo) is revealed to have taken the shot. Agu waves to Buck, who returns it.
Buck gets up, the dead Huragok starts to shake and starts to give off a high-pitched whine, Buck dives for cover and it explodes, propelling Dare's helmet into the air. The Superintendent tracks the helmet.
- Superintendent (on-screen): LOST-AND-FOUND ITEM! CALCULATING TRAJECTORY...
The Superintendent finds that the helmet will be launched through a window.
- Superintendent (on-screen): OPENING WINDOW SHUTTER!
The Superintendent's avatar shows a happy face. Buck walks up to meet Agu near the SOEIV. He picks up his assault rifle and holsters it.
- Buck: "What the heck was that? You ever seen one before?"
Romeo doesn't respond. Buck depolarizes his helmet and takes it off.
- Buck: "Hey, Romeo! You got your ears on?"
Romeo shrugs.
- Buck: "Oh, I get it. Permission to speak, smart ass."
Agu depolarizes his helmet.
- Lance Corporal Kojo "Romeo" Agu: "No, I don't know what it was, but it was gonna grease your ass good. Just like it did the Captain."
- Buck: "Yeah, maybe. You hear from Mickey, Dutch?"

Buck investigates a piece of the Huragok's armor, with Dare's stomach armor plate attached to it, stuck in a wall.
- Romeo: "Negative."
- Buck: "The Rookie?"
Romeo shakes his head.
- Buck: "We need to get above this crap, link up with the bee-net. One of our drones must have seen where they hit."
- Romeo: "So, we're poppin' smoke on the lady's mission? She ever tell you what she wanted?"
- Buck: "No... never. Doesn't matter. All I care about now is gettin' my men out of this city. Even you."
Buck puts his helmet back on, and walks off. Romeo joins him. Fade to black.
Level ends.
Achievements[edit]
The following achievements can be unlocked on Tayari Plaza across the Xbox 360 and Halo: The Master Chief Collection editions of Halo 3: ODST.
| Halo: 3: ODST (Xbox 360) | Halo: MCC (Xbox One) | Halo: MCC (Steam) | Title | Unlock requirement | Games |
|---|---|---|---|---|---|
 |
 |
 |
Complete Tayari Plaza on Normal, Heroic, or Legendary. (Halo 3: ODST) Complete Tayari Plaza on any difficulty. (Halo: The Master Chief Collection) |
Halo: The Master Chief Collection | |
 |
 |
Beat the par time on Tayari Plaza. | |||
 |
 |
Beat the par score on Tayari Plaza. | |||
 |
 |
Finish Tayari Plaza with at least one Marine still breathing. |
Trivia[edit]
- In Halo: The Master Chief Collection, sometimes the sound of the carrier's slipspace jump, which accompanied the opening text, is missing.
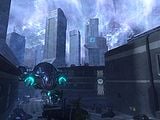
- Throughout the entire level, the sky is filled with blue fog and ionized particles, residue from the Solemn Penance's in-atmosphere Slipspace jump.
- Buck soon comes across dead Sangheili on his way to Dare. A total of fourteen dead Sangheili are on this level, another possible reference to the number seven; 14/2 = 7.
- In the area where Buck mentions the "family feud" between Brutes and Elites, the wall graffiti to the right of the road says "Believe," a reference to the Halo 3 Believe ad, as seen here.
- The "family feud" noted by Buck and the dead Elites encountered are due to the fact that just after the Prophet of Regret jumped away, reinforcements sent by the Prophet of Truth arrived and assumed control over the battle. The Brutes not only overtook the Elites previously in command but also executed any Elites stationed on and above the planet. This was a part of Truth's complex socio-political scheme for the Covenant that would culminate with the beginning of the Great Schism two weeks later.[2]
- Among the group of dead Elites is one in an Assault Harness despite the story being Halo 2-era. The Assault Harness may have already been in use among Special Operations Elites strictly for covert missions/operations, which might explain why this particular armor permutation is present during the Battle of Mombasa only during the events of Halo 3: ODST.
- Near the second group of dead Elites are two deactivated Energy Swords, the only swords in the entire game. There is also an Ultra among this group under the overpass. It is one of only three Elites holding the rank of Ultra in the whole game.
- In the area with the pinned Marines, if one heads left, one can find some papers on the ground with Bungie members on them.
- The Marines pinned in the plaza before the Hunter fight are the only Marines wielding Silenced SMGs by default in this game.
- The Engineer that Romeo kills can be seen to the left of Dare's drop pod before the ending cutscene is triggered. Only its armor is visible; if shot or meleed it will react like a fixed metal object and will not take damage.
- Buck describes linking up with the "bee-net," likely an abbreviation for "battlenet," the communications and tactical support network of UNSC military units. It is also a reference to B.net, the colloquial name for Bungie's website.
- The Marine allies in this level have very low health, even on Easy difficulty. This could be due to injuries sustained in battle or fallout from the in-atmosphere slipspace jump from the Solemn Penance.
- Finishing under three minutes is difficult, even on legendary. The player must break through the enemy as fast as possible, killing necessary enemies. For speedrunners, it's one of the most challenging missions due to par time.
- This is one of the recommended levels to perform for experienced players when it comes to some of the Halo: The Master Chief Collection's weekly challenges, such as Battle Hardened, Skullduggery, Forza Firefight, and Delta Droppings.
Gallery[edit]

Preview of the level in Halo 3: ODST menu.
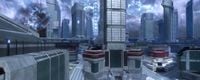
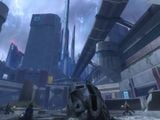
A panorama of New Mombasa in the EMP's aftermath.
A Phantom deploys Covenant troops in Sector 6.

First-person view of Buck fighting Unggoy.
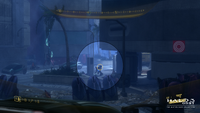
First-person view of Buck using an M6C/SOCOM's scope.
A trio of Unggoy deployed to Sector 6.
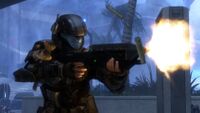
Buck firing his assault rifle.
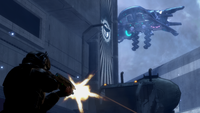
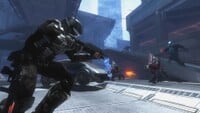
First-person view of Buck fighting Covenant.
A Phantom carrying Huragok flies overhead of Buck.
Covenant troops approaching Buck and two marines.
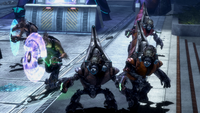
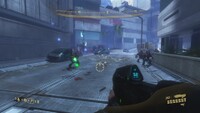
A large group of Unggoy and Kig-Yar in Sector 6.
An Unggoy Major prepares to throw a plasma grenade.
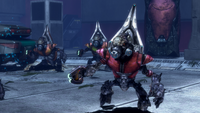
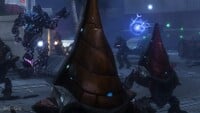
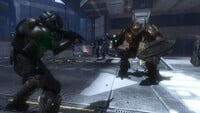
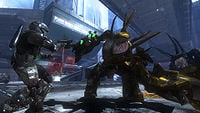
Buck fighting Unggoy and Jiralhanae.
Buck approaches a pair of Mgalekgolo.
A Mgalekgolo tries to melee Buck.
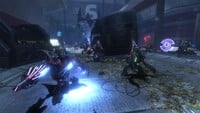
Dare's SOEIV surrounded by a trio of Unggoy.
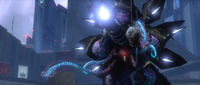
The Huragok holding Dare's helmet.
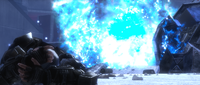
Buck dives away from the Huragok's explosion.
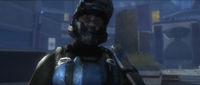
Romeo with his helmet's visor depolarized.
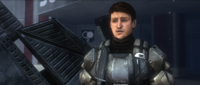
Buck without his helmet.


Sources[edit]
- ^ Halo 3: ODST Editing Kit, game file
H3ODSTEK\tags\levels\atlas\sc100\sc100.scenario - ^ Halo Waypoint marketing, Ten Twenty
| |||||||||||||||||


