Uprising (Level): Difference between revisions
From Halopedia, the Halo wiki
No edit summary |
|||
| Line 324: | Line 324: | ||
*In the beginning of the level, you can see sparks of blueish light streaming around of the edge of the cliff. They have a resemblance to the [[Holo-Drone]]s from when fighting [[Sesa 'Refumee]]. | *In the beginning of the level, you can see sparks of blueish light streaming around of the edge of the cliff. They have a resemblance to the [[Holo-Drone]]s from when fighting [[Sesa 'Refumee]]. | ||
*Part of the events of the levels do not make sense: [[Master Chief]] and the [[Arbiter]] were teleported to their relative locations after meeting [[Gravemind]] at the same time. At the end of [[Uprising]], you see [[Tartarus]] arriving at the control room, yet at the start of the next level, you see the [[Phantoms]] just leaving [[High Charity]]. This explained in the [[Legendary Edition]] DVD, where you are told that they take place at the same time, and that there is a door closing sound at the end, and also at the start of the next [[Arbiter]] Level. | *Part of the events of the levels do not make sense: [[Master Chief]] and the [[Arbiter]] were teleported to their relative locations after meeting [[Gravemind]] at the same time. At the end of [[Uprising]], you see [[Tartarus]] arriving at the control room, yet at the start of the next level, you see the [[Phantoms]] just leaving [[High Charity]]. This explained in the [[Legendary Edition]] DVD, where you are told that they take place at the same time, and that there is a door closing sound at the end, and also at the start of the next [[Arbiter]] Level. | ||
*The [[Random Brute]] is found on this level. | |||
==Gallery== | ==Gallery== | ||
Revision as of 06:15, March 4, 2009
|
Prev: |
|
|
Next: |
|
| Uprising | |
|---|---|

| |
|
Game: |
|
|
Player: |
|
|
Date: |
|
|
Location: |
The surface of Installation 05. |
 |
Halopedia doesn't currently have a walkthrough for this level; could you write one? |
Uprising is the 13th campaign level in Halo 2, and the 12th playable one.
As Thel 'Vadamee, the player must battle his way through Brutes and Jackals to reach a rendezvous with Rtas 'Vadumee. Along the way, he will receive some aid from Grunts and other Elites.
Usable Weapons
- Brute Plasma Rifle
- Brute Shot
- Particle Beam Rifle
- Energy Sword
- Fuel Rod Gun
- Plasma Pistol
- Plasma Rifle
- Rocket Launcher
- Shielded Plasma Cannon
- Shotgun
- Covenant Carbine
- Needler
- Frag Grenade
- Plasma Grenade
Allies
Vehicles
Transcript
Oh, So That's How it Is
{Cutscene}
Thel 'Vadamee is seen arriving on a cliff face via teleporting from the Gravemind. The view shows a view of Delta Halo's Control Room. He then turns to his left and finds a conveniently-placed Plasma Rifle, lying on a rock stained with Elite blood, and readies himself on the path ahead.
Thel 'Vadamee sees Brute Shot grenades going off in the distance, followed by Plasma Rifle bursts firing in the air
Brute: "Weaklings!"
'Vadamee picks up an Energy Sword
Elite: (Dying) "The Brutes... have betrayed us... the Councilors...!"
'Vadamee sees a Brute shooting at a dead Elite.
Brute: "Let's just throw them over the edge!"
Brute: "Where's the fun in that?"
Another Brute approaches the two other Brutes.
Brute : "I already checked there!"
Brute : "Just making sure..."
'Vadamee ambushes the Brutes and assassinates them.
Brute Captain: (Growls) "Go see what's taking them so long!"
Brute Captain:(If spotted) "He's still just an Elite. Go! Kill him!"
Or alternatively, if spotted
Brute : (Sarcastically) So, you've come to save your friends!
After 'Vadamee reaches the doors of a structure, a cloaked Special Operations Elite arrives from the door and helps 'Vadamee to kill any remaining Brutes.
Spec Ops Elite: "By the Prophets ... what have these Brutes done?"
The Elite turns and looks at 'Vadamee, then tightens his fist.
Spec Ops Elite: "They have shed our brothers' blood... and for that, they must die!"
Insertion Drop Pods land on the canyon, unveiling Elite reinforcements.
Spec Ops Elite: "A Zealot! So much for a stealthy advance."
Zealot Elite: "Bah! Over so soon?"
If 'Vadamee moves into the structure before the rest of the Elite reinforcements does..
Zealot Elite: "Arbiter! Save some for the rest of us!"
If 'Vadamee waits until the reinforcements enter the structure..
Zealot: "Make haste! There are more Brutes to kill!"
Once the Elites clear the first structure place, they find a couple of Grunts running about. With their help, they finish off the remaining Brutes, Jackals and Drones in the area.
'Vadamee and his allies enter the next room where several more Brutes take defensive positions.
Zealot: "Ha ha! Long have I waited for this!"
Brute: "Not all dead? Raise the alarms!"
Later, 'Vadamee finds a Grunt cowering in a corner. Sometimes, he will speak as follows
Cowardly Grunt: "Please ... no hurt! Me like Elites! Brutes stinky bad-bad! Me stay here, make sure no Brutes come behind mighty Arbiter!" (Chuckles nervously)
As 'Vadamee and the allies enter a hallway with dead Elites and Grunts, with scattered weapons..
Spec Ops Elite: (Praying to dead Grunts and Elites) Start the journey ... be at peace.
(Alternatively)
Spec Ops Elite: ...And yet I live.
(or)
Zealot Elite:(Sadly, Kneeling over dead Unggoy)He is no more.
'Vadamee and his allies go into another room, where more Covenant Loyalist forces await.
The pack soon enter another room, with more Elite and Grunt corpses and scattered weapons. As the door to the outside opens, several Brutes and Jackals are taken aback by surprise as the Elites (and any remaining Grunts) charge at them.
As they head forward, more Brutes await and are soon eliminated. A few Ghosts are placed near the position. The Arbiter pilots one of them, and the Elites follow on foot.
'Vadamee takes the vanguard and surprise-attacks the nearby Brute camp head-on. The Elites follow, as a big battle takes place between Plasma Turrets, Ghosts and infantry.
After clearing the Loyalist forces in the area, Jackals behind follow up to reinforce the camp, and after they are eliminated, 'Vadamee and his allies follow up on the next camp where a Grunt on a Plasma Turret aids the Covenant Separatists. A few more Brute-Controlled Ghosts and a Spectre try to stop the Separatist forces with failure.
A small Jackal camp awaits in the next area, where they are easily taken care of by the Arbiter. Elite(s) take the opportunity the pilot the Ghosts throughout the camp.
Another Loyalist camp awaits with a Plasma explosives held at the front to stop the Separatists, and a few Jackal Snipers as support. The Separatist forces crushes the defences and rushes through the next area.
Fight Club
The next area is guarded by multiple Brutes and a few Wraiths. Once most of the area is cleared of Brutes, a few more Elite Drop Pods land, to reinforce the current Separatist pack.
Inside a structure room, they find a cache of Human and Covenant weapons
Elite: "What vulgar taste! Even as trophies, these weapons are worthless!"
Vadamee and his allies get through the Brute forces and a Brute-controlled Ghost and enters a cave to find Jackals and another Brute-controlled Ghost.
'Vadamee exits the last door. A Wraith approaches him slowly. Arbiter readies his weapon. The lid opens to reveal Rtas 'Vadumee
Rtas 'Vadumee: "By the rings, Arbiter!? The Councilors! Are they -"
Thel 'Vadamee: (finishing his line) "Murdered...By the Brutes."
Rtas 'Vadumee: "Vile, disloyal beasts! The Prophets were fools to trust them!"
They see Phantoms fly over them. It stops above the platform of the Delta Halo Control Room. Tartarus lands from the gravity lift, with Commander Miranda Keyes and 343 Guilty Spark in captivity. Tartarus greets the Brute guards with growls. He enters, and the doors close behind him.
Walkthrough
Easy Walkthrough
Part 01: Oh, So That's How It Is
When you start the level you only have a Plasma Rifle. Walk through the path to meet the corpse of an Elite and an Energy Sword lying by. Strafe over it to pick up the Energy Sword and possibly a few grenades. Continue through, and there should be a few Brutes. They drop grenades. Use your Energy Sword on them, and then continue down the pathway again. Destroy all Brutes here with a mixture of Plasma Rifle bursts and Energy Sword slices. Swap your Plasma Rifle for a Brute Shot.
If you need some specific advice, we'll spell it out for you: Camouflage yourself, run behind the Minor Brute, cut him down, and then move forward and attack the Brute pair. At this point some Brutes will be heading your way. Take cover and stick a Plasma Grenade to the Brutes if you have any.
Continue up the hill and destroy all Brutes with some of their own medicine: their Brute Shots. If your Brute Shot runs out of ammo, use the Energy Sword. Midway through this, a Spec-ops Elite with an Energy Sword will help you destroy the Brutes. After they are all destroyed, some pods will come out with three Elites. There will be two Minor Elites with Plasma Rifles. It`s a good idea to give one Minor Elite a Brute Shot, for some more fire support. Among them, fortunately, is a rare Zealot. Take care of him, as he can also die.
Follow the Elite that just helped you kill the Brutes into the room. The room will lead you into another room, full of allied Grunts, enemy Drones, Jackals, and Brutes. Kill all enemies on the first level with some grenades and Brute Shot rounds. Hopefully, you'll pick up more Brute Shot rounds, otherwise, keep it and use it as a melee weapon (three melees kill a Brute on Easy) or use your Sword instead. Another way to kill a Brute is a Needler because of its homing ability.
Find a ramp up onto the second level. Kill all your enemies here. You should definitely pick up some Brute Shot ammo here. If your Sword runs out, swap it for a Brute Plasma Rifle. Go up the ramp that leads to a door. It has some Drones and Brutes guarding it, with some Minor Grunts running away from them. Take care of them all with your Brute Plasma Rifle. Use your Brute Shot on Brutes if needed. Go in through the door.
Below should be some Brutes and Jackals. Take them out with your Brute Plasma Rifle, or your Brute Shot, or use grenades, it doesn't really matter. However, if you are using grenades, beware of your allied Zealot; he dies easily when you toss grenades at him. Swap your Brute Plasma Rifle for another Brute Plasma Rifle, it might be running low on ammo now. Continue through the door, and it'll lead to to another door, which will lead you into a room with several ledges. Look down, and there'll be heaps of enemies, consisting of Jackals and Brutes. Before going down from the first ledge, look to your left. You will see two Power Cores along with a weapon holder. If you stand somewhat left of center between the Cores, face very slightly from the right of center between the cores and then melee the upper part, you can knock both of them down, with one heading for the Jackals far from you and the other careening to the Methane Tank and other Jackals right below you. This results in a spectacular explosion and wipes out all the Jackals on the ledge. After that, toss grenades down or use your Brute Plasma Rifle to wipe out stragglers and the remaining enemies.
Jump down, and face the Brutes. It is more effective using a Brute Shot melee then using Brute Plasma Rifle bursts. Jump down again, and take out all Brutes there. Once it's done, a second wave of Brutes will come out the door, once again, take them out. You should pick up some Brute Shot rounds.
Go inside the door, and strafe over the dead corpses of the Elites. There should be an Energy Sword. Swap your Brute Plasma Rifle for it.
Continue through the doorway to find several Brutes and Jackals and a particular Brute on a turret. It`s a good idea to go invisible to stick the Brute, or use your Sword to kill him and take control of the turret. Otherwise he can pose a threat to your Grunt allies. Kill the other enemies with the Sword or the Brute Shot, it doesn't really matter once you've taken them all out. Once that's taken care of, continue through the room. You should walk over a Fuel Rod Cannon; swap for it with the Brute Shot. Continue through the room; behind a crate should be more Fuel Rod Cannon ammo.
Part 02: Step Aside...Let the Man Go Through!
Quickly reload the Fuel Rod Cannon and walk through the door. Do not give your Fuel Rod to any allies whatsoever. Shoot the Brute on the right, then quickly shoot the Brute on the left because your ally Zealot will always head toward the right first or there may be an ally suicide. If your Fuel Rod did not deal with the Brutes or Jackals don't worry, your allies will. Go down the pathway. A Brute Captain will now get off his Ghost and try to shoot you with his Brute Shot. Behind him, some of his allies will come. It`s a good idea to hijack the Ghost and kill them. Try and destroy them as soon as possible, because, if not, it could mean the end for an abundance of your allies.
If you didn't hijack the Ghost, there two more in the cave. Get on the Ghost and go through the cave. It might be hard here because of the darkness, but, don't worry, you'll make your way through.
When you get out of the cave, in front of you will be some enemy Brutes and Jackals. Look to your right, there should be a Brute on a Shielded Plasma Turret. Ram into him with your Ghost, he'll die. Your allies should be following you by now, helping you destroy all enemies. Ram into the rest of the enemies, or shoot them, making sure that you do not harm your allies, as you might need them for help at the end. At this point, a few Minor Grunts may die; don't worry, it's expected.
When all the Jackals and Brutes are dead, turn around into the cave where you came from, there should be one or two waves of Jackals. You can let your allies take care of them, or you could alternatively get off your Ghost and mow them down with the Energy Sword. At this point, your Energy Sword might be out of ammo. If not, keep using it. If it is, swap your out-of-ammo Energy Sword for the Brute Shot somewhere around where you are, and hop back on your Ghost.
Go down the ramp; it leads to another place similar to where you were just fighting. Kill all the enemies there, it's straightforward. Midway through, a Spectre with two Brutes (one driver, one on the turret) will come. If you are on the cliff with the turret, take the Beam Rifle and snipe the Spectre driver, then the Brute that's commanding the turret. If you couldn't snipe the Spectre driver, you can take it over by hopping on the Spectre twice, or three to four times if a Brute hops back on, or alternatively kill it with your Ghost and carry on.
Go down the ramp again, some Brutes might be hiding. You can ram them with your Ghost, or if you took control of the Spectre wait for an ally Elite to get in. Just carry on and let your allies kill them. Don't fret, your allies can stand enemy fire.
Keep on going down, try to ram the Jackals if you can; however, if you can't don't worry, they don't harm you much unless you are trying to get yourself killed by standing in their way; proving you a very easy target.
Go down the waterfall, where you'll meet Brutes on the floor and Jackals on the bridge-like thing above. Kill them if you want to, but it's not compulsory and proves a waste of time.
Keep on going down the waterfall and then, down the jump, into the fray of enemies. Your allies might follow you from here, but it's unlikely, after all the skipping you have done.
Part 03: Fight Club
You may want to snipe a bit on top of the falls (take the Beam Rifles the Jackals had.) Beware; your other Elite allies (especially the Zealot) will job down and start attacking the Loyalists. As you jump down, your Ghost/Spectre might flip over. If it does, it's most likely it'll flip a fair distance from you; so don't bother going back. If you are still on your Spectre/Ghost, kill them. If not, just use your weapons. Once all the enemies in this section are dead, go under the bridge and there will be two Wraiths. You have two options to deal with the Wraiths. Board one and hijack it and blast the other with the hijack wraith main turret, or board one, and chuck a grenade in. Board the other, and repeat as so.
Go back to the other section, and find a ramp up. It should be on the right from where you jumped down from the waterfall. Get off the Ghost and kill the Brutes with your Brute Shot or remaining Energy Sword. They're no threat; the only threat is the Plasma Grenades they might throw. Get out your Fuel Rod Cannon and head towards the door you see on the other side of the bridge. Walk into it, and then walk backwards without facing backwards. Shoot your Fuel Rod into the fray of Brutes, they will die. If not, mow them down with your remaining Energy Sword or Brute Shot. Walk into the room, there might be one or two Brutes there. Kill them with any method possible. Swap your dead Energy Sword/Brute Shot for a Covenant Carbine, and try to pick up some Fuel Rod ammo. Don't worry about the Rocket Launcher, it's not of much use unless you purposely try to waste your Fuel Rod Cannon. Switch to your Covenant Carbine and go out the door. Shoot the Sniper Jackals, and kill all Brutes. Continue on, and you will see a cave. The first and second wave of enemies contains a Brute on a Ghost, you might want to steal that from him, and ram all enemies over. Then, continue through the door, and you have finished. Also the weapon you have right now you will have in the last level.(Think about trading your Fuel Rod for a Rocket Launcher)
Congratulations, you have completed Uprising the third to the last level of Halo 2. Two more to go, then you're done with the game!
Legendary Walkthrough
01: Oh, So That's How It Is?
Whew! Through with the Gravemind. You know, this place was so pretty, and I was so happy to have outfought the end group of Elites in the Mausoleum that I let my guard down first time I was here. Big mistake. There are no less than eight Brutes in this happy outdoor area, who are having fun blowing corpses off of cliffs with grenades. I think that says just a bit too much about the Brutes.
A lot like Gravemind, though, we begin this level in a rather disadvantageous situation: no grenades, no sword, and a plasma rifle. Luckily, the sword can easily be obtained just ahead down the path, where a minor Elite is lying, mortally wounded by the looks of it. Grabbing the sword will cause him to give you a little speech about how the Brutes screwed the Elites over (gee, thanks for telling us that before they blasted us into a pit where we were yapped at by Audrey) and that "the Councilors..." I don't know exactly what he's trying to say about the Councilors, and it irritates me. It seems to me like this level originally had a purpose: namely to try and save the Councilors from the Brutes. As it stands, the only objective in the whole level is "Take revenge on the Brute traitors".
Time to take on the Brutes. You can either let them come to you before killing them one by one (hard) or run straight past the morons as they stand and stare. (I guess I wouldn't have expected an Arbiter to show up literally from nowhere either). The second way is far easier, but you'll need to do a bit of quick work with camo and sword. As you go around the first bend, camouflage, then sword-lunge the Brute and finish him with a quick sword-melee. Easier, camo and assassinate the brute to save some battery for the sword. Generally, he has at least one grenade, but if not (or even if so), you'll want to turn around. There's an Elite (dead), a little rock, and a big rock. Jump up onto the big rock, grabbing the Elite's grenades as you go. Head straight over the top of the rock and into the next section of the area; with luck, the next group of Brutes won't notice. Head straight over towards the cliff; bear in mind that as you do, two Brutes will rush out in front of you. Watch your motion tracker, and activate your camo to save yourself a good deal of trouble. Run up the hillside, being careful to stay to the left, and you'll find two Brutes up top, one in your way. Stick him with a grenade and run through the door double quick. As soon as you're in, a Special Ops Elite will come out and waste the other Brutes.
As the Brutes frantically try to regain control of the situation, our stealth Elite will shell them all to death with grenades. You may want to watch out for berserkers, though, as he can't always take care of them. At any rate, once all the Brutes are dead, three Elites, one a Zealot, will show up to help. Quickly swap out your plasma rifle for a Brute Shot.
Head through the door at the other end of this next room and you will find yourself in a multi-leveled cavern. Ahead of you are two Brutes, patrolling away from you. Run up and assassinate them both with the Brute Shot. Ahead of them, two Jackals will show up. Your Elites can probably take care of them, but you could always do it yourself with the Brute Shot. Head up the slope, but do not follow the path! Instead, head to the left of the big column-thing and jump up to the next level. A couple of Jackals will leap down in front, easy meat for the Brute Shot's merciless blade. As you head further up the path, two Brutes and a Drone swarm will come through the door. Camouflage, run through the door, wait for all the Drones to file out, then stick one with a grenade. As soon as it explodes, lob another at one of the Brutes and sword the other to death. As your team comes up from below (possibly minus a member or two; after all, they just took on three Brutes and two Jackals), move on through the L-shaped hall, into the stepped room. Man, I love this place.
On the level below you are some Jackals, congregated around an explosive crate. In front of you, on the left, are two of the tall, push-able explosive crates. Shove 'em off the ledge (don't melee them, obviously), watch those Jackals fly, then drop down and melee any survivors. You should get a checkpoint, which you'll want. Down one level, there are four Brutes. The strategy that works best for me is to stick one, wait for it to explode, camouflage, drop down, stick another, then sword the rest before they get what's happening. Down on the floor below are four Brutes, easy targets for plasma grenades. Don't drop down onto the floor, though; as soon as the last Brute berserks, four more will show up and help him out. If your team is still alive (at least the Zealot and SpecOps probably are), let them handle this—or at least wear the Brutes down a little.
The next room holds a Brute on a turret, three Brutes not on turrets, and two or three Jackals in a fairly small space. To make matters worse, at some point four more Brutes will show up, and these guys will often rush the ramp to the lower level. If the Zealot somehow survived this far, he can wreak havoc here. If not, you have a slightly tougher task on your hands. Right away, stick a grenade to the turret; it's the biggest threat in the area, able to kill you in two or three hits. The Jackals will often dodge away from the explosion in such a way that they're visible from the ramp. Drop some Brute Shot fire on them; try and wipe them out. If you got two of the Jackals, the second wave of Brutes will probably show up now. Almost immediately, one, or sometimes two, of the Brutes will go up the ramp. Camouflage, stick one, and sword the other as he turns to look at the grenade. Another Brute likes to take up a position to the right of the exit; he'll be easy to stick from the ramp. That leaves three more Brutes. One will often try and head up the ramp; camo, circle around behind him and Brute Shot-melee his butt. Stick a grenade to anything standing still, then take out the berserker with the sword.
Whew. Head on through the L-shaped hall, swapping your Brute Shot in exchange for the Fuel Rod Cannon. In the next room, which is empty, there's another Fuel Rod Cannon behind a crate. Grab that for ammo.
02: Step Aside! Let the Man Go Through!
Once you're prepared, step through the door. Kill one of the Brutes (I suggest the rightmost one) with the Fuel Rod Cannon, then fire a single shot at the other one to weaken him before you sword him to death. As you move down the path, four Brutes and a Jackal sniper will show up. Camo, head around to the left, and sword the sniper. Then, use your remaining Fuel Rods to kill most of the Brutes before finishing up with the sword. Once they're all dead, swap out your Fuel Rod Cannon for a Beam Rifle.
The next part is among my favorites in the game, partly because there's so many different ways to do things. You can resolutely take out all the enemies with a Ghost; you can boost past them all; you can snipe everything to death before cautiously moving through; hell, you can even skip the next two battles by sword-flying. If you feel like taking the last route, zoom in on the Jackal sniper in the next area, make sure the cross hairs are red (he's on a ledge on the right side, near the top) and quickly roll your fingers over X and Y, then hold the Right Trigger. It'll probably take a few tries, but if you're doing it right, you'll swing the sword and your aim will go off a bit. Eventually, you'll go soaring up towards him. If you're massively unlucky, he'll see you coming and snipe you beautifully out of the sky, but usually he's oblivious until you're actually up there, at which point he panics and becomes a good target for your sword. Jump up onto the next ridge, turn right, and head that direction. At the first time when you can go left without falling to your death, do so. Head along the ledge (you may want to use camouflage) until you see two Ghosts on the ground. Drop down, hop into one, and zoom away.
Alternatively, there's a way to skip the whole rest of the level, but it's pretty hard, and you'll need at least one shot left in the Fuel Rod Cannon. Use the Fuel Rod Cannon to sword-fly up to the Jackal sniper again, turn right again, but this time, keep going that way—don't take the left turn. Cross a sort of trench, and then, once you're on the far side of it, take a left. Eventually, you'll come to a narrow bridge over two of the ground area. It's in a crooked shape. Stand on the right edge, where it changes direction, and walk off the edge. Count to three and fire a Fuel Rod Cannon shot into the wall. If you time this perfectly, the end cutscene of the level will begin. Note that this is very hard.
If you choose to stay on the ground, there are quite a few Brutes and Jackals around this valley, and there are enough Ghosts for the Brutes that I'd suggest you just speed past them. If you really want to fight them all, you can, but there's no set advice I can give you. Just remember to snipe the Jackal sniper before you start, and remember the Bungie Proverb: "Never stop running, never stop firing, never burn money". Meaning: "Don't make yourself a target, don't wait too long for the perfect shot, and don't pass up a good opportunity".
The next valley is pretty hard. You can't really boost through; there's a bottleneck near the exit where you'll pretty much have everyone shooting you. It's best to thin the opposition first. Initially, there are four Jackals, a Jackal sniper, and a Brute in the wooded area to your left. Kill the Brute first, then the sniper, then another of the Jackals. As soon as there are only three Jackals left, look over towards your exit. A Specter with a Brute driving and another Brute on the turret will approach. Snipe the driver so they can't move, then kill the turret-guy before he can open fire. Grab a full Beam Rifle from the crate. Then hop back in your Ghost and head for the exit. Another group of Brutes, usually two or three of them, will show up as you leave, but they won't be able to hit you if you boost past them.
Up ahead are a few scattered Jackals; blow right past them. Slow down as you go down the steep hill; stop before you reach the bottom. Ahead are a large group of Brutes with two snipers and a few Jackals. However, if you stop for enough away from them, they won't see you as you stand there and blow their heads off. Obviously, take out the snipers first, then the Brutes, then anyone else. Be warned that beyond the main group are two Jackals on either side of the river, just waiting to ambush you. Once all the enemies are dead, grab the less full beam rifle from one of the snipers, then grab the more full beam rifle. That way, neither of them will disappear, nor will the one you just dropped. Three beam rifles will be pretty helpful for this next bit.
03: Fight Club
Sadly, this chapter is not great. it is extremely boring and bad. Ahead are two snipers, one above the waterfall, the other to his right. Neither of them know you're there. Gun them down without hesitation. Once they're dead, your priority is the structure; more specifically, the four Brutes occupying it. Two are on the ramp; two are directly across from you. The ones on the ramp should go first; take off both their helmets before you kill either one. That way, the berserker will be an easier target. The ones in the structure rarely berserk, but man, can they ever throw grenades! Every couple seconds, you'll have to dodge the glowing blue death they sling at you. Aside from that, they aren't too tough. Once they're dead, the structure is yours, not that you really want it.
Note that if you wait a few seconds before killing the Brutes inside the structure, you can have the entertaining sight of watching a Brute repeatedly shoot a wall with a shotgun! To see how it works, I guess.
Well, the structure is yours, anyway. Drive your Ghost up into the building, and fast. The Brutes want the structure back, and you need a checkpoint. Because eleven Brutes are going to come at you, although fortunately not all at once. Inside the structure there are various weapons. Above the door exiting the weapon room there is a triangular ledge. On it there is a skull called the Ghost skull.
When the Brutes show up, just outside the door that you'll eventually continue through, a Jackal sniper is on a ledge a ways behind them. Snipe him before he notices you, then get back into cover. What will follow is a pretty long and dangerous battle in which you have to get headshots and duck back into cover every couple seconds. However, you have an advantage in that you have camo. Use it to give yourself enough time to target your enemies, and the battle will become far easier. The main problem here will be avoiding getting surrounded—some bright-spark Brutes find it fun to circle around, come up the ramp, and lob grenades at you as you snipe. Eventually, some of the more daring Brutes may even come right into your hiding place, but they should fall to your sword. If you find more and more of them coming in, you may want to grab a Brute Shot or Shotgun from the big ammo stash. After you get about seven of the Brutes, take cover and you will often get another checkpoint. Eventually, when they all go down, you'll get another checkpoint, and a Wraith tank will drive over into your general area. Camouflage, drop down, board the tank, and beat the driver to death. Get in, and look under the natural bridge. Another Wraith tank, huh? Well, now we have one too. Introduce the other tank to the magic of the plasma mortar. When he dies, you'll get another checkpoint.
If you feel cowardly today, you could just skip the whole battle by sword-flying past the first group of Brutes while camouflaged. Of course, you could run into four more Brutes in the next room. That's poetic justice there.
Eventually, once the eleven Brutes are dead and both Wraiths are out of commission, a couple of Elites will fall from the sky to help. Zoom under the natural bridge in your tank and start shelling the Brutes in the second structure with plasma. They'll lob a load of grenades at you, but, unlike Halo 1, you no longer die when your vehicle is stuck. Take the Brutes down until they stop throwing grenades. Fire a couple blasts from the plasma mortar. Then drive your tank up against the wall and grenade-jump up into the second structure. Head for the tunnel and move forward until you hear a Ghost coming. Then back off, back into your Wraith tank, and shell that Ghost and the others that follow it. On your right, a couple of snipers might show up between the trees, but they'll fall easily to the almighty mortar.
Once everything stops moving, get out of your Wraith, head back up the ramp, grab whatever ammo and grenades you need, and head down the tunnel. End of level.
Speed Run Walkthrough
Note: This walkthrough requires correct Grenade Jumping, Sword Flying, Active Camouflage usage, precision in everything and speed. This walkthrough is based on Cygnus's 2:22 Legendary Co-Op run, with a bit of minor editing as I personally deem fit from tactics used in Spotcheck's 1:57 Normal run. It may be altered as and when faster runs emerge. Certain portions detailed here may only take place on Legendary and alternate methods, not detailed here, will be necessary in such events.
Go along the path, picking up the Energy Sword as you do so. Once around the corner, jump up and over the rock, picking up the Plasma Grenade as you do so. If there is no Plasma Grenade present, however, it would be prudent to use Active Camouflage and back stab the Brute nearby for his grenade. If you did not get spotted by the Brute as you vaulted the rock, you will get a checkpoint as you near the next rock, otherwise you will not get it. Jump onto the rock and then Sword Fly to the Brute emerging from the inner area. Leave them to the Infiltrator Elite lying in wait and run past. As the next door opens, throw a Plasma Grenade to the bottom of the cliff and use it to Grenade Jump up to the Grunts. Swap out your Plasma Rifle for the nearby Carbine. Hopefully you get a checkpoint here, it doesn't always happen.
Zoom in and Sword Fly to the enemy reinforcements that emerge from the door, then use Active Camouflage to sneak past the Brutes that enter. Jump up and sight the Brute on the lower level, then quickly Sword Fly to him. Knock off the Jackal that goes through the door before he delays you too much. Head through to the next area and jump down the slopes. Run past the Brute that goes through the door. Head into the next area with the Shade and Sword Fly to the Brute that goes through the door. Pick up the Fuel Rod Gun in the area after that, and the reload before the door.
"Step Aside, Let the Man Go Through" will appear now. Use Camouflage to sneak past the Brutes and Jackals waiting outside. Sword Fly to the Brute Captain arriving in his Ghost and Cancel off him onto the rock. Get next to the tree-like object and jump up the cliff, then face downwards and jump upwards and forward, then jump again and make it to the top of the mountain. Once on top, turn slightly to the right so that the bend of Delta Halo is in the distance, then walk forward. You'll get a checkpoint here if you've been fast enough.
Head forward and down the sloping section to a thin stretch of pointed rock. Drop down the right side, as close to the wall as possible, then aim downwards and fire your Fuel Rod Cannon. It's rather hard to state precisely where to aim, but just note that you don't have to be firing so close as to hurt yourself. It may be a few tries before you get the targeting perfect, but keep at it.
Trivia
Glitches
- If the dying Elite with the Energy Sword at the beginning of the level is melee'd as the quote "The Brutes have betrayed us...the Councilors..." plays, then his mouth will start moving to the words.
- You can have unlimited Plasma Pistols on this level. If you give a Grunt a Fuel Rod Gun or a Rocket Launcher then drive in a vehicle toward him, he will dive out of the way and drop his weapon and pull out a Plasma Pistol with 100% ammo.
- If the Grunts that you find the in the first cavern room are still with you when you get to the three-leveled room, you will notice that they will not follow you any further. Should you push (not melee) them toward and off the edge, they will die when they hit the next level down.
- If you get on top of the mountains by were the Spectre comes you should see a pathway in the mountain straight at you, when you get to the end mysteriously two trees can be seen floating like the one in Assault on the Control Room.
- If you walk by a certain tree you will see part of the Arbiter's body and if you shoot it you will take damage.
- If you take a Ghost past the last door, stop, and get out just before the cut-scene starts, the Ghost will show in the cut-scene.
- The Ghost Skull and the Cowardly Grunt can be found on this level.
References
- The ending of the Fight Club cut scene is quite similar to the scene in Star Wars: Return of the Jedi, in which Han Solo is confronted with an AT-ST, only to be surprised by the fact that Chewbacca is controlling it.
- In this whole level, there are a total of Seven Elites, another seven reference.
Symbolism
- Due to the emphasis of the Elites now being abandoned by the Prophets and no longer having contact with them, this level is one of two levels throughout all three games to have the least bit of dialogue, the other being 343 Guilty Spark.
- The dark, gloomy clouds in the broad day light sky emphasize that this stage marks the darkest day for the Elites, being abandoned by the Prophets, and left to be slaughtered like animals by the Brutes.
Miscellaneous
- If you are in a Ghost and you accelerate towards the communications tower near the slopes quickly, look up and there is a Phantom going overhead.
- There was cinematic cut from the beginning of this level in which you would see Brutes lining up and killing Elite Councilors.
- Grunt allies surprisingly can be given the Rocket Launcher. The best way to do this is obtain the Thunderstorm Skull and play on Easy. Therefore your Grunts are Ultras and can take a lot of damage.
- At several points throughout the level, one or more of your enemies will run ahead to alert groups further along. (Most notably the Brute that will run into the top of the three-leveled room and yell "Elite resistance, warn the others!")
- This level and The Great Journey are the only levels in Halo 2 where a Zealot Elite appear on any difficulty. They are also the only levels where Zealots appear as allies in the whole trilogy.
- When entering the cave you could also see all types of mysterious faces, at the end by the cave if you look to the right there are cat faces.
- When beginning the mission, go to the second rock to the north east, after that turn a little bit left to see the other wall, there is grass forming a bird head and if you look more up there are horns which might mean this is another devil bird like the one in Zanzibar.
- This is the only level in the entire Halo series that is just a "revenge" mission, there are no orders to follow, no missions or guidelines to follow, just settling the score with the Brutes and making your way through the Forerunner complexes.
- Just before "Step Aside, Let the Man Through", you can find a Grunt covering his head and shaking. If you nudge him he will say: "Please! No hurt! Me like Elites!. Brutes stinky bad bad! Me stay here and make sure no Brutes come behind mighty Arbiter! [laughs nervously]... eh?" This Grunt is known as the Cowardly Grunt, and is one of the three Talking Grunts.
- In the Fight Club part, there is a Brute with a Shotgun that if not killed, can be seen trying out the Shotgun on the wall.
- In the beginning of the level, you can see sparks of blueish light streaming around of the edge of the cliff. They have a resemblance to the Holo-Drones from when fighting Sesa 'Refumee.
- Part of the events of the levels do not make sense: Master Chief and the Arbiter were teleported to their relative locations after meeting Gravemind at the same time. At the end of Uprising, you see Tartarus arriving at the control room, yet at the start of the next level, you see the Phantoms just leaving High Charity. This explained in the Legendary Edition DVD, where you are told that they take place at the same time, and that there is a door closing sound at the end, and also at the start of the next Arbiter Level.
- The Random Brute is found on this level.
Gallery
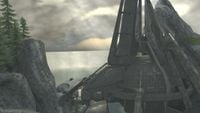
Delta Halo's Control Room.
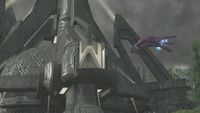
The Brute Controlled Phantom Lands At the control room door.


References
Related Pages
| Preceded by Gravemind |
Halo 2 Campaign Uprising |
Succeeded by High Charity |


