Halo (Halo 3 level): Difference between revisions
From Halopedia, the Halo wiki
Stigma-231 (talk | contribs) m (Reverted edits by 12.77.178.53 (Talk) to last version by Zero Spartan) |
(Undo revision 1627358 by AHEXILE (talk) Whilst that is a possibility (though unlikely), linking it like that would imply it is the definite intended meaning, which is not the case.) Tag: Undo |
||
| (607 intermediate revisions by more than 100 users not shown) | |||
| Line 1: | Line 1: | ||
{{ | {{Title|Halo}} | ||
{{ | {{Status|Gameplay}} | ||
{{disambig header|Halo 3 campaign level|other uses of the word Halo|Halo (disambiguation)}} | |||
{{Level infobox | {{Level infobox | ||
|prev=''[[Cortana ( | |pagegamelabel=H3 | ||
|next=''[[Halo 3 | |prev = ''[[Cortana (level)|Cortana]]'' | ||
|game=''[[Halo 3]]'' | |next = ''[[Halo 3 credits]]'' | ||
|name='''''Halo'''''[[ | *''[[Epilogue (Halo 3)|Epilogue]]'' (''Master Chief Collection'') | ||
|player=[[ | *''[[Prologue]]'' (chronologically) | ||
|date= [[2552]] | |game = ''[[Halo 3]]'' | ||
| | |devname=<code>120_halo</code> | ||
| | |name = '''''Halo''''' | ||
|image =[[File:H3 Halo Loadscreen.png|300px]] | |||
|player = [[John-117]] | |||
| | |date = [[2552#December|December 11, 2552]]{{ref/Site|D=01|M=6|Y=2020|URL=http://halo.xbox.com/en-us/intel/featured/video/herofortitude/bfe5038b-314a-4f17-a6be-f7613e0e3788|Site=Halo Waypoint|Page=Hero-Fortitude}}<br>[[2553#March|March 3, 2553]] {{C|Eulogy cutscene}}<br>[[2557#July|July 21, 2557]] {{C|Legendary ending}} | ||
|place = [[Installation 08]] | |||
|objective= Activate and escape from [[Installation 08|Halo]]. | |||
|partime=00:20:00 {{C|''Master Chief Collection''}} | |||
|parscore=24,000 {{C|''Master Chief Collection''}}<br/>15,000 {{C|''Halo 3''}} | |||
| | |||
}} | }} | ||
{{Article quote|Light the Ring. Destroy the Flood.}} | |||
'''Halo'''<ref>[http://halo.bungie.net/Stats/GameStatsCampaignHalo3.aspx?gameid=21687 '''Bungie.net''': ''Halo 3 Game Details'']</ref> is the tenth and final [[Campaign]] mission of ''[[Halo 3]]''. | |||
Upon completing it on [[Normal]] or higher, the player unlocks the [[Return]] achievement. If the player gets 15,000 points or more in the meta game, they will unlock the [[Reclaimer (Achievement)|Reclaimer]] achievement. This level is also the second level in the ''Halo'' series to bear the name of another level, following the [[Halo (Halo: Combat Evolved level)|second level]] of the [[Halo: Combat Evolved|first game]]. | |||
John | ==Summary== | ||
[[John-117]], [[Thel 'Vadam]] and [[Sergeant]] [[Avery Junior Johnson|Johnson]] make their way towards the [[Control Room]] in order to activate the ring using the [[Activation Index|Index]] from the first [[Installation 04|Halo]] encountered. However, the [[Gravemind]] sends [[Flood]] [[Flood combat form|combat forms]] (and later [[Flood pure form|pure forms]]), carried by [[Flood dispersal pod]]s, to try to stop them. After holding outside the Control Room for a while, [[343 Guilty Spark]] opens the door and they reach the Control Room. When Spark realizes that they are going to activate the unfinished Halo, which will destroy the Ark and the new installation, he fatally injures Johnson, who was activating the ring. The monitor then locks the Arbiter out of the Control Room and corners John-117. Just as Spark is about to kill the [[SPARTAN-II program|Spartan-II]], Johnson, barely alive, fires his Spartan Laser and damages the monitor. He then hands the weapon to John-117 and faints. The Chief, after firing three shots at the Monitor, finally kills the [[rampancy|rampant]] AI unit. He then says farewell to Johnson who dies from his injuries, and activates the ring with Cortana. Outside the Control Room, the Chief and the Arbiter battle their way to Johnson's Warthog and race their way to the {{UNSCShip|Forward Unto Dawn}}. After entering the frigate, the Arbiter heads to the bridge while the Chief uploads Cortana to a [[holotank]], and she proceeds to fire up the frigate's engines. The Master Chief, stuck in the cargo bay as they enter the portal, relaxes as the Halo fires and then explodes, killing the [[Gravemind]] and the Flood upon the Ark. | |||
Cortana | In March 2553, Lord Hood delivers a speech commemorating the fallen combatants of the battle, and reveals that the Chief, with Cortana in his helmet, did not return to Earth with the front half of the ''Forward Unto Dawn''. As a result, the Master Chief has been officially declared [[missing in action]], though both Lord Hood and the Arbiter, the only Sangheili present at the memorial, express doubt over the Chief's presumed death. Lord Hood, though unable to forgive the Arbiter for what his species did to humanity, shakes hands with his former enemy and thanks him for standing by the Master Chief until the end. 'Vadam then leaves for Sanghelios with Rtas 'Vadum on board the ''[[Shadow of Intent]]'' to ensure that [[Sanghelios|their own world]] is safe. | ||
In a post-credits scene, it's revealed that the Master Chief survived but is trapped in the rear half of the ''Forward Unto Dawn'' which was dropped out into unknown space when the [[Portal at Voi]] shut down from the damage caused when the Halo fired and "did a number on the Ark." Much like after their victory at the first Halo ring, Cortana lists their accomplishments - stopping the Covenant and the [[Prophet of Truth]] and the Flood - and believes that they are finished. This time, the Master Chief agrees with Cortana that their work is finished. The Chief uploads Cortana to another holo tank and she promises to drop a [[distress beacon]], but warns that it could possibly be years before anyone finds and rescues them. The Master Chief goes into cryosleep to await rescue, ordering Cortana to "[[Halo 4|wake me. When you need me]]." | |||
On Legendary difficulty, the rear half of the ''Forward Unto Dawn'' is shown drifting towards an [[Requiem|unknown planet]]. | |||
== | ==Transcript== | ||
[[File:Soiark.jpg|thumb|300px|Master Chief, [[Thel 'Vadam|the Arbiter]], and Cortana passing over the ''[[Shadow of Intent]]''.]] | |||
[http://www.youtube.com/watch?v=AwHh4TvqKKo '''{''Cutscene''}'''] | |||
''Fades in to the Pelican [[John-117]], [[Thel 'Vadam]] and [[Cortana]] are on board and heading towards [[Installation 08]]. The {{Class|CAS|assault carrier}} ''[[Shadow of Intent]]'' flies slowly under the megastructure. Cuts to the cockpit of the Pelican.'' | |||
'' | |||
[[ | |||
*'''[[Shipmaster]] [[Rtas 'Vadum]] (COM)''': "We are aboard, [[Human]]s...and [[Sangheili|Elites]]. Will you not come with us, brother?" | |||
*'''[[Arbiter]] [[Thel 'Vadam]]''': "No. This is our fight. And I ''will'' see it finished." | |||
*'''[[ | |||
''The [[D77H-TCI Pelican|Pelican]] nears the Halo ring.'' | |||
*'''[[ | *'''[[Cortana]]''': "[[Avery Junior Johnson|Johnson]]? Do you have the Frigate?" | ||
'' | *'''[[Sergeant Major]] [[Avery Junior Johnson]] ([[Local grid Pz67-3383|Video COM]])''': "Yes, ma'am. I'll land her as close to the control room as I can." | ||
*''' | *'''Cortana''': "''Safe'' is better than close, [[Sergeant Major]]." | ||
*''' | *'''Johnson (Video COM)''': "Roger that. And ma'am? It's good to have you back." | ||
''The Pelican arrives at Halo, flying over unfinished terrain. The rear port engine is too damaged for a normal landing. The [[John-117|Master Chief]] makes a crash landing in a snowy canyon near the Control Room. The Chief and the Arbiter clamber out. From behind the cliffs approaches the {{UNSCShip|Forward Unto Dawn}}.''[[File:1578645048 c67a9b7a49 b.jpg|thumb|300px|Master Chief's Pelican crash-landing on [[Installation 08]].]] | |||
*''' | *'''Cortana''': "Halo. It's so new... Unfinished. I'm not exactly sure what will happen when we fire it..." | ||
''The | ''The Arbiter tosses the Master Chief an [[MA5C assault rifle]].'' | ||
*''' | *'''[[Master Chief Petty Officer]] [[John-117]]''': "We'll head for the Portal. And we'll all go home." | ||
''' | '''{''Gameplay''}''' | ||
===Full Circle=== | |||
'''''[[Assault on the Control Room]].''''' | |||
''The Chief and the Arbiter prepare to head for the Control Room, making sure that they stock up on enough supplies from their crashed Pelican.'' | |||
''The Chief and | |||
*'''Cortana''': "Head through the cliffs." | *'''Cortana''': "Head through the cliffs." | ||
''The Chief and | ''The Chief and the Arbiter head through the icy caves.'' | ||
''If the Chief | ''If the Chief stalls:'' | ||
*'''Cortana''': "The Control Room isn't far!" | *'''Cortana''': "The Control Room isn't far!" | ||
''If the Chief heads for the [[ | ''If the Chief heads for the [[Terminal (Halo 3)|Terminal]] instead:'' | ||
*'''Cortana''': "Where are you going?" | *'''Cortana''': "Where are you going?" | ||
''When the Chief reaches the Terminal'' | ''When the Chief reaches the Terminal:'' | ||
*'''Cortana''': "Wait, what's that?" | *'''Cortana''': "Wait, what's that?" | ||
| Line 137: | Line 89: | ||
*'''Cortana''': "How many of these have you found?" | *'''Cortana''': "How many of these have you found?" | ||
''If the Chief re-accesses the Terminal, or takes too long reading it | ''If the Chief re-accesses the Terminal, or takes too long reading it:'' | ||
*'''Cortana''': "Come on, Chief, let's get back on track. The Control Room is outside!" | *'''Cortana''': "Come on, Chief, let's get back on track. The Control Room is outside!" | ||
''The Chief and | ''The Chief and the Arbiter arrive at the foot of the pyramid-like Control Room structure. Suddenly, [[Flood dispersal pod]]s begin to drop in.'' | ||
*'''[[Gravemind]]''': "Did you think me defeated?" | *'''[[Gravemind]]''': ''(angrily)'' "Did you think me ''defeated''?!" | ||
*'''Cortana''': "Flood | *'''Cortana''': "Flood dispersal pods! Control Room's at the top of that tower, Chief, go!" | ||
'' | ''The Master Chief and the Arbiter fight their way through numerous combat forms and head for a ramp on the right side of the tower. More Flood drop in on them, but Sentinels appear and provide cover fire.'' | ||
''If the Chief reaches the end of the wrong side of the tower.'' | |||
'' | *'''Cortana''': "There should be ''ramps'' that lead to the top - check the other side!" | ||
'' | ''The Arbiter and the Master Chief push their way up the tower, but the [[Flood]] continues to attack with overwhelming force.'' | ||
''Johnson appears on the cliff with a [[M6 Spartan Laser|Spartan Laser]], shooting down Flood forms.'' | |||
'' | *'''Johnson (COM)''': "I got you covered, Chief. Meet you at the top of that tower." | ||
''If the Chief heads back the other way:'' | |||
'' | *'''Johnson (COM)''': "Careful, I can't cover you on the far side." | ||
''The Master Chief and the Arbiter continue upward.'' | |||
'' | *'''Johnson (COM)''': "Keep moving, Chief! I've got your back." | ||
''The Master Chief and the Arbiter get closer to the top. Johnson continues to fire from the cliff.'' | |||
'' | *'''Johnson (COM)''': "Flood are crawling all over that tower; watch yourself!" | ||
''Flood | ''The Master Chief and the Arbiter reach the top floor. Johnson provides cover fire for them as numerous Flood forms continue assaulting the tower.'' | ||
*''' | *'''Johnson (COM)''': "[[343 Guilty Spark|Spark]]? You in there? Open the damn door!" | ||
*'''343 Guilty Spark (COM)''': "Of course, [[Reclaimer]]. | *'''[[343 Guilty Spark]] (COM)''': "Of course, [[Reclaimer]]. Just as soon as you dispose of all proximate Flood threats. I'm afraid contamination protocols do not allow me to-" | ||
*''' | *'''Johnson (COM)''': "Yeah, yeah, I hear you!" | ||
*'''Cortana''': "Was that the Monitor? You didn't tell me he was here. Well, we ''are'' finally doing what he wanted." | *'''Cortana''': "Was that the ''[[Monitor]]''? You didn't tell me he was here. Well, we ''are'' finally doing what he wanted." | ||
''The Flood continues to stubbornly attack with | ''The Flood continues to stubbornly attack with overwhelming force.'' | ||
'' | *'''Gravemind''': "I have beaten fleets of ''thousands!'' Consumed a galaxy of flesh and mind and bone!" | ||
''The Chief, the Arbiter, Sergeant Johnson and any surviving [[Sentinel]]s fight off wave after wave of Flood. Finally, the tower is secured. Johnson comes down from the cliff and joins the Master Chief and the Arbiter.'' | |||
*''' | *'''Johnson''': "Open up! Coast is clear." | ||
*''' | *'''Cortana (COM)''': "Not for long. I'm tracking additional dispersal pods. They'll be hitting any minute!" | ||
''The doors to the tower open.'' | |||
'' | *'''Johnson''': "Chief, Arbiter! Let's move!" | ||
''The trio enters the tower. They move down a corridor, turn the corner, and arrive at a set of blast doors.'' | |||
*''' | *'''Gravemind ([[Character interludes|Gravemind Moment]])''': "Do I take life or ''give'' it? [[Forerunner-Precursor war|Who is victim, and ''who'' is foe?]]" | ||
*''' | *'''Cortana''': "It's trying to ''rebuild'' itself on this ring!" | ||
*'''Johnson''': "Hurry! Control Room's close!" | |||
''The trio heads through another set of blast doors and finally reaches the Control Room.'' | |||
{'' | [http://www.youtube.com/watch?v=EnxbGgDC_Oc '''{''Cutscene''}'''] | ||
''The Chief, | ''The Control Room doors open up. The Master Chief, the Arbiter, and Johnson cautiously enter. Hearing the shrieks and growls of the approaching Flood, they turn around, weapons drawn. The second set of blast doors closes, sealing the Flood out. The Arbiter stands guard at the doorway while the Master Chief and Johnson prepare to activate the installation.''[[File:1578649590 bd337a0283 b.jpg|thumb|300px|The trio enters the Control Room.]] | ||
*'''Cortana''': "Yank me, Chief." | *'''Cortana''': "Yank me, Chief." | ||
''The Chief removes Cortana from his helmet.'' | ''The Chief removes Cortana's [[data crystal chip|data chip]] from his helmet.'' | ||
*''' | *'''Johnson''': "I'm not gonna lose [[Cortana|her]] [[Miranda Keyes|too]]." | ||
''The Chief tosses | ''The Chief tosses the data chip to Johnson, who heads for the control panel. A rotating [[Holography|holographic]] image of the incomplete Halo ring hovers at the center of the chamber.'' | ||
''343 Guilty Spark appears from above and accompanies Johnson.'' | |||
*''' | *'''343 Guilty Spark''': ''(humming to himself)'' "Oh, hello! Wonderful news - the installation is almost complete!" | ||
*''' | *'''Johnson''': ''(uninterested)'' "Terrific." | ||
*''' | *'''343 Guilty Spark''': "Yes...isn't it? ''(Short but uneasy silence)'' I have begun my simulations. No promises, but initial results indicate this facility should be ready to fire...in just a few more days!" | ||
*''' | *'''Johnson''': ''(impatiently)'' "We don't ''have'' a few more days!" ''(gets ready to activate the installation)'' | ||
*''' | *'''343 Guilty Spark''': ''(shocked, alarmed)'' "Bu-bu-but a premature firing will ''destroy'' [[Installation 00|the Ark]]!" | ||
*''' | *'''Johnson''': ''(dismissively)'' "Deal with it." | ||
''Guilty Spark | *'''343 Guilty Spark''': ''(quietly, to himself)'' "...will destroy this installation." | ||
''Spark's "eye" suddenly turns red, and he blasts Johnson with his energy beam.'' | |||
*''' | *'''Johnson''': ''(falls to his knees and collapses, screaming in pain)'' "Aaaah!!" | ||
'' | *'''343 Guilty Spark''': "Unacceptable! Unacceptable! ''Absolutely'' unacceptable!" | ||
'' | |||
''The Chief rushes to Johnson's aid. 343 Guilty Spark shoots at the Master Chief, who is flung backwards from the force of the blast and onto the floor. His [[energy shielding|energy shields]] drop and attempt to recharge.'' | |||
'' | *'''343 Guilty Spark''': ''(in hysterics)'' "Protocol dictates action! I see now that helping you was ''wrong!''" | ||
''The Arbiter, hearing the commotion, moves forward, and 343 Guilty Spark blasts him as well, knocking him out of the Control Room. (In single-player, the doors close, sealing the Arbiter out of the room). The Chief tries to get back up, and Spark blasts him again, knocking him to his knees. With no shields protecting him this time, his armor starts to smoke.'' | |||
*'''343 Guilty Spark''': ''(his eye turns back to blue)'' "You are the [[human|child]] of my [[Forerunner|makers]]. [[Reclaimer|Inheritor]] of ''all'' they left behind. You ''are'' Forerunner! But this ring... ''(his eye turns red again)''...is ''mine''." | |||
[[File:HTMCC-H3 ChiefVsSpark.jpg|thumb|300px|John-117 and Guilty Spark fight over the Halo ring.]] | |||
''The Chief fires at 343 Guilty Spark with no effect | '''{''Gameplay''}''' | ||
*'''343 Guilty Spark''': "I take no pleasure in doing what ''must'' be done." | |||
''The Chief fires whatever weapons he has at the [[rampancy|rampant]] 343 Guilty Spark with no effect whatsoever. Spark counters with his powerful laser blasts and a repulsion field that forces the Chief backwards.'' | |||
*'''343 Guilty Spark''': "You do ''not'' deserve this ring!" | *'''343 Guilty Spark''': "You do ''not'' deserve this ring!" | ||
| Line 256: | Line 213: | ||
*'''343 Guilty Spark''': "''I'' have kept it safe. It belongs to ''me''!" | *'''343 Guilty Spark''': "''I'' have kept it safe. It belongs to ''me''!" | ||
*''' | ''Unnoticed by 343 Guilty Spark, Johnson manages to sit halfway up and shoulder the Spartan Laser.'' | ||
*'''Johnson''': "Not for long!" | |||
''Johnson shoots 343 Guilty Spark with his Spartan Laser. Caught off-guard, 343 Guilty Spark is blasted away from the Chief, falling to the ground and becoming inert.'' | |||
''Johnson | ''The Chief rushes up to Johnson.'' | ||
*'''Johnson''': "Kick his ass." | *'''Johnson''': ''(weakly)'' "Kick his ass." | ||
''Johnson passes out. The Chief takes | ''Johnson passes out. The Chief takes his Spartan Laser to destroy Guilty Spark.'' | ||
''343 Guilty Spark rises from the floor, flying at a slightly tilted angle. At this point, 343 Guilty Spark will say four sentences at random.'' | ''343 Guilty Spark rises from the floor, flying at a slightly tilted angle, his metal body visibly damaged. At this point, 343 Guilty Spark will say four sentences at random.'' | ||
*'''343 Guilty Spark''': "You - you cracked my casing!" | *'''343 Guilty Spark''': "You - you cracked my casing!" | ||
*'''343 Guilty Spark''': " | *'''343 Guilty Spark''': "Damage! ''Damage!'' That hurt, Reclaimer!" | ||
*'''343 Guilty Spark''': "My eye! Do you mean to blind me! | *'''343 Guilty Spark''': "My eye! Do you mean to blind me?!" | ||
*'''343 Guilty Spark''': "Stop now, before one of us gets hurt!" | *'''343 Guilty Spark''': "Stop now, before one of us gets hurt!" | ||
''After making the first shot, Spark begins to fly at a more tilted angle, leaking blue plasma from his sides and he begins to spark. Again, the following sentences are in random order.'' | ''After making the first shot, Spark begins to fly at a more tilted angle, leaking blue plasma from his sides and he begins to spark. Again, the following sentences are stated in random order.'' | ||
*'''343 Guilty Spark''': ''( | *'''343 Guilty Spark''': ''(voice breaks, then readjusts itself)'' "-destroy your inheritance!" | ||
*'''343 Guilty Spark''': "Accept your le-gacy!" | *'''343 Guilty Spark''': "Accept your le-gacy!" | ||
*'''343 Guilty Spark''': "Think of you-ou-ou-our | *'''343 Guilty Spark''': "Think of you-ou-ou-our [[Forerunner|forefathers]]!" | ||
''Following the second shot, Spark's casing becomes distorted, with pieces of him sheared off. More plasma leaks from his sides and | ''Following the second shot, Spark's casing becomes distorted, with pieces of him sheared off completely. More plasma leaks from his sides and the sparks happen more ferociously. The right side of his 'eye' has broken off. Once again, the following sentences are said in a random order.'' | ||
*'''343 Guilty Spark''': (Makes a garbled humming sound) | *'''343 Guilty Spark''': ''(Makes a garbled humming sound)'' | ||
*'''343 Guilty Spark''': ''( | *'''343 Guilty Spark''': ''(high, crackling voice)'' "M-m-my pr-precious!" | ||
*'''343 Guilty Spark''': ''( | *'''343 Guilty Spark''': ''(deteriorating, breaking voice)'' "I a-a-a-am the Monitor of Installation Z-Zero F-Four!" | ||
''After making the finishing shot.'' | ''After making the finishing shot.'' | ||
*'''343 Guilty Spark''': "Oh myyyyyyyyyy-aaahh!" | *'''343 Guilty Spark''': "''Oh myyyyyyyyyy-aaahh!''" | ||
''Guilty Spark explodes | ''343 Guilty Spark explodes in a flash of blue and white light.'' | ||
[http://www.youtube.com/watch?v=AaYhzwACZVM '''{''Cutscene''}'''] | |||
''The Master Chief bends over Sergeant Johnson, who is still alive - barely.'' | |||
*'''John-117''': "I'm getting you out of here." | |||
'' | *'''Johnson''': "N-No... No, you're not." | ||
''Johnson grabs the Chief's hand with Cortana's chip in his.'' | |||
*''' | *'''Johnson''': "Don't - don't let her go. Don't...''ever'' let her go. ''(coughs)'' Send me out... with a bang." | ||
''Johnson | ''Johnson succumbs to his wounds. The Master Chief takes Cortana from him, and lets go of his hand. He stands up and wordlessly releases Cortana into Halo's core, gripping the data chip tightly.'' | ||
*''' | *'''Cortana''': ''(Pauses; looks sadly at Johnson's body)'' "Chief... I'm ''so'' sorry." | ||
[[File:ChiefBeam-large.jpg|thumb|300px|[[John-117]] activating Halo.]] | |||
'' | ''The Master Chief says nothing. He makes a slight gesture with his hand. Cortana bows her head, eyes closed, and presses her hand to the core, activating Halo. She uploads herself back into her chip.'' | ||
''The Master Chief | ''The Master Chief places her chip in the back of his helmet and then turns around. Behind him, the control console lights up and throbs with power. A massive beam of energy erupts from the Core and the whole Control Room starts to shake violently. A support beam falls from the ceiling and crashes into the platform. Johnson's body slides off the platform as it tilts to one side and begins to fall. The Master Chief runs for the door, which has opened again. The Arbiter can now be seen waiting for the Master Chief.'' | ||
'' | '''{''Gameplay''}''' | ||
=== The Way the World Ends === | ===The Way the World Ends=== | ||
'''''Pedal to the Metal.''''' | '''''Pedal to the Metal.''''' | ||
[[File:Halo Chief Arbiter.jpg|thumb|300px|John-117 and Thel 'Vadam in Avery Johnson's [[M12 Warthog|Warthog]].]] | |||
[[ | *'''[[Thel 'Vadam]]''': "I am sorry, Spartan. But come." | ||
''Pieces of the walls around them suddenly explode; the Master Chief and the Arbiter run for the doorway leading outside, fighting a small group of Flood along the way.'' | |||
''The Master Chief and the Arbiter make it back outside, revealing a piece of collapsed ice forming a slope upwards.'' | |||
'' | *'''Thel 'Vadam''': "Even in death, your Sergeant guides us on." | ||
*''' | *'''Cortana''': "The ''[[UNSC Forward Unto Dawn|Dawn]]''... Of course - the frigate! We still have a chance!" | ||
*'''Cortana''': "The '' | *'''Cortana''': "Find the doorway in the cliffs, Chief. The ''Dawn'' is on the other side." | ||
*'''Cortana''': " | ''If the Master Chief takes too long to get to the doorway.'' | ||
*'''Cortana''': "See that doorway further on? Get to it." | |||
''The Master Chief and the Arbiter head along the cliff, encountering Flood and Sentinels, the latter having followed 343 Guilty Spark's lead and turned against them too.'' | |||
''They make it inside and find themselves in the middle of a battle between the Flood and a group of Sentinels.'' | |||
'' | *'''[[Gravemind]]''': ''(in a resigned and defeated tone)'' "Resignation is my virtue. Like water I ebb and flow. Defeat is simply the addition of time to a sentence I ''never'' deserved... But ''you'' [[Forerunner-Precursor war|imposed]]." | ||
''The Master Chief and the Arbiter fight their way through a horde of [[Pod infector]]s and [[Flood carrier form|carrier form]]s.'' | |||
*'''Cortana''': "Don't let this ring be the end of us, Chief." | *'''Cortana''': "Don't let this ring be the end of us, Chief." | ||
''They make it back outside.'' | ''They make it back outside, where they find a Warthog waiting for them.'' | ||
*'''Cortana''': "There! Johnson's [[Warthog]]." | *'''Cortana''': "There! Johnson's [[M12 Warthog|Warthog]]." | ||
'' | ''The Master Chief takes the wheel. The Arbiter takes the turret. (3-4 player co-op: Two Warthogs are present, both facing opposite directions.)'' | ||
*'''Cortana''': "Come on, Spartan - | *'''Cortana''': "Come on, Spartan - go, go, ''go!''" | ||
''As they reach open area, a massive explosion erupts alongside them.'' | ''The Master Chief floors it. As they reach an open area, a massive explosion erupts alongside them.'' | ||
*'''Cortana''': "Drive, Chief. Head for the | *'''Cortana''': "Drive, Chief. Head for the [[Charon-class light frigate|frigate]]." | ||
[[ | [[File:1577758987 aa8783f570 b.jpg|thumb|300px|John-117 and Thel 'Vadam race to escape Halo in Johnson's Warthog.]] | ||
*'''Cortana''': "Come on! Faster!" | *'''Cortana''': "Come on! Faster!" | ||
''The Chief and | ''The Chief and the Arbiter reach a massive open structure.'' | ||
*'''Cortana''': "The ''Dawn'' is close. We ''can'' make it! As long as the ground doesn't fall | *'''Cortana''': "The ''Dawn'' is close. We ''can'' make it! As long as the ground doesn't fall underneath us..." | ||
''The Warthog soon enters inside the interior of a large | ''The Warthog soon enters inside the interior of a large hallway with ramps.'' | ||
*'''Cortana''': "The charging sequence | *'''Cortana''': "The charging sequence...it's too much for the ring to take!" | ||
''They soon reach another open structure where | ''They soon reach another open structure where battles between the Flood and Sentinels continue.'' | ||
*'''Cortana''': "Halo is ripping itself apart!" | *'''Cortana''': "Halo is ripping itself apart!" | ||
| Line 374: | Line 342: | ||
''They come upon a large open stretch.'' | ''They come upon a large open stretch.'' | ||
*'''Cortana''': "Hurry Chief! Don't stop!" | *'''Cortana''': "Hurry, Chief! Don't stop!" | ||
*'''Cortana''': "Charging sequence at 30%..." | *'''Cortana''': "Charging sequence at 30%..." | ||
''They reach one more open structure, this time a few Flood [[ | ''They reach one more open structure, this time a few Flood [[Flood pure form|pure forms]] await them.'' | ||
*'''Cortana''': "50%, Chief!" | *'''Cortana''': "50%, Chief!" | ||
''They reach another | ''They reach another hallway with ramps, where a larger battle between Sentinels and the Flood rages on.'' | ||
*'''Cortana''': "70%!" | *'''Cortana''': "70%!" | ||
''The | ''The Warthog makes it out of the hallway battle, to an area where the frigate can be seen from a distance.'' | ||
' | [[File:Escape.jpg|thumb|300px|John-117 and Thel 'Vadam escaping [[Installation 08]] on a [[M274 Mongoose|Mongoose]].]] | ||
*'''Cortana''': | *'''Cortana''': "80% charged!" | ||
'' | ''They head for the final bend, encountering more Sentinels. In the distance, a small group of Flood can be seen falling off a collapsing section of platform.'' | ||
*''' | *'''Cortana''': ''(desperately)'' "90% - firing sequence initiated!" | ||
'' | ''If the Chief heads to an [[:Category:Easter eggs|Easter egg]], they meet one last Covenant soldier.'' | ||
*''' | *'''[[Final Grunt]]''': "Hey, [[Demon]]! The jerk store called, and they're all out of you! Poor ''you'', stolen at the age of six and conscripted into the military, waaaaagh...! Okay look, if you let me live, I got the [[Fist of Rukt]]. Look, I'll be the bottom! I'll polish your boots. I'll polish your helmet! It's the ''[[Wikipedia:Benzene|gas]]'', ha-ha! When I'm on the gas, I don't know what I'm doing half the time!" | ||
''The Master Chief and the Arbiter make it to the final straight stretch to the {{UNSCShip|Forward Unto Dawn}}, but there's a 70m (230ft) gap of thin air between the open cargo bay and the edge of the structure.'' | |||
*'''Cortana''': "''Gun it'', Chief! Jump! ''Floor it''! Right into the hangar!" | |||
'''{'' | [http://www.youtube.com/watch?v=JxrOw35DOGc '''{''Cutscene''}'''] | ||
''The Warthog | ''The Warthog makes the jump, but doesn't land well, tumbling and rolling as it crashes into the frigate's hangar. The Master Chief and the Arbiter recover, then the ''Forward Unto Dawn'' shifts. A [[M808 Scorpion|Scorpion Tank]] begins sliding towards the Arbiter, who takes cover behind a pile of crates. The tank plows into it. The Chief leaps over the Warthog and hesitates, seeing the Arbiter digging himself out of the crates. The Chief nods at him and the Arbiter nods back. The Arbiter rushes to the bridge while the Chief runs to the hangar control and inserts Cortana to take control of the frigate. Her [[avatar]] appears from a [[holotank]] next to the terminal.'' | ||
*'''Cortana''': "Hang on!" | *'''Cortana''': "Hang on!" | ||
''Cortana ignites the thrusters at full burn and launches the ''Dawn'' at full speed. The Chief grabs onto the terminal | ''Cortana ignites the thrusters at full burn and launches the ''Forward Unto Dawn'' at full speed. The Chief grabs onto the terminal, hanging on for dear life as the ''Forward Unto Dawn'' leaves Halo's atmosphere. As the Chief tries to stay anchored, the Warthog flies out, striking the Chief on its way through the open hangar doors and out into empty space. The Chief flies off the panel, then glides down the floor towards the doors, with a self-destructing Halo looming beneath. The Chief punches his fist hard into the floor to get a grip, halting near the back end of the hangar. Cortana reaches out her arm towards him, scared of losing him.'' | ||
*'''Cortana''': "Chief! | *'''Cortana''': "''Chief!''" | ||
''The Scorpion flies out towards the Chief. He ducks his head just in time as it flies over him, narrowly missing the Chief but smashing the floor behind him and falling back towards Halo. The Chief begins to back | ''The Scorpion flies out towards the Chief. He ducks his head just in time as it flies over him, narrowly missing the Chief but smashing the floor behind him and falling back towards Halo. The Chief begins to climb back up to Cortana, finally making it to the holotank. Meanwhile, the Arbiter makes it to the bridge and sits down at the controls. The Chief braces behind the panel, inserting Cortana back into his helmet.'' | ||
[[File:FUD Escaping The Ark.jpg|thumb|300px|The ''Dawn'' escapes an unfinished Halo.]] | |||
*'''Cortana''': "If we don't make it | *'''Cortana''': "If we don't make it..." | ||
*''' | *'''John-117''': ''(Determined)'' "We'll make it." | ||
*'''Cortana''': "It's been an honor serving with you, | *'''Cortana''': "It's been an honor serving with you, ''John''." | ||
''Halo | ''The Chief finally rests his head back, exhausted. Halo fires and then suddenly explodes, engulfing the hangar in a blinding white light. All goes blank.'' | ||
''Level ends'' | |||
===Eulogy=== | |||
[http://www.youtube.com/watch?v=clt7zsx6aJQ '''{''Finale''}'''] | |||
[[File:Attend2.PNG|thumb|300px|Marines and the Arbiter pay their respects to Earth's fallen heroes.]] | |||
''On a hillside near the [[Portal at Voi]], which has now been shut down, [[UNSC Marine Corps|Marines]] gather. Fleet Admiral Lord [[Terrence Hood]] removes his hat, and begins his speech.'' | |||
*'''[[Terrence Hood|Lord Hood]]''': "For us, the storm has passed. The [[Human-Covenant War|war]] is over. But let us never forget those who journeyed into the howling dark and did not return. For their decision required courage beyond measure..." | |||
''Flashback: The front half of the ''Forward Unto Dawn'' enters the Earth's atmosphere, and crashes into the Indian Ocean. Two Marines track its descent.'' | |||
*'''Lord Hood (voiceover)''': "...sacrifice, and unshakable conviction that their fight, ''our'' fight, was elsewhere." | |||
''' | ''Flashback continued: An engineering crew cuts into the ''Forward Unto Dawn'' with torches while a rescue Pelican hovers overhead. The Arbiter emerges from the wreckage.'' | ||
''Flashback ends: The Arbiter is revealed to be present at the memorial, standing solemnly with the Marines. The ''[[Shadow of Intent]]'' can be seen hovering above in the distance.'' | |||
'' | *'''Lord Hood''': "As we start to rebuild, this hillside will remain barren. A memorial to heroes fallen. They ennobled all of us, and they shall not be forgotten." | ||
''Lord Hood puts his hat back on and salutes. Sergeant Stacker turns to the other Marines present.'' | |||
''[[ | *'''[[Gunnery Sergeant (UNSC)|Gunnery Sergeant]] [[Reynolds]]''': "Present arms!" | ||
'' | ''[[Seven]] Marines raise their [[BR55HB battle rifle|Battle Rifles]] and each fire a single burst of three shots: a [[Wikipedia:Three-volley salute|3-volley salute]]. The view pans over the Portal, now closed and silent, and [[Mount Kilimanjaro]] against the evening sky.'' | ||
''Later, the Arbiter approaches Lord Hood, standing alone in front of [[Voi Memorial|the Memorial]], which appears to be a Pelican wing, decorated with pictures of the fallen, including [[Miranda Keyes|Commander Miranda Keyes]] and [[Avery Junior Johnson|Sergeant Major Avery Johnson]], along with flowers, medals, ribbons, and other tokens of respect.'' | |||
[[File:Handshake-large.jpg|thumb|300px|Lord Hood and the Arbiter shake hands.]] | |||
''Under the UNSC emblem is an inscription commemorating the dead:'' | |||
''' | <tt>'''IN MEMORY OF THOSE FALLEN'''</tt> | ||
<tt>'''IN THE DEFENSE OF EARTH'''</tt> | |||
''' | <tt>'''AND HER COLONIES'''</tt> | ||
<tt>'''MARCH 3, 2553'''</tt> | |||
''Lord Hood and the Arbiter stare at the Memorial.'' | |||
'' | *'''Lord Hood''': "I remember how [[Human-Covenant War|this war]] [[First Battle of Harvest|started]]. What your kind did to mine. I can't forgive you. But..." | ||
''Hood turns to the Arbiter and holds out his hand.'' | |||
''' | *'''Lord Hood''': "You have my thanks. For standing by him to the end." | ||
''The Arbiter slowly shakes Admiral Hood's hand. After letting go, Hood's eyes are drawn to one part of the memorial in particular.'' | |||
'' | *'''Lord Hood''': "Hard to believe [[John-117|he's]] dead." | ||
''The Arbiter looks away, toward the ''Shadow of Intent'', hovering silently in the sky.'' | |||
'' | *'''Thel 'Vadam''': ''(quietly)'' "[[Arrival|Were it so easy]]." | ||
[[File:Thel Vadam and Rtas Vadum.jpg|thumb|300px|Thel 'Vadam and Rtas 'Vadum prepare to return home.]] | |||
''The | ''The Arbiter leaves the Memorial. His [[Kez'katu-pattern Phantom|Phantom]] heads back to the ''Shadow of Intent'', hovering in about the same position as the Portal to the Ark once was. The Arbiter meets Shipmaster Rtas 'Vadum on the [[bridge]]. 'Vadum is looking at a holographic image of Earth.'' | ||
*''' | *'''Rtas 'Vadum''': "Things look different. Without the [[San'Shyuum|Prophets]]' lies clouding my vision. I would like to see [[Sanghelios|our own world]] - to know that it is safe." | ||
''The Arbiter reassuringly places a hand on 'Vadum's shoulder.'' | |||
*'''Thel 'Vadam''': "Fear not. For we have made it so." | |||
''The Arbiter clenches his fist to his chest.'' | |||
'' | *'''Rtas 'Vadum''': "By your word, Arbiter." ''(clenches his fist to his chest likewise to Thel 'Vadam.)'' | ||
''The | ''The Arbiter takes a seat on the command chair, the one normally used by Rtas 'Vadum.'' | ||
*''' | *'''Thel 'Vadam''': "Take us home." | ||
''The ''Shadow of Intent'' leaves Earth.'' | |||
'' | ''Going back to the Voi Memorial, the view shows that next to the print "March 3, 2553", the number "117" is carved into the metal of the wing, and a rank insignia is taped to the upper right of it as a tribute to the Master Chief.'' | ||
''Fade to black. Credits roll.'' | |||
'' | ===Epilogue=== | ||
[http://www.youtube.com/watch?v=h62oVkSOB1Q '''{''Epilogue''}'''] | |||
*'''Cortana''': " | *'''Cortana''': "Chief? Can you hear me?" | ||
''The | ''The Master Chief, very much alive, awakens, floating in zero gravity in a debris-filled hallway on board the {{UNSCShip|Forward Unto Dawn}}.'' | ||
*'''Cortana''': "I' | *'''Cortana''': ''(relieved)'' "I thought I'd lost you, too." | ||
''The Master Chief looks at a gaping hole in the hallway. He drifts to his floating [[MA5C assault rifle|assault rifle]] and holsters it, then begins to drift to the end of the hallway.'' | |||
[[File:H3 - FUD aft.jpg|thumb|300px|The aft section of the ''Forward Unto Dawn'' lost in space.]] | |||
*'''John-117''': "What happened?" | |||
*'''Cortana''': "I'm not sure. When Halo fired, it shook itself to pieces. Did a number on the Ark. [[Portal at Voi|The Portal]] couldn't sustain itself. We made it through just as it collapsed." | |||
''The Chief reaches the end of the hallway, which opens up into empty space. The ''Forward Unto Dawn'' is revealed to be sheared in half, floating in a cloud of its own debris, still red-hot from the sudden slipspace slowdown.'' | |||
*'''Cortana''': "Well... some of us made it." | |||
''The ''Forward Unto Dawn's'' remaining half continues to drift aimlessly in unknown space.'' | |||
''The Chief begins to drift further inside the ship, finding a row of [[cryo chamber|cryotubes]] complete with a holotank to plug Cortana into.'' | |||
*'''Cortana''': "But you did it. [[Prophet of Truth|Truth]] and the [[Covenant]], the [[Flood]]..." | |||
''The Chief plugs Cortana's data chip into the holotank and she appears.'' | |||
*'''Cortana''': "It's finished." | |||
''The Master Chief turns off the flashlight on his helmet.'' | |||
*'''John-117''': "It's finished." | |||
''The Chief places his assault rifle in one of the rackets on the wall.'' | |||
*'''Cortana''': "I'll drop a [[distress beacon|beacon]], but it'll be a while before anyone finds us." | |||
''The Chief climbs into one of the cryotubes.'' | |||
*'''Cortana''': "[[2557|Years]], even." | |||
''The cryotube door begins to close.'' | |||
*'''Cortana''': "I'll miss you." | |||
'' | [[File:Legendary Planet.jpg|thumb|300px|The ''Forward Unto Dawn'' drifting towards [[Requiem|a mysterious planet]].]] | ||
*'''John-117''': "[[Dawn|Wake me]]. [[Halo 4|When you need me]]." | |||
''Cortana smiles, nodding. The cryotube closes and seals, freezing the Master Chief and bringing the Halo Trilogy to its conclusion.'' | |||
''Fade to black'' | |||
[http://www.youtube.com/watch?v=cvKqOZ8YY-o '''{''Legendary-only Scene''}'''] | |||
''The back half of the ''Forward Unto Dawn'' is seen drifting towards [[Requiem|a planet]]. A star is eclipsed by the ''Forward Unto Dawn'' for a second as it slowly comes out from behind the planet, casting light upon it momentarily before blinding the view completely.'' | |||
[[ | |||
''Game ends'' | |||
==Achievements== | |||
The following [[achievement]]s can be unlocked on this mission on the [[Xbox 360]] edition of ''Halo 3''. | |||
{|class="wikitable" | |||
|-align="center" | |||
!Icon | |||
!Name | |||
!Description | |||
!{{Gamerscore|Gamerscore}} | |||
|-align="center" | |||
|[[File:H3 Achievement Return.png]] | |||
|[[Return]] | |||
|Finish the final mission of the [[Campaign]] on [[Normal]], [[Heroic]], or [[Legendary]]. | |||
|{{Gamerscore|50}} | |||
|-align="center" | |||
|[[File:H3 Achievement Campaign Complete Normal.png]] | |||
|[[Campaign Complete: Normal]] | |||
|Finish the [[Campaign]] on [[Normal]]. | |||
|12{{Gamerscore|5}} | |||
|-align="center" | |||
|[[File:H3 Achievement Campaign Complete Heroic.png]] | |||
|[[Campaign Complete: Heroic]] | |||
|Finish the [[Campaign]] on [[Heroic]]<br />(unlocks achievement for [[Normal]], if not earned). | |||
|12{{Gamerscore|5}} | |||
|-align="center" | |||
|[[File:H3 Achievement Campaign Complete Legendary.png|65px]] | |||
|[[Campaign Complete: Legendary]] | |||
|Finish the [[Campaign]] on [[Legendary]]<br />(unlocks achievement for [[Normal]] and [[Heroic]], if not earned). | |||
|12{{Gamerscore|5}} | |||
|-align="center" | |||
|[[File:H3 Achievement Mythic.png]] | |||
|[[Mythic (Achievement)|Mythic]] | |||
|Find and claim this skull. | |||
|{{Gamerscore|10}} | |||
|} | |||
* | ==Trivia== | ||
===Glitches=== | |||
{{Main|Glitches}} | |||
*When the Flood first start to arrive in the Dispersal Pods, do not attack any of them. Exit the cave area and take a right hugging the wall for a second. After a rock and a bit of structure one will be able to climb the hill and back up to the cliff face near the terminal entrance. Enter the small building and hang around the terminal for a minute, then exit and jump back down the cliff like one would normally. More Dispersal Pods will land, doubling all Flood encounters. It seems to be an AI Respawn Glitch. Its effects stop after Johnson dies and only for the Flood. Numbers change with difficulty. | |||
*It is possible to kill Johnson and grab an infinite ammo Spartan Laser. The player must kill him the first time and take his low-ammo laser, switching it for a weapon Johnson can't pick up. He will stand up again with another Spartan Laser, and killing him again will allow this player to obtain it. This is handy to leave outside the control room door, because it is very effective against Sentinels and Flood alike. However, after killing Johnson multiple times (betrayal amount depends on the difficulty), the player will be marked as a [[Treason|traitor]] and Johnson will try to kill him/her.<ref>[http://www.youtube.com/watch?v=zk_zebv0-sk '''YouTube''': ''Johnson's Spartan Laser Glitch'']</ref> | |||
*If one kills Johnson before entering the Control Room, after killing 343 Guilty Spark, when the door opens, one can see Johnson on the floor wounded and a Flood [[Pod infector]] will convert him into a [[Flood combat form|Combat Form]]. If the Pod infectors are killed before they do so, he will get up and fight with the player, though he won't leave the building (since he's supposed to be dead, he has no scripted path to follow); if one tries pushing him out the door he will automatically run back. Still, if one somehow manages to push him until the Warthog, he will come within the Hog, but during the ending cutscene Johnson is not in the Warthog for obvious reasons. | |||
*If the player deploys an Auto-Turret after the Gravemind moment, the Auto-Turret will become an enemy. If the player deploys it facing the blast door, the one before fighting 343 Guilty Spark, and get killed while simultaneously triggering the cutscene, one will see two Master Chiefs, one dead and one alive. If the player does this on Co-op, after the cutscene, the Master Chief player will be unable to fight and Guilty Spark will target the Arbiter instead. Also, the Auto-Turret is capable of taking down the Arbiter's shield in the cutscene and will occasionally attack the Arbiter, Johnson, and/or Master Chief in the cutscene. | |||
*If one uses the aforementioned glitch for the infinite ammo Spartan Laser, one can kill the Arbiter and make him pick it up. If one does this near the end before getting on a vehicle, the Arbiter will pick it up and run towards the Control Room. He will stand there and not get in the Warthog or Mongoose. | |||
*A series of Cortana's dialogue during the Warthog Run ("Drive, Chief. Head for the frigate" to "Hurry, Chief! Don't stop!") may not play when the player plays the level from Mission Start. | |||
* | ===Mistakes=== | ||
*At the beginning of the level, Thel 'Vadam passes an Assault Rifle to the Chief in the cutscene. However, if the player got to this level by completing the level Cortana right before, the player will start with whatever weapon they took from that level, if they have the Cortana Skull, they will spawn with a Spartan Laser and if they didn't play the previous level, they have a rocket launcher and shotgun. | |||
**If the previous level is finished with the Flamethrower equipped, however, the loadout will be set to Assault Rifle and Rocket Launcher. | |||
*In gameplay, the Arbiter's primary weapon is a {{Pattern|Okarda'phaa|plasma rifle}} and an [[Type-1 Energy Weapon/Sword|Energy Sword]] as the secondary. During the cutscene in the Control Room, he is oddly shown wielding a [[Type-51 Carbine|Covenant Carbine]]. | |||
*Johnson's position in the gameplay section of the Control Room is different from his position in the cutscenes. During the cutscenes, he's directly in front of the Control Room's console, whereas in gameplay he is positioned nearly outside of the circular walkway. | |||
* | ===Easter eggs=== | ||
{{Main|Easter eggs}} | |||
[[File:Halo Mongoose End.jpg|thumb|There is a [[M274 Ultra-Light All-Terrain Vehicle|Mongoose]] hidden to the far left of the area where Johnson's Warthog is parked, though completing the level with the Mongoose does not alter the cutscene at the end (i.e. it's still a Warthog in the cutscene)]] | |||
*There is a [[Final Grunt|Talking Grunt]] on this level. He tries to make fun of the Master Chief's childhood by mocking how he was kidnapped and forced into the [[SPARTAN-II program]]. This is also a reference to other [[Special dialogue Grunt|Talking Grunts]], who appeared in past ''Halo'' games. | |||
*If you go all the way to the cave with the Terminal, then look to your right. You will see a dark area. Grenade launch yourself over to the first pillar then jump to the platform to your left. If you look at the wall with your flashlight you'll see Jason Jones (founder of Bungie) jumping up and down in his underwear. | |||
* | ===References=== | ||
[[File:IslandCompare.jpg|thumb|A comparison between the Cartographer Island and the final section of the Warthog run.]] | |||
*Another reference to ''Halo: Combat Evolved'', in the campaign lobby the Mission Start's description is ''[[Assault on the Control Room]]''. | |||
*The unfinished state of [[Installation 08]] seems to reference the original Halo concepts where the ring was in a broken form. | |||
*One of the lines spoken by 343 Guilty Spark while the player battles him is "...destroy your inheritance!". This has been interpreted by some as a reference to ''[http://www.imdb.com/title/tt0296766/ Inheritance]'', a feature film starring [[Jen Taylor]], who provides the voice of Cortana. However, it is more likely that 343 Guilty Spark is referring to the relation between the Forerunners and humans. | |||
*One of the other lines spoken by 343 Guilty Spark during the fight is "My precious!" This is a reference to [[Wikipedia:Gollum|Gollum]], a character from the ''[[Wikipedia:The Lord of the Rings|Lord of the Rings]]'' novels, who was absolutely obsessed with the One Ring and referred to it as his "precious". | |||
*It has been noted that the final section bears a striking resemblance to the [[Cartographer]] island from the level ''[[Silent Cartographer]]'' from the first game. Although it may be a coincidence, it is possible that the structure is the beginnings of the Cartographer island. | |||
*The last section of gameplay on this level is a remake of the [[Warthog run]] on ''[[The Maw]]'', the last level of the first game, only it is slightly more complex than the original Warthog run, and has no time limit, although the player will die if a panel falls out from underneath them which serves as a replacement to the time limit. It maintains many elements of the original 'Maw Run', including a chasm-jump. It is of note that both runs effectively start in control centers ({{UNSCShip|Pillar of Autumn}}'s bridge, and Halo's Control Room), use the Warthog as the main method of transport, involve an escape to a hangar bay and end with large explosions that destroy a Halo. | |||
*There is a [[Seven|7]] reference in the end when Lord Hood has finished making his speech, '''7''' Marines under orders from Sergeant Stacker fire a 3-volley salute with their battle rifles. | |||
*Cortana's line, "But you did it. Truth and the Covenant... the Flood, It's finished," is a reference to one of her lines from the end of ''Halo: Combat Evolved'' — "We did what we had to do... for Earth. An entire Covenant armada obliterated, and the ''Flood''... we had no choice. Halo... it's finished." In the first game, the Chief denies it, as the war is not over yet. ("I think we're just getting started.") This time, with the war over and the Flood obliterated, he agrees. | |||
**It is also a reference to the final scene of ''Halo 2'', where the Chief says he is 'finishing the fight.' "Finish the Fight" was used as the tagline for ''Halo 3'''s advertising campaign. | |||
**Also worthy of note is that the ''Halo'' Trilogy starts with the Master Chief awakening from cryo-sleep and ends with him going into cryo-sleep. | |||
*The chapter title "The Way the World Ends" and Johnson's line "Send me out... with a bang." are both references to the poem "[[wikipedia:The Hollow Men|The Hollow Men]]" by T. S. Eliot: "This is the way the world ends / Not with a bang but a whimper." The poem is also referenced to in [[Halo 3 announcement trailer|''Halo 3'' announcement trailer]] (and previously in the [[Cortana Letters]]) and [[Reversed messages]] found in the ''Halo 3'' soundtrack. | |||
*Behind the final Terminal is a replica of the one of the [[phase pulse generator]]s like the ones in ''Halo: Combat Evolved'', however, it's heavily barricaded with four pillars to prevent anyone from disrupting it like John had in ''[[Two Betrayals]]''. In addition, the chamber itself is exactly as it appeared in ''Halo: Combat Evolved'' but with increased security measures such as unbreakable glass and four more additional barricades surrounding the protected pulse generator. However, if one returns to this room after the cutscene in which Johnson dies, the barriers are gone, but the player is still unable to interrupt the beam like in ''Halo: Combat Evolved''. | |||
* | ===Production notes=== | ||
*The part where the player first sees the Control Room ziggurat originally featured a cutscene with the ''Forward Unto Dawn'' flying overhead, revealing Sergeant Johnson's intention to accompany John-117 and Thel 'Vadam into the Control Room; in this version, Cortana was under the impression that Johnson was supposed to have returned to the portal with the ''Shadow of Intent'' until this point.<ref>[https://www.youtube.com/watch?v=3DrOvOXI_l8 '''YouTube''': '' Halo 3 - Cut Cinematic - Ziggurat Reveal'']</ref> | |||
* | ===Miscellaneous=== | ||
*This is the third level to contain the Flamethrower. | |||
*Oddly, even though [[High Charity]] is destroyed and there are no Flood controlled ships in the system, Flood Dispersal Pods somehow fall from the sky. It is possible that they came from the location where Gravemind is rebuilding himself on the ring. | |||
*If one heads over to the large crevasse next to the [[Control Room]] in the beginning of the level, one can look down and see an almost endless series of catwalks. One can only explore the crevasse in theater mode. In addition, after destroying 343 Guilty Spark, if one rechecks the crevasse it will be distorted by energy waves caused by the rings activation in the control room. This crevasse may be similar to the 'Honeycomb' channels that are used for faster travels, power storage and that [[Carol Rawley|Foehammer]] comes out of in the beginning of the level, ''[[Assault on the Control Room]]'' in ''Halo: Combat Evolved''. | |||
*Throughout the fight on the ground floor with the first waves of Flood, a [[M41 SPNKR|Rocket Launcher]] and a [[Pez'tk-pattern fuel rod gun|Fuel Rod Gun]] can be found near the lower structures of the tower, each carrying eight Rockets, and 20 Fuel Rods, respectively. | |||
*It is impossible to kill the Monitor without the Laser. | |||
**The Monitor will be invulnerable to any damage, including Laser until Johnson knocks him away. | |||
*The soundtrack for the second half of the level is called "Greatest Journey", however during the [[MJOLNIR Powered Assault Armor|MJOLNIR]] Theme part, there are some musical parts that are not featured in the shipped version of the soundtrack title but they are featured in "To Kill a Demon" and "Three Gates" soundtrack titles. | |||
*There are hidden vehicles on this level during the Warthog Run. They are 4 Ghosts, 2 Choppers and a Mongoose (The Ghosts can only be found if Legendary Co-Op), making it so players can finish the level on four player Co-Op in all different vehicles. Also, getting out of a Ghost while in midair during the final jump can result in the ending cutscene starting before the players enter the cargo bay. | |||
*Completing this level with four people over Xbox Live on Legendary with the Iron skull on and all four players in a [[Karo'etba-pattern Ghost|Ghost]], will reward players with the [[Vidmaster Challenge: Annual]] Achievement. | |||
*Regardless of what weapons you have before killing Spark, your loadout will be always reset to the [[MA5C assault rifle]] with 32/96, no secondary weapon, and no grenades. However, should the level load during the second rally point, you will start with the assault rifle, a shotgun, and possess grenades. | |||
*In ''[[Halo: Primordium]]'', it's revealed that [[343 Guilty Spark]] survived his apparent destruction and his badly damaged casing was eventually retrieved by the {{UNSCShip|Rubicon}} from the Ark. | |||
*In ''[[Halo Wars 2: Awakening the Nightmare]]'', it's revealed that some of the [[Flood]] survived the destruction of [[High Charity]]'s backup reactor and the firing of [[Installation 08]] and remained quarantined within the wreckage of the Covenant holy city. | |||
*In the ''[[Halo: The Master Chief Collection]]'' version of ''Halo 3'', the epilogue and after credits scene are depicted as a separate non-playable level called ''Epilogue''. It also lacks the end credits between the memorial scene and the Master Chief and Cortana on the {{UNSCShip|Forward Unto Dawn}} wreckage. In this version of the game, the player can access the Legendary ending simply by playing ''Epilogue'' on Legendary. They do not need to play the whole game on Legendary to get the ending showing [[Requiem]] in ''The Master Chief Collection''. | |||
*Finishing the level with the Flamethrower equipped on the [[Cortana (level)|previous level]] will reset the loadout to MA5C Assault Rifle and Rocket Launcher. | |||
==Gallery== | |||
===Design documentation=== | |||
<gallery> | |||
File:H3 HaloPaperSketch.jpeg|An early paper sketch for the level layout. | |||
File:H3 HaloDesignDoc.jpeg|A design document for the level. | |||
</gallery> | |||
===Concept art and matte paintings=== | |||
<gallery> | |||
File:H3_Installation08_Interior.jpg|Concept art of Installation 08's interior for ''[[Halo 3]]''. | |||
File:H3 Installation08_Matte.jpg|Closeup of the Halo. | |||
File:H3_Installation08_Clouds.jpg|Concept art of the Halo over the Ark. | |||
File:H3_Installation08_ControlRoom_Concept_1.jpg|Early concept art of the control room, with the Ark in the background. | |||
File:H3_Installation08_ControlRoom_Concept_2.jpg|Finalized concept art of the structure, now bearing clear similarities to the original ring's control room. | |||
File:H3_Installation08_Wall_Concept.jpg|Concept art for a wall structure in the level. | |||
File:H3 WarthogRun Concept.jpg|Concept art for the level's Warthog run. | |||
</gallery> | |||
===Storyboards=== | |||
;Halo level | |||
<gallery> | |||
File:H3 Halo Storyboard 1.jpg | |||
File:H3 Halo Storyboard 2.jpg | |||
File:H3 Halo Storyboard 3.jpg | |||
File:H3 Halo Storyboard 4.jpg | |||
File:H3 Halo Storyboard 5.jpg | |||
File:H3 Halo Storyboard 6.jpg | |||
File:H3 Halo Storyboard 7.jpg | |||
File:H3 Halo Storyboard 8.jpg | |||
File:H3 Halo Storyboard 9.jpg | |||
File:H3 Halo Storyboard 10.jpg | |||
File:H3 Halo Storyboard 11.jpg | |||
File:H3 Halo Storyboard 12.jpg | |||
File:H3 Halo Storyboard 13.jpg | |||
File:H3 Halo Storyboard 14.jpg | |||
File:H3 Halo Storyboard 15.jpg | |||
File:H3 Halo Storyboard 16.jpg | |||
File:H3 Halo Storyboard 17.jpg | |||
File:H3 Halo Storyboard 18.jpg | |||
File:H3 Halo Storyboard 19.jpg | |||
File:H3 Halo Storyboard 20.jpg | |||
File:H3 Halo Storyboard 21.jpg | |||
File:H3 Halo Storyboard 22.jpg | |||
File:H3 Halo Storyboard 23.jpg | |||
File:H3 Halo Storyboard 24.jpg | |||
File:H3 Halo Storyboard 25.jpg | |||
File:H3 Halo Storyboard 26.jpg | |||
File:H3 Halo Storyboard 27.jpg | |||
File:H3 Halo Storyboard 28.jpg | |||
File:H3 Halo Storyboard 29.jpg | |||
File:H3 Halo Storyboard 30.jpg | |||
File:H3 Halo Storyboard 31.jpg | |||
File:H3 Halo Storyboard 32.jpg | |||
File:H3 Halo Storyboard 33.jpg | |||
File:H3 Halo Storyboard 34.jpg | |||
</gallery> | |||
;Epilogue | |||
<gallery> | |||
File:H3 Epilogue Storyboard 1.jpg | |||
File:H3 Epilogue Storyboard 2.jpg | |||
File:H3 Epilogue Storyboard 3.jpg | |||
File:H3 Epilogue Storyboard 4.jpg | |||
File:H3 Epilogue Storyboard 5.jpg | |||
File:H3 Epilogue Storyboard 6.jpg | |||
File:H3 Epilogue Storyboard 7.jpg | |||
File:H3 Epilogue Storyboard 8.jpg | |||
</gallery> | |||
===Gameplay=== | |||
<gallery> | |||
File:H3 Menu 10 Halo.png|Preview of the level in ''Halo 3'' menu. | |||
File:H3 ChiefAndArbyReady.png|John-117 and Thel 'Vadam prepare to find the control room. | |||
File:Halo3holdstill.jpg|John-117 battles a Flood combat form. | |||
File:H3 ChiefBurnsFloodTank.png|John-117 uses a flamethrower. | |||
File:DeathofAveryJohnson.jpg|343 Guilty Spark attacks Johnson. | |||
File:SwordJohnson.jpg|Johnson holding an Energy Sword. | |||
File:MCC-H3Coop.png|All four playable characters after fighting 343 Guilty Spark. | |||
File:H3 ChiefSparkBattle.png|John-117 charging the Spartan Laser to fire at 343 Guilty Spark. | |||
File:Johnson Infected.jpg|Johnson being infected if the glitch to keep him alive is done. | |||
File:HTMCC-H3 DualWieldingDuo.png|Thel 'Vadam and John-117 on their way to the Warthog. | |||
File:3Way2-large.jpg|Aggressor Sentinels fighting Flood combat forms. | |||
File:HTMCC-H3 Connected.jpg|The [[Raid on Installation 08|fight]] is finished. | |||
</gallery> | |||
==Sources== | |||
{{Ref/Sources}} | |||
{{Succession box | |||
| before = ''[[Cortana (level)|Cortana]]'' | |||
| title = ''Halo 3'' Campaign Missions | |||
| years = '''''Halo''''' | |||
| after = [[Halo 3 credits|Halo 3 Credits]] | |||
}} | |||
{{ | |||
[[Category:Halo 3 | {{Levels|H3}} | ||
[[Category:Halo 3 campaign]] | |||
Latest revision as of 09:09, May 12, 2024
|
Prev: |
|
|
Next: |
|
| Halo | |
|---|---|

| |
|
Game: |
|
|
Map file name (?): |
|
|
Player: |
|
|
Date: |
December 11, 2552[1] |
|
Location: |
|
|
Objective(s): |
Activate and escape from Halo. |
|
Par Time: |
00:20:00 (Master Chief Collection) |
|
Par Score: |
24,000 (Master Chief Collection) |
 |
Halopedia has a walkthrough guide for this level; see Halo (Halo 3 level)/Walkthrough. |
| “ | Light the Ring. Destroy the Flood. | ” |
Halo[2] is the tenth and final Campaign mission of Halo 3.
Upon completing it on Normal or higher, the player unlocks the Return achievement. If the player gets 15,000 points or more in the meta game, they will unlock the Reclaimer achievement. This level is also the second level in the Halo series to bear the name of another level, following the second level of the first game.
Summary[edit]
John-117, Thel 'Vadam and Sergeant Johnson make their way towards the Control Room in order to activate the ring using the Index from the first Halo encountered. However, the Gravemind sends Flood combat forms (and later pure forms), carried by Flood dispersal pods, to try to stop them. After holding outside the Control Room for a while, 343 Guilty Spark opens the door and they reach the Control Room. When Spark realizes that they are going to activate the unfinished Halo, which will destroy the Ark and the new installation, he fatally injures Johnson, who was activating the ring. The monitor then locks the Arbiter out of the Control Room and corners John-117. Just as Spark is about to kill the Spartan-II, Johnson, barely alive, fires his Spartan Laser and damages the monitor. He then hands the weapon to John-117 and faints. The Chief, after firing three shots at the Monitor, finally kills the rampant AI unit. He then says farewell to Johnson who dies from his injuries, and activates the ring with Cortana. Outside the Control Room, the Chief and the Arbiter battle their way to Johnson's Warthog and race their way to the UNSC Forward Unto Dawn. After entering the frigate, the Arbiter heads to the bridge while the Chief uploads Cortana to a holotank, and she proceeds to fire up the frigate's engines. The Master Chief, stuck in the cargo bay as they enter the portal, relaxes as the Halo fires and then explodes, killing the Gravemind and the Flood upon the Ark.
In March 2553, Lord Hood delivers a speech commemorating the fallen combatants of the battle, and reveals that the Chief, with Cortana in his helmet, did not return to Earth with the front half of the Forward Unto Dawn. As a result, the Master Chief has been officially declared missing in action, though both Lord Hood and the Arbiter, the only Sangheili present at the memorial, express doubt over the Chief's presumed death. Lord Hood, though unable to forgive the Arbiter for what his species did to humanity, shakes hands with his former enemy and thanks him for standing by the Master Chief until the end. 'Vadam then leaves for Sanghelios with Rtas 'Vadum on board the Shadow of Intent to ensure that their own world is safe.
In a post-credits scene, it's revealed that the Master Chief survived but is trapped in the rear half of the Forward Unto Dawn which was dropped out into unknown space when the Portal at Voi shut down from the damage caused when the Halo fired and "did a number on the Ark." Much like after their victory at the first Halo ring, Cortana lists their accomplishments - stopping the Covenant and the Prophet of Truth and the Flood - and believes that they are finished. This time, the Master Chief agrees with Cortana that their work is finished. The Chief uploads Cortana to another holo tank and she promises to drop a distress beacon, but warns that it could possibly be years before anyone finds and rescues them. The Master Chief goes into cryosleep to await rescue, ordering Cortana to "wake me. When you need me."
On Legendary difficulty, the rear half of the Forward Unto Dawn is shown drifting towards an unknown planet.
Transcript[edit]

Fades in to the Pelican John-117, Thel 'Vadam and Cortana are on board and heading towards Installation 08. The CAS-class assault carrier Shadow of Intent flies slowly under the megastructure. Cuts to the cockpit of the Pelican.
- Shipmaster Rtas 'Vadum (COM): "We are aboard, Humans...and Elites. Will you not come with us, brother?"
- Arbiter Thel 'Vadam: "No. This is our fight. And I will see it finished."
The Pelican nears the Halo ring.
- Sergeant Major Avery Junior Johnson (Video COM): "Yes, ma'am. I'll land her as close to the control room as I can."
- Cortana: "Safe is better than close, Sergeant Major."
- Johnson (Video COM): "Roger that. And ma'am? It's good to have you back."
The Pelican arrives at Halo, flying over unfinished terrain. The rear port engine is too damaged for a normal landing. The Master Chief makes a crash landing in a snowy canyon near the Control Room. The Chief and the Arbiter clamber out. From behind the cliffs approaches the UNSC Forward Unto Dawn.

- Cortana: "Halo. It's so new... Unfinished. I'm not exactly sure what will happen when we fire it..."
The Arbiter tosses the Master Chief an MA5C assault rifle.
- Master Chief Petty Officer John-117: "We'll head for the Portal. And we'll all go home."
{Gameplay}
Full Circle[edit]
The Chief and the Arbiter prepare to head for the Control Room, making sure that they stock up on enough supplies from their crashed Pelican.
- Cortana: "Head through the cliffs."
The Chief and the Arbiter head through the icy caves.
If the Chief stalls:
- Cortana: "The Control Room isn't far!"
If the Chief heads for the Terminal instead:
- Cortana: "Where are you going?"
When the Chief reaches the Terminal:
- Cortana: "Wait, what's that?"
After accessing the Terminal.
- Cortana: "How many of these have you found?"
If the Chief re-accesses the Terminal, or takes too long reading it:
- Cortana: "Come on, Chief, let's get back on track. The Control Room is outside!"
The Chief and the Arbiter arrive at the foot of the pyramid-like Control Room structure. Suddenly, Flood dispersal pods begin to drop in.
- Gravemind: (angrily) "Did you think me defeated?!"
- Cortana: "Flood dispersal pods! Control Room's at the top of that tower, Chief, go!"
The Master Chief and the Arbiter fight their way through numerous combat forms and head for a ramp on the right side of the tower. More Flood drop in on them, but Sentinels appear and provide cover fire.
If the Chief reaches the end of the wrong side of the tower.
- Cortana: "There should be ramps that lead to the top - check the other side!"
The Arbiter and the Master Chief push their way up the tower, but the Flood continues to attack with overwhelming force.
Johnson appears on the cliff with a Spartan Laser, shooting down Flood forms.
- Johnson (COM): "I got you covered, Chief. Meet you at the top of that tower."
If the Chief heads back the other way:
- Johnson (COM): "Careful, I can't cover you on the far side."
The Master Chief and the Arbiter continue upward.
- Johnson (COM): "Keep moving, Chief! I've got your back."
The Master Chief and the Arbiter get closer to the top. Johnson continues to fire from the cliff.
- Johnson (COM): "Flood are crawling all over that tower; watch yourself!"
The Master Chief and the Arbiter reach the top floor. Johnson provides cover fire for them as numerous Flood forms continue assaulting the tower.
- Johnson (COM): "Spark? You in there? Open the damn door!"
- 343 Guilty Spark (COM): "Of course, Reclaimer. Just as soon as you dispose of all proximate Flood threats. I'm afraid contamination protocols do not allow me to-"
- Johnson (COM): "Yeah, yeah, I hear you!"
- Cortana: "Was that the Monitor? You didn't tell me he was here. Well, we are finally doing what he wanted."
The Flood continues to stubbornly attack with overwhelming force.
- Gravemind: "I have beaten fleets of thousands! Consumed a galaxy of flesh and mind and bone!"
The Chief, the Arbiter, Sergeant Johnson and any surviving Sentinels fight off wave after wave of Flood. Finally, the tower is secured. Johnson comes down from the cliff and joins the Master Chief and the Arbiter.
- Johnson: "Open up! Coast is clear."
- Cortana (COM): "Not for long. I'm tracking additional dispersal pods. They'll be hitting any minute!"
The doors to the tower open.
- Johnson: "Chief, Arbiter! Let's move!"
The trio enters the tower. They move down a corridor, turn the corner, and arrive at a set of blast doors.
- Gravemind (Gravemind Moment): "Do I take life or give it? Who is victim, and who is foe?"
- Cortana: "It's trying to rebuild itself on this ring!"
- Johnson: "Hurry! Control Room's close!"
The trio heads through another set of blast doors and finally reaches the Control Room.
The Control Room doors open up. The Master Chief, the Arbiter, and Johnson cautiously enter. Hearing the shrieks and growls of the approaching Flood, they turn around, weapons drawn. The second set of blast doors closes, sealing the Flood out. The Arbiter stands guard at the doorway while the Master Chief and Johnson prepare to activate the installation.

- Cortana: "Yank me, Chief."
The Chief removes Cortana's data chip from his helmet.
The Chief tosses the data chip to Johnson, who heads for the control panel. A rotating holographic image of the incomplete Halo ring hovers at the center of the chamber.
343 Guilty Spark appears from above and accompanies Johnson.
- 343 Guilty Spark: (humming to himself) "Oh, hello! Wonderful news - the installation is almost complete!"
- Johnson: (uninterested) "Terrific."
- 343 Guilty Spark: "Yes...isn't it? (Short but uneasy silence) I have begun my simulations. No promises, but initial results indicate this facility should be ready to fire...in just a few more days!"
- Johnson: (impatiently) "We don't have a few more days!" (gets ready to activate the installation)
- 343 Guilty Spark: (shocked, alarmed) "Bu-bu-but a premature firing will destroy the Ark!"
- Johnson: (dismissively) "Deal with it."
- 343 Guilty Spark: (quietly, to himself) "...will destroy this installation."
Spark's "eye" suddenly turns red, and he blasts Johnson with his energy beam.
- Johnson: (falls to his knees and collapses, screaming in pain) "Aaaah!!"
- 343 Guilty Spark: "Unacceptable! Unacceptable! Absolutely unacceptable!"
The Chief rushes to Johnson's aid. 343 Guilty Spark shoots at the Master Chief, who is flung backwards from the force of the blast and onto the floor. His energy shields drop and attempt to recharge.
- 343 Guilty Spark: (in hysterics) "Protocol dictates action! I see now that helping you was wrong!"
The Arbiter, hearing the commotion, moves forward, and 343 Guilty Spark blasts him as well, knocking him out of the Control Room. (In single-player, the doors close, sealing the Arbiter out of the room). The Chief tries to get back up, and Spark blasts him again, knocking him to his knees. With no shields protecting him this time, his armor starts to smoke.
- 343 Guilty Spark: (his eye turns back to blue) "You are the child of my makers. Inheritor of all they left behind. You are Forerunner! But this ring... (his eye turns red again)...is mine."

{Gameplay}
- 343 Guilty Spark: "I take no pleasure in doing what must be done."
The Chief fires whatever weapons he has at the rampant 343 Guilty Spark with no effect whatsoever. Spark counters with his powerful laser blasts and a repulsion field that forces the Chief backwards.
- 343 Guilty Spark: "You do not deserve this ring!"
343 Guilty Spark corners the Master Chief.
- 343 Guilty Spark: "I have kept it safe. It belongs to me!"
Unnoticed by 343 Guilty Spark, Johnson manages to sit halfway up and shoulder the Spartan Laser.
- Johnson: "Not for long!"
Johnson shoots 343 Guilty Spark with his Spartan Laser. Caught off-guard, 343 Guilty Spark is blasted away from the Chief, falling to the ground and becoming inert.
The Chief rushes up to Johnson.
- Johnson: (weakly) "Kick his ass."
Johnson passes out. The Chief takes his Spartan Laser to destroy Guilty Spark.
343 Guilty Spark rises from the floor, flying at a slightly tilted angle, his metal body visibly damaged. At this point, 343 Guilty Spark will say four sentences at random.
- 343 Guilty Spark: "You - you cracked my casing!"
- 343 Guilty Spark: "Damage! Damage! That hurt, Reclaimer!"
- 343 Guilty Spark: "My eye! Do you mean to blind me?!"
- 343 Guilty Spark: "Stop now, before one of us gets hurt!"
After making the first shot, Spark begins to fly at a more tilted angle, leaking blue plasma from his sides and he begins to spark. Again, the following sentences are stated in random order.
- 343 Guilty Spark: (voice breaks, then readjusts itself) "-destroy your inheritance!"
- 343 Guilty Spark: "Accept your le-gacy!"
- 343 Guilty Spark: "Think of you-ou-ou-our forefathers!"
Following the second shot, Spark's casing becomes distorted, with pieces of him sheared off completely. More plasma leaks from his sides and the sparks happen more ferociously. The right side of his 'eye' has broken off. Once again, the following sentences are said in a random order.
- 343 Guilty Spark: (Makes a garbled humming sound)
- 343 Guilty Spark: (high, crackling voice) "M-m-my pr-precious!"
- 343 Guilty Spark: (deteriorating, breaking voice) "I a-a-a-am the Monitor of Installation Z-Zero F-Four!"
After making the finishing shot.
- 343 Guilty Spark: "Oh myyyyyyyyyy-aaahh!"
343 Guilty Spark explodes in a flash of blue and white light.
The Master Chief bends over Sergeant Johnson, who is still alive - barely.
- John-117: "I'm getting you out of here."
- Johnson: "N-No... No, you're not."
Johnson grabs the Chief's hand with Cortana's chip in his.
- Johnson: "Don't - don't let her go. Don't...ever let her go. (coughs) Send me out... with a bang."
Johnson succumbs to his wounds. The Master Chief takes Cortana from him, and lets go of his hand. He stands up and wordlessly releases Cortana into Halo's core, gripping the data chip tightly.
- Cortana: (Pauses; looks sadly at Johnson's body) "Chief... I'm so sorry."

The Master Chief says nothing. He makes a slight gesture with his hand. Cortana bows her head, eyes closed, and presses her hand to the core, activating Halo. She uploads herself back into her chip.
The Master Chief places her chip in the back of his helmet and then turns around. Behind him, the control console lights up and throbs with power. A massive beam of energy erupts from the Core and the whole Control Room starts to shake violently. A support beam falls from the ceiling and crashes into the platform. Johnson's body slides off the platform as it tilts to one side and begins to fall. The Master Chief runs for the door, which has opened again. The Arbiter can now be seen waiting for the Master Chief.
{Gameplay}
The Way the World Ends[edit]
Pedal to the Metal.

- Thel 'Vadam: "I am sorry, Spartan. But come."
Pieces of the walls around them suddenly explode; the Master Chief and the Arbiter run for the doorway leading outside, fighting a small group of Flood along the way.
The Master Chief and the Arbiter make it back outside, revealing a piece of collapsed ice forming a slope upwards.
- Thel 'Vadam: "Even in death, your Sergeant guides us on."
- Cortana: "The Dawn... Of course - the frigate! We still have a chance!"
- Cortana: "Find the doorway in the cliffs, Chief. The Dawn is on the other side."
If the Master Chief takes too long to get to the doorway.
- Cortana: "See that doorway further on? Get to it."
The Master Chief and the Arbiter head along the cliff, encountering Flood and Sentinels, the latter having followed 343 Guilty Spark's lead and turned against them too.
They make it inside and find themselves in the middle of a battle between the Flood and a group of Sentinels.
- Gravemind: (in a resigned and defeated tone) "Resignation is my virtue. Like water I ebb and flow. Defeat is simply the addition of time to a sentence I never deserved... But you imposed."
The Master Chief and the Arbiter fight their way through a horde of Pod infectors and carrier forms.
- Cortana: "Don't let this ring be the end of us, Chief."
They make it back outside, where they find a Warthog waiting for them.
- Cortana: "There! Johnson's Warthog."
The Master Chief takes the wheel. The Arbiter takes the turret. (3-4 player co-op: Two Warthogs are present, both facing opposite directions.)
- Cortana: "Come on, Spartan - go, go, go!"
The Master Chief floors it. As they reach an open area, a massive explosion erupts alongside them.
- Cortana: "Drive, Chief. Head for the frigate."

- Cortana: "Come on! Faster!"
The Chief and the Arbiter reach a massive open structure.
- Cortana: "The Dawn is close. We can make it! As long as the ground doesn't fall underneath us..."
The Warthog soon enters inside the interior of a large hallway with ramps.
- Cortana: "The charging sequence...it's too much for the ring to take!"
They soon reach another open structure where battles between the Flood and Sentinels continue.
- Cortana: "Halo is ripping itself apart!"
They come upon a large open stretch.
- Cortana: "Hurry, Chief! Don't stop!"
- Cortana: "Charging sequence at 30%..."
They reach one more open structure, this time a few Flood pure forms await them.
- Cortana: "50%, Chief!"
They reach another hallway with ramps, where a larger battle between Sentinels and the Flood rages on.
- Cortana: "70%!"
The Warthog makes it out of the hallway battle, to an area where the frigate can be seen from a distance.

- Cortana: "80% charged!"
They head for the final bend, encountering more Sentinels. In the distance, a small group of Flood can be seen falling off a collapsing section of platform.
- Cortana: (desperately) "90% - firing sequence initiated!"
If the Chief heads to an Easter egg, they meet one last Covenant soldier.
- Final Grunt: "Hey, Demon! The jerk store called, and they're all out of you! Poor you, stolen at the age of six and conscripted into the military, waaaaagh...! Okay look, if you let me live, I got the Fist of Rukt. Look, I'll be the bottom! I'll polish your boots. I'll polish your helmet! It's the gas, ha-ha! When I'm on the gas, I don't know what I'm doing half the time!"
The Master Chief and the Arbiter make it to the final straight stretch to the UNSC Forward Unto Dawn, but there's a 70m (230ft) gap of thin air between the open cargo bay and the edge of the structure.
- Cortana: "Gun it, Chief! Jump! Floor it! Right into the hangar!"
The Warthog makes the jump, but doesn't land well, tumbling and rolling as it crashes into the frigate's hangar. The Master Chief and the Arbiter recover, then the Forward Unto Dawn shifts. A Scorpion Tank begins sliding towards the Arbiter, who takes cover behind a pile of crates. The tank plows into it. The Chief leaps over the Warthog and hesitates, seeing the Arbiter digging himself out of the crates. The Chief nods at him and the Arbiter nods back. The Arbiter rushes to the bridge while the Chief runs to the hangar control and inserts Cortana to take control of the frigate. Her avatar appears from a holotank next to the terminal.
- Cortana: "Hang on!"
Cortana ignites the thrusters at full burn and launches the Forward Unto Dawn at full speed. The Chief grabs onto the terminal, hanging on for dear life as the Forward Unto Dawn leaves Halo's atmosphere. As the Chief tries to stay anchored, the Warthog flies out, striking the Chief on its way through the open hangar doors and out into empty space. The Chief flies off the panel, then glides down the floor towards the doors, with a self-destructing Halo looming beneath. The Chief punches his fist hard into the floor to get a grip, halting near the back end of the hangar. Cortana reaches out her arm towards him, scared of losing him.
- Cortana: "Chief!"
The Scorpion flies out towards the Chief. He ducks his head just in time as it flies over him, narrowly missing the Chief but smashing the floor behind him and falling back towards Halo. The Chief begins to climb back up to Cortana, finally making it to the holotank. Meanwhile, the Arbiter makes it to the bridge and sits down at the controls. The Chief braces behind the panel, inserting Cortana back into his helmet.

- Cortana: "If we don't make it..."
- John-117: (Determined) "We'll make it."
- Cortana: "It's been an honor serving with you, John."
The Chief finally rests his head back, exhausted. Halo fires and then suddenly explodes, engulfing the hangar in a blinding white light. All goes blank.
Level ends
Eulogy[edit]

On a hillside near the Portal at Voi, which has now been shut down, Marines gather. Fleet Admiral Lord Terrence Hood removes his hat, and begins his speech.
- Lord Hood: "For us, the storm has passed. The war is over. But let us never forget those who journeyed into the howling dark and did not return. For their decision required courage beyond measure..."
Flashback: The front half of the Forward Unto Dawn enters the Earth's atmosphere, and crashes into the Indian Ocean. Two Marines track its descent.
- Lord Hood (voiceover): "...sacrifice, and unshakable conviction that their fight, our fight, was elsewhere."
Flashback continued: An engineering crew cuts into the Forward Unto Dawn with torches while a rescue Pelican hovers overhead. The Arbiter emerges from the wreckage.
Flashback ends: The Arbiter is revealed to be present at the memorial, standing solemnly with the Marines. The Shadow of Intent can be seen hovering above in the distance.
- Lord Hood: "As we start to rebuild, this hillside will remain barren. A memorial to heroes fallen. They ennobled all of us, and they shall not be forgotten."
Lord Hood puts his hat back on and salutes. Sergeant Stacker turns to the other Marines present.
- Gunnery Sergeant Reynolds: "Present arms!"
Seven Marines raise their Battle Rifles and each fire a single burst of three shots: a 3-volley salute. The view pans over the Portal, now closed and silent, and Mount Kilimanjaro against the evening sky.
Later, the Arbiter approaches Lord Hood, standing alone in front of the Memorial, which appears to be a Pelican wing, decorated with pictures of the fallen, including Commander Miranda Keyes and Sergeant Major Avery Johnson, along with flowers, medals, ribbons, and other tokens of respect.

Under the UNSC emblem is an inscription commemorating the dead:
IN MEMORY OF THOSE FALLEN
IN THE DEFENSE OF EARTH
AND HER COLONIES
MARCH 3, 2553
Lord Hood and the Arbiter stare at the Memorial.
- Lord Hood: "I remember how this war started. What your kind did to mine. I can't forgive you. But..."
Hood turns to the Arbiter and holds out his hand.
- Lord Hood: "You have my thanks. For standing by him to the end."
The Arbiter slowly shakes Admiral Hood's hand. After letting go, Hood's eyes are drawn to one part of the memorial in particular.
- Lord Hood: "Hard to believe he's dead."
The Arbiter looks away, toward the Shadow of Intent, hovering silently in the sky.
- Thel 'Vadam: (quietly) "Were it so easy."

The Arbiter leaves the Memorial. His Phantom heads back to the Shadow of Intent, hovering in about the same position as the Portal to the Ark once was. The Arbiter meets Shipmaster Rtas 'Vadum on the bridge. 'Vadum is looking at a holographic image of Earth.
- Rtas 'Vadum: "Things look different. Without the Prophets' lies clouding my vision. I would like to see our own world - to know that it is safe."
The Arbiter reassuringly places a hand on 'Vadum's shoulder.
- Thel 'Vadam: "Fear not. For we have made it so."
The Arbiter clenches his fist to his chest.
- Rtas 'Vadum: "By your word, Arbiter." (clenches his fist to his chest likewise to Thel 'Vadam.)
The Arbiter takes a seat on the command chair, the one normally used by Rtas 'Vadum.
- Thel 'Vadam: "Take us home."
The Shadow of Intent leaves Earth.
Going back to the Voi Memorial, the view shows that next to the print "March 3, 2553", the number "117" is carved into the metal of the wing, and a rank insignia is taped to the upper right of it as a tribute to the Master Chief.
Fade to black. Credits roll.
Epilogue[edit]
- Cortana: "Chief? Can you hear me?"
The Master Chief, very much alive, awakens, floating in zero gravity in a debris-filled hallway on board the UNSC Forward Unto Dawn.
- Cortana: (relieved) "I thought I'd lost you, too."
The Master Chief looks at a gaping hole in the hallway. He drifts to his floating assault rifle and holsters it, then begins to drift to the end of the hallway.

- John-117: "What happened?"
- Cortana: "I'm not sure. When Halo fired, it shook itself to pieces. Did a number on the Ark. The Portal couldn't sustain itself. We made it through just as it collapsed."
The Chief reaches the end of the hallway, which opens up into empty space. The Forward Unto Dawn is revealed to be sheared in half, floating in a cloud of its own debris, still red-hot from the sudden slipspace slowdown.
- Cortana: "Well... some of us made it."
The Forward Unto Dawn's remaining half continues to drift aimlessly in unknown space.
The Chief begins to drift further inside the ship, finding a row of cryotubes complete with a holotank to plug Cortana into.
The Chief plugs Cortana's data chip into the holotank and she appears.
- Cortana: "It's finished."
The Master Chief turns off the flashlight on his helmet.
- John-117: "It's finished."
The Chief places his assault rifle in one of the rackets on the wall.
- Cortana: "I'll drop a beacon, but it'll be a while before anyone finds us."
The Chief climbs into one of the cryotubes.
- Cortana: "Years, even."
The cryotube door begins to close.
- Cortana: "I'll miss you."

- John-117: "Wake me. When you need me."
Cortana smiles, nodding. The cryotube closes and seals, freezing the Master Chief and bringing the Halo Trilogy to its conclusion.
Fade to black
The back half of the Forward Unto Dawn is seen drifting towards a planet. A star is eclipsed by the Forward Unto Dawn for a second as it slowly comes out from behind the planet, casting light upon it momentarily before blinding the view completely.
Game ends
Achievements[edit]
The following achievements can be unlocked on this mission on the Xbox 360 edition of Halo 3.
| Icon | Name | Description | Gamerscore |
|---|---|---|---|

|
Return | Finish the final mission of the Campaign on Normal, Heroic, or Legendary. | 50 |

|
Campaign Complete: Normal | Finish the Campaign on Normal. | 125 |

|
Campaign Complete: Heroic | Finish the Campaign on Heroic (unlocks achievement for Normal, if not earned). |
125 |

|
Campaign Complete: Legendary | Finish the Campaign on Legendary (unlocks achievement for Normal and Heroic, if not earned). |
125 |

|
Mythic | Find and claim this skull. | 10 |
Trivia[edit]
Glitches[edit]
- Main article: Glitches
- When the Flood first start to arrive in the Dispersal Pods, do not attack any of them. Exit the cave area and take a right hugging the wall for a second. After a rock and a bit of structure one will be able to climb the hill and back up to the cliff face near the terminal entrance. Enter the small building and hang around the terminal for a minute, then exit and jump back down the cliff like one would normally. More Dispersal Pods will land, doubling all Flood encounters. It seems to be an AI Respawn Glitch. Its effects stop after Johnson dies and only for the Flood. Numbers change with difficulty.
- It is possible to kill Johnson and grab an infinite ammo Spartan Laser. The player must kill him the first time and take his low-ammo laser, switching it for a weapon Johnson can't pick up. He will stand up again with another Spartan Laser, and killing him again will allow this player to obtain it. This is handy to leave outside the control room door, because it is very effective against Sentinels and Flood alike. However, after killing Johnson multiple times (betrayal amount depends on the difficulty), the player will be marked as a traitor and Johnson will try to kill him/her.[3]
- If one kills Johnson before entering the Control Room, after killing 343 Guilty Spark, when the door opens, one can see Johnson on the floor wounded and a Flood Pod infector will convert him into a Combat Form. If the Pod infectors are killed before they do so, he will get up and fight with the player, though he won't leave the building (since he's supposed to be dead, he has no scripted path to follow); if one tries pushing him out the door he will automatically run back. Still, if one somehow manages to push him until the Warthog, he will come within the Hog, but during the ending cutscene Johnson is not in the Warthog for obvious reasons.
- If the player deploys an Auto-Turret after the Gravemind moment, the Auto-Turret will become an enemy. If the player deploys it facing the blast door, the one before fighting 343 Guilty Spark, and get killed while simultaneously triggering the cutscene, one will see two Master Chiefs, one dead and one alive. If the player does this on Co-op, after the cutscene, the Master Chief player will be unable to fight and Guilty Spark will target the Arbiter instead. Also, the Auto-Turret is capable of taking down the Arbiter's shield in the cutscene and will occasionally attack the Arbiter, Johnson, and/or Master Chief in the cutscene.
- If one uses the aforementioned glitch for the infinite ammo Spartan Laser, one can kill the Arbiter and make him pick it up. If one does this near the end before getting on a vehicle, the Arbiter will pick it up and run towards the Control Room. He will stand there and not get in the Warthog or Mongoose.
- A series of Cortana's dialogue during the Warthog Run ("Drive, Chief. Head for the frigate" to "Hurry, Chief! Don't stop!") may not play when the player plays the level from Mission Start.
Mistakes[edit]
- At the beginning of the level, Thel 'Vadam passes an Assault Rifle to the Chief in the cutscene. However, if the player got to this level by completing the level Cortana right before, the player will start with whatever weapon they took from that level, if they have the Cortana Skull, they will spawn with a Spartan Laser and if they didn't play the previous level, they have a rocket launcher and shotgun.
- If the previous level is finished with the Flamethrower equipped, however, the loadout will be set to Assault Rifle and Rocket Launcher.
- In gameplay, the Arbiter's primary weapon is a Okarda'phaa-pattern plasma rifle and an Energy Sword as the secondary. During the cutscene in the Control Room, he is oddly shown wielding a Covenant Carbine.
- Johnson's position in the gameplay section of the Control Room is different from his position in the cutscenes. During the cutscenes, he's directly in front of the Control Room's console, whereas in gameplay he is positioned nearly outside of the circular walkway.
Easter eggs[edit]
- Main article: Easter eggs

- There is a Talking Grunt on this level. He tries to make fun of the Master Chief's childhood by mocking how he was kidnapped and forced into the SPARTAN-II program. This is also a reference to other Talking Grunts, who appeared in past Halo games.
- If you go all the way to the cave with the Terminal, then look to your right. You will see a dark area. Grenade launch yourself over to the first pillar then jump to the platform to your left. If you look at the wall with your flashlight you'll see Jason Jones (founder of Bungie) jumping up and down in his underwear.
References[edit]

- Another reference to Halo: Combat Evolved, in the campaign lobby the Mission Start's description is Assault on the Control Room.
- The unfinished state of Installation 08 seems to reference the original Halo concepts where the ring was in a broken form.
- One of the lines spoken by 343 Guilty Spark while the player battles him is "...destroy your inheritance!". This has been interpreted by some as a reference to Inheritance, a feature film starring Jen Taylor, who provides the voice of Cortana. However, it is more likely that 343 Guilty Spark is referring to the relation between the Forerunners and humans.
- One of the other lines spoken by 343 Guilty Spark during the fight is "My precious!" This is a reference to Gollum, a character from the Lord of the Rings novels, who was absolutely obsessed with the One Ring and referred to it as his "precious".
- It has been noted that the final section bears a striking resemblance to the Cartographer island from the level Silent Cartographer from the first game. Although it may be a coincidence, it is possible that the structure is the beginnings of the Cartographer island.
- The last section of gameplay on this level is a remake of the Warthog run on The Maw, the last level of the first game, only it is slightly more complex than the original Warthog run, and has no time limit, although the player will die if a panel falls out from underneath them which serves as a replacement to the time limit. It maintains many elements of the original 'Maw Run', including a chasm-jump. It is of note that both runs effectively start in control centers (UNSC Pillar of Autumn's bridge, and Halo's Control Room), use the Warthog as the main method of transport, involve an escape to a hangar bay and end with large explosions that destroy a Halo.
- There is a 7 reference in the end when Lord Hood has finished making his speech, 7 Marines under orders from Sergeant Stacker fire a 3-volley salute with their battle rifles.
- Cortana's line, "But you did it. Truth and the Covenant... the Flood, It's finished," is a reference to one of her lines from the end of Halo: Combat Evolved — "We did what we had to do... for Earth. An entire Covenant armada obliterated, and the Flood... we had no choice. Halo... it's finished." In the first game, the Chief denies it, as the war is not over yet. ("I think we're just getting started.") This time, with the war over and the Flood obliterated, he agrees.
- It is also a reference to the final scene of Halo 2, where the Chief says he is 'finishing the fight.' "Finish the Fight" was used as the tagline for Halo 3's advertising campaign.
- Also worthy of note is that the Halo Trilogy starts with the Master Chief awakening from cryo-sleep and ends with him going into cryo-sleep.
- The chapter title "The Way the World Ends" and Johnson's line "Send me out... with a bang." are both references to the poem "The Hollow Men" by T. S. Eliot: "This is the way the world ends / Not with a bang but a whimper." The poem is also referenced to in Halo 3 announcement trailer (and previously in the Cortana Letters) and Reversed messages found in the Halo 3 soundtrack.
- Behind the final Terminal is a replica of the one of the phase pulse generators like the ones in Halo: Combat Evolved, however, it's heavily barricaded with four pillars to prevent anyone from disrupting it like John had in Two Betrayals. In addition, the chamber itself is exactly as it appeared in Halo: Combat Evolved but with increased security measures such as unbreakable glass and four more additional barricades surrounding the protected pulse generator. However, if one returns to this room after the cutscene in which Johnson dies, the barriers are gone, but the player is still unable to interrupt the beam like in Halo: Combat Evolved.
Production notes[edit]
- The part where the player first sees the Control Room ziggurat originally featured a cutscene with the Forward Unto Dawn flying overhead, revealing Sergeant Johnson's intention to accompany John-117 and Thel 'Vadam into the Control Room; in this version, Cortana was under the impression that Johnson was supposed to have returned to the portal with the Shadow of Intent until this point.[4]
Miscellaneous[edit]
- This is the third level to contain the Flamethrower.
- Oddly, even though High Charity is destroyed and there are no Flood controlled ships in the system, Flood Dispersal Pods somehow fall from the sky. It is possible that they came from the location where Gravemind is rebuilding himself on the ring.
- If one heads over to the large crevasse next to the Control Room in the beginning of the level, one can look down and see an almost endless series of catwalks. One can only explore the crevasse in theater mode. In addition, after destroying 343 Guilty Spark, if one rechecks the crevasse it will be distorted by energy waves caused by the rings activation in the control room. This crevasse may be similar to the 'Honeycomb' channels that are used for faster travels, power storage and that Foehammer comes out of in the beginning of the level, Assault on the Control Room in Halo: Combat Evolved.
- Throughout the fight on the ground floor with the first waves of Flood, a Rocket Launcher and a Fuel Rod Gun can be found near the lower structures of the tower, each carrying eight Rockets, and 20 Fuel Rods, respectively.
- It is impossible to kill the Monitor without the Laser.
- The Monitor will be invulnerable to any damage, including Laser until Johnson knocks him away.
- The soundtrack for the second half of the level is called "Greatest Journey", however during the MJOLNIR Theme part, there are some musical parts that are not featured in the shipped version of the soundtrack title but they are featured in "To Kill a Demon" and "Three Gates" soundtrack titles.
- There are hidden vehicles on this level during the Warthog Run. They are 4 Ghosts, 2 Choppers and a Mongoose (The Ghosts can only be found if Legendary Co-Op), making it so players can finish the level on four player Co-Op in all different vehicles. Also, getting out of a Ghost while in midair during the final jump can result in the ending cutscene starting before the players enter the cargo bay.
- Completing this level with four people over Xbox Live on Legendary with the Iron skull on and all four players in a Ghost, will reward players with the Vidmaster Challenge: Annual Achievement.
- Regardless of what weapons you have before killing Spark, your loadout will be always reset to the MA5C assault rifle with 32/96, no secondary weapon, and no grenades. However, should the level load during the second rally point, you will start with the assault rifle, a shotgun, and possess grenades.
- In Halo: Primordium, it's revealed that 343 Guilty Spark survived his apparent destruction and his badly damaged casing was eventually retrieved by the UNSC Rubicon from the Ark.
- In Halo Wars 2: Awakening the Nightmare, it's revealed that some of the Flood survived the destruction of High Charity's backup reactor and the firing of Installation 08 and remained quarantined within the wreckage of the Covenant holy city.
- In the Halo: The Master Chief Collection version of Halo 3, the epilogue and after credits scene are depicted as a separate non-playable level called Epilogue. It also lacks the end credits between the memorial scene and the Master Chief and Cortana on the UNSC Forward Unto Dawn wreckage. In this version of the game, the player can access the Legendary ending simply by playing Epilogue on Legendary. They do not need to play the whole game on Legendary to get the ending showing Requiem in The Master Chief Collection.
- Finishing the level with the Flamethrower equipped on the previous level will reset the loadout to MA5C Assault Rifle and Rocket Launcher.
Gallery[edit]
Design documentation[edit]
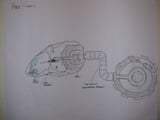
An early paper sketch for the level layout.
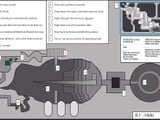
A design document for the level.


Concept art and matte paintings[edit]
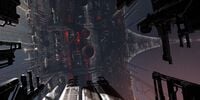
Concept art of Installation 08's interior for Halo 3.
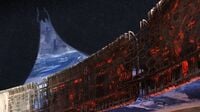
Closeup of the Halo.

Concept art of the Halo over the Ark.
Early concept art of the control room, with the Ark in the background.
Finalized concept art of the structure, now bearing clear similarities to the original ring's control room.
Concept art for a wall structure in the level.
Concept art for the level's Warthog run.


Storyboards[edit]
- Halo level


- Epilogue


Gameplay[edit]
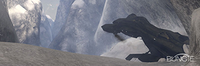
Preview of the level in Halo 3 menu.
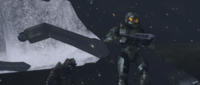
John-117 and Thel 'Vadam prepare to find the control room.
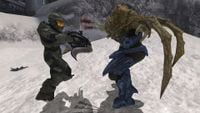
John-117 battles a Flood combat form.
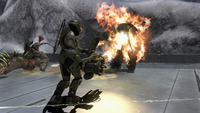
John-117 uses a flamethrower.
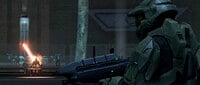
343 Guilty Spark attacks Johnson.
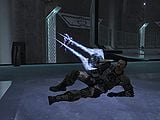
Johnson holding an Energy Sword.
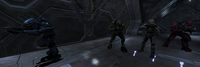
All four playable characters after fighting 343 Guilty Spark.
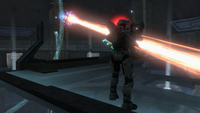
John-117 charging the Spartan Laser to fire at 343 Guilty Spark.
Johnson being infected if the glitch to keep him alive is done.
Thel 'Vadam and John-117 on their way to the Warthog.
Aggressor Sentinels fighting Flood combat forms.
The fight is finished.


Sources[edit]
| Preceded by Cortana |
Halo 3 Campaign Missions Halo |
Succeeded by Halo 3 Credits |
| ||||||||||||||||||||||||||||||||||||||||


