Floodgate (Level): Difference between revisions
From Halopedia, the Halo wiki
(→Trivia) |
|||
| Line 217: | Line 217: | ||
''A Flood Combat Form appears to the right, and 343 Guilty Spark turns and uses a powerful energy beam on it, destroying it in a single glancing hit. 343 Guilty Spark turns back to the Covenant device where Cortana supposedly is, and begins to interface it with a beam projected from his central eye.'' | ''A Flood Combat Form appears to the right, and 343 Guilty Spark turns and uses a powerful energy beam on it, destroying it in a single glancing hit. 343 Guilty Spark turns back to the Covenant device where Cortana supposedly is, and begins to interface it with a beam projected from his central eye.'' | ||
*'''343 Guilty Spark''': "We must act quickly before your construct suffers any further trauma!" | *'''343 Guilty Spark''': "Hurry! We must act quickly before your construct suffers any further trauma!" | ||
''The Chief grabs 343 Guilty Spark and pulls him away from Cortana's storage unit.'' | ''The Chief grabs 343 Guilty Spark and pulls him away from Cortana's storage unit.'' | ||
Revision as of 22:38, February 7, 2009
|
Prev: |
|
|
Next: |
|
| Floodgate | |
|---|---|

| |
|
Game: |
|
|
Player: |
|
|
Date: |
November 4th, 2552 |
|
Location: |
|
 |
Halopedia doesn't currently have a walkthrough for this level; could you write one? |
Floodgate is the sixth Campaign mission of Halo 3 and the first Halo 3 level with the Flood.
Background

It takes place in Voi, Kenya on the continent of Africa on Earth during the Second Battle of Earth. Floodgate is also the first campaign mission where the non-playable Elites are encountered in Halo 3. It is also one of the shortest levels in the game (the shortest in terms of distance traveled), if not the shortest of all three games.
Shortly after disabling the Anti-Air Gun in The Storm, UNSC Frigates under the command of Lord Hood attack the Covenant controlled Forerunner Dreadnought. This attempt failed, and it appeared the Dreadnought survived unscathed. The Covenant Loyalists activated the Portal to the Ark, temporarily disabling the UNSC's nearby ships. The remainder of the Covenant Loyalist fleet follows the Dreadnought into the portal. With the UNSC fleet disabled, and the Anti-Air gun out of commission; a Flood-controlled Covenant CCS-class Battlecruiser comes out of Slipspace nearby and crashes into Traxus Factory Complex 09.[1]
In order to eliminate the infestation, John-117 and the Arbiter Thel 'Vadam must overload the crashed cruiser's engines, wiping out the entire city and the Flood with it. To do this, they push back through the factory where they just came from, fighting many Flood Combat Forms, including a new Flood species, the Pure Forms. They are then aided by the arrival of Rtas 'Vadum and a Covenant Separatist fleet. 'Vadam and Chief, along with some Elites, push forward to the crashed ship, and 'Vadam holds position while the Chief extracts what is believed to be Cortana, stored in a Covenant Storage Device. This eventually turns out to be only a recording.
Once on the Covenant ship, Shadow of Intent, 343 Guilty Spark extracts Cortana's recorded message from the Covenant Storage Device. The UNSC and Covenant Separatists begin to prepare for the voyage to The Ark. While doing so, Covenant warships begin to glass Voi and the immediate vicinity to prevent further contamination by the Flood.
Upon completing it on the Normal, Heroic, or Legendary difficulties, the player will earn the "Cleansing" achievement and 30 Gamerpoints. Earning over 15,000 points in the Campaign meta-game will give the player the Exterminator achievement and 10 Gamerpoints.

Starting Weapons
| Player V Starting Point > |
Mission Start | Rally Point Alpha |
| Master Chief Primary Weapon Solo |
BR55HB SR Battle Rifle | BR55HB SR Battle Rifle |
| Master Chief Secondary Weapon Solo |
MA5C Assault Rifle | MA5C Assault Rifle |
| Master Chief Primary Weapon Co-op |
BR55HB SR Battle Rifle | BR55HB SR Battle Rifle |
| Master Chief Secondary Weapon Co-op |
MA5C Assault Rifle | MA5C Assault Rifle |
| Thel 'Vadam/N'tho 'Sraom/Usze 'Taham Primary Weapon | Type-51 Carbine | Type-51 Carbine |
| Thel 'Vadam/N'tho 'Sraom/Usze 'Taham Secondary Weapon | Type-25 Directed Energy Rifle | Type-25 Directed Energy Rifle |
Cutscenes
Transcript
Note: In co-op game play, Thel 'Vadam doesn't speak, and real time conversations including him do not play.
It Followed Me Home
Hot zone. Weapons free.
{Gameplay}
- Commander Keyes (COM): "The Flood - it's spreading all over the city."
- Lord Hood (COM): "How do we contain it?"
- Commander Keyes (COM): "Find the crashed Flood ship; overload its engine core. We either destroy this city, or risk losing the entire planet."
- Lord Hood (COM): "Do it."
- Miranda Keyes (COM): "Chief, make your way to the crash site."
To the right of a couple of Marines are seen on the cliff edge fighting off several Flood Combat forms. They typically are overrun and mutate into more Combat forms. Occasionally however, the Marines survive, and run out of view (the Flood 'mist' obscures them)
Sometime later, when the Chief and 'Vadam re-enter the city.
- Marine Officer or NCO (COM): "All squads, report!"
- Marine Sergeant (COM): "Multiple contacts, unknown hostiles."
- Thel 'Vadam: (May vary upon difficulty setting) "There are some powerful weapons we've not yet used..."
You find a group of Marines in a loading ramp.
- Marine (COM): "There! Over there! We are surrounded, Sergeant!"
- Marine (COM): "Aaaaah!"
- Marine Sergeant (COM): "Fall back, fall back!"
- Female Marine: "Sergeant, come on!"
Infection Forms and Combat Forms descend and swarm on the Marines at the ramp, infecting and killing them, forcing the other Marines, the Chief, and 'Vadam to kill them.
They fight off the current wave of Flood.
- Thel 'Vadam: "Quickly! Let us find their ship. Make short work of this abomination!"
The Marines accompany the Chief and 'Vadam into a building, where a lone Marine fights off a horde of infection forms. {It is possible to save him, but more often than not, he will be mutated before your eyes}
- Infected Marine: "Uhh! Get off me!"
or
- Infected Marine: "Get it off! Get it off!"
If the Marine is not saved, the Infection Form dives into his chest, gruesomely transforming him into a Flood Combat Form. This forces the Master Chief and 'Vadam to kill him immediately.
Marines are pinned down behind sandbags with lots of Flood surrounding the area. The Chief and Arbiter clear the section of the warehouse.
If the Marines are saved from being killed or infected.
- Female Marine : "It gets inside you, chews you up."
- Marine: "We gotta get outta here."
Reaching the other end of the warehouses, the surviving Marines who joined the Chief and 'Vadam hold position after clearing the area.
- Thel 'Vadam: (with anger and disgust) "Wretched parasite! Rise up and I will kill you! Again and again!"
Upstairs, a couple of Marines, one wielding the Flamethrower, try to combat the Flood as well, but they soon die, leaving the Flamethrower for the Chief or 'Vadam to pick up as they head up there and down a hole in the floor into the office areas.
- Cortana (Cortana Moment): "Chief! (connection drops) I can't tell you everything... it's not safe. The Gravemind... it knows I'm in the sys-(connection drops)."
The Chief and 'Vadam force their way through another wave of Flood, and find a marine huddling in a corner of the large room used for the Aid Station in the Storm on Voi, surrounded by three dead marines. The Marine is holding a Pistol, and will occasionally aim it at his own head, then lower it and bury his face in his hands.
- Traumatized Marine: "I... I didn't have a choice. (pause) The El-tee... the Sergeant... they were all infected! (Pause) I could see it crawling... SLIMING AROUND BENEATH THEIR SKIN! (sobs) (pause) A-and then they got up... s-started to talk! OH GOD! Their voices! Oh, God! No, make them stop! (pause) (His speech turns maniacal) I did them a favor... y-yeah that's it; I helped them! (sobs) (pause) Maybe... maybe I need to help myself..."
With no time to spare, the Chief and 'Vadam continue on ahead to the lake bed.
Shadow of Intent
The Flood. It has Evolved.
The Master Chief and Thel 'Vadam enter the lake bed of Voi where the Scarab was previously fought and destroyed.
Ship Master Rtas 'Vadum (COM): "Hail Humans, and take heed."
{Cutscene}
Ship Master Rtas 'Vadum (COM): "This is the carrier Shadow of Intent."
The Chief and the 'Vadam pause to see three Elite-controlled CCS-class Battlecruisers fly in formation as an Assault Carrier slices overhead from Slipspace.
Ship Master Rtas 'Vadum (COM): "Clear this sector, while we deal with the Flood."
A Major and 5 Special Operation Elites leap out of landed Orbital Insertion Pods ahead of the Chief and 'Vadam, fighting against the Flood.
{Gameplay}
- Thel 'Vadam: "My brothers, I fear you bring bad news."
- Major Domo Elite: "High Charity has fallen, become a dreaded hive!
- Thel 'Vadam: "And The Fleet? Has quarantine been broken?"
- Major Domo Elite: "A single ship broke through our line, and we gave chase."
- Thel 'Vadam: "We had a fleet of hundreds!"
- Major Domo Elite: "Alas brother, the Flood. It has evolved!"
The Chief, 'Vadam, and Elites fight their way through the infestation and arrive at the crash site.
- Commander Keyes (COM): "Chief, the Elites are looking for something. We didn't believe them when they told us."
- Johnson (COM): "It's Cortana, Chief! She's on that ship! Find her - get her out!"
Once outside again, a couple of Separatists Phantoms arrive, dropping off more Elite reinforcements to combat the Flood.
- Major Domo Elite or SpecOps Elite: "Hurry, Demon! We seek the same prize. But our Shipmaster will sacrifice all to stop the Flood."
The Master Chief, 'Vadam, and the remaining Elites fight past dozens of Pure Forms, Combat Forms, and Infection Forms to the massive, burning hulk of the crashed Flood battle cruiser. Up an incline, an ominous hole resides in the ship's hull, leading to the interior.
- Thel 'Vadam: "I shall remain here. We will let nothing pass."
Master Chief drops in alone.
Infinite Devil Machine
- Gravemind (Gravemind moment): "Do not be afraid. I am peace...I am salvation."

The Chief reaches into a large room after passing several dead Ultra Elites.
- Gravemind (Gravemind moment): "I am a timeless chorus; join your voice with mine and sing victory everlasting!"
<youtube width="300" height="300">hTa_vJ-l4fY</youtube>
{Cutscene}
Inside the central chamber of the Flood-infested crashed cruiser. The Chief finds 'Cortana' in a small Covenant hand held memory unit.
- Cortana: (recorded) "Chief!"
- Master Chief: "Cortana?"
- Cortana: (recorded) "High Charity, the Prophets' holy city, it's on its way..."
Cortana's projection above the holographic unit flickers and then disappears.
- Master Chief: "Cortana!"
Suddenly, the humming of a Phantom's gravity drives are heard, and a Phantom appears over the open chamber. The Chief turns and readies his Assault Rifle at it while 343 Guilty Spark floats down from the Phantom, which continues to hover overhead.
- 343 Guilty Spark: (surprised) "Reclaimer!"
A Flood Combat Form appears to the right, and 343 Guilty Spark turns and uses a powerful energy beam on it, destroying it in a single glancing hit. 343 Guilty Spark turns back to the Covenant device where Cortana supposedly is, and begins to interface it with a beam projected from his central eye.
- 343 Guilty Spark: "Hurry! We must act quickly before your construct suffers any further trauma!"
The Chief grabs 343 Guilty Spark and pulls him away from Cortana's storage unit.
- Master Chief: "Wait. Leave her alone."
- 343 Guilty Spark: "If we do not take this device to a safe location, somewhere I can make repairs..."
343 Guilty Spark continues to try to project his multicolored energy beam into Cortana's storage unit.
- Master Chief: "On Halo, you tried to kill Cortana. You tried to kill me".
- 343 Guilty Spark: "Protocol dictated my response! She had the Activation Index and you were going to destroy my installation. You did destroy my installation. Now, I only have one function: to help you, Reclaimer, as I always should have done."
The Master Chief stares wordlessly at 343 Guilty Spark, then slightly motions with Cortana's storage device. 343 Guilty Spark takes Cortana's device away, shooting his beam into it, while the Phantom projects a Gravity Lift. 343 Guilty Spark enters it first and the Master Chief reluctantly follows.
The view cuts to an aerial one over the whole town of Voi at a high altitude. Clouds completely obscure the surface of Earth, but part of the crashed Flood-controlled battle cruiser is visible in the distance. The Phantom flies away from the surface while two CCS-class Battle cruisers of the Fleet of Retribution "Glass" the town of Voi with plasma beams.
The view then cuts to an aerial one above the Forerunner Portal. Its 'wings' are open and blue energy streams from their tips to the open Slip space portal drifting ominously above the construct. The scene is quiet, and the moon is in the background. Fighting on Earth has ceased, and the Second Battle of Earth has ended with the departure of the Prophet of Truth's fleet through the Portal hours earlier. Four vessels of the Sangheili Fleet are gathered above the Portal, and 343 Guilty Spark's Phantom arches to the largest of them: the assault carrier Shadow of Intent.
Inside the bridge of the Shadow of Intent. Elites and humans are gathered around a long holographic table, with Ship Master Rtas 'Vadum floating on a gravity throne at one end with his Elite attendants, Master Chief and Thel 'Vadam in the middle, and Fleet Admiral Hood and Commander Miranda Keyes at the far side of the table. All are silent except 343 Guilty Spark, who is bobbing at the center of the table and interfacing with Cortana's memory unit with his projector beam.
- 343 Guilty Spark: "Uncertain. This storage device has suffered considerable trauma. Its matrices are highly unstable."
343 Guilty Spark glances at 'Vadum and Lord Hood
- Lord Hood: 'Perhaps one of our technicians-"
- Rtas 'Vadum: "That will not be necessary."
Coincidentally, the storage device works again, and a holographic projection of Cortana springs up.
- Cortana: (recorded) "Chief!"
- 343 Guilty Spark: "Success!"
- Cortana: (recorded) "High Charity...the Prophets' Holy City, is on its way to Earth, with an army of Flood. I can't tell you everything. It's not safe. The Gravemind...it knows I'm in the system."
Cortana's image flickers, and the Chief turns to Rtas 'Vadum.
- Master Chief: "It's just a message."
- Ship Master Rtas 'Vadum: "Let it play."
343 Guilty Spark jolts the device with another beam.
- Cortana: (recorded) "But it doesn't know about the Portal, where it leads. On the other side, there's a solution; a way to stop the Flood, without firing the remaining Halo rings-"
Suddenly, Cortana's skin lights with lightning. She clutches her head, gasps in sudden pain and collapses onto the 'floor'."
- Cortana: (recorded) (softly, her voice filled with agony) "Hurry, Chief... the Ark...there isn't much time."
Cortana's recording ends, she is left staring with desperation at the Chief.
- 343 Guilty Spark: "I'm sorry..."
- Rtas 'Vadum(Leaning back in his seat): "No matter, Oracle. We've heard enough. Our fight is through the Portal, with the Brutes and the bastard Truth!"
Special Operations Elites around the room raise their forearms and roar in agreement.
- Lord Hood(Wearily): "Fine. We'll remain here...hold out as long as we can."
- Ship Master Rtas 'Vadum: "Did you not hear? Your world is doomed." (Descends from his seat.) "A Flood army, a Gravemind, has you in its sights! You barely survived a small contamination."
- Lord Hood: "And you, Ship Master, just glassed half a continent! Maybe the Flood isn't all I should be worried about..."
- Ship Master Rtas 'Vadum: "One single Flood spore can destroy a species. Were it not for the Arbiter's council, I would have glassed your entire planet!"
Lord Hood angrily raises his fist at 'Vadum, but Miranda Keyes places a hand on his shoulder.
- Commander Keyes: "Sir, with respect, Cortana has a solution."
- Lord Hood: (skeptical) "Cortana? Did you see her condition? How damaged she is?"
While Hood and Keyes argue, the Master Chief bends down and observes Cortana's pained, frozen figure, still collapsed on the holographic table.
- Lord Hood: "She could be corrupted for all we know. Her "solution" could be a Flood trap!"
- Commander Keyes: "We should go through the Portal, find out for sure."
- Lord Hood: "What we should do Commander, is understand - clearly - that this is humanity's final stand - here - at Earth. We go, we risk everything; every last man, woman, and child. If we stand our ground, we might just have a chance."
- Thel 'Vadam: "No. If your construct is wrong, then the Flood has already won."
- Master Chief: "I'll find Cortana's solution. And I'll bring it back."
- Lord Hood: "Earth...is all we have left. You trust Cortana that much?"
- Master Chief: "Sir. Yes sir."
- Lord Hood: "Then this is either the best decision you've ever made or the worst. Hell if it is, Chief? I doubt I'll live long enough to find out which."
Lord Hood turns, looks wordlessly at Miranda Keyes, and then exits the bridge.
Inside the Shadow of Intent's hangar bay, both the Elites and the UNSC are getting ready for battle; the battle through the Portal. While a Separatist Phantom drifts into the hangar on the far side, two M12 Warthog LRVs race to the loading elevator, drawing near a group of Marines clustered around some UNSC crates. At uneasy rest opposing the Marines are a Major Elite sitting on a Ghost and a few SpecOps Elites. The Major Elite's Particle Beam Rifle is resting on the floor. Sergeant Major Johnson, with his arm full with 'stolen' Covenant Carbines brushes past the wordless Elites, scooping to pick up the Major Elite's rifle. The Elites, resentful at this unpermitted weapon collection, rise challengingly around Johnson.
Nearby, a pair of ODSTs are joking with each other as 'Vadam passes by, with an acquired M41 Rocket Launcher over his shoulder and carried a Flamethrower underhand. The ODSTs and a pair of nearby Marines observe 'Vadam in half-awe, half-disappointment over the loss of their heavy weapons, when 343 Guilty Spark drifts through the Marines in tow behind 'Vadam, leaving a Marine speechless. Johnson re-joins the Marines, beginning to hand out Carbines, the scene cuts to the fore of the hangar, where a Pelican Dropship lays before the hangar's energy field.

The Chief and Miranda Keyes stand at attention before Lord Hood, who looks at them grimly from the rear of the Pelican as the troop bay door shuts and the Pelican takes off. Keyes glances at the Chief wordlessly, and the two leave, going off to their own businesses.
Hood's Pelican arcs away from the gathered Sangheilian Fleet as the Shadow of Intent powers its engines and thrusts into the Portal, followed by eight Cruisers, a Carrier, the UNSC Frigates Forward Unto Dawn and Aegis Fate.
Walkthrough
Finding your way around the Floodgate mission shouldn't be much of a problem. Since you're backtracking your footsteps all the way the Lakebed A of the previous mission. The recommended skulls on Legendary are Tough Luck and Catch. Tough Luck may cost you a few multi-kill bonuses, but grenades aren't a vital part of your arsenal during this mission. Catch is, like in all other Flood-only mission, a consequence-free multiplier. The Flood don't use grenades, so leaving it inactivated is a waste. All other skulls except Famine are okay on this mission, so try activating one of them too. This is arguably the easiest level with Iron activated. Simply because it is very short.
Storage Area
Make your way down the hill, and enter the Storage Area where you fought the Chieftain. A Skull is located somewhere near, visit the Halo 3 Skulls page for details. Collect grenades, a Gravity Hammer and a Shotgun en route to your first encounter with the Flood. Combat Forms will drop down and start attacking your allies. The safest choice would be to hang back and wait for them to approach you. Jumping in to save the Marines is a risky decision. Seeing as a single Infection Form can make easy work of one, their chances of survival are close to nil. Make sure you have your Gravity Hammer at the ready, taking full advantage of its wide area of effect. You could usually wipe out several Combat Forms headed towards you with a single blow. The majority don't carry weapons until later on in the level, so melee weapons are a good choice.
Scour the area for more Shotgun ammo, this is your main weapon during this mission, so always be on the look out for more cartridges. There are four Shotguns in the Storage Area, so make sure you have a full amount of ammo before moving on. There'll also be a Shotgun to the left of the next room.
Warehouse
Inside this Warehouse, engaging the Flood over open ground is clearly suicidal. Though only a few carry weapons, their sheer numbers and scattered Infection Forms (reanimating additional corpses) make it easy to be overwhelmed. The recommended way of dealing with massive amount of Flood is to launch an initial attack before taking a defensive position and encouraging the Flood to come to you.
The doorway beside the metal stairs is the best place to make your stand. Generally, the Flood will attack individually or in small groups. They shouldn't be that difficult to deal with. Larger packs of Combat Forms are more dangerous, just backpedal and fire point blank Shotgun blasts at their chests. If it's a really big group, that's your cue to break out with the Gravity Hammer.
There are some potentially useful equipment here, including a Trip Mine, Bubble Shield and Regenerator. You'll find that these items are common throughout the mission. The most useful is probably the Regenerator. Combat Forms carrying weapons could lower your shield rapidly, so it's useful to have something which can counter that.
The next wave of Flood is smaller. If a large group is headed for your position, shoot the Fusion Coils as they pass by them. The explosion should engulf a few. Your biggest concern would be to avoid being surrounded. Otherwise, this battle should be relatively easy. The metal walkway that leads to the next room is home to a Flamethrower. It's enjoyable to use, but you'll really need to destroy Combat Forms quickly on Legendary. Use it to torch the prone Flood bodies, which is quicker than using melee attacks.
When you reach the twisting metal corridor, pull out your Gravity Hammer and be ready as you approach the first corner. A large group of Combat Forms have been impatiently awaiting your arrival, and now their main aim is to ambush you. If you sprint forward, you can take them all out with two well-aimed strikes. Exit the warehouse and you'll arrive at Lake bed B.
Lake Bed B
A friendly Phantom will deploy a squad of Elites at your location. They are a big help, but they could also be a nuisance. If you're actively seeking a high score, valuable kills will be stolen. The Elites also tend to jump into the line of fire when you least expect it, and their furious grenade lobbing could lead to you being unintentionally betrayed.
Still, the Elite landing party will thin down the force of Combat Forms situated on the side of the lake bed. If you find any intact Flood bodies, destroy them to avoid their reanimation. When all is visually clear, search the area for two Plasma Rifles to duel wield. Approach the ramp slowly, and immediately pull back into cover as Combat Forms leap from the cliff to your left. Dispatch them at range, using your Plasma Rifles. They usually carry Brute Shots and Shotguns at this point, so take care not to get hit.
More Combat Forms will advance down the ramp, so knock them over before they open fire. Two Carrier Forms will waddle down the slope. Toss some Frag Grenades or Plasma Grenades to rapidly blow them up, them aim to pop the swarm of Infection Forms as they approach. make sure no nearby corpses are reanimated.
Whilst you may grieve over the loss of your Gravity Hammer, the Plasma Rifles are exceptionally more useful during the following battles.
Factory B
As you enter the factory, avoid trying to fight the Combat Forms in the open. Stay near the damaged truck and try to gain the Flood's attention. Shoot each of them one-by-one as they approach.
As you leave the low corridor, further Combat Forms will drop down from the ceiling. They'll generally land in close proximity of each other, so throw a grenade or two into their midst. Then retrieve your second Plasma Rifle and dispatch any that remain. Quickly run underneath the walkway to avoid being shot by the second wave. They'll arrive through the door above, so stay alert. Wait at the bottom of the stairway to take out any that run down. The Arbiter will take care of the rest. It could help to deploy a Regenerator at the bottom of staircase to your advantage.
On the upper level of this building, you can find a second Flamethrower. This isn't the best of weapons to deal with the Combat Forms, but they should make easy work of the Pure Forms outside.
Lake Bed A
Another group of Elites is usually (but not always) dropped off as you exit the warehouse. This time, take advantage of their aid as you fight the initial wave of Combat Forms and the Pure Forms further ahead. Be warned that they will take little consideration when you run in front of them. It's easy to get caught in the crossfire and get killed by one of their Plasma Grenades.
Make sure the immediate area is clear before picking up an Energy Sword in place of your Plasma Rifles. If you can't find one, pick it one up the next battle. Grab the Machine Gun Turret, then carefully walk along the concrete path. Use short bursts of turret fire to temporarily disable the Ranged Forms that attack from distance as you push forward. If you rush, there is a big chance of being surrounded. So slowly advance, dealing with any Combat Forms that draw near, and choose cover that shelters you from incoming projectiles.
At the far end of the concrete path, use grenades to weaken the large groups of Flood before using your Energy Sword to finish them off. Usually it would take forever to kill a Tank Form of Legendary, with a single Energy Sword slash is enough to take one down. Move into the corner of the area and lure the Flood to your position. They'd come in manageable numbers, so they shouldn't be too difficult.
Finish your objective by heading into the Flood ship and retrieving what seems to be Cortana.
Debriefing
New Enemies: Infection Form, Carrier Form, Combat Form, Stalker Form, Tank Form, Ranged Form
New Vehicles: --
New Items: --
New Weapons: Flamethrower, Energy Sword
This is the first mission in which you fight the Flood, making it a new experience when fighting the newly evolved Pure Forms. Keep in mind the useful weapons when in combat with them and any other Flood, especially on higher difficulties. And also remember that Tilt isn't recommended during Flood-based missions. You can freely follow the weapon instructions during this walkthrough because you'll receive new ones at the start of the next mission (which are the Assault Rifle and Sniper Rifle). This is a good starter mission for engaging the Flood. You can test the best technique of dispatching them without dying, because although there are some instructions about where to go and what to do, there are billion other techniques that work just as well.
Exterminator Achievement Milestone: 15,000 points
Recommended Multiplier: 6+ ( Tough Luck(1.5) + Catch(1.5) + Black Eye(1.5) + Iron(3) + Tilt(2) + Mythic(2) )
TIME BONUS
0-10 min - 3x
10-15 min - 2.5x
15-20 min - 2x
20-25 min - 1.5x
Suicidal Marine
Shortly after you get the Flamethrower, there will be a Marine in the corner talking to himself about his squad's infection by the Flood, and how he just "did them a favor." After this, he says something about how he should do himself a favor too, and points his pistol at his head, seemingly about to kill himself, although he alternates between this and putting his gun down and shaking. It should also be noted that he sometimes will not have his gun out, and instead be pointing his empty hand at his head. The suicidal marine has never been observed to actually kill himself, but many players do, either out of a desire to end his misery or for more sadistic reasons.
Trivia
- This was the first and only known time the Flood have been on Earth.
- When you encounter the Marines in the loading ramp area in the beginning of the level, it is in fact possible to save all of them except one, who is scripted to mutate into a Flood Combat Form. However, this is extremely difficult, and next to impossible on higher difficulties.
- The Marine that is scripted to be infected is not always the Sergeant, despite the "that's not the sergeant anymore" line.
- This level has the Fog skull, which can be gotten by shooting the Flood Combat Form that jumps from the first building on the right at the start of the level. If you time it right, the Flood, holding the skull, will die, and it will drop down so you can pick it up.
- It is possible to save the first Marine you encounter upon entering the facility. One way is to throw a frag grenade right behind the Marine (you must be fast). Almost every time you do this, the grenade will kill most of the Infection Forms and any on the Marine himself, leaving you to kill anymore Infection Forms left. However, turning on the Cowbell Skull would cause more serious damage to the Marine and result in his death.
- Some of the Flood noises heard on this level are not sound effects, but part of the track Dread Intrusion, from the Halo 3 Original Soundtrack.
- Often, the suicidal Marine will change race, that is, one play through he will be white, the other play through he will be black, and another he will be Asian. This happens to all NPC marines.
- The Suicidal Marine bears a striking resemblance to the Crazed Marine in the Halo: Combat Evolved level 343 Guilty Spark that shoots you (thinking that you may be Flood-controlled). It should be noted that the player comes across the Crazed Marine in the first level you fight the Flood and that you come across the Suicidal Marine in the first level you fight the Flood in Halo 3.
- At the very beginning, where it says "It followed me home", walk forward until you see the large crack separating the land. If you zoom in, you will see 2 Marines, one with an SMG and one with a Pistol running. They will be followed by 4 Flood Combat Forms. If the Marines survive this wave, 6 more will come. Its fun to see how Marines fare against the Flood. Amazingly, in some cases they will survive this attack. If they do, they will run back the way they came. But if they lose, the surviving Flood will either stay where they stand, or they will run back to where they came from. You can help them with Grenades and your Battle Rifle but they will most likely die when they get ambushed by Flood up ahead.
- This level, and the level 343 Guilty Spark, are the only levels in the Halo series where Marines aid you in fighting against the Flood. (Though the level The Covenant does feature some combat sequences where the Marines or ODSTs assist you in combating the Flood).
- When Lord Hood accuses the Ship Master of glassing half the continent of Africa, he is hyperbolically saying this in order to emphasize his disgust in the actions taken it glassing the area. In fact, the glassing of half the continent is impossible, for Mount Kilimanjaro can be seen unscathed in the post game credits; also, the memorial cinematic is set in Kenya which would coincidentally lie within the "half the continent" supposedly glassed.
- During the part where the two Phantoms drop off Elite reinforcements to assist, the Elites that are dropped from the second Phantom (the one further up ahead, nearer to the crashed cruiser) can be saved if you reach there in time, otherwise they will die fighting the Flood, near a Gravity Hammer equipped-Brute corpse.
- If you melee the Suicidal Marine, (depending whether if he survives) he will stop crying and may follow you through the rest of the level.
- On rare occasions, when you reach the Suicidal Marine, he will be wearing a different uniform. Example: Standard Marine uniform or Specialist uniform.
- Even if Lord Hood says that humanity's last stand is at Earth, the UNSC still has other planets that aren't glassed, like Sigma Octanus IV.
- All of the Elites in the game are equipped with an Energy Sword as their secondary weapon. But oddly, they will never use it, save when their shields are drained and only have a bit of health left, (likely to be killed at that point) or when accidentally stuck by another Elite throwing a Plasma Grenade. And also, the player during gameplay can't give the weapon to them either.
- Inside of the ship, among the fallen Elite, you can find an Elite with a helmet that is crossed between a Combat and Assault helmet. Occasionally, when infected the bodies will split and you will get two infected Elites, other times they will stay combined.
- At the first checkpoint, the marines on the radio that says, "We're surrounded, Sergeant." is in fact Gus Sorola, the voice actor of Private Simmons from the web series, Red vs. Blue.
- It should be noted that the layout of the factory portion is nearly the same as the layout in The Storm, except the player is going in the opposite direction. This is similar to Two Betrayals.
- It is possible to fight Flood Combat Forms inside the crashed ship. If you melee the Elite corpses down the hole and shoot the Flood bio-mass walls, the Infection Forms that emerge will take over the corpses of the Elites and will attempt to kill you.
- In this level there is a poster on the ground that shows Jason Jones and has "Missing" over it.
- If the suicidal marine is infected by the flood he will sometimes fight on your side.
- If playing on Co-Op as the 2nd, 3rd, or 4th player (an elite) you can get into the drop pods that drop off the elites from the Shadow of Intent, by holding down the right bumper close to them, provided the drop pods do not get shot at.
- If you drop down the hole and have marines left if you jump back up. You could then push them down the hole and let them help you. Occasionally you have to push them everywhere occasionally they will have to be pushed. The same can be done with Elite allies.
Gallery
- Floodgate1.jpg
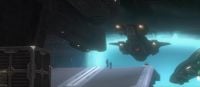
The Shadow Of Intent leaves Earth via The Portal
Lord Hood's dropship leaves The Shadow Of Intent

| Preceded by The Storm |
Halo 3 Campaign Missions Floodgate |
Succeeded by The Ark |


