Quarantine Zone: Difference between revisions
From Halopedia, the Halo wiki
| (578 intermediate revisions by more than 100 users not shown) | |||
| Line 1: | Line 1: | ||
< | {{Status|Gameplay}} | ||
== | {{Center|'''Quarantine Zone''' redirects here. For the location, see [[Quarantine zone (location)]]. For the achievement, see [[Quarantine Zone (achievement)]].}} | ||
{{Level infobox | |||
|pagegamelabel=H2 | |||
|prev = ''[[Sacred Icon]]'' | |||
|next = ''[[Gravemind (level)|Gravemind]]'' | |||
|game = ''[[Halo 2]]'' (<small>''[[Halo 2: Anniversary|Anniversary]]''</small>) | |||
|name = '''''Quarantine Zone''''' | |||
|devname=<code>06b_floodzone</code> | |||
|image = [[File:H2A QuarantineZone Loadscreen.png|300px]] | |||
|player = [[Thel 'Vadamee]] | |||
|date = [[2552|November 3, 2552]] | |||
|place=[[Quarantine zone (location)|Quarantine zone]] and the [[Library]], [[Installation 05|Delta Halo]] | |||
|objective= Push through the Quarantine Zone to the Library and retrieve the [[Activation Index|Sacred Icon]]. | |||
|partime=00:15:00 {{C|''Master Chief Collection''}} | |||
|parscore=7,000 {{C|''Master Chief Collection''}} | |||
}} | |||
{{Article quote|Parasites, humans - no matter. The Icon must be found.}} | |||
'''Quarantine Zone''' is the eleventh [[campaign]] level of ''[[Halo 2]]'', which follows up immediately from the end of [[Sacred Icon (level)|Sacred Icon]]. The [[Arbiter]], [[Thel 'Vadam]]ee, must battle his way past [[Forerunner]] [[Sentinels]] and vehicle-using [[Flood]] to reach the [[Library]]'s [[Index Chamber]]. | |||
== | ==Transcript== | ||
[https://youtu.be/We9G29xWmQY '''{''Cutscene''}'''] | |||
[http://www.youtube.com/watch?v=8-uuwa47JDk'''{''Anniversary Cutscene''}'''] | |||
''A [[Phantom]] stops and drops reinforcements, then moves off screen. Arbiter Thel 'Vadamee and [[Special Operations Commander]] [[Rtas 'Vadum]]ee are meeting on the snow below as multiple [[Special Operations Sangheili|Special Operations]] [[Sangheili]] gather around them.'' | |||
*'''Thel 'Vadamee''': "In the center of this zone is a [[Activation Index|Sacred Icon]] critical to the [[Great Journey]]. I must find it." | |||
'' 'Vadumee nods.'' | |||
*'''Rtas 'Vadumee''': ''(Clenches his fist)'' "We shall cut into the heart of this infestation, retrieve the Icon, and burn any [[Flood]] that stand in our way!" | |||
''Sangheili roar and growl in agreement.'' | |||
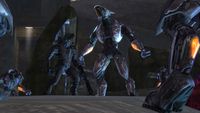
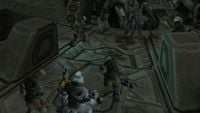
[[File:H2A - Rtas rallying troops.jpg|thumb|300px|Rtas 'Vadumee rallies his Sangheili to battle.]] | |||
*'''Rtas 'Vadumee''': ''(to 'Vadamee)'' "The parasite is not to be trifled with. I hope you know what you are doing." | |||
'' 'Vadamee looks to his left at the entrance ahead (He looks to his right in ''Anniversary'').'' | |||
'''{''Gameplay''}''' | |||
===Objects in Mirror Are Larger Than They Appear=== | |||
*'''Rtas 'Vadumee (COM)''': "Forward, warriors! And fear not pain nor death. Go, Arbiter, I'll follow when our reinforcements arrive." | |||
* | |||
''An [[Enforcer]], along with some [[Aggressor Sentinel]]s enter through the large door in the wall ahead.'' | |||
*[[ | *'''Special Operations Sangheili''': "Enforcers! To the [[Wuzum-pattern Spectre|vehicles]]! We'll need their heavy guns. Onward to the Sacred Icon!" | ||
''The teams pass through the tunnel and enter the structure within, they see Flood combat forms riding [[Type-32 Rapid Assault Vehicle|Ghosts]].'' | |||
*[[ | *'''Special Operations Sangheili''': "What? The [[Flood|parasite]] controls our vehicles? No matter, they will die all the same." | ||
''The team destroy the Flood-driven vehicles as well as several Enforcers and Aggressor Sentinels. They continue and find an unmanned [[M12 Force Application Vehicle|Warthog]] with dead [[UNSC Marine Corps|human bodies]] around it.'' | |||
* | *'''Special Operations Sangheili''': "Commander, we found a human vehicle!" | ||
*'''Rtas 'Vadumee (COM)''': "Keep moving, I'm on my way." | |||
''In a lower area, a [[M808 Main Battle Tank|Scorpion tank]], another Warthog and several more Ghosts all under Flood control do battle with another Enforcer, while a Flood-controlled [[Muz-pattern Wraith|Wraith]] lobs plasma mortars from across the gap. 'Vadamee and his team eventually clear the area.'' | |||
[[ | ''As the Arbiter leaves the structure, a human controlled [[D77-TC Pelican|Pelican]] with a tank attached will fly overhead, firing at several Aggressor Sentinels clustered ahead, and occasionally at the Arbiter's team as well as the Flood.'' | ||
'' | ===Healthy Competition=== | ||
''The team eventually clear the area, after dealing with several Enforcers and an onslaught of Flood combat forms. They leave through a door on the lower level.'' | |||
''If all Sangheili allies are dead:'' | |||
''' | *'''Rtas 'Vadumee (COM)''': "Arbiter, I'm sending you a squad of my most experienced warriors to assist you. Do not squander their talents." | ||
'' | ''The Arbiter drives through a valley of Flood-controlled Wraiths, with Enforcers rising and falling into and from the pits in the center. Dodging several combat forms wielding [[M41 SPNKR|heavy UNSC weapons]], the team continue through a tunnel ahead, and the crashed [[Sentinel Constructor Factory]] comes into view. Battling a large number of [[Forerunner]] constructs, the team eventually makes it into the factory through a tear in its side. The team is forced to fight its way through the stricken constructor factory, under constant attack from Sentinels and Flood forms. Eventually the team makes it back outside where they find an abandoned Scorpion Tank and other UNSC supplies being guarded by the Flood. The surviving Sangheili go through a short tunnel and enter a large valley that is filled with Flood forms and Enforcers. A Covenant [[Kez'katu-pattern Phantom|Phantom]] swoops in to drop off a Spectre along with Rtas 'Vadumee and another Special Operations Sangheili to aid the Arbiter.'' | ||
''' | *'''Special Operations Sangheili #2''': "Forward to the [[Activation index|Icon]]! The parasite's ranks swell as we draw nearer to the [[Library]]. Steel your nerves, we're not turning back." | ||
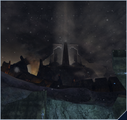
'' | [[File:HTMCC-H2A Gondola Station.jpg|thumb|300px|The team approach the gondola station to the Library.]] | ||
''The Arbiter and his allies fight through the valley and reach the entrance to the Library, where a Flood-controlled Scorpion Tank and Wraith face off with Enforcers. Flood are guarding the entrance with multiple [[M247 General Purpose Machine Gun|machine gun turrets]]. The Arbiter and his allies eventually defeat them all.'' | |||
''' | *'''Rtas 'Vadumee''': "Once again, brothers, we are victorious!" | ||
'' | ''Alternatively:'' | ||
*'''Rtas 'Vadumee''': "Once again, brothers, victory is ours!" | |||
''They enter a tunnel and find a [[Gondola]] on the other side.'' | |||
'' | |||
''' | [https://youtu.be/We9G29xWmQY?t=28 '''{''Cutscene''}'''] | ||
[http://www.youtube.com/watch?v=SW7yl32BadM'''{''Anniversary Cutscene''}'''] | |||
'' | ''Thel 'Vadamee and Rtas 'Vadumee are running to the control panel of the gondola. The Arbiter is about to activate the drive switch until they hear the grinding and whirring noise of another gondola approaching the Library.'' | ||
''' | *'''Rtas 'Vadumee''': "More humans? They must be after the Icon." | ||
'' | ''Flood screeches echo through the air.'' | ||
''' | *'''Rtas 'Vadumee''': "On your way, Arbiter." ''(Draws his [[Type-1 energy sword|energy sword]])'' "I'll deal with these beasts!" | ||
'' | ''Rtas 'Vadumee takes off. 'Vadamee turns back to the control panel and activates the gondola with a soft punch.'' | ||
''The gondola starts moving, and [[Tartarus]]'s Phantom hovers above it.'' | |||
''' | *'''Tartarus (COM)''': "I see that coward didn't join you. I'll do what I can to keep the Flood off your back." | ||
'' | ''The entrance, in the shape of a circle, rotates, then opens in four-quarter pieces. | ||
'' | ===Shooting Gallery=== | ||
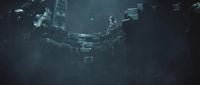
[[File:H2A-In Amber Clad Quarantine Zone.png|thumb|300px|The UNSC ''In Amber Clad'' holds position near Delta Halo's library.]] | |||
'''{''Gameplay''}''' | |||
( | *'''Tartarus (COM)''': "We cannot let the humans capture the Icon. The [[Hierarchs]] do not look kindly on failure." | ||
*'''Special Operations Sangheili #3''': "I grow restless without a target." | |||
''Up ahead is a ledge, where multiple Flood combat forms wait to ambush the team.'' | |||
''' | *'''Spec Ops Elite #4''': "Look, up ahead. The parasite gathers for an attack." | ||
'' | ''The combat forms leap down onto the gondola, forcing the team to defend themselves. As the gondola continues moving in and up.'' | ||
( | *'''Tartarus (COM)''': "Humans, I'll thin their ranks." | ||
''Tartarus flies his Phantom to the Gondola the UNSC forces are riding on, greatly decreasing the Sangheili's support fire. The gondolas enter a tunnel leading up. Masses of Flood combat forms begin to attack the team through holes in the gondola.'' | |||
*'''Special Operations Sangheili #3''': ''(sarcastically)'' "What courage! Nice and safe in his [[Kez'katu-pattern Phantom|Phantom]]!" | |||
'' | *'''Special Operations Sangheili #4''': "Ignore the braggart, ready yourselves." | ||
'' | ''The Gondolas exit the tunnel as the second wave of Flood has been defeated.'' | ||
''( | *'''Tartarus (COM)''': "Humans! I'll get them." | ||
'' | ''Tartarus flies his Phantom away again, and the Sangheili discuss the situation.'' | ||
'' | *'''Special Operations Sangheili #3''': "That fool! He'll alert them to our presence!" | ||
'' | *'''Special Operations Sangheili #4''': "Look on the bright side, maybe they'll shoot him down!" | ||
''' | ''The Gondola draws closer to the Library's entrance.'' | ||
'' | *'''Special Operations Sangheili''': "Behold, the Library of our lords!" | ||
( | *'''Tartarus (COM)''': "The humans are already inside, Arbiter! After them! I'll watch the perimeter." | ||
''Once the Gondola reaches the entrance.'' | |||
===That Old, Familiar Feeling=== | |||
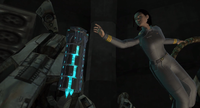
[[File:H2A-Miranda.jpg|thumb|300px|[[Miranda Keyes]] reaches for the [[Index]], floating in its container inside the [[Library]].]] | |||
''( | *'''Tartarus (COM)''': "Hurry, Arbiter! Get the Icon!" | ||
''' | ''The remaining Sangheili gather at the Gondola's exit.'' | ||
'' | *'''Special Operations Sangheili #3''': "We shall protect this vessel. It may be our only means of escape." | ||
''' | *'''Special Operations Sangheili #4''': "Retrieve the Icon, Arbiter, for the [[Covenant]], and the Journey!" | ||
'' | ''(Note: If there's only one Sangheili left alive, he will say both lines one after the other.)'' | ||
'' | ''Flood [[infection forms]] crawl across the floor as the Arbiter enters the Library. The hallway is littered by a multitude of dead Marines and combat forms, and blood smears the ground.'' | ||
'' | ''The Arbiter locates the entryway to the [[Activation index|Icon]].'' | ||
''' | [https://youtu.be/We9G29xWmQY?t=88 '''{''Cutscene''}'''] | ||
[http://www.youtube.com/watch?v=rKELPqhRCB0'''{''Anniversary Cutscene''}'''] | |||
''' | ''Dolly-shot of the center of the Library, where the Index is floating in a container similar to the one on [[Alpha Halo]]. [[Commander (UNSC)|Commander]] [[Miranda Keyes]] '''(who is carrying an SMG in the Anniversary)''' is approaching what appears to be a Flood tentacle, most likely the Gravemind's '''(in the Anniversary, it's a power cord from the Enforcer on top of it)''', hanging off of some Enforcer wreckage.'' | ||
''( | ''She holds onto the tentacle/cable, '''(in the Anniversary, she sets aside her SMG)''', and reaches for the Index. The container whirs, clicks, then releases the Index. She grabs it.'' | ||
*'''Commander Keyes''': "Gotcha." | |||
'' | ''The tentacle/cable loosens its hold — or the Gravemind purposely releases it — and continues to loosen. Keyes is about to fall to her death until the tentacle/cable suddenly stops. She looks up and finds [[Sergeant Major]] [[Avery J. Johnson]] holding onto the tentacle/cable.'' | ||
''( | *'''Sergeant Johnson''': ''(grunts)'' "You know, [[Jacob Keyes|your father]] never asked me for help either." | ||
''' | *'''Commander Keyes''': ''(Places the Index in her belt)'' "The Index is secure." | ||
'' | ''Keyes climbs back onto the floor.'' | ||
''( | *'''Sergeant Johnson''': "[[McKenzie (Marine)|McKenzie]], [[Perez (Marine)|Perez]], how's our exit?" | ||
''No response.'' | |||
'' | |||
''' | *'''Sergeant Johnson''': "You hear me, Marines?!" | ||
'' | ''Still no response. Johnson readies his battle rifle.'' | ||
---- | |||
'''Original version:''' | |||
'''Johnson | *'''Sergeant Johnson''': ''(To Keyes)'' "We got trouble." | ||
'' | ''Keyes readies two [[SMG|M7 Sub Machine Guns]]. Johnson walks slowly, watching for any enemy in sight. He turns to his right.'' | ||
'' | ''Cut to wreckage from Johnson's POV. A [[active camouflage|cloaked]] hostile leaps with little noise. Johnson sees the movement and aims his [[BR55 Battle Rifle|battle rifle]].'' | ||
'''Johnson | *'''Sergeant Johnson''': "Damn!" | ||
'' | ''Johnson opens fire, but misses. The cloaked hostile gets close enough for Johnson to club it twice with his battle rifle, but with no effect. The attacker is revealed to be Thel 'Vadamee who grabs Johnson by the shoulders and sets him straight on his feet. He stares Johnson in the face with anger.'' | ||
'''Johnson | *'''Sergeant Johnson''': "How 'ya doin?" | ||
'' | '''Vadamee growls, and hits him with a head-to-head clash, knocking Johnson down and out. 'Vadamee looks up to see Keyes.'' | ||
''' | *'''Commander Keyes''': "Sergeant, stay down!" ''(Aims her SMGs at the Arbiter)'' | ||
'' | ''She fires, and bullets light up 'Vadamee's shields. 'Vadamee dashes for nearby cover, his shields drained as he reaches a piece of wreckage.'' | ||
''( | *'''Commander Keyes''': ''(turns to the unconscious Johnson)'' "Johnson, are you all right? Johnson!" | ||
''' | '''Vadamee takes advantage of Keyes' distraction and leaps high from his cover, his shields flickering from the previous shots. He lands right in front of Keyes and slaps the SMGs out of her hands. She is about to react when a shock surrounding her whole body flickers, and pulls her away from 'Vadamee.'' | ||
'' | ---- | ||
'''Anniversary version:''' | |||
'''Johnson:''' " | *'''Sergeant Johnson''': ''(To Keyes)'' "We got trouble." | ||
'' | ''Johnson walks slowly, watching for any enemy in sight. He aims his [[BR55 Battle Rifle|battle rifle]] around, shining the mounted flashlight into the darkness. Suddenly he hears heavy footsteps on the right. He spins around just in time to see Thel 'Vadamee jumping at him.'' | ||
''' | *'''Thel 'Vadamee''': ''(roars in fury)'' | ||
'' | ''Johnson fires his battle rifle several times, hitting 'Vadamee, whose shields deflect the incoming fire. Johnson dodges out of the way. 'Vadamee lands and takes a swing at Johnson. The Sergeant blocks the strike with his battle rifle, but is knocked back by the force of the blow.'' | ||
''' | *'''Sergeant Johnson''': "Damn!" | ||
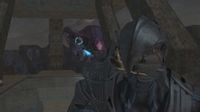
[[File:H2A-HowYaDoing.jpg|thumb|300px|Sergeant Johnson stares down the Arbiter after being disarmed.]] | |||
''The Arbiter takes another swing at Johnson, who, again, manages to block the attack with his battle rifle. Johnson rams his elbow into the Arbiter's chest, driving the Sangheili back a couple steps. He then swings his battle rifle at the Arbiter, but 'Vadamee knocks the weapon out of his hands with a single swipe.'' | |||
'' | ''Before Johnson can recover, the Arbiter grabs him by the throat and forces him up against a wall. | ||
'' | *'''Sergeant Johnson''': "How 'ya doin?" | ||
''' | '''Vadamee growls and throws Johnson to the floor. He then starts to approach Johnson when submachine gun fire lights his shields up. Scene rotates to the left, revealing Miranda Keyes firing her submachine gun.'' | ||
''' | *'''Commander Keyes''': "Sergeant, stay down!" | ||
'' | '''Vadamee dashes for nearby cover as Keyes continues firing at him. He disappears from her sight.'' | ||
''( | *'''Commander Keyes''': ''(turns to Johnson, only to see him unconscious)'' "Johnson, are you all right? Johnson!" | ||
''' | '''Vadamee takes advantage of Keyes' distraction and leaps high from his cover. He lands right in front of Keyes, who reacts by firing her SMG at point blank range. The Arbiter grabs the barrel of her weapon with one hand and forces it away from him. He then wrenches the SMG out of Keyes' hands with such force, she is thrown to the floor. Miranda starts to crawl away when a shock surrounding her whole body flickers, and pulls her away from 'Vadamee.'' | ||
---- | |||
''( | ''Cuts to Tartarus, who is using his personal [[Gravity hammer (fiction)|gravity hammer]], the [[Fist of Rukt]] on Keyes. She lands flat on his shoulder unconscious. He catches her in his grasp.'' | ||
''' | *'''Tartarus''': "Excellent work, Arbiter. The Hierarchs will be pleased." | ||
''' | '' 'Vadamee has a hand on his side, where he was shot when his shields were drained.'' | ||
'' | *'''Thel 'Vadamee''': "The Icon... is my responsibility." | ||
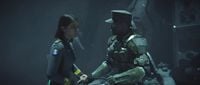
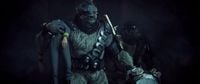
[[File:H2A - Inevitable betrayal.jpg|thumb|300px|Bloodied and betrayed, the wounded Arbiter is unable to resist Tartarus as his troops seize the Index and their human opponents.]] | |||
''( | *'''Tartarus''': "''Was'' your responsibility." ''(takes the Index from Keyes' belt)'' "Now it is mine." | ||
'' | ''Wide-shot of two [[Jiralhanae]] aiming their [[Type-25 Grenade Launcher|Brute Shots]] at 'Vadamee. The Arbiter stares at them in disbelief.'' | ||
'' | ''Cut to another Jiralhanae dragging the unconscious Johnson, with Tartarus firmly placing Keyes on the same Jiralhanae's shoulder'' | ||
*'''Tartarus''': "[[Great Schism|A bloody fate]] awaits you and the rest of your incompetent [[Sangheili|race]]." ''(points his hammer at 'Vadamee)'' "And I, Tartarus, [[Chieftain of the Jiralhanae|Chieftain of the Brutes]] will send you to it!" | |||
---- | |||
'''Original version:''' | |||
''Close-up of 'Vadamee'' | |||
*'''Thel 'Vadamee''': "When the [[Hierarch|Prophets]] learn of this, they will take your head!" | |||
*'''Tartarus''': "''When'' they learn?" ''(chuckles)'' | |||
''Close-up of side-shot of Tartarus'' | |||
*'''Tartarus''': "Fool. They ''ordered'' me to do it." | |||
''Slow zoom in on 'Vadamee. He jerks his neck up in horror.'' | |||
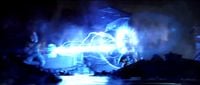
''Tartarus releases a blast from his hammer which sends 'Vadamee falling into the pit below with one gravity shock.'' | |||
---- | |||
'''Anniversary version:''' | |||
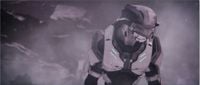
[[File:H2A-Arbiter-01.jpg|thumb|300px|The Arbiter finds out he and his species are betrayed.]] | |||
''A very angry 'Vadamee clutching his wound while two Jiralhanae surround him.'' | |||
*'''Thel 'Vadamee''': "When the [[Hierarch|Prophets]] learn of this, they will take your head!" | |||
*'''Tartarus''': "''When'' they learn?" ''(chuckles)'' Fool. They ''ordered'' me to do it." | |||
'''Vadamee's face goes from angry to shocked as his eyes widen in horror and surprise, while the two Jiralhanae guarding him move out of the way.'' | |||
''Tartarus smirks as he activates his hammer and releases a concussive blast from it, sending 'Vadamee rolling on the floor and eventually falling into the dark pit below.'' | |||
---- | |||
''Cuts to black and level ends.'' | |||
=== | ==Achievements== | ||
The following [[achievement]]s can be unlocked on ''Quarantine Zone'' across the [[Halo 2 (Windows Vista)|Windows Vista]] and ''[[Halo: The Master Chief Collection]]'' editions of ''Halo 2: Anniversary''. The original [[Xbox]] release of ''Halo 2'' did not contain achievement unlocks. | |||
{| class="wikitable" | |||
|- | |||
! scope="col" style="width:135px;text-align:center;" |'''''Halo 2'' (Windows Vista)''' | |||
! scope="col" style="width:135px;text-align:center;" |'''''Halo: MCC'' (Xbox One, Xbox Series X|S)''' | |||
! scope="col" style="width:135px;text-align:center;" |'''''Halo: MCC'' (Steam)''' | |||
! scope="col" style="width:175px;height:20px;text-align:center;" |'''Title''' | |||
! scope="col" style="width:350px;height:20px;text-align:center;" |'''Unlock requirement''' | |||
! scope="col" style="width:200px;height:20px;text-align:center;" |'''Games''' | |||
|- | |||
|[[File:H2V Achievement Quarantine Zone.png|center|64px]] | |||
|[[File:HTMCC H2A Achievement QuarantineZone.png|center|114px]] | |||
|[[File:HTMCC H2A Achievement Steam Quarantine Zone.jpg|center|64px]] | |||
|<center>'''[[Quarantine Zone (achievement)|Quarantine Zone]]'''</center> | |||
|Beat Quarantine Zone on any difficulty. | |||
|<center>[[Halo 2 (Windows Vista)|''Halo 2'' (Windows Vista)]]<br/>''[[Halo: The Master Chief Collection]]''</center> | |||
|- | |||
|<center>N/A</center> | |||
|[[File:HTMCC H2A Achievement HotZone.png|center|114px]] | |||
|[[File:HTMCC H2A Achievement Steam HotZone.jpg|center|64px]] | |||
|<center>'''[[Hot Zone]]'''</center> | |||
|Beat the par time on Quarantine Zone. | |||
|<center>''[[Halo: The Master Chief Collection]]''</center> | |||
|- | |||
|<center>N/A</center> | |||
|[[File:HTMCC H2A Achievement TheDoctorIsIn.png|center|114px]] | |||
|[[File:HTMCC H2A Achievement Steam TheDoctorIsIn.jpg|center|64px]] | |||
|<center>'''[[Fists of Fury]]'''</center> | |||
|Beat the par score on Quarantine Zone. | |||
|<center>''[[Halo: The Master Chief Collection]]''</center> | |||
|- | |||
|<center>N/A</center> | |||
|[[File:HTMCC H2A Achievement Delighted.png|center|114px]] | |||
|[[File:HTMCC H2A Achievement Steam Delighted.jpg|center|64px]] | |||
|<center>'''[[Delighted]]'''</center> | |||
|Activate [[Terminal (Halo 2: Anniversary)|Terminal #9]] on Quarantine Zone. | |||
|<center>''[[Halo: The Master Chief Collection]]''</center> | |||
|- | |||
|<center>N/A</center> | |||
|[[File:HTMCC H2A Achievement SkulltakerSputnik.png|center|114px]] | |||
|[[File:HTMCC H2A Achievement Steam SkulltakerSputnik.jpg|center|64px]] | |||
|<center>'''[[Skulltaker Halo 2: Sputnik]]'''</center> | |||
|Find and claim the [[Halo 2 skulls#Sputnik|Sputnik Skull]]. | |||
|<center>''[[Halo: The Master Chief Collection]]''</center> | |||
|- | |||
|<center>N/A</center> | |||
|[[File:HTMCC H2A Achievement ChieftainoftheBrutes.png|center|114px]] | |||
|[[File:HTMCC Achievement Chieftain of the Brutes Steam.jpg|center|64px]] | |||
|<center>'''[[Chieftain of the Brutes (achievement)|Chieftain of the Brutes]]'''</center> | |||
|Collect the Tartarus toy in Quarantine Zone. | |||
|<center>''[[Halo: The Master Chief Collection]]''</center> | |||
|- | |||
|<center>N/A</center> | |||
|[[File:HTMCC H2A Achievement SixPedalsFourDirections.png|center|114px]] | |||
|[[File:HTMCC Achievement SixPedalsFourDirections Steam.jpg|center|64px]] | |||
|<center>'''[[Six Pedals, Four Directions]]'''</center> | |||
|Drive a Scorpion while playing as the Arbiter. | |||
|<center>''[[Halo: The Master Chief Collection]]''</center> | |||
|- | |||
|} | |||
In | ==Production notes== | ||
[[Flood Juggernaut]]s were initially intended to appear in the level. In early design documents, they would be introduced at the canyon before the Arbiter enters the cave leading to the crashed sentinel factory. The cave was a wall with "Flood crust" that contain Juggernauts, which would burst out of the crust or burst out from its debris if players destroy the crust. Three additional walls with "crusts" were envisioned for the area. While two were replaced with bottomless pits that now spawn Flood combat forms, the third wall was positioned at what has now become a dead end at the rightmost portion of the canyon; it would have blocked access to a tunnel that leads to the next area, forcing players to destroy the curst and release a Flood Juggernaut. Allied Wraiths would have accompanied the player and fired mortar bolts from a distance until it is safe to advance.{{Ref/Book|AoH|Page=142}} | |||
However, based on files existing in the final game, later during the development of ''Halo 2'', the introduction appears to have been moved to the spiral ramp in the prior area, with two Juggernauts climbing out of the bottomless pit. Another major encounter with Juggernauts was upon exiting the crashed factory; Bungie initially intended for the player to stumble across a Flood Juggernaut mercilessly butchering a trio of marines, who were defending a Scorpion tank. This is confirmed further by the fact marine spawn points were listed in this area, but they do not appear as they were cut. There is even cut dialogue located in the map files of Rtas 'Vadumee expressing pity for these humans.{{Ref/YouTube|Id=Jugg|-cbVFPJVFo0|The Vengeful 'Vadam|I Brought Halo 2's Cut Flood Juggernaut Back Into The Campaign!|D=03|M=11|Y=2023}} | |||
If that | ==Trivia== | ||
===Glitches=== | |||
*Because Quarantine Zone is the second part of a two-part level, your weapons will carry over from [[Sacred Icon (Level)|Sacred Icon]], unless one of your weapons was a [[M19 SSM Rocket Launcher|Rocket Launcher]] or [[Magnum#Halo_2_and_Halo_2:_Anniversary|Magnum]], or if you were equipped with both types of Sentinel Beams. If you finish Sacred Icon with a Rocket Launcher you will start Quarantine Zone with a Covenant Carbine and an Energy Sword. | |||
*At the end of the level, there are about a dozen [[Infection Forms]] that will not attack you, and you can even get them to crawl on you. If you follow them, they will go to the place that you are supposed to go and disappear. | |||
*At the end of the level there will be multiple dead [[Elite]] [[Combat Forms]] and [[Marines]]. If you shoot off the leg armor of the dead Elite [[Combat Forms]] with a [[M90 Close Assault Weapon System|Shotgun]], they will [[Sliding Flood|growl and slide along the floor]]. | |||
*It is possible to get blown up out of the map by the [[Scorpion]] tank attached to a [[D77-TC Pelican Dropship|Pelican]] earlier in the level. | |||
*If you don't kill any of the Combat Forms on the Gondola, there may be an Elite Combat form outside the entrance to the Index Chamber. Also, the Combat Forms may follow you off the Gondola, but not too far. | |||
*Sometimes when you skip the level and enter the door that leads to the Gondola, wait until the game says "''Loading... done''", go back to the door, and you should see all your allies appearing even if they didn't follow you. | |||
*During the Gondola ride, it is possible to not fight, without the possibility of having a combat form sneak up and attack you. Go to the back of the Gondola, staying on the top level. Looking up, you will see a long ramp that runs to the top. Jump up to the ramp, either by a grenade jump (Sputnik needed), or a crouch jump. Walk up this ramp, and keep going. You will notice that you will go through the wall, and fall onto an invisible floor just above the main level of the gondola. The Flood will not see you up here, nor jump up where you are. You can also shoot through the walls. | |||
**At this location, if you jump while the gondola is going up, then when you land, your legs will still be up as if you're still in midair. | |||
**This location is ideal to get the Silent But Deadly achievement. | |||
*It is possible to get a look inside the Index Chamber without triggering the cutscene. Once you do, a lift, similar to the one that is used at the end of [[The Library (level)|The Library]], is seen crashed to the floor, along with the Enforcer wreckage seen in the ending scene. | |||
*At the part where you get the Sputnik skull, it is possible to get out of the level once you get the Sputnik skull head back towards the tunnel. Once you are facing the tunnel, turn right and go to the corner. Grenade jump to the top of the wall. (If you want to do it quick, you can use two grenades, but you can also jump up onto one of the tree branches if you want to conserve grenades.) Walk across the wall to either side with active camo turned on to avoid Sentinels, and you should be out. You can go to the limits of the map, see the corner of the skybox, and even see walls that are invisible on one side. You can also (If you haven't destroyed it) jump on top of the Enforcer if it is sitting by the exit. | |||
*There is a floating structure in the mountains. To see it you need to obtain the Sputnik Skull. Grenade jump on top of the wall connected to the mountains, after that you can see more mountains to the right. Go straight to them and when you get there you can see that it is placed on a big crater and if you go down you will see that this structure wall is floating. | |||
*Strangely, Combat Forms are seen wielding Beam Rifles, but they never shoot them, even during combat. | |||
*Sometimes, when you ride the gondola, if you jump from the high level to the low level, you might fall through the floor. | |||
*Towards the end of "Healthy Competition" if you are in a vehicle such as a Warthog or tank with Elites on board, when you near the entrance to the gondola, your allies on board will stop shooting. | |||
*If you are in a tank, when you reach the start of the Sentinel Factory in which you have to proceed on foot, your Elite allies on board will not get off and follow you. You will have to force them off the tank by flipping it upside down. | |||
====Mistakes==== | |||
*If you look closely at a segment of the cutscene in which the [[Thel 'Vadam|Arbiter]] and Rtas ‘Vadumee activate the gondola, you can see some of the snow particles floating up instead of down. It may be an overlooked filtering error or a feature of Halo's environment, or perhaps simply the wind. | |||
*If you look closely at the final cinematic, when Miranda fires her SMGs at the Arbiter, you'll see a section where the guns seemingly stop firing, but the sound continues through. This is fixed in the ''Anniversary'' cutscene. | |||
*During the last cinematic, after Sgt. Johnson gets Miranda up on the platform and calls for his Marines, Miranda clearly has her hands at her side then takes them up with her SMGs. It doesn't show Miranda taking them out or picking them up. This is fixed in the ''Anniversary'' cutscene as well. | |||
*If you watch closely, at the cutscene in which the Arbiter activates the gondola, when the gondola moves, the Arbiter will not move with it. He will just float where he is standing. | |||
*In the chapter "Shooting Gallery", when the name appears, no black bars (letterboxing) appear. The name is instead floating in the corner over the screen. | |||
*If all but one of the Spec-ops Elites from the beginning of the level die, and if the last one is with you when the Phantom drops off reinforcements, he will state that an enemy Phantom is inbound, even though it's an allied Phantom. | |||
*If the final cutscene, "That Old, Familiar Feeling..." is viewed in classic graphics, one can see a mistake at the part where Miranda begins firing upon The Arbiter after he headbutts Johnson. The Arbiter's right arm not only seems to be armorless and seemingly out of socket, but his elbow also bends in the wrong direction. This mistake is not seen for the rest of the cutscene. | |||
=== | ===Easter eggs=== | ||
{{Main|Easter eggs}} | |||
*The [[Halo 2 skulls#Sputnik|Sputnik Skull]] can be found on this level, but only on Legendary difficulty. | |||
*There is a [[Sentinel]] that is [[Needler Sentinel|armed with a Needler]] located on the leftmost side of one of the crashed Sentinel Constructor Factory. This was part of an idea that [[Sentinels]] were to be armed with [[Needlers]], and possibly other weapons. The idea was dropped and all but this one were cut from the game. | |||
*There is a [[BR55 Battle Rifle|Battle Rifle]] in this level that holds more ammo than allowed. It is found in a corner after you fight your way through the Sentinels in the end of the Sentinel Factory. | |||
*If you zoom in on the planet that's in the sky, you can see that there is an image of 343 Guilty Spark on it. | |||
* The ninth terminal is a Forerunner terminal in the first large room in the crashed Sentinel manufacturing facility. It is on the lower level, beneath the platform on the far side of the room. | |||
===References=== | |||
*The name of the last chapter ("That Old Familiar Feeling") references the fact that the section's layout is virtually identical to the Library level from ''Halo: Combat Evolved''. The title was clearly intended to inspire a "familiar feeling" of dread, as the original level was infamous as one of the hardest in the first game. | |||
*The name of the first chapter "Objects in Mirror Are Larger Than They Appear" is a reference to all of the vehicle use in the chapter with the title being what is seen on the mirrors of modern-day vehicles. | |||
===Miscellaneous=== | |||
*Quarantine Zone is the longest level in the entire trilogy distance-wise, as the [[Gondola]] ride triples the distance the player traveled. | |||
*If you quickly run off the Gondola into the hallway, you can hear [[SMG]] fire in the distance. If you use the Sputnik Skull to get to the human's gondola before entering the last area of the level, you can enter it through another entrance and see SMGs hovering just outside the tunnel leading to the center chamber. These SMGs fire in spontaneous bursts, and you can even pick them up, but they will continue firing random bursts and be unresponsive to pressing the trigger. | |||
*By using the Sputnik skull and some good jumping with the Rocket Launcher, it is possible to skip parts of the map, including spawn triggers. In doing this, you can skip the spawning of your allies at the part right before the gondola ride, as well as any enemy spawn points. In doing this, the cutscene that normally takes place on the gondola will not activate, and you will be able to explore the gondola and even activate the switch. However, the switch does not start the gondola, and you cannot go back outside once you get on the gondola. Strangely, the switch is not a gondola switch like the ones in the level Regret, but actually an elevator switch from the underwater elevator at that same level. | |||
==Gallery== | |||
===Halo 2=== | |||
<gallery> | |||
File:H2 header - Quarantine Zone.png|Preview of the level ''Halo 2'' menu. | |||
File:H2 Arbiter and Rtas QuarantineZone.jpg|Thel 'Vadamee is determined to recover the activation index. | |||
File:Rally.jpg|Rtas 'Vadumee rallies his forces against the Flood. | |||
File:H2 Arbiter Gondola Phantom.jpg|Tartarus' Phantom follows 'Vadamee into the Library. | |||
File:Miranda and the Index.png|Miranda reaching for the activation index. | |||
File:Arbiterinjured.jpg|'Vadamee is betrayed by Tartarus and the Jiralhanae. | |||
</gallery> | |||
===Halo 2: Anniversary=== | |||
<gallery> | |||
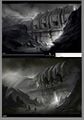
File:H2A_SentinelFactory_Entrance_Concept.jpg|Concept art of the entrance into the downed Sentinel Factory. | |||
File:H2A-Rtas-02.jpg|Rtas 'Vadumee in the quarantine zone. | |||
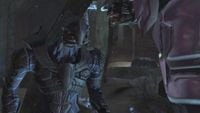
File:HTMCC-H2A Arbiter Boarding.jpg|Thel 'Vadamee boards a Ghost being operated by a Flood combat form. | |||
File:HTMCC-H2A Crashed Sentinel Manufacturing Facility.jpg|The burning wreckage of the Sentinel manufacturing facility. | |||
File:HTMCC-H2A Quarantine Zone.jpg|The surface of the quarantine zone, with the Library in the background. | |||
File:H2A-Rtas&Arbiter.jpg|Rtas 'Vadumee volunteers to stay behind and hold the Flood at bay. | |||
File:H2AMirandaCable.jpg|Johnson saves Miranda Keyes from falling into the depths of the Library. | |||
File:H2AMAJ.jpg|Keyes and Johnson with the activation index in the Library. | |||
File:H2A - Arbiter attacking Johnson.jpg|'Vadamee attacking Johnson in the Library. | |||
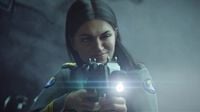
File:H2A-KeyesWithSMG2.jpg|Keyes defends against 'Vadamee with her SMG. | |||
File:H2A - Tartarus capturing Keyes.jpg|Tartarus holding Keyes on his shoulder. | |||
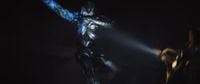
File:H2A - Fist of Rukt on Arbiter.jpg|Tartarus fires upon 'Vadamee with a blast from the Fist of Rukt, sending him tumbling to his intended death. | |||
</gallery> | |||
==Sources== | |||
{{Ref/Sources}} | |||
{{level}} | {{Succession box | ||
| before = ''[[Sacred Icon]]'' <br /> | |||
| title = [[Campaign|''Halo 2'' Campaign Missions]] | |||
| years = '''''Quarantine Zone''''' | |||
| after = ''[[Gravemind (level)|Gravemind]]'' | |||
}} | |||
{{Levels|H2}} | |||
Latest revision as of 05:35, February 5, 2024
|
Prev: |
|
|
Next: |
|
| Quarantine Zone | |
|---|---|

| |
|
Game: |
|
|
Map file name (?): |
|
|
Player: |
|
|
Date: |
|
|
Location: |
Quarantine zone and the Library, Delta Halo |
|
Objective(s): |
Push through the Quarantine Zone to the Library and retrieve the Sacred Icon. |
|
Par Time: |
00:15:00 (Master Chief Collection) |
|
Par Score: |
7,000 (Master Chief Collection) |
 |
Halopedia has a walkthrough guide for this level; see Quarantine Zone/Walkthrough. |
| “ | Parasites, humans - no matter. The Icon must be found. | ” |
Quarantine Zone is the eleventh campaign level of Halo 2, which follows up immediately from the end of Sacred Icon. The Arbiter, Thel 'Vadamee, must battle his way past Forerunner Sentinels and vehicle-using Flood to reach the Library's Index Chamber.
Transcript[edit]
{Cutscene} {Anniversary Cutscene}
A Phantom stops and drops reinforcements, then moves off screen. Arbiter Thel 'Vadamee and Special Operations Commander Rtas 'Vadumee are meeting on the snow below as multiple Special Operations Sangheili gather around them.
- Thel 'Vadamee: "In the center of this zone is a Sacred Icon critical to the Great Journey. I must find it."
'Vadumee nods.
- Rtas 'Vadumee: (Clenches his fist) "We shall cut into the heart of this infestation, retrieve the Icon, and burn any Flood that stand in our way!"
Sangheili roar and growl in agreement.

- Rtas 'Vadumee: (to 'Vadamee) "The parasite is not to be trifled with. I hope you know what you are doing."
'Vadamee looks to his left at the entrance ahead (He looks to his right in Anniversary).
{Gameplay}
Objects in Mirror Are Larger Than They Appear[edit]
- Rtas 'Vadumee (COM): "Forward, warriors! And fear not pain nor death. Go, Arbiter, I'll follow when our reinforcements arrive."
An Enforcer, along with some Aggressor Sentinels enter through the large door in the wall ahead.
- Special Operations Sangheili: "Enforcers! To the vehicles! We'll need their heavy guns. Onward to the Sacred Icon!"
The teams pass through the tunnel and enter the structure within, they see Flood combat forms riding Ghosts.
- Special Operations Sangheili: "What? The parasite controls our vehicles? No matter, they will die all the same."
The team destroy the Flood-driven vehicles as well as several Enforcers and Aggressor Sentinels. They continue and find an unmanned Warthog with dead human bodies around it.
- Special Operations Sangheili: "Commander, we found a human vehicle!"
- Rtas 'Vadumee (COM): "Keep moving, I'm on my way."
In a lower area, a Scorpion tank, another Warthog and several more Ghosts all under Flood control do battle with another Enforcer, while a Flood-controlled Wraith lobs plasma mortars from across the gap. 'Vadamee and his team eventually clear the area.
As the Arbiter leaves the structure, a human controlled Pelican with a tank attached will fly overhead, firing at several Aggressor Sentinels clustered ahead, and occasionally at the Arbiter's team as well as the Flood.
Healthy Competition[edit]
The team eventually clear the area, after dealing with several Enforcers and an onslaught of Flood combat forms. They leave through a door on the lower level.
If all Sangheili allies are dead:
- Rtas 'Vadumee (COM): "Arbiter, I'm sending you a squad of my most experienced warriors to assist you. Do not squander their talents."
The Arbiter drives through a valley of Flood-controlled Wraiths, with Enforcers rising and falling into and from the pits in the center. Dodging several combat forms wielding heavy UNSC weapons, the team continue through a tunnel ahead, and the crashed Sentinel Constructor Factory comes into view. Battling a large number of Forerunner constructs, the team eventually makes it into the factory through a tear in its side. The team is forced to fight its way through the stricken constructor factory, under constant attack from Sentinels and Flood forms. Eventually the team makes it back outside where they find an abandoned Scorpion Tank and other UNSC supplies being guarded by the Flood. The surviving Sangheili go through a short tunnel and enter a large valley that is filled with Flood forms and Enforcers. A Covenant Phantom swoops in to drop off a Spectre along with Rtas 'Vadumee and another Special Operations Sangheili to aid the Arbiter.
- Special Operations Sangheili #2: "Forward to the Icon! The parasite's ranks swell as we draw nearer to the Library. Steel your nerves, we're not turning back."

The Arbiter and his allies fight through the valley and reach the entrance to the Library, where a Flood-controlled Scorpion Tank and Wraith face off with Enforcers. Flood are guarding the entrance with multiple machine gun turrets. The Arbiter and his allies eventually defeat them all.
- Rtas 'Vadumee: "Once again, brothers, we are victorious!"
Alternatively:
- Rtas 'Vadumee: "Once again, brothers, victory is ours!"
They enter a tunnel and find a Gondola on the other side.
{Cutscene} {Anniversary Cutscene}
Thel 'Vadamee and Rtas 'Vadumee are running to the control panel of the gondola. The Arbiter is about to activate the drive switch until they hear the grinding and whirring noise of another gondola approaching the Library.
- Rtas 'Vadumee: "More humans? They must be after the Icon."
Flood screeches echo through the air.
- Rtas 'Vadumee: "On your way, Arbiter." (Draws his energy sword) "I'll deal with these beasts!"
Rtas 'Vadumee takes off. 'Vadamee turns back to the control panel and activates the gondola with a soft punch.
The gondola starts moving, and Tartarus's Phantom hovers above it.
- Tartarus (COM): "I see that coward didn't join you. I'll do what I can to keep the Flood off your back."
The entrance, in the shape of a circle, rotates, then opens in four-quarter pieces.
Shooting Gallery[edit]

{Gameplay}
- Tartarus (COM): "We cannot let the humans capture the Icon. The Hierarchs do not look kindly on failure."
- Special Operations Sangheili #3: "I grow restless without a target."
Up ahead is a ledge, where multiple Flood combat forms wait to ambush the team.
- Spec Ops Elite #4: "Look, up ahead. The parasite gathers for an attack."
The combat forms leap down onto the gondola, forcing the team to defend themselves. As the gondola continues moving in and up.
- Tartarus (COM): "Humans, I'll thin their ranks."
Tartarus flies his Phantom to the Gondola the UNSC forces are riding on, greatly decreasing the Sangheili's support fire. The gondolas enter a tunnel leading up. Masses of Flood combat forms begin to attack the team through holes in the gondola.
- Special Operations Sangheili #3: (sarcastically) "What courage! Nice and safe in his Phantom!"
- Special Operations Sangheili #4: "Ignore the braggart, ready yourselves."
The Gondolas exit the tunnel as the second wave of Flood has been defeated.
- Tartarus (COM): "Humans! I'll get them."
Tartarus flies his Phantom away again, and the Sangheili discuss the situation.
- Special Operations Sangheili #3: "That fool! He'll alert them to our presence!"
- Special Operations Sangheili #4: "Look on the bright side, maybe they'll shoot him down!"
The Gondola draws closer to the Library's entrance.
- Special Operations Sangheili: "Behold, the Library of our lords!"
- Tartarus (COM): "The humans are already inside, Arbiter! After them! I'll watch the perimeter."
Once the Gondola reaches the entrance.
That Old, Familiar Feeling[edit]

- Tartarus (COM): "Hurry, Arbiter! Get the Icon!"
The remaining Sangheili gather at the Gondola's exit.
- Special Operations Sangheili #3: "We shall protect this vessel. It may be our only means of escape."
- Special Operations Sangheili #4: "Retrieve the Icon, Arbiter, for the Covenant, and the Journey!"
(Note: If there's only one Sangheili left alive, he will say both lines one after the other.)
Flood infection forms crawl across the floor as the Arbiter enters the Library. The hallway is littered by a multitude of dead Marines and combat forms, and blood smears the ground.
The Arbiter locates the entryway to the Icon.
{Cutscene} {Anniversary Cutscene}
Dolly-shot of the center of the Library, where the Index is floating in a container similar to the one on Alpha Halo. Commander Miranda Keyes (who is carrying an SMG in the Anniversary) is approaching what appears to be a Flood tentacle, most likely the Gravemind's (in the Anniversary, it's a power cord from the Enforcer on top of it), hanging off of some Enforcer wreckage.
She holds onto the tentacle/cable, (in the Anniversary, she sets aside her SMG), and reaches for the Index. The container whirs, clicks, then releases the Index. She grabs it.
- Commander Keyes: "Gotcha."
The tentacle/cable loosens its hold — or the Gravemind purposely releases it — and continues to loosen. Keyes is about to fall to her death until the tentacle/cable suddenly stops. She looks up and finds Sergeant Major Avery J. Johnson holding onto the tentacle/cable.
- Sergeant Johnson: (grunts) "You know, your father never asked me for help either."
- Commander Keyes: (Places the Index in her belt) "The Index is secure."
Keyes climbs back onto the floor.
No response.
- Sergeant Johnson: "You hear me, Marines?!"
Still no response. Johnson readies his battle rifle.
Original version:
- Sergeant Johnson: (To Keyes) "We got trouble."
Keyes readies two M7 Sub Machine Guns. Johnson walks slowly, watching for any enemy in sight. He turns to his right.
Cut to wreckage from Johnson's POV. A cloaked hostile leaps with little noise. Johnson sees the movement and aims his battle rifle.
- Sergeant Johnson: "Damn!"
Johnson opens fire, but misses. The cloaked hostile gets close enough for Johnson to club it twice with his battle rifle, but with no effect. The attacker is revealed to be Thel 'Vadamee who grabs Johnson by the shoulders and sets him straight on his feet. He stares Johnson in the face with anger.
- Sergeant Johnson: "How 'ya doin?"
'Vadamee growls, and hits him with a head-to-head clash, knocking Johnson down and out. 'Vadamee looks up to see Keyes.
- Commander Keyes: "Sergeant, stay down!" (Aims her SMGs at the Arbiter)
She fires, and bullets light up 'Vadamee's shields. 'Vadamee dashes for nearby cover, his shields drained as he reaches a piece of wreckage.
- Commander Keyes: (turns to the unconscious Johnson) "Johnson, are you all right? Johnson!"
'Vadamee takes advantage of Keyes' distraction and leaps high from his cover, his shields flickering from the previous shots. He lands right in front of Keyes and slaps the SMGs out of her hands. She is about to react when a shock surrounding her whole body flickers, and pulls her away from 'Vadamee.
Anniversary version:
- Sergeant Johnson: (To Keyes) "We got trouble."
Johnson walks slowly, watching for any enemy in sight. He aims his battle rifle around, shining the mounted flashlight into the darkness. Suddenly he hears heavy footsteps on the right. He spins around just in time to see Thel 'Vadamee jumping at him.
- Thel 'Vadamee: (roars in fury)
Johnson fires his battle rifle several times, hitting 'Vadamee, whose shields deflect the incoming fire. Johnson dodges out of the way. 'Vadamee lands and takes a swing at Johnson. The Sergeant blocks the strike with his battle rifle, but is knocked back by the force of the blow.
- Sergeant Johnson: "Damn!"

The Arbiter takes another swing at Johnson, who, again, manages to block the attack with his battle rifle. Johnson rams his elbow into the Arbiter's chest, driving the Sangheili back a couple steps. He then swings his battle rifle at the Arbiter, but 'Vadamee knocks the weapon out of his hands with a single swipe.
Before Johnson can recover, the Arbiter grabs him by the throat and forces him up against a wall.
- Sergeant Johnson: "How 'ya doin?"
'Vadamee growls and throws Johnson to the floor. He then starts to approach Johnson when submachine gun fire lights his shields up. Scene rotates to the left, revealing Miranda Keyes firing her submachine gun.
- Commander Keyes: "Sergeant, stay down!"
'Vadamee dashes for nearby cover as Keyes continues firing at him. He disappears from her sight.
- Commander Keyes: (turns to Johnson, only to see him unconscious) "Johnson, are you all right? Johnson!"
'Vadamee takes advantage of Keyes' distraction and leaps high from his cover. He lands right in front of Keyes, who reacts by firing her SMG at point blank range. The Arbiter grabs the barrel of her weapon with one hand and forces it away from him. He then wrenches the SMG out of Keyes' hands with such force, she is thrown to the floor. Miranda starts to crawl away when a shock surrounding her whole body flickers, and pulls her away from 'Vadamee.
Cuts to Tartarus, who is using his personal gravity hammer, the Fist of Rukt on Keyes. She lands flat on his shoulder unconscious. He catches her in his grasp.
- Tartarus: "Excellent work, Arbiter. The Hierarchs will be pleased."
'Vadamee has a hand on his side, where he was shot when his shields were drained.
- Thel 'Vadamee: "The Icon... is my responsibility."

- Tartarus: "Was your responsibility." (takes the Index from Keyes' belt) "Now it is mine."
Wide-shot of two Jiralhanae aiming their Brute Shots at 'Vadamee. The Arbiter stares at them in disbelief.
Cut to another Jiralhanae dragging the unconscious Johnson, with Tartarus firmly placing Keyes on the same Jiralhanae's shoulder
- Tartarus: "A bloody fate awaits you and the rest of your incompetent race." (points his hammer at 'Vadamee) "And I, Tartarus, Chieftain of the Brutes will send you to it!"
Original version:
Close-up of 'Vadamee
- Thel 'Vadamee: "When the Prophets learn of this, they will take your head!"
- Tartarus: "When they learn?" (chuckles)
Close-up of side-shot of Tartarus
- Tartarus: "Fool. They ordered me to do it."
Slow zoom in on 'Vadamee. He jerks his neck up in horror.
Tartarus releases a blast from his hammer which sends 'Vadamee falling into the pit below with one gravity shock.
Anniversary version:

A very angry 'Vadamee clutching his wound while two Jiralhanae surround him.
- Thel 'Vadamee: "When the Prophets learn of this, they will take your head!"
- Tartarus: "When they learn?" (chuckles) Fool. They ordered me to do it."
'Vadamee's face goes from angry to shocked as his eyes widen in horror and surprise, while the two Jiralhanae guarding him move out of the way.
Tartarus smirks as he activates his hammer and releases a concussive blast from it, sending 'Vadamee rolling on the floor and eventually falling into the dark pit below.
Cuts to black and level ends.
Achievements[edit]
The following achievements can be unlocked on Quarantine Zone across the Windows Vista and Halo: The Master Chief Collection editions of Halo 2: Anniversary. The original Xbox release of Halo 2 did not contain achievement unlocks.
| Halo 2 (Windows Vista) | Halo: MCC (Xbox One, Xbox Series X|S) | Halo: MCC (Steam) | Title | Unlock requirement | Games |
|---|---|---|---|---|---|
 |
 |
 |
Beat Quarantine Zone on any difficulty. | Halo: The Master Chief Collection | |
 |
 |
Beat the par time on Quarantine Zone. | |||
 |
 |
Beat the par score on Quarantine Zone. | |||
 |
 |
Activate Terminal #9 on Quarantine Zone. | |||
 |
 |
Find and claim the Sputnik Skull. | |||
 |
 |
Collect the Tartarus toy in Quarantine Zone. | |||
 |
 |
Drive a Scorpion while playing as the Arbiter. |
Production notes[edit]
Flood Juggernauts were initially intended to appear in the level. In early design documents, they would be introduced at the canyon before the Arbiter enters the cave leading to the crashed sentinel factory. The cave was a wall with "Flood crust" that contain Juggernauts, which would burst out of the crust or burst out from its debris if players destroy the crust. Three additional walls with "crusts" were envisioned for the area. While two were replaced with bottomless pits that now spawn Flood combat forms, the third wall was positioned at what has now become a dead end at the rightmost portion of the canyon; it would have blocked access to a tunnel that leads to the next area, forcing players to destroy the curst and release a Flood Juggernaut. Allied Wraiths would have accompanied the player and fired mortar bolts from a distance until it is safe to advance.[1]
However, based on files existing in the final game, later during the development of Halo 2, the introduction appears to have been moved to the spiral ramp in the prior area, with two Juggernauts climbing out of the bottomless pit. Another major encounter with Juggernauts was upon exiting the crashed factory; Bungie initially intended for the player to stumble across a Flood Juggernaut mercilessly butchering a trio of marines, who were defending a Scorpion tank. This is confirmed further by the fact marine spawn points were listed in this area, but they do not appear as they were cut. There is even cut dialogue located in the map files of Rtas 'Vadumee expressing pity for these humans.[2]
Trivia[edit]
Glitches[edit]
- Because Quarantine Zone is the second part of a two-part level, your weapons will carry over from Sacred Icon, unless one of your weapons was a Rocket Launcher or Magnum, or if you were equipped with both types of Sentinel Beams. If you finish Sacred Icon with a Rocket Launcher you will start Quarantine Zone with a Covenant Carbine and an Energy Sword.
- At the end of the level, there are about a dozen Infection Forms that will not attack you, and you can even get them to crawl on you. If you follow them, they will go to the place that you are supposed to go and disappear.
- At the end of the level there will be multiple dead Elite Combat Forms and Marines. If you shoot off the leg armor of the dead Elite Combat Forms with a Shotgun, they will growl and slide along the floor.
- It is possible to get blown up out of the map by the Scorpion tank attached to a Pelican earlier in the level.
- If you don't kill any of the Combat Forms on the Gondola, there may be an Elite Combat form outside the entrance to the Index Chamber. Also, the Combat Forms may follow you off the Gondola, but not too far.
- Sometimes when you skip the level and enter the door that leads to the Gondola, wait until the game says "Loading... done", go back to the door, and you should see all your allies appearing even if they didn't follow you.
- During the Gondola ride, it is possible to not fight, without the possibility of having a combat form sneak up and attack you. Go to the back of the Gondola, staying on the top level. Looking up, you will see a long ramp that runs to the top. Jump up to the ramp, either by a grenade jump (Sputnik needed), or a crouch jump. Walk up this ramp, and keep going. You will notice that you will go through the wall, and fall onto an invisible floor just above the main level of the gondola. The Flood will not see you up here, nor jump up where you are. You can also shoot through the walls.
- At this location, if you jump while the gondola is going up, then when you land, your legs will still be up as if you're still in midair.
- This location is ideal to get the Silent But Deadly achievement.
- It is possible to get a look inside the Index Chamber without triggering the cutscene. Once you do, a lift, similar to the one that is used at the end of The Library, is seen crashed to the floor, along with the Enforcer wreckage seen in the ending scene.
- At the part where you get the Sputnik skull, it is possible to get out of the level once you get the Sputnik skull head back towards the tunnel. Once you are facing the tunnel, turn right and go to the corner. Grenade jump to the top of the wall. (If you want to do it quick, you can use two grenades, but you can also jump up onto one of the tree branches if you want to conserve grenades.) Walk across the wall to either side with active camo turned on to avoid Sentinels, and you should be out. You can go to the limits of the map, see the corner of the skybox, and even see walls that are invisible on one side. You can also (If you haven't destroyed it) jump on top of the Enforcer if it is sitting by the exit.
- There is a floating structure in the mountains. To see it you need to obtain the Sputnik Skull. Grenade jump on top of the wall connected to the mountains, after that you can see more mountains to the right. Go straight to them and when you get there you can see that it is placed on a big crater and if you go down you will see that this structure wall is floating.
- Strangely, Combat Forms are seen wielding Beam Rifles, but they never shoot them, even during combat.
- Sometimes, when you ride the gondola, if you jump from the high level to the low level, you might fall through the floor.
- Towards the end of "Healthy Competition" if you are in a vehicle such as a Warthog or tank with Elites on board, when you near the entrance to the gondola, your allies on board will stop shooting.
- If you are in a tank, when you reach the start of the Sentinel Factory in which you have to proceed on foot, your Elite allies on board will not get off and follow you. You will have to force them off the tank by flipping it upside down.
Mistakes[edit]
- If you look closely at a segment of the cutscene in which the Arbiter and Rtas ‘Vadumee activate the gondola, you can see some of the snow particles floating up instead of down. It may be an overlooked filtering error or a feature of Halo's environment, or perhaps simply the wind.
- If you look closely at the final cinematic, when Miranda fires her SMGs at the Arbiter, you'll see a section where the guns seemingly stop firing, but the sound continues through. This is fixed in the Anniversary cutscene.
- During the last cinematic, after Sgt. Johnson gets Miranda up on the platform and calls for his Marines, Miranda clearly has her hands at her side then takes them up with her SMGs. It doesn't show Miranda taking them out or picking them up. This is fixed in the Anniversary cutscene as well.
- If you watch closely, at the cutscene in which the Arbiter activates the gondola, when the gondola moves, the Arbiter will not move with it. He will just float where he is standing.
- In the chapter "Shooting Gallery", when the name appears, no black bars (letterboxing) appear. The name is instead floating in the corner over the screen.
- If all but one of the Spec-ops Elites from the beginning of the level die, and if the last one is with you when the Phantom drops off reinforcements, he will state that an enemy Phantom is inbound, even though it's an allied Phantom.
- If the final cutscene, "That Old, Familiar Feeling..." is viewed in classic graphics, one can see a mistake at the part where Miranda begins firing upon The Arbiter after he headbutts Johnson. The Arbiter's right arm not only seems to be armorless and seemingly out of socket, but his elbow also bends in the wrong direction. This mistake is not seen for the rest of the cutscene.
Easter eggs[edit]
- Main article: Easter eggs
- The Sputnik Skull can be found on this level, but only on Legendary difficulty.
- There is a Sentinel that is armed with a Needler located on the leftmost side of one of the crashed Sentinel Constructor Factory. This was part of an idea that Sentinels were to be armed with Needlers, and possibly other weapons. The idea was dropped and all but this one were cut from the game.
- There is a Battle Rifle in this level that holds more ammo than allowed. It is found in a corner after you fight your way through the Sentinels in the end of the Sentinel Factory.
- If you zoom in on the planet that's in the sky, you can see that there is an image of 343 Guilty Spark on it.
- The ninth terminal is a Forerunner terminal in the first large room in the crashed Sentinel manufacturing facility. It is on the lower level, beneath the platform on the far side of the room.
References[edit]
- The name of the last chapter ("That Old Familiar Feeling") references the fact that the section's layout is virtually identical to the Library level from Halo: Combat Evolved. The title was clearly intended to inspire a "familiar feeling" of dread, as the original level was infamous as one of the hardest in the first game.
- The name of the first chapter "Objects in Mirror Are Larger Than They Appear" is a reference to all of the vehicle use in the chapter with the title being what is seen on the mirrors of modern-day vehicles.
Miscellaneous[edit]
- Quarantine Zone is the longest level in the entire trilogy distance-wise, as the Gondola ride triples the distance the player traveled.
- If you quickly run off the Gondola into the hallway, you can hear SMG fire in the distance. If you use the Sputnik Skull to get to the human's gondola before entering the last area of the level, you can enter it through another entrance and see SMGs hovering just outside the tunnel leading to the center chamber. These SMGs fire in spontaneous bursts, and you can even pick them up, but they will continue firing random bursts and be unresponsive to pressing the trigger.
- By using the Sputnik skull and some good jumping with the Rocket Launcher, it is possible to skip parts of the map, including spawn triggers. In doing this, you can skip the spawning of your allies at the part right before the gondola ride, as well as any enemy spawn points. In doing this, the cutscene that normally takes place on the gondola will not activate, and you will be able to explore the gondola and even activate the switch. However, the switch does not start the gondola, and you cannot go back outside once you get on the gondola. Strangely, the switch is not a gondola switch like the ones in the level Regret, but actually an elevator switch from the underwater elevator at that same level.
Gallery[edit]
Halo 2[edit]
Preview of the level Halo 2 menu.
Thel 'Vadamee is determined to recover the activation index.
Rtas 'Vadumee rallies his forces against the Flood.
Tartarus' Phantom follows 'Vadamee into the Library.
Miranda reaching for the activation index.
'Vadamee is betrayed by Tartarus and the Jiralhanae.


Halo 2: Anniversary[edit]
Concept art of the entrance into the downed Sentinel Factory.
Rtas 'Vadumee in the quarantine zone.
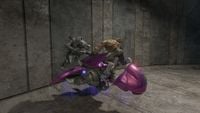
Thel 'Vadamee boards a Ghost being operated by a Flood combat form.
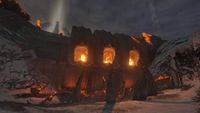
The burning wreckage of the Sentinel manufacturing facility.
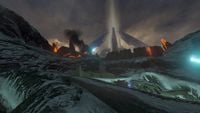
The surface of the quarantine zone, with the Library in the background.
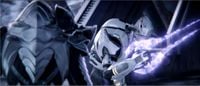
Rtas 'Vadumee volunteers to stay behind and hold the Flood at bay.
Johnson saves Miranda Keyes from falling into the depths of the Library.
Keyes and Johnson with the activation index in the Library.
'Vadamee attacking Johnson in the Library.
Keyes defends against 'Vadamee with her SMG.
Tartarus holding Keyes on his shoulder.
Tartarus fires upon 'Vadamee with a blast from the Fist of Rukt, sending him tumbling to his intended death.


Sources[edit]
- ^ The Art of Halo, page 142
- ^ YouTube - The Vengeful 'Vadam, I Brought Halo 2's Cut Flood Juggernaut Back Into The Campaign! (Retrieved on Nov 3, 2023)
| Preceded by Sacred Icon |
Halo 2 Campaign Missions Quarantine Zone |
Succeeded by Gravemind |
| |||||||||||||||||||||||||||||||


