High Charity (level): Difference between revisions
From Halopedia, the Halo wiki
m (Adding game to SEO title) |
m (Text replacement - "\|(right|thumb)(\|[^\]\n]+)?\|(right|thumb)" to "|thumb$2") |
||
| (39 intermediate revisions by 14 users not shown) | |||
| Line 1: | Line 1: | ||
{{Title|High Charity}} | {{Title|High Charity}} | ||
{{Status|Gameplay}} | |||
{{Disambig header|the level|other uses|High Charity (disambiguation)}} | {{Disambig header|the level|other uses|High Charity (disambiguation)}} | ||
{{Level infobox | {{Level infobox | ||
|pagegamelabel=H2 | |||
|prev=''[[Uprising]]'' | |prev=''[[Uprising]]'' | ||
|next=''[[The Great Journey]]'' | |next=''[[The Great Journey]]'' | ||
|game=''[[Halo 2]]'' (<small>''[[Halo 2: Anniversary|Anniversary]]''</small>) | |game=''[[Halo 2]]'' (<small>''[[Halo 2: Anniversary|Anniversary]]''</small>) | ||
|name=''High Charity'' | |name=''High Charity'' | ||
|image=[[File: | |devname=<code>07b_forerunnership</code> | ||
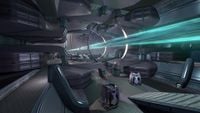
|image=[[File:H2A HighCharity Loadscreen.png|300px]] | |||
|player=[[John-117]] | |player=[[John-117]] | ||
|date= [[2552#November | |date= [[2552#November|November 3, 2552]] | ||
|place=Inside [[High Charity]] | |place=Inside [[High Charity]] | ||
|objective=Stop [[Prophet of Truth|Truth]] from reaching the [[Forerunner Dreadnought|Dreadnought]]. | |objective=Stop [[Prophet of Truth|Truth]] from reaching the [[Forerunner Dreadnought|Dreadnought]]. | ||
| | |partime=00:15:00 {{C|''Master Chief Collection''}} | ||
|parscore=9,000 {{C|''Master Chief Collection''}} | |||
}} | }} | ||
{{Article quote|[[Cortana]] can handle the [[Activation Index|Index]] - stopping [[Prophet of Truth|Truth]] is up to you.}} | {{Article quote|[[Cortana]] can handle the [[Activation Index|Index]] - stopping [[Prophet of Truth|Truth]] is up to you.}} | ||
'''High Charity''' is the fourteenth and penultimate [[campaign]] level of ''[[Halo 2 | '''High Charity''' is the fourteenth and penultimate [[campaign]] level of ''[[Halo 2]]''. As the [[John-117|Master Chief]], the player must battle their way through the [[Flood]]-infested [[High Charity]] to stop the [[Prophet of Truth]] before he boards the [[Anodyne Spirit|Forerunner Dreadnought]]. This is the last level played from Master Chief's perspective in ''Halo 2''; the next and final level, [[The Great Journey]], returns to [[Thel 'Vadam|the Arbiter]] as a playable character. This level is also the only time when Master Chief encounters the Flood in combat in ''Halo 2'', and also the only level in the game with no allies aiding the player. It is also the shortest playable campaign level. The [[Halo 2 skulls|Iron Skull]] can be found on this level. | ||
==Transcript== | ==Transcript== | ||
[https://youtu.be/sERbW5x36Yo '''{''Cutscene''}'''] | |||
[ | |||
[http://www.youtube.com/watch?v=Q_R9Tvd00VM '''{''Anniversary Cutscene''}'''] | [http://www.youtube.com/watch?v=Q_R9Tvd00VM '''{''Anniversary Cutscene''}'''] | ||
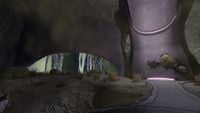
[[File:H2A - Lower districts.jpg|300px|thumb|The three Phantoms fly away from the platform.]] | [[File:H2A - Lower districts.jpg|300px|thumb|The three Phantoms fly away from the platform.]] | ||
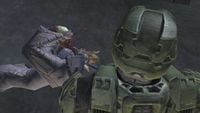
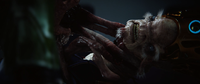
''The Master Chief drops down a [[gravity lift]] just in time to see the Phantoms containing the Brute Chieftain [[Tartarus]] and the [[Prophet of Truth]] fly away. He walks over to the [[Prophet of Mercy|High Prophet of Mercy]], who | ''The Master Chief drops down a [[gravity lift]] just in time to see the Phantoms containing the Brute Chieftain [[Tartarus]] and the [[Prophet of Truth]] fly away. He walks over to the [[Prophet of Mercy|High Prophet of Mercy]], who is still struggling against the [[Pod infector]] latched onto his throat.'' | ||
*'''[[John-117]]''': "[[Prophet of Truth|Your pal]]. Where's he going?" | *'''[[John-117]]''': "[[Prophet of Truth|Your pal]]. Where's he going?" | ||
*'''[[Prophet of Mercy]]''': ''(weakly)'' "[[Earth]]... to finish what we started. And ''this'' time, none of you... will be left behind..." | *'''[[Prophet of Mercy]]''': ''(weakly)'' "[[Earth]]... to finish [[Battle for Earth|what we started]]. And ''this'' time, none of you... will be left behind..." | ||
''Master Chief | ''Master Chief grabs the Flood form and rips it off of Mercy, squeezing it in his hand, and pops it. Mercy gives a strangled cry and dies. [[Cortana]]'s hologram appears on Mercy's throne.'' | ||
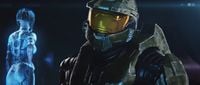
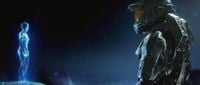
*'''Cortana''': "That structure, at the center of the city... it's a [[Anodyne Spirit|Forerunner ship]]! And Truth is heading straight for it! If he leads the Covenant fleet to Earth, they won't stand a chance. You ''have'' to stop him!" | *'''Cortana''': "That structure, at the center of the city... it's a [[Anodyne Spirit|Forerunner ship]]! And Truth is heading straight for it! If he leads the Covenant fleet to Earth, they won't stand a chance. You ''have'' to stop him!" | ||
| Line 38: | Line 40: | ||
''The view shows the {{UNSCShip|In Amber Clad}} crashed into a nearby tower.'' | ''The view shows the {{UNSCShip|In Amber Clad}} crashed into a nearby tower.'' | ||
*'''Cortana''': "If he does, I'll detonate ''In Amber Clad's'' reactor just like we did the ''[[UNSC Pillar of Autumn|Autumn]]'s''. The blast will destroy this city and the ring. Not a very ''original'' plan, but we know it'll work." | *'''Cortana''': "If he does, I'll detonate ''In Amber Clad's'' reactor just like we did the ''[[UNSC Pillar of Autumn|Autumn]]'s''. The blast will destroy this city ''and'' the ring. Not a very ''original'' plan, but we know it'll work." | ||
''The Master Chief reaches for her.'' | ''The Master Chief reaches for her.'' | ||
| Line 44: | Line 46: | ||
*'''Cortana''': "No. I don't want to chance a remote detonation. I'll need to stay here." | *'''Cortana''': "No. I don't want to chance a remote detonation. I'll need to stay here." | ||
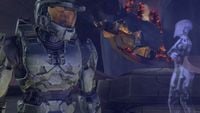
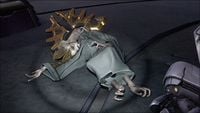
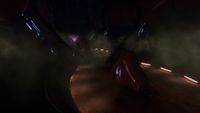
[[File:H2A - John and Cortana watch Pelican crash.jpg|300px | [[File:H2A - John and Cortana watch Pelican crash.jpg|300px|thumb|John and Cortana watch as a Flood-controlled Pelican dropship crash lands into the tower.]] | ||
''The Chief and Cortana then watch as a [[D77-TC Pelican|Pelican]] crashes onto the platform, and soon the [[Flood combat form]]s inside the dropship run out.'' | ''The Chief and Cortana then watch as a [[D77-TC Pelican|Pelican]] crashes onto the platform, and soon the [[Flood combat form]]s inside the dropship run out.'' | ||
| Line 51: | Line 53: | ||
===Cross-Purposes=== | ===Cross-Purposes=== | ||
*'''Cortana''': "Flood controlled-dropships are touching down all over the city! That creature beneath the Library... that '[[Gravemind]]'... used us. We were just a diversion. ''In Amber Clad'' was always its intended vector. There's [[High Charity conduit|a conduit]] connecting this tower to the ship. Head back inside. I'll lead you to it." | |||
*'''Cortana''': "Flood controlled-dropships are touching down all over the city! That creature beneath the Library... that '[[Gravemind]]'... used us. We were just a diversion. ''In Amber Clad'' was always | |||
''A mass of Flood combat forms attack a pair of [[Jiralhanae]] near the door leading back into the Mausoleum tower. Two more Pelicans fly in over the platform, one of them disgorging a pair of [[Flood carrier form]]s, before they fly away, one heading down to the [[Lower districts]] and the other accelerating higher.'' | ''A mass of Flood combat forms attack a pair of [[Jiralhanae]] near the door leading back into the Mausoleum tower. Two more Pelicans fly in over the platform, one of them disgorging a pair of [[Flood carrier form]]s, before they fly away, one heading down to the [[Lower districts]] and the other accelerating higher.'' | ||
| Line 79: | Line 80: | ||
===Please, Make Yourself at Home=== | ===Please, Make Yourself at Home=== | ||
''The Master Chief finds that the Flood have already begun to infest the city, the beginning of a process that will ultimately see High Charity converted into a [[Flood hive]]. Flood biomass clings to the walls, and the air is darkened with [[Flood spores]], making navigation difficult. Signs of the constant fighting are evident everywhere, with Covenant and Flood corpses scattered around. He makes his way through a corridor filled with Flood, and then another with battling Flood and Covenant. Ultimately he makes it out into a garden-like area, where Jiralhanae-led Covenant patrol.'' | ''The Master Chief finds that the Flood have already begun to infest the city, the beginning of a process that will ultimately see High Charity converted into a [[Flood hive]]. Flood biomass clings to the walls, and the air is darkened with [[Flood spores]], making navigation difficult. Signs of the constant fighting are evident everywhere, with Covenant and Flood corpses scattered around. He makes his way through a corridor filled with Flood, and then another with battling Flood and Covenant. Ultimately he makes it out into a garden-like area, where Jiralhanae-led Covenant patrol.'' | ||
| Line 105: | Line 105: | ||
*'''Cortana''': "Brute and Elite ships are engaging one another all around High Charity. I'm running out of options, Chief. I can't stall the launch sequence much longer. The next lift will take you up to the conduit. Hurry!" | *'''Cortana''': "Brute and Elite ships are engaging one another all around High Charity. I'm running out of options, Chief. I can't stall the launch sequence much longer. The next lift will take you up to the conduit. Hurry!" | ||
''The Chief makes it to another gravity lift, and takes it | ''The Chief makes it to another gravity lift, and takes it to the top. A green conveyor, the [[High Charity conduit|conduit]] can be seen stretching out to the Forerunner Dreadnought in the distance. Multiple Flood forms attack a [[pack]] of Jiralhanae.'' | ||
===Once More, with Feeling=== | ===Once More, with Feeling=== | ||
| Line 133: | Line 133: | ||
''The Chief jumps into the conduit.'' | ''The Chief jumps into the conduit.'' | ||
[ | [https://youtu.be/n2_RQhUvOPI '''{''Cutscene''}'''] | ||
[http://www.youtube.com/watch?v=X3zg6N3I-3k'''{''Anniversary Cutscene''}'''] | [http://www.youtube.com/watch?v=X3zg6N3I-3k'''{''Anniversary Cutscene''}'''] | ||
| Line 155: | Line 155: | ||
''Level ends.'' | ''Level ends.'' | ||
== Trivia == | ==Production notes== | ||
During the production of ''High Charity'', the level was intended to feature a [[Warthog run]] at the mission's conclusion. The level was to feature a trench run that involved massive, horizontal [[gravity lift|grav-lift]] transporters that you could drive a Warthog into and through. The Warthog run took place in several tubes which were divided by the aforementioned grav-lifts, and [[John-117]] was going to travel along these tubes in a Warthog in order to board the Prophet of Truth's Forerunner ship.{{Ref/Site|URL=https://halo.bungie.net/News/content.aspx?type=topnews&cid=25650|Site=Bungie.net|Page=One Final Effort|D=12|M=4|Y=2016}} | |||
The trench run would have been timed, much like the trench run from the level ''[[The Maw]]'' in ''[[Halo: Combat Evolved]]''. The tubes would have centered around the Conduit and many enemies would have fought along the geometry. The enemies that would have appeared in the run include the [[Flood]], [[Jiralhanae]], [[Unggoy]], [[Kig-Yar]], [[Yanme'e]], and several Brute-manned [[Wuzum-pattern Spectre|Type-46 Spectres]]. | |||
Some incomplete map geometry that was intended for the warthog trench run was left on the disk. The ''Halo 2'' mod [https://www.youtube.com/watch?v=3mLd7eGe-Dk "Induction"] re-used the map geometry in a multiplayer level. | |||
==Trivia== | |||
===Glitches=== | ===Glitches=== | ||
{{Main|Glitches}} | {{Main|Glitches}} | ||
*The [[Flood Juggernaut|Flood Juggernaut's]] data (such as model, textures, etc.) are stored on this .map file, although it only has spawn points on Quarantine Zone and The Oracle, where its data is not present. | *The [[Flood Juggernaut|Flood Juggernaut's]] data (such as model, textures, etc.) are stored on this .map file, although it only has spawn points on Quarantine Zone and The Oracle, where its data is not present. | ||
*When you get to the last room with the green beam across the room to the ship, you can get on the beam by just going on top of one of the Covenant boxes and then jumping on the beam and walking forward, but you will have to stop, because if you go any farther the cutscene will start. | *When you get to the last room with the green beam across the room to the ship, you can get on the beam by just going on top of one of the Covenant boxes and then jumping on the beam and walking forward, but you will have to stop, because if you go any farther the cutscene will start. | ||
*If you knock a Combat Form off the side of the ramps of the Phantom dock, it will climb up the walls, similar to the ones that do the same during the elevator ride in The Oracle. But, they cannot jump | *If you knock a Combat Form off the side of the ramps of the Phantom dock, it will climb up the walls, similar to the ones that do the same during the elevator ride in ''[[The Oracle]]''. But, they cannot jump onto the deck. | ||
*Some Flood biomass can be destroyed. It must be small, and will just disappear and leave a bit of Flood blood. | *Some Flood biomass can be destroyed. It must be small, and will just disappear and leave a bit of Flood blood. | ||
*Exclusive to the ''Anniversary'' version, if this level loads after playing the [[Uprising (level)|previous]] (instead of setting it up from the campaign menu), the opening cutscene will abruptly stop before the Flood combat forms exit the crashed | *Exclusive to the ''Anniversary'' version, if this level loads after playing the [[Uprising (level)|previous]] (instead of setting it up from the campaign menu), the opening cutscene will abruptly stop before the Flood combat forms exit the crashed Pelican and screech into the air. | ||
===Mistakes=== | ===Mistakes=== | ||
*There is still a [[ | *There is still a [[Kez'katu-pattern Phantom|Phantom]] docked on the landing pad at the start of the level, but an energy field prevents you from walking on the back fins. It should also be noted that it has no weaponry. | ||
===Easter | ===Easter eggs=== | ||
{{Main|Easter | {{Main|Easter eggs}} | ||
*The [[Halo 2 | *The [[Halo 2 skulls#Iron|Iron Skull]] can be found on this level. | ||
*A dead body of a Brute that looks just like [[Tartarus]] can be found on this level in one of the many rooms; he has the exact same shoulder piece (which is easy to recognize). | *A dead body of a Brute that looks just like [[Tartarus]] can be found on this level in one of the many rooms; he has the exact same shoulder piece (which is easy to recognize). | ||
*In the room with the glass shards hanging from the ceiling after the corridor where you first hear [[Prophet of Truth|Truth]] over the loudspeaker, there is an unknown and hard-to-see switch that looks just like the switches used to activate the gondolas on the level [[Delta Halo]], as well as the ones used to activate the elevators on the [[The Arbiter|Arbiter]] and [[The Oracle|Oracle]] levels. To see it (with the best view), bring a [[Type-50 particle beam rifle|Particle Beam Rifle]] and head to the platform on the other side of the chamber (across from where you entered). Once you get there, head to the glowing panel in the platform (it points to the center of the room). Look to your left at the platform and the door where the [[Yanme'e|Drones]] come from (when you reach the platform). Look at that platform's glowing panel, zoom in to 5×, and look up slightly. You should see the switch around there, and you can zoom in to 10× and see the switch in closer detail. However, there is no known way to get to it (unless by mod) and activate it, so its purpose is unknown. | *In the room with the glass shards hanging from the ceiling after the corridor where you first hear [[Prophet of Truth|Truth]] over the loudspeaker, there is an unknown and hard-to-see switch that looks just like the switches used to activate the gondolas on the level [[Delta Halo]], as well as the ones used to activate the elevators on the [[The Arbiter|Arbiter]] and [[The Oracle|Oracle]] levels. To see it (with the best view), bring a [[Type-50 particle beam rifle|Particle Beam Rifle]] and head to the platform on the other side of the chamber (across from where you entered). Once you get there, head to the glowing panel in the platform (it points to the center of the room). Look to your left at the platform and the door where the [[Yanme'e|Drones]] come from (when you reach the platform). Look at that platform's glowing panel, zoom in to 5×, and look up slightly. You should see the switch around there, and you can zoom in to 10× and see the switch in closer detail. However, there is no known way to get to it (unless by mod) and activate it, so its purpose is unknown. | ||
* The twelfth terminal is a Covenant terminal to the left of the door after entering the Inner Sanctum. | |||
===References=== | ===References=== | ||
| Line 178: | Line 186: | ||
===Miscellaneous=== | ===Miscellaneous=== | ||
* The Flood mass in the Pelican's cockpit resembles a [[Proto-Gravemind]], and is likewise being used to pilot a craft, but is significantly smaller than the one encountered aboard the Truth and Reconciliation. | *The Flood mass in the Pelican's cockpit resembles a [[Proto-Gravemind]], and is likewise being used to pilot a craft, but is significantly smaller than the one encountered aboard the ''[[Truth and Reconciliation]]''. | ||
* In the beginning of the level, [[D77-TC Pelican|Pelicans]] will appear around the area. They can be approached, jumped on, and shot at but not boarded. | *In the beginning of the level, [[D77-TC Pelican|Pelicans]] will appear around the area. They can be approached, jumped on, and shot at but not boarded. | ||
* The [[Yanme'e|Drones]] that engage the [[Flood combat form]]s have a unique brown exoskeleton. | *The [[Yanme'e|Drones]] that engage the [[Flood combat form]]s have a unique brown exoskeleton. | ||
* Just like in Gravemind, the spires that appear in the [[Sanctum of the Hierarchs]] can fall if the anti-gravity generator is destroyed. Like in Gravemind, this can not only be used to provide some cover, but also kill any [[Jiralhanae|Brutes]], [[Unggoy|Grunts]] or [[Flood]] (with the right timing). You will also notice that one of them has already fallen, once the elevator reaches the top. (These will provide protection from [[Covenant]] and Flood fire | *Just like in ''[[Gravemind (level)|Gravemind]]'', the spires that appear in the [[Sanctum of the Hierarchs]] can fall if the anti-gravity generator is destroyed. Like in ''Gravemind'', this can not only be used to provide some cover, but also kill any [[Jiralhanae|Brutes]], [[Unggoy|Grunts]] or [[Flood]] (with the right timing). You will also notice that one of them has already fallen, once the elevator reaches the top. (These will provide protection from [[Covenant]] and Flood fire) | ||
*During the part where you reach a canyon-like indoor area where you encounter the Drones a second time, if you look out the window, you can see strange tentacles, evidently part of the Gravemind as it assembles a body on High Charity from its inhabitants. | *During the part where you reach a canyon-like indoor area where you encounter the Drones a second time, if you look out the window, you can see strange tentacles, evidently part of the Gravemind as it assembles a body on High Charity from its inhabitants. | ||
*This is the only level where you can see a [[Flood combat form]]s with a [[Type-25 | *This is the only level where you can see a [[Flood combat form]]s with a [[Type-25 Brute Shot|Brute Shot]] and [[Kewu R'shi'k-pattern plasma rifle|Brute Plasma Rifle]] in ''[[Halo 2]]''. It is also the only level where Flood can be fought with the aforementioned weapons. It is also the only level in the original trilogy in which the Flood wield the latter weapon. | ||
*On [[Legendary]], it is possible to see some invisible [[Flood combat form|Elite Combat Forms]] and [[Flood combat form|Human Combat Forms]] walking around. Typically during the fight in front of the Hierarchs' private quarters as one of the last waves of Flood coming from the elevated platforms. This is the second known instance of invisible Flood, first being the armory on [[The Maw]] in ''Halo: Combat Evolved''. | *On [[Legendary]], it is possible to see some invisible [[Flood combat form|Elite Combat Forms]] and [[Flood combat form|Human Combat Forms]] walking around. Typically, during the fight in front of the Hierarchs' private quarters as one of the last waves of Flood coming from the elevated platforms. This is the second known instance of invisible Flood, the first being the armory on ''[[The Maw]]'' in ''Halo: Combat Evolved''. | ||
*While this level is the only level where Master Chief fights the Flood in ''Halo 2'', it is also the only level where no living Sangheili are encountered. | *While this level is the only level where Master Chief fights the Flood in ''Halo 2'', it is also the only level where no living Sangheili are encountered. | ||
*High Charity and [[The Covenant (level)|The Covenant]] are the only levels in the trilogy in which [[Jiralhanae|Brutes]] can be encountered combating the [[ | *''High Charity'' and ''[[The Covenant (level)|The Covenant]]'' are the only levels in the trilogy in which [[Jiralhanae|Brutes]] can be encountered combating the [[Flood]] on screen. It is also the only level where [[Yanme'e|Drones]] fight Flood. | ||
*High Charity is the last level in ''Halo 2'' in which Grunts are encountered as enemies. | *''High Charity'' is the last level in ''Halo 2'' in which Grunts are encountered as enemies. | ||
*This level was supposed to have a [[Warthog run]] where [[John-117]] escapes from High Charity. Using [[modding]], or [[Glitches]], the player can still access the area. A Halo user called Black Diamond restored it by putting in scripts and spawns. It was cut due to time constraints. | |||
==Gallery== | ==Gallery== | ||
===Design documentation=== | |||
<gallery> | |||
File:H2 HighCharity DesignDoc.jpg|Design documentation for a near-final revision of this level. | |||
</gallery> | |||
===Halo 2=== | ===Halo 2=== | ||
<gallery> | <gallery> | ||
File:H2 header - High Charity.png|Preview of the level in ''Halo 2'' menu. | |||
File:H2 header - High Charity.png| | File:H2 Phantom Departure.jpg|The Phantoms lift off just as John-117 arrives. | ||
File: | File:City.jpg|The Phantoms carrying Truth and Tartarus leave. | ||
File:Clad1.jpg|Cortana and John-117 | File:Halo picture 09.jpg|John-117 approaches the Prophet of Mercy. | ||
File: | File:Clad1.jpg|Cortana and John-117 with [[UNSC frigate]] ''[[UNSC In Amber Clad|In Amber Clad]]'' in the background. | ||
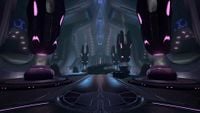
File:High Charity Interior.jpg|The interior of High Charity. | File:H2 Flood Touchdown.jpg|John-117 watches as a Flood-infested Pelican crashes nearby. | ||
File:Ship6.jpg|The power conduit | File:High Charity Interior.jpg|The interior of ''High Charity''. | ||
File:Forerunner Ship.jpg|Cortana watches as the Dreadnought flees High Charity. | File:H2 InfestedSanctum.jpg|John-117 in the Inner Sanctum. | ||
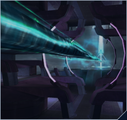
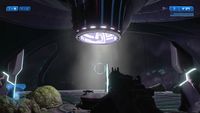
File:Conduit 1.png|John-117 taking the conduit to the Dreadnought. | |||
File:Ship6.jpg|The power conduit sends John-117 into the Forerunner Dreadnought. | |||
File:Forerunner Ship.jpg|Cortana watches as the Dreadnought flees ''High Charity''. | |||
File:Ship8.jpg|The ship leaves ''High Charity'' while the Great Schism rages on. | |||
</gallery> | </gallery> | ||
===Halo 2: Anniversary=== | ===Halo 2: Anniversary=== | ||
<gallery> | <gallery> | ||
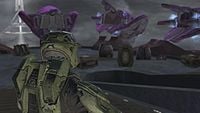
File:H2A - HighCharityBattle Concept.png|Concept art depicting a massive aerial battle within ''High Charity''. | |||
File:MercyDeath.jpg|John-117 approaches the Prophet of Mercy. | |||
File:H2A - Mercydeath.png|Mercy being strangled by a Flood pod infector. | |||
File:H2A-CortanaAndJohn.jpg|John-117 and Cortana discuss their plan to stop Tartarus. | |||
File:H2A-CortanaAndJohn2.jpg|Cortana telling John-117 to leave her behind. | File:H2A-CortanaAndJohn2.jpg|Cortana telling John-117 to leave her behind. | ||
File:Mercycorpse.jpg|The Prophet of Mercy lies dead after the Chief has killed the Pod infector. | File:Mercycorpse.jpg|The Prophet of Mercy lies dead after the Chief has killed the Pod infector. | ||
File:H2AHC.jpg|Flood biomass taking over the | File:HTMCC-H2A Flood Growth and Tentacles.jpg|Flood biomass growing in ''High Charity''. | ||
File:HTMCC-H2A Hazy High Charity.jpg|Lights in the city begin shutting down as Flood spores take over the atmosphere. | |||
File:HTMCC-H2A Inner Sanctum Damaged.jpg|The Sanctum of Hierarchs damaged. | |||
File:H2AHC.jpg|Flood biomass taking over the Inner Sanctum. | |||
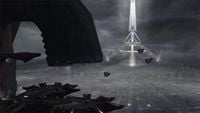
File:HTMCC-H2A Once More with Feeling.jpg|The power conduit connecting ''Anodyne Spirit'' to ''High Charity''. | |||
</gallery> | </gallery> | ||
| Line 214: | Line 240: | ||
{{succession box | before = ''[[Uprising]]'' <br />| title = [[halo 2|''Halo 2'' Campaign Missions]] | years = '''''High Charity''''' |after = ''[[The Great Journey]]''}} | {{succession box | before = ''[[Uprising]]'' <br />| title = [[halo 2|''Halo 2'' Campaign Missions]] | years = '''''High Charity''''' |after = ''[[The Great Journey]]''}} | ||
{{ | {{Levels|H2}} | ||
Latest revision as of 12:01, April 12, 2023
|
Prev: |
|
|
Next: |
|
| High Charity | |
|---|---|

| |
|
Game: |
|
|
Map file name (?): |
|
|
Player: |
|
|
Date: |
|
|
Location: |
Inside High Charity |
|
Objective(s): |
Stop Truth from reaching the Dreadnought. |
|
Par Time: |
00:15:00 (Master Chief Collection) |
|
Par Score: |
9,000 (Master Chief Collection) |
 |
Halopedia has a walkthrough guide for this level; see High Charity (level)/Walkthrough. |
| “ | Cortana can handle the Index - stopping Truth is up to you. | ” |
High Charity is the fourteenth and penultimate campaign level of Halo 2. As the Master Chief, the player must battle their way through the Flood-infested High Charity to stop the Prophet of Truth before he boards the Forerunner Dreadnought. This is the last level played from Master Chief's perspective in Halo 2; the next and final level, The Great Journey, returns to the Arbiter as a playable character. This level is also the only time when Master Chief encounters the Flood in combat in Halo 2, and also the only level in the game with no allies aiding the player. It is also the shortest playable campaign level. The Iron Skull can be found on this level.
Transcript[edit]
{Cutscene} {Anniversary Cutscene}

The Master Chief drops down a gravity lift just in time to see the Phantoms containing the Brute Chieftain Tartarus and the Prophet of Truth fly away. He walks over to the High Prophet of Mercy, who is still struggling against the Pod infector latched onto his throat.
- Prophet of Mercy: (weakly) "Earth... to finish what we started. And this time, none of you... will be left behind..."
Master Chief grabs the Flood form and rips it off of Mercy, squeezing it in his hand, and pops it. Mercy gives a strangled cry and dies. Cortana's hologram appears on Mercy's throne.
- Cortana: "That structure, at the center of the city... it's a Forerunner ship! And Truth is heading straight for it! If he leads the Covenant fleet to Earth, they won't stand a chance. You have to stop him!"
- John-117: "That Brute has the Index. And Miranda and Johnson. He can activate the ring."
The view shows the UNSC In Amber Clad crashed into a nearby tower.
- Cortana: "If he does, I'll detonate In Amber Clad's reactor just like we did the Autumn's. The blast will destroy this city and the ring. Not a very original plan, but we know it'll work."
The Master Chief reaches for her.
- Cortana: "No. I don't want to chance a remote detonation. I'll need to stay here."

The Chief and Cortana then watch as a Pelican crashes onto the platform, and soon the Flood combat forms inside the dropship run out.
{Gameplay}
Cross-Purposes[edit]
- Cortana: "Flood controlled-dropships are touching down all over the city! That creature beneath the Library... that 'Gravemind'... used us. We were just a diversion. In Amber Clad was always its intended vector. There's a conduit connecting this tower to the ship. Head back inside. I'll lead you to it."
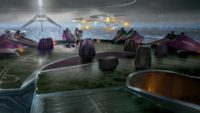
A mass of Flood combat forms attack a pair of Jiralhanae near the door leading back into the Mausoleum tower. Two more Pelicans fly in over the platform, one of them disgorging a pair of Flood carrier forms, before they fly away, one heading down to the Lower districts and the other accelerating higher.
If the Chief spends too much time fighting:
- Cortana: "We don't have time for this, Chief. Truth's Phantom is nearing the Forerunner ship."
A pair of Unggoy flee out of the door, pursued by a combat form. The Chief fights past them, and meets a cluster of Jiralhanae in the next room. Flood soon attack from behind the Jiralhanae. The Chief battles his way through and soon reaches a gravity lift leading upstairs.
- Cortana: "I'll disable this lift once you reach the top. That'll slow them down... I hope."
After the Chief reaches the top:
- Prophet of Truth (Loudspeaker): "Shall we let the Flood consume our holy city? Turn High Charity into another of their wretched hives? No enemy has ever withstood our might. The Flood too shall fail."
The Chief passes through a room with a dead Sangheili and a dead Kig-Yar and comes to a massive open room. He stands on a platform in one corner, while other similar platforms are spaced around the room. The Spartan notices a huge array of colored shards of glass, taken from each world the Covenant have glassed. Far below, the Mausoleum of the Arbiter is barely visible as mist surrounds it. The Chief watches a skirmish between several Flood combat forms and a swarm of Yanme'e and a Jiralhanae on a distant platform.
- Cortana: "I'll do what I can to slow the launch sequence, but there's something inside the ship...a presence that's fighting back. For a Covenant construct, it's unusually formidable."
If the Chief remains in the chamber for too long:
- Cortana: "No time to admire the ceiling, Chief. Truth's Phantom has reached the Forerunner ship."
More Yanme'e enter the area from the other side and engage both the Flood and the Master Chief. The Chief activates a series of gravity bridges and makes it to the opposite side of the chamber. He defeats several combat forms and leaves the area. As he enters the next room:
Please, Make Yourself at Home[edit]
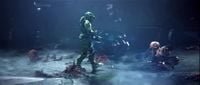
The Master Chief finds that the Flood have already begun to infest the city, the beginning of a process that will ultimately see High Charity converted into a Flood hive. Flood biomass clings to the walls, and the air is darkened with Flood spores, making navigation difficult. Signs of the constant fighting are evident everywhere, with Covenant and Flood corpses scattered around. He makes his way through a corridor filled with Flood, and then another with battling Flood and Covenant. Ultimately he makes it out into a garden-like area, where Jiralhanae-led Covenant patrol.
- Prophet of Truth (Loudspeaker): "The parasite did not defeat the Forerunners...and it shall not defeat us."
- Gravemind: "Arrogant creature! Your deaths will be instantaneous, while we shall suffer the progress of infinitude!"
Flood soon appear and engage the Covenant present. The Chief can either fight all enemies present, or attempt to slip past. After passing through another darkened corridor, he emerges into another garden-type area. This time, only Flood can be seen.
- Cortana: "The security systems in this part of the tower are particularly robust."
- Prophet of Truth (Loudspeaker): "Whosoever is gripped by fear, take heed. I am the Prophet of Truth... And I am not afraid. Noble Mercy is here at my side. His wise counsel ever in my ears."
- Gravemind: "We exist together, now... Two corpses, in one grave."
A swarm of Yanme's enter through a broken window looking out over the massive chamber that the Chief previously traversed. The insectoid aliens engage the Flood. Several massive Flood tentacles can be seen outside the window (possibly part of the Gravemind). Leaving the room, the Chief reaches another cross section and heads to the left, towards a lift.
- Cortana: "Apparently, these are the Prophet Hierarchs' private quarters. Their inner sanctum."
Sanctified[edit]
- Prophet of Truth (Loudspeaker): "This crisis will not be the end of us. It is but one last hurdle before the Journey and salvation!"
The Chief enters the Sanctum. A Covenant position consisting of Unggoy, Kig-Yar and Jiralhanae, including several Jiralhanae Honor Guardsmen is present at the far door in the room, defending the inner Sanctum. The Covenant forces hide behind multiple stationary shield generators and crates. Flood soon invade the Sanctum, clashing with the Covenant. The Chief eventually breaks through and enters the inner Sanctum, which is also infested by Flood biomass. Several Covenant corpses lie scattered about.
- Cortana: "Brute and Elite ships are engaging one another all around High Charity. I'm running out of options, Chief. I can't stall the launch sequence much longer. The next lift will take you up to the conduit. Hurry!"
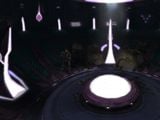
The Chief makes it to another gravity lift, and takes it to the top. A green conveyor, the conduit can be seen stretching out to the Forerunner Dreadnought in the distance. Multiple Flood forms attack a pack of Jiralhanae.
Once More, with Feeling[edit]

- Cortana: "I knew the Covenant were good at re-purposing Forerunner technology, but this is amazing... They've been using the Forerunner ship's engines as an energy source for the city. The ship isn't so much launching as it is disengaging; uncoupling itself from High Charity's power grid - Stopping Truth, that's all that matters!"
- Prophet of Truth (Loudspeaker): "Now is the time of our unworlding, in a moment we shall all become...as gods."
- Cortana: "You know the plan - You've got to catch Truth, I've got to handle the Index. Go!"
- Prophet of Truth (Loudspeaker): "If you will falter, know this...one final effort is all that remains."
- Cortana: "Forget about the Flood, you've got to get aboard!"
If the Chief continues to mess about and not board the ship.
- Cortana: "I can't go with you!"
- Cortana: "I have to stay here, Chief!"
- Cortana: "Chief, leave me!"
- Cortana: "We're out of time, Chief! Into the conduit!"
- Cortana: "Jump in, now!"
The Chief jumps into the conduit.
{Cutscene} {Anniversary Cutscene}

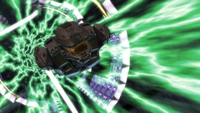
The Chief travels through the conduit — a tube of green energy — at an extremely high speed. The conduit disengages as the Forerunner Dreadnought starts to launch, and John hurtles into the ship through a large portal, landing with scrapes flickering off his armor as a large set of doors closes behind him.
- Cortana (COM): "Chief, when you get to Earth...good luck."
- John-117: "After I'm through with Truth..."
- Cortana (COM): "Don't make a girl a promise..."
Cut to Cortana back on the balcony outside
- Cortana: "...if you know you can't keep it."
Cortana watches the ship rise, and exit through the top of High Charity, where Jiralhanae-controlled and Sangheili-controlled ships are continuing to destroy one another. Soon the Dreadnought enters slipspace, and vanishes.
Fades to black.
Level ends.
Production notes[edit]
During the production of High Charity, the level was intended to feature a Warthog run at the mission's conclusion. The level was to feature a trench run that involved massive, horizontal grav-lift transporters that you could drive a Warthog into and through. The Warthog run took place in several tubes which were divided by the aforementioned grav-lifts, and John-117 was going to travel along these tubes in a Warthog in order to board the Prophet of Truth's Forerunner ship.[1]
The trench run would have been timed, much like the trench run from the level The Maw in Halo: Combat Evolved. The tubes would have centered around the Conduit and many enemies would have fought along the geometry. The enemies that would have appeared in the run include the Flood, Jiralhanae, Unggoy, Kig-Yar, Yanme'e, and several Brute-manned Type-46 Spectres.
Some incomplete map geometry that was intended for the warthog trench run was left on the disk. The Halo 2 mod "Induction" re-used the map geometry in a multiplayer level.
Trivia[edit]
Glitches[edit]
- Main article: Glitches
- The Flood Juggernaut's data (such as model, textures, etc.) are stored on this .map file, although it only has spawn points on Quarantine Zone and The Oracle, where its data is not present.
- When you get to the last room with the green beam across the room to the ship, you can get on the beam by just going on top of one of the Covenant boxes and then jumping on the beam and walking forward, but you will have to stop, because if you go any farther the cutscene will start.
- If you knock a Combat Form off the side of the ramps of the Phantom dock, it will climb up the walls, similar to the ones that do the same during the elevator ride in The Oracle. But, they cannot jump onto the deck.
- Some Flood biomass can be destroyed. It must be small, and will just disappear and leave a bit of Flood blood.
- Exclusive to the Anniversary version, if this level loads after playing the previous (instead of setting it up from the campaign menu), the opening cutscene will abruptly stop before the Flood combat forms exit the crashed Pelican and screech into the air.
Mistakes[edit]
- There is still a Phantom docked on the landing pad at the start of the level, but an energy field prevents you from walking on the back fins. It should also be noted that it has no weaponry.
Easter eggs[edit]
- Main article: Easter eggs
- The Iron Skull can be found on this level.
- A dead body of a Brute that looks just like Tartarus can be found on this level in one of the many rooms; he has the exact same shoulder piece (which is easy to recognize).
- In the room with the glass shards hanging from the ceiling after the corridor where you first hear Truth over the loudspeaker, there is an unknown and hard-to-see switch that looks just like the switches used to activate the gondolas on the level Delta Halo, as well as the ones used to activate the elevators on the Arbiter and Oracle levels. To see it (with the best view), bring a Particle Beam Rifle and head to the platform on the other side of the chamber (across from where you entered). Once you get there, head to the glowing panel in the platform (it points to the center of the room). Look to your left at the platform and the door where the Drones come from (when you reach the platform). Look at that platform's glowing panel, zoom in to 5×, and look up slightly. You should see the switch around there, and you can zoom in to 10× and see the switch in closer detail. However, there is no known way to get to it (unless by mod) and activate it, so its purpose is unknown.
- The twelfth terminal is a Covenant terminal to the left of the door after entering the Inner Sanctum.
References[edit]
- The darkly lit room decorated with glowing blue crystals is a section of the Sanctum of the Hierarchs, first mentioned in Halo: First Strike.
- The Prophet of Truth talks over the loudspeakers from time to time during the level, one of these times he says that "one final effort is all that remains". This line is repeated by Admiral Hood in Halo 3. This line originates from dialog recording sessions conducted pre-Halo where Jaime Griesemer is directing Jason Jones in a painful attempt at a Scottish accent. An mp3 of the clip is available on Bungie.net media player Bungie.net News: Bungie Day Memories. One Final Effort is also the name of a track on the Halo 3: Original Soundtrack.
Miscellaneous[edit]
- The Flood mass in the Pelican's cockpit resembles a Proto-Gravemind, and is likewise being used to pilot a craft, but is significantly smaller than the one encountered aboard the Truth and Reconciliation.
- In the beginning of the level, Pelicans will appear around the area. They can be approached, jumped on, and shot at but not boarded.
- The Drones that engage the Flood combat forms have a unique brown exoskeleton.
- Just like in Gravemind, the spires that appear in the Sanctum of the Hierarchs can fall if the anti-gravity generator is destroyed. Like in Gravemind, this can not only be used to provide some cover, but also kill any Brutes, Grunts or Flood (with the right timing). You will also notice that one of them has already fallen, once the elevator reaches the top. (These will provide protection from Covenant and Flood fire)
- During the part where you reach a canyon-like indoor area where you encounter the Drones a second time, if you look out the window, you can see strange tentacles, evidently part of the Gravemind as it assembles a body on High Charity from its inhabitants.
- This is the only level where you can see a Flood combat forms with a Brute Shot and Brute Plasma Rifle in Halo 2. It is also the only level where Flood can be fought with the aforementioned weapons. It is also the only level in the original trilogy in which the Flood wield the latter weapon.
- On Legendary, it is possible to see some invisible Elite Combat Forms and Human Combat Forms walking around. Typically, during the fight in front of the Hierarchs' private quarters as one of the last waves of Flood coming from the elevated platforms. This is the second known instance of invisible Flood, the first being the armory on The Maw in Halo: Combat Evolved.
- While this level is the only level where Master Chief fights the Flood in Halo 2, it is also the only level where no living Sangheili are encountered.
- High Charity and The Covenant are the only levels in the trilogy in which Brutes can be encountered combating the Flood on screen. It is also the only level where Drones fight Flood.
- High Charity is the last level in Halo 2 in which Grunts are encountered as enemies.
- This level was supposed to have a Warthog run where John-117 escapes from High Charity. Using modding, or Glitches, the player can still access the area. A Halo user called Black Diamond restored it by putting in scripts and spawns. It was cut due to time constraints.
Gallery[edit]
Design documentation[edit]
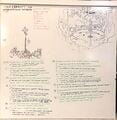
Design documentation for a near-final revision of this level.

Halo 2[edit]
Preview of the level in Halo 2 menu.
The Phantoms lift off just as John-117 arrives.
The Phantoms carrying Truth and Tartarus leave.
John-117 approaches the Prophet of Mercy.
Cortana and John-117 with UNSC frigate In Amber Clad in the background.
John-117 watches as a Flood-infested Pelican crashes nearby.
The interior of High Charity.
John-117 in the Inner Sanctum.
John-117 taking the conduit to the Dreadnought.

The power conduit sends John-117 into the Forerunner Dreadnought.

Cortana watches as the Dreadnought flees High Charity.

The ship leaves High Charity while the Great Schism rages on.


Halo 2: Anniversary[edit]
Concept art depicting a massive aerial battle within High Charity.
John-117 approaches the Prophet of Mercy.
Mercy being strangled by a Flood pod infector.
John-117 and Cortana discuss their plan to stop Tartarus.
Cortana telling John-117 to leave her behind.
The Prophet of Mercy lies dead after the Chief has killed the Pod infector.
Flood biomass growing in High Charity.
Lights in the city begin shutting down as Flood spores take over the atmosphere.
The Sanctum of Hierarchs damaged.
Flood biomass taking over the Inner Sanctum.
The power conduit connecting Anodyne Spirit to High Charity.


Sources[edit]
- ^ Bungie.net, One Final Effort (Retrieved on Apr 12, 2016) [archive]
| Preceded by Uprising |
Halo 2 Campaign Missions High Charity |
Succeeded by The Great Journey |
| |||||||||||||||||||||||||||||||


