Halo 3 skulls
From Halopedia, the Halo wiki
Summary
A Skull in Halo 3 is an easter egg left in by Bungie to make the game more challenging or interesting, or to unlock potentials that would otherwise remain hidden. There is no information text to wield a skull, as there is with a weapon, but it can be picked up just the same, and its effects range from the useless to the terrifying. In Halo 2, these skulls were hidden very far out of the normal path of the level, sometimes even backwards. In Halo 3, it is the same old situation. In addition, the skulls now have some sort of importance to the Halo 3 Meta-game. They multiply the amount of points you receive in the meta-game, meaning that activating them in the lobby will give you point multipliers.
NOTE: In order to obtain any of the skulls, you cannot start the level from a mid-level "insertion point"—you MUST begin the level from the very beginning. You do not, however, have to finish the level after you hold the skull. You can save and quit after holding it, and it will be fully unlocked.
List of Known Gold Skulls
Iron
Level: Sierra 117[1]
Directions: This skull is at the end of the level. It is located on the roof of the building to the left of the building where Sergeant Johnson is being held captive, if you're facing Johnson. You can gain access to the roof by jumping onto the pipes. Travel all the way over to the left side of the roof, and the skull is concealed in the corner.
Difficulty: Normal, Heroic, Legendary
Achievement Icon: A skull marked with a stylized drawing of a hammer
Effect: When playing co-op, if either player dies the game restarts you at your last checkpoint, similar to Halo 2 on Legendary. On solo, it restarts the mission.[2]
Point Multiplier: 3x
Black Eye
Level: Crow's Nest[1]
Directions: It's in the same room you start in. Hanging down from the ceiling is some piping. On top of this piping, on the side nearest to the large display (the one that Hood appears on) lies the “Black Eye Skull”. You can gain access to the pipes a few different ways, one of the easiest however is to jump on the crate like thing, then jumping onto pipes from there.
Difficulty: Normal, Heroic, Legendary
Achievement Icon: Skull marked with a bruise under one eye.
Effect: Your shield does not charge normally. To charge your shields you must kill an enemy with a melee attack (anything but the Energy Sword). You can charge your shields into the Overshield range by doing this.
Point Multiplier: 1.5x
Tough Luck
Level: Tsavo Highway[1]
Directions: At the point in the level when the huge covenant cruiser flies overhead (after the first shield blocking the road), on your left is some large piping following the road you are walking on. Underneath this piping are some support beams that extend out over a cliff. Jump onto the first of these beams, and travel to the end of it. Look to your left, and the Tough Luck Skull will be sitting on a rock extending from a cliff edge.
Difficulty: Normal, Heroic, Legendary
Achievement Icon: A skull marked with a three-leaf clover
Effect: Enemies always make every saving throw, always berserk, always dive, never flee…
Point Multiplier: 1.5x
Catch
Directions: In the first area where you need to destroy the Wraith Tanks, when you enter this area, do not eliminate the Wraith Tanks (The skull appears when the tanks appear, and disappears when the tanks are destroyed). The skull is located on top of the circular building next to the Anti-Air Tank. You can access the roof using a grenade jump, or jumping on the back of a hog. Or, if those methods prove too difficult and frustrating, you can push one of the large crates over to the building with a ghost and use that as a step of sorts, or even steal multiple Ghosts and stack them near the structure as a makeshift step. The skull will vanish if you destroy BOTH Wraiths, so you have a bit of a handicap on your hands. Destroying the Anti-Air tank would be your best bet because it could make a nice ramp if you destroyed it at the perfect location (and you don't want green plasma missiles firing at you point-blank).
Difficulty: Normal, Heroic, Legendary
Achievement Icon: Skull marked with a stylized drawing of a plasma grenade.
Effect: AI will toss more grenades.
Point Multiplier: 1.5x
Note: There is a glitch in some games where this skull will not appear.
Update: The glitch is really just that the campaign needs to be completed on Normal difficulty or higher for the skull to appear.
Update: If you destroy the regular wraith and sniper the gunner on the anti-air wraith, then kill everything else, the anti-air wraith will (may) ignore you and shoot at Hornets that continue to appear in the sky.
Fog
Level: Floodgate
Directions: At the very beginning of the level, as you are walking down from the anti-air gun you destroyed in the previous mission, you encounter a ramp (next to a missile launcher). Around this ramp, you hit a checkpoint. At this point, you should also hear a marine yelling, “There! Over There!” You have a small window of opportunity at this point, but it is fairly easy to get the Fog Skull. Look up, and to the right, directly at the roof of the building next to the missile launcher. There is a single flood combat form (not to be mistaken with the two other flood forms jumping in front of you) which is holding the skull. Kill him before he jumps, and he will drop the skull down to the ground where you can retrieve it. Too early, and the skull will get stuck on the roof though, so just time it carefully. Also there are some sandbags in the way, don't miss the shot by getting stuck behind them.
Difficulty: Normal, Heroic, Legendary
Achievement Icon: A skull marked with a swirl of fog
Effect: No motion sensor
Point Multiplier: 1.5x
Famine
Directions: Near the point where the path you follow branches off into two sections (one leading to the area where you need to let the tanks across the bridge, and the other leading towards the area where you meet up with the frigate). Take the right path, as you would if you were completing the mission, and you’ll notice a structure above you / to the right of you (near the area where you encounter a few ghosts). You need to scale the rocks to the right of the structure, and then travel across it so that you pass 3 of the large support beams extending into the cliffs. Inside of the fourth support beam, lies the Famine Skull. A well placed grenade, a Brute Chopper, or deployable cover should have you up there in no time! You can do this before or after you get the Scorpion as you pass the area twice, the skull spawns there as sson as you reach that area the first time.
Difficulty: Normal, Heroic, Legendary
Achievement Icon: A skull marked with a smaller skull
Effect: When enemies drop their weapons, they will have considerably less ammo in them.
Point Multiplier: 2x
Thunderstorm
Level: The Covenant[1]
Directions: After you take command of one of the Hornet vehicles, fly towards the second force field generator (the one the Arbiter disabled), and land. The skull is waiting at the very top, at the end of the ramp extending over the sea.
Difficulty: Normal, Heroic, Legendary
Achievement Icon: A skull marked with a lightning bolt
Effect: Each enemy receives a rank promotion, for example, Minor Grunts will become Major Grunts.
Point Multiplier: 1.5x
Tilt
Directions: In the circular room where Cortana mentions that she “Likes to play games too…” It’s a bit difficult to get to, as it requires getting on top of the ceiling of the room. Upon entering the room, head towards the left side where you will see some mushroom shaped extrusions along the wall. Get on top of these, and then look up and towards the right for another set of extrusions. Jump to these. From here, you should be able to jump on top of the ceiling of the room, where the Tilt Skull lies in the center.
- Note: If you try to get the skull on your second time through the room (after you start the chain reaction) it wont be there.
Difficulty: Normal, Heroic, Legendary
Achievement Icon:
Effect: Enemy resistances and weaknesses are greatly increased. Essentially, it creates a situation where you will more often have to use a battery weapon to take down shields and power armor, and then an ammo weapon to finish the opponent off, than just use one or the other to take them down.
Point Multiplier: 2x
Mythic
Directions: At the beginning of the level start by heading into the canyon, but hug the right wall. Very soon, you will notice that there is a turn to the right that is off the normal trail. Head a bit down this path, and the “Mythic Skull” will be sitting there.
Difficulty: Normal, Heroic, Legendary
Achievement Icon: Skull marked with a swirl
Effect: Enemies have 2x more health and shielding, and are therefore harder to kill.
Point Multiplier: 2x
List of Known Silver Skulls
Blind
Level: Sierra 117[1]
Directions: Near the first enemy encounter stay to the right. Follow the wall on around past the small building until you reach the cliff edge. The skull is on a rock right just over the edge.
Difficulty: Normal, Heroic, Legendary
Achievement Icon: No Achievement
Effect: HUD and first person arm disappear.
Grunt Birthday Party
Level: Crow's Nest[1]
Directions: After the first objective, en route to the barracks, you will fall down into a large pipe. There will be smaller pipes coming from the sides and Drones (insect-like enemies) flying out right and left. At the end don't fall off to the floor, look over the edge to see a small ledge a few feet below you. The ledge has a green arrow pointing towards the wall. Your goal is to just drop over the edge and immediately pull back and land under the floor you were just standing on, (on the ledge), or you can try to slide onto it from the edge. Once there, the skull will be at the end in a room. To pick it up you have to press and hold the Right Bumper.
Difficulty: Normal, Heroic, Legendary
Achievement Icon: No Achievement
Effect: When killed by headshots, Grunt's heads explode into confetti and children can be heard yelling "Yay!". It also does some blast damage to nearby objects and enemies, but it is very little. This skull is great when coupled with the Cowbell skull as the explosive force is maximized by the Cowbell skull.
Cowbell
Directions: Begin by heading all the way to the part of the level where you battle the Scarab. After defeating it, look in the middle of the desert area which you battled it in for a fairly large structure (it’s the building you see if you are at the bottom of the ramp you are supposed to go up, and turn to look in the opposite direction). Inside of this structure are several Gravity Lifts (shown below). Take one of these for later. Next, head up the huge ramp, and head inside of the building (the one with the cartographer inside). Pass through a few of the rooms in this building, and you’ll eventually come to a room with a whole lot of Explosive crates. Right after this room is a Staircase/Hallway that leads to the level below. The Skull is located at the top of the room, at the point where you turn on the staircase to head for the next part of the slope. There are four platforms above you, the Skull is on the uppermost of these platforms. Use the Gravity Lift to jump up to it (try to position the grav lift on the line above the second light spec up the ramp, and try try try again, reverting saves when you fail repeatadly), and there you have it! -But if it's not there, you probably didn't make it to the top. Fall down and look up and you will see one more "level."
Difficulty: Normal, Heroic, Legendary
Achievement Icon: No Achievement
Effect: Explosive force increased
I Would Have Been Your Daddy
Level: The Covenant
Directions: After defeating the Scarabs and going inside, get to the location with all 7 Ring Holograms. Continue until after the cutscene where the Arbiter kills Truth and kill the Flood(make sure that the Flood music has stopped) before jumping through the ring holograms in a specific order. That order is as follows (1 is at the entrance, 7 is closest to Truth):
4,6,5,4,5,3,4
When you jump through the final halo, the rings will start pulsating, and you will be awarded the “I Would Have Been Your Daddy” skull. It will be right next to the bridge that brings you over to the Prophet of Truth.
There are three different ways to find the IWHBYD skull, depending on the selected difficulty.
Difficulty: Normal, Heroic, Legendary
Achievement Icon: No Achievement
Effect: New Dialogue in Game
External References
For more information on Campaign scoring and Skulls see "Campaign Scoring 101" article on Bungie.Net
Special Effects (Pictures)
- 2737147-Full.jpg
Grunt Birthday.
- 2778992-Full.jpg
More exploding Grunts.
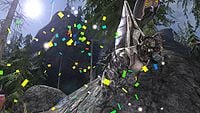
Close up of an exploding grunt.

Video
Gold Skulls Locations <youtube width="350" height="350>9WrXr4Aa3Bs</youtube>
Silver Skulls 3/4 Locations <youtube width="350" height="350>roXCIh2Rz60&NR</youtube>
Silver Skull IWHBYD Location (short version) <youtube width="350" height="350>LLOm7olquhk</youtube>
Silver Skull IWHBYD Location (long version) <youtube width="350" height="350>s_oPHB5cCg0</youtube>
Guide to all 13 Halo 3 Skulls <youtube width="350" height="350">XIE7I2OPgyA</youtube>


