343 Guilty Spark (level): Difference between revisions
From Halopedia, the Halo wiki
| (105 intermediate revisions by 47 users not shown) | |||
| Line 1: | Line 1: | ||
{{Title|343 Guilty Spark}} | {{Title|343 Guilty Spark}} | ||
{{Status|Gameplay}} | |||
{{Disambig header|the level in Halo: Combat Evolved|other uses of the term|343 (disambiguation)}} | |||
{{Level infobox | {{Level infobox | ||
|pagegamelabel=CE | |||
|prev=''[[Assault on the Control Room]]'' | |prev=''[[Assault on the Control Room]]'' | ||
|next=''[[The Library]]'' | |next=''[[The Library]]'' | ||
|name='''''343 Guilty Spark''''' | |name='''''343 Guilty Spark''''' | ||
|image=[[File: | |image=[[File:HCEA 343GuiltySpark Loadscreen.png|300px]] | ||
|player=[[ | |game=''[[Halo: Combat Evolved]]'' {{C|''[[Halo: Combat Evolved Anniversary|Anniversary]]''}} | ||
|date= [[2552#September | |devname=<code>c10</code>{{Ref/File|Id=HCEEK|HCEEK|HCEEK\tags\levels\c10\c10.scenario}} | ||
|player=[[Master_Chief_(gameplay)#Halo:_Combat_Evolved|Master Chief]] | |||
|date= [[2552#September|September 21, 2552]] | |||
|place= On the surface of [[Installation 04]] | |place= On the surface of [[Installation 04]] | ||
|objective= *Locate [[Jacob Keyes|Captain Keyes]] | |objective= *Locate [[Jacob Keyes|Captain Keyes]] | ||
*Escape | *Escape | ||
|partime=00:15:00 {{C|''Master Chief Collection''-only}} | |||
|parscore=17,000 {{C|''Master Chief Collection''-only}} | |||
}} | }} | ||
{{Article | {{Article quote|Creep through a swamp to meet the only enemy the Covenant fear.}} | ||
'''343 Guilty Spark''' is the sixth [[campaign]] level in ''[[Halo: Combat Evolved | '''343 Guilty Spark''' is the sixth [[campaign]] level in ''[[Halo: Combat Evolved]]''. | ||
In the swamps near a [[Flood containment facility]] on the surface of Installation 04, John-117 is dropped from ''[[Echo 419]]'' to search for [[Captain (Navy)|Captain]] [[Jacob Keyes]] who has been out of contact for over 12 hours. Soon, the Master Chief stumbles upon a structure and ventures within it, only to find out that the Marines accompanying the Captain have been slaughtered by | In the swamps near a [[Flood containment facility]] on the surface of Installation 04, John-117 is dropped from ''[[Echo 419]]'' to search for [[Captain (Navy)|Captain]] [[Jacob Keyes]] who has been out of contact for over 12 hours. Soon, the Master Chief stumbles upon a structure and ventures within it, only to find out that the Marines accompanying the Captain have been slaughtered by [[Flood|an unknown force]]. After realizing the fate of the Marines, John fights his way out to the swamp and encounters [[343 Guilty Spark|a questionable ally]]. | ||
==Transcript== | ==Transcript== | ||
===Well Enough Alone=== | ===Well Enough Alone=== | ||
[[File: | [[File:HCEA 343 Guilty Spark Intro.jpg|thumb|300px|''[[Echo 419]]'' arrives at the swamp.]] | ||
[http://www.youtube.com/watch?v=JLRoDjCxe4I '''{''Original Cutscene''}'''] | [http://www.youtube.com/watch?v=JLRoDjCxe4I '''{''Original Cutscene''}'''] | ||
[http://www.youtube.com/watch?v=MQr3XigwVE8 '''{Anniversary ''Cutscene''}'''] | [http://www.youtube.com/watch?v=MQr3XigwVE8 '''{Anniversary ''Cutscene''}'''] | ||
''View flies over a group of [[Kig- | ''View flies over a group of [[Kig-Yar]] and [[Unggoy]] running through a swamp, panicky and obviously in retreat. As it pans over them, the outline of a [[D77-TC Pelican|Pelican dropship]] can be seen through the fog and rain, which further materializes as the view draws closer.'' | ||
*'''Flight Captain [[Carol Rawley]] (COM)''': "The last transmission from the Captain's dropship was from this area. That was over twelve hours ago." | *'''Flight Captain [[Carol Rawley]] (COM)''': "The last transmission from the Captain's dropship was from this area. That was over twelve hours ago." | ||
'''''NOTE''': In the Anniversary subtitles, Rawley adds, "...and we've been unable to reestablish contact with the Captain or his team."'' | |||
'''{''Gameplay''}''' | '''{''Gameplay''}''' | ||
| Line 38: | Line 42: | ||
*'''Rawley (COM)''': "When you locate Captain Keyes, radio in, and I'll come pick you up." | *'''Rawley (COM)''': "When you locate Captain Keyes, radio in, and I'll come pick you up." | ||
''In certain parts of the level, the player can hear a radio transmission coming from a crashed human dropship and a [[ | ''In certain parts of the level, the player can hear a radio transmission coming from a crashed human dropship and a [[Covenant comm node|Covenant communications terminal]]. As it repeats, static pervades the transmission, and the signal fades in and out of clarity.'' | ||
*'''Dropship [[Victor 933]]'s Pilot (Recording)''': "Dropship [[Victor 933]]-(static)-''[[UNSC Pillar of Autumn|Pillar of Autumn]]''-(static)-need assistance. We are under att-(static)-attack by some new kind of hostile-(static)-isn't [[Covenant Empire|Covenant]]. (Static) Captain Keyes has been captured by hostiles. (static) -dug in at a large structure in a swamp-(static)-We need to pull out. Please-(static)-I will set this message to repeat at-(static)-regular intervals. Dropship Victor 933, clear." | *'''Dropship [[Victor 933]]'s Pilot (Recording)''': "Dropship [[Victor 933]]-(static)-''[[UNSC Pillar of Autumn|Pillar of Autumn]]''-(static)-need assistance. We are under att-(static)-attack by some new kind of hostile-(static)-isn't [[Covenant Empire|Covenant]]. (Static) Captain Keyes has been captured by hostiles. (static) -dug in at a large structure in a swamp-(static)-We need to pull out. Please-(static)-I will set this message to repeat at-(static)-regular intervals. Dropship Victor 933, clear." | ||
''John-117 quickly finds the crashed dropship sending the message. There are weapons and supplies piled nearby, but no signs of life. An explosion in the distance throws the bodies of an Unggoy and a Kig-Yar through the air. He heads off to investigate and finds a crashed Covenant [[ | ''John-117 quickly finds the crashed dropship sending the message. There are weapons and supplies piled nearby, but no signs of life. An explosion in the distance throws the bodies of an Unggoy and a Kig-Yar through the air. He heads off to investigate and finds a crashed Covenant [[Dextro Xur-pattern Spirit|Spirit]].'' | ||
''The Chief also encounters a small group of Unggoy and Kig- | ''The Chief also encounters a small group of Unggoy and Kig-Yar, which he quickly eliminates, before crossing a log bridge. As he moves across the bridge, he sees several [[Flood combat form|shadowy figures]] running around on the top of the cliff to the right. Also, his [[motion tracker]] shows seemingly friendly units in the swamp not too far from his location, but they suddenly disappear off radar.'' | ||
''When he reaches the other side, he hears [[MA5B | ''When he reaches the other side, he hears [[MA5B assault rifle|assault rifle]] fire nearby. He investigates and sees a mob of Unggoy and Kig-Yar fleeing from a large entrance. A [[M9 fragmentation grenade|frag grenade]] explosion throws a [[Mamua'uda-pattern Shade|Shade]] turret through the air. The fleeing Covenant regroup nearby and attack him out of fear.'' | ||
''John-117 kills the Covenant and hurries to the entrance, but finds no one there. A lift arrives for him. He takes the lift down into the depths of the structure.'' | ''John-117 kills the Covenant and hurries to the entrance, but finds no one there. A lift arrives for him. He takes the lift down into the depths of the structure.'' | ||
| Line 52: | Line 56: | ||
''John-117 passes through several large rooms and many smaller ones inside the structure, filled with Unggoy, Kig-Yar, empty Shade turrets, discarded weapons, and dead bodies - both Marine and Covenant. Curiously there is no sign of any [[Sangheili]], alive or dead. In some rooms, Kig-Yar and Unggoy gather at the doorways as if expecting an attack. In one room, the Chief discovers a strange green-yellow substance falling from the ceiling.'' | ''John-117 passes through several large rooms and many smaller ones inside the structure, filled with Unggoy, Kig-Yar, empty Shade turrets, discarded weapons, and dead bodies - both Marine and Covenant. Curiously there is no sign of any [[Sangheili]], alive or dead. In some rooms, Kig-Yar and Unggoy gather at the doorways as if expecting an attack. In one room, the Chief discovers a strange green-yellow substance falling from the ceiling.'' | ||
[[File:343GS lvl 01.jpg|thumb | [[File:343GS lvl 01.jpg|thumb|300px|The Chief arrives at the ominously empty facility.]] | ||
''As the Chief comes into an area blasted with gunfire and scorch marks, there is the sound of shattering glass. A lone Marine sits leaning against a wall, M6D | ''As the Chief comes into an area blasted with gunfire and scorch marks, there is the sound of shattering glass. A lone Marine sits leaning against a wall, [[M6D magnum]] pointed at him. The Marine shoots at the Spartan if the Chief comes too close, while screaming at the top of his lungs the following phrases. He also fiddles around with his pistol a lot, checking to see if the magazine is full.'' | ||
'''[[Paranoid Marine]]''': | '''[[Paranoid Marine]]''': | ||
| Line 68: | Line 72: | ||
*"''Just leave me alone!''" | *"''Just leave me alone!''" | ||
*"[[Avery | *"[[Avery Johnson|Sarge]]? [[Manuel Mendoza|Mendoza]]? [[Bisenti]]? Oh God...the things took them. Away, away, away, they went away... ''(mumbles and cries)'' They're gone! Get it? ''Gone''!" | ||
*"They won't get me! Oh God... Oh God, I don't want to be like them. Please, please no, nooo..." | *"They won't get me! Oh God... Oh God, I don't want to be like them. Please, please no, nooo..." | ||
''John-117 leaves him, and makes his way into the room, which is covered in dead Covenant bodies, blood, bullet holes and plasma scoring. Some areas of the floor are blackened with blasts from explosions. In some areas, small flecks of a greenish substance are found on the floor. The Chief finds a partially shattered walkway and ascends to the second floor. An | ''John-117 leaves him, and makes his way into the room, which is covered in dead Covenant bodies, blood, bullet holes and plasma scoring. Some areas of the floor are blackened with blasts from explosions. In some areas, small flecks of a greenish substance are found on the floor. The Chief finds a partially shattered walkway and ascends to the second floor. An assault rifle lies on the ground, pointing like an arrow towards the entrance of a room marked with ominous red Forerunner glyphs. The door appears to have been forced open. The Chief goes in, passes a dead Marine, and walks down a ramp.'' | ||
''The Chief comes down one of two ramps on either side of a doorway, which has been recently been forced open by a [[United Nations Space Command|UNSC]] [[spoofer]].'' | ''The Chief comes down one of two ramps on either side of a doorway, which has been recently been forced open by a [[United Nations Space Command|UNSC]] [[spoofer]].'' | ||
| Line 79: | Line 83: | ||
[http://www.youtube.com/watch?v=nzVAb6vkNd4 '''{Anniversary ''Cutscene''}'''] | [http://www.youtube.com/watch?v=nzVAb6vkNd4 '''{Anniversary ''Cutscene''}'''] | ||
[[File:JenkinsHelmetCEA.png|thumb | [[File:JenkinsHelmetCEA.png|thumb|300px|Private Jenkins' discarded helmet.]] | ||
''John-117 approaches the door cautiously and listens for any movement inside. Just as he is about to type a command into the spoofer, there is a noise behind him. He turns around, gun ready to shoot, but sees nothing. After a moment, he turns back to the door, places his gun on his shoulder and opens the door. When it opens, the body of | ''John-117 approaches the door cautiously and listens for any movement inside. Just as he is about to type a command into the spoofer, there is a noise behind him. He turns around, gun ready to shoot, but sees nothing. After a moment, he turns back to the door, places his gun on his shoulder and opens the door. When it opens, the body of a Marine falls into his arms. He advances a few paces, places the body on the floor gently while making sure nobody follows him through. He sweeps his assault rifle about the room.'' | ||
''The floor is covered in [[human]] blood. Discarded UNSC weapons litter the floor. John-117 also notices a helmet lying on the floor, and, crouching, moves swiftly towards it. Once there, he surveys the room one more time, places his rifle on the floor, and picks up the helmet. The name "JENKINS" is stamped across it. There is a large, jagged hole punched through the top of it. The Master Chief shakes his head. He then examines the helmet more closely and notices that the [[ | ''The floor is covered in [[human]] [[blood]]. Discarded UNSC weapons litter the floor. John-117 also notices a helmet lying on the floor, and, crouching, moves swiftly towards it. Once there, he surveys the room one more time, places his rifle on the floor, and picks up the helmet. The name "JENKINS" is stamped across it. There is a large, jagged hole punched through the top of it. The Master Chief shakes his head. He then examines the helmet more closely and notices that the [[helmet recorder]], near the [[Heads-up display]], is still intact. He retrieves the [[M4 field disk]] and inserts it into a socket in his helmet.'' | ||
<tt>'''> OPEN RECORD VIEW [2552.5.27.5:52:56 L]'''</tt> | <tt>'''> OPEN RECORD VIEW [2552.5.27.5:52:56 L]'''</tt> | ||
| Line 91: | Line 95: | ||
<tt>'''> PLAY >'''</tt> | <tt>'''> PLAY >'''</tt> | ||
[[File:SargeBisentiArguing.jpg|thumb | [[File:SargeBisentiArguing.jpg|thumb|300px|Sergeant Johnson arguing with Bisenti over flip music.]] | ||
''The view switches to a [[Night vision device|night vision]]-enabled recording. Jenkins looks around the inside of Pelican | ''The view switches to a [[Night vision device|night vision]]-enabled recording. Jenkins looks around the inside of a Pelican. There are several other Marines seated in the dropship with him. [[Flip music]], Johnson's favorite genre, blares over the cabin speakers.'' | ||
*'''[[Private (UNSC)|Private]] Manuel Mendoza''': "Why do we always have to listen to this old stuff, Sarge?" | *'''[[Private (UNSC)|Private]] Manuel Mendoza''': "Why do we always have to listen to this old stuff, Sarge?" | ||
| Line 143: | Line 147: | ||
<tt>'''> PLAY >'''</tt> | <tt>'''> PLAY >'''</tt> | ||
[[File:InfectedEliteCorpse.jpg|thumb | [[File:InfectedEliteCorpse.jpg|thumb|300px|The squad discovers an oddly-mutilated Sangheili corpse.]] | ||
'' | ''Inside the room where John-117 encountered the Paranoid Marine, the squad stands around a [[Sangheili]] carcass. Its chest is torn wide open. Private Mendoza is examining a similar corpse on the left hand side of the screen.'' | ||
*'''Private [[Kappus]]''': "--which is weird, right? I mean...look at it." | *'''Private [[Kappus]]''': "--which is weird, right? I mean...look at it." | ||
| Line 153: | Line 157: | ||
*'''Private [[Kappus]]''': "Something...scrambled the insides." | *'''Private [[Kappus]]''': "Something...scrambled the insides." | ||
'''NOTE''': In the Anniversary subtitles, Kappus says, "Something tore open its chest and scrambled the insides." | '''''NOTE''': In the Anniversary subtitles, Kappus says, "Something tore open its chest and scrambled the insides."'' | ||
*'''Johnson''': "What's that? Plasma scoring?" | *'''Johnson''': "What's that? Plasma scoring?" | ||
| Line 164: | Line 168: | ||
*'''Johnson''': "Looks like a Covenant patrol. Badass Elite units, all [[KIA]]." | *'''Johnson''': "Looks like a Covenant patrol. Badass Elite units, all [[KIA]]." | ||
''Keyes looks down at the dead Sangheili.'' | |||
*'''Keyes''': "Real pretty... Friend of yours?" | *'''Keyes''': "Real pretty... Friend of yours?" | ||
| Line 185: | Line 191: | ||
*'''Kappus''': "Yes, sir." | *'''Kappus''': "Yes, sir." | ||
''Kappus removes a | ''Kappus removes a spoofer from his pocket and sticks it to the door. He punches a few keys, and the door opens. He waves the squad through. Bisenti takes point through the door, Jenkins close behind him, and the rest of the squad fans out around him. An odd rumbling sound is heard.'' | ||
*'''Mendoza''': "I've got a bad feeling about this..." | *'''Mendoza''': "I've got a bad feeling about this..." | ||
| Line 205: | Line 211: | ||
*'''Johnson''': "Mendoza, get your ass back up to Second Squad's position, and find out what the ''hell'' is goin' on." | *'''Johnson''': "Mendoza, get your ass back up to Second Squad's position, and find out what the ''hell'' is goin' on." | ||
*''' | *'''Mendoza''': "But sir-" | ||
*'''Johnson''': "I don't have time for your lip, soldier! I gave you an order!" | *'''Johnson''': "I don't have time for your lip, soldier! I gave you an order!" | ||
| Line 213: | Line 219: | ||
*'''Kappus''': "Sarge! Listen!" | *'''Kappus''': "Sarge! Listen!" | ||
''The odd hissing noise grows louder and louder. | ''The odd hissing noise grows louder and louder. Everyone scans the room, trying to find the source of the strange sounds.'' | ||
*''' | *'''Jenkins''': "What is ''that''?" | ||
*'''Johnson''': "Where's that coming from, Mendoza?" | *'''Johnson''': "Where's that coming from, Mendoza?" | ||
*''' | *'''Mendoza''': "Everywhere... I don't - there! ''(Spanish) ¡Mira!''" ''(Look!)'' | ||
''Mendoza points to a nearby door, which has just exploded outwards. Small [[ | ''Mendoza points to a nearby door, which has just exploded outwards. Small [[Pod infector|squid-like creatures]] swarm from it.'' | ||
*'''Private [[Riley]]''': "Ahh...augh! Get it | *'''Private [[Riley]]''': "Ahh...augh! Get it out! Get it out- augh!" | ||
''Riley lies on the ground, one of the | ''Riley lies on the ground, one of the Pod infectors attached to his chest. Bisenti tries to pull it off him.'' | ||
*'''Bisenti''': "Hold still, hold still!" | *'''Bisenti''': "Hold still, hold still!" | ||
| Line 233: | Line 237: | ||
''Bisenti pulls the creature off of Riley, who goes limp. Bisenti struggles with the creature, which is now trying to infect him.'' | ''Bisenti pulls the creature off of Riley, who goes limp. Bisenti struggles with the creature, which is now trying to infect him.'' | ||
[[File:KeyesJohnsonCEA.png|thumb | [[File:KeyesJohnsonCEA.png|thumb|300px|Sergeant Johnson and Captain Keyes fight back-to-back as their squad is overrun by the Flood.]] | ||
*'''Johnson''': "Let 'em have it!" | *'''Johnson''': "Let 'em have it!" | ||
''The Marines and Captain Keyes open fire, to little effect. | ''The Marines and Captain Keyes open fire, to little effect. Pod infectors swarm them with overwhelming numbers.'' | ||
*'''Keyes''': "Sergeant, we're surrounded!" | *'''Keyes''': "Sergeant, we're surrounded!" | ||
| Line 251: | Line 255: | ||
*'''Mendoza''': "Yo, this is loco!" | *'''Mendoza''': "Yo, this is loco!" | ||
*''' | *'''Keyes''': "Get back here, Marine! ''That's an order!''" | ||
''The Marine squad is overtaken, still firing, while their blood sprays as | ''The Marine squad is overtaken, still firing, while their blood sprays as Pod infectors continue to crawl onto them. Another group of infectors drop from the ceiling, right between Johnson, Keyes and Jenkins.'' | ||
*'''Johnson''': "Jenkins!" | *'''Johnson''': "Jenkins!" | ||
''Several | ''Several infectors attack Jenkins, blocking out his helmet cam. The screen cuts to black.'' | ||
<tt>'''> UNEXPECTED HALT X <nowiki>[</nowiki>[[Wounded in action|WND]]/INCAP/[[Killed in action|KIA]]? Ref.a4 3d.3]'''</tt> | <tt>'''> UNEXPECTED HALT X <nowiki>[</nowiki>[[Wounded in action|WND]]/INCAP/[[Killed in action|KIA]]? Ref.a4 3d.3]'''</tt> | ||
| Line 263: | Line 267: | ||
<tt>'''> END RECORD VIEW [2552.5.27.6:39:23 L]'''</tt> | <tt>'''> END RECORD VIEW [2552.5.27.6:39:23 L]'''</tt> | ||
''John-117 removes the chip from his helmet, shakes his head, and tosses the chip to the ground. The noises begin again. He readies his | ''John-117 removes the chip from his helmet, shakes his head, and tosses the chip to the ground. The noises begin again. He readies his assault rifle.'' | ||
===The Flood=== | ===The Flood=== | ||
'''{''Gameplay''}''' | '''{''Gameplay''}''' | ||
''The door John-117 came through is now locked. Three doors holding dozens of | ''The door John-117 came through is now locked. Three doors holding dozens of Pod infectors break open one at a time, their inhabitants attacking him.'' | ||
''The entrance breaks open. Massive amounts of | ''The entrance breaks open. Massive amounts of infectors skitter inside, followed by unarmed Sangheili combat forms.'' | ||
''John-117 escapes the facility, encountering Flood forms and some Covenant infantry struggling to survive.'' | ''John-117 escapes the facility, encountering Flood forms and some Covenant infantry struggling to survive.'' | ||
[[File:Scrn 036.jpg|thumb | [[File:Scrn 036.jpg|thumb|250px|John is about to be attacked by [[Pod infector]]s that broke quarantine in the containment facility.]] | ||
''John-117 tries to take the elevator he entered with, but while he waits for it to come down, it suddenly falls down and crashes down to the bottom of the facility.'' | ''John-117 tries to take the elevator he entered with, but while he waits for it to come down, it suddenly falls down and crashes down to the bottom of the facility.'' | ||
| Line 280: | Line 284: | ||
''After some fighting, John-117 arrives at another elevator, but it goes deeper underground and Unggoy blood is seen painted on the elevator's shaft. At the bottom of the shaft, he's attacked by armed combat forms - both infected Sangheili and humans. This detour forces him to fight his way back up.'' | ''After some fighting, John-117 arrives at another elevator, but it goes deeper underground and Unggoy blood is seen painted on the elevator's shaft. At the bottom of the shaft, he's attacked by armed combat forms - both infected Sangheili and humans. This detour forces him to fight his way back up.'' | ||
''John-117 eventually sees two | ''John-117 eventually sees two (three on Easy/Normal difficulty) Marines armed with [[M90 shotgun|shotguns]] and assault rifles fighting the Flood.'' | ||
''Although their weapons give them a distinct advantage, a single Pod infector or a single combat form attack can kill them.'' | |||
''If they survive, they hold their position inside the room, saying the following in random order:'' | |||
*"This is suicide (man)!" | |||
*"I'm gone, man!" | |||
*"I'm not sticking around to get killed!" | |||
*"We/I can't stop them!" | |||
*"Forget this!" | |||
*"Later, dude!" | |||
' | *"I've had enough of this crap!" | ||
' | *"I'm outta here!" | ||
''John-117 reaches the final elevator and rises to an exit from the structure.'' | ''John-117 reaches the final elevator and rises to an exit from the structure.'' | ||
| Line 290: | Line 310: | ||
*'''Rawley (COM)''': "This is ''Echo 419''. Chief, is that you? I lost your signal when you disappeared inside the structure. What's going on down there? I'm tracking movement all over the place!" | *'''Rawley (COM)''': "This is ''Echo 419''. Chief, is that you? I lost your signal when you disappeared inside the structure. What's going on down there? I'm tracking movement all over the place!" | ||
''John-117 reaches the top where a group of | ''John-117 reaches the top where a trapped group of 10 Marines are holding out.'' | ||
''It is obvious they used a lot of ammo to escape, and it is all stacked in a pile. Most Marines hold | ''It is obvious they used a lot of ammo to escape, and it is all stacked in a pile. Most Marines hold shotguns and assault rifles, one or two have [[Okarda'phaa-pattern plasma rifle|plasma rifles]].'' | ||
[[File: | [[File:HCE 343GuiltySpark SecondSquad.jpg|thumb|250px|John-117 leads the Marine survivors to escape the Flood-infested swamp.]] | ||
*''' | *'''[[Chips Dubbo]]''': "Sir! Thank God you're here. We've been lost out here for hours. After we lost contact with the rest of the mission, we, we headed for the RV point, and then these-these....these ''things''...they ambushed us. We've gotta get out of here!" | ||
*'''Flight Captain Rawley (COM)''': "There's a large tower a few hundred meters from your current position. Find a way above the fog and foliage canopy and I can move in and pick you up." | *'''Flight Captain Rawley (COM)''': "There's a large tower a few hundred meters from your current position. Find a way above the fog and foliage canopy and I can move in and pick you up." | ||
''The Marine squad eagerly follows John-117 outside, where the Flood close in from all sides. Some Marines are attacked by | ''The Marine squad eagerly follows John-117 outside, where the Flood close in from all sides. Some Marines are attacked by Pod infectors, and their allies are forced to shoot them.'' | ||
''As John-117 comes near the tower Rawley was speaking of, an odd blue object and a flotilla of [[Aggressor Sentinel|floating robotic automatons]] descend from the mist. The robots begin to slice away at any nearby Flood with [[Sentinel beam|built-in energy beams]], avoiding the Marines. After a few seconds of fighting around the base of the tower, the screen fades to white.'' | ''As John-117 comes near the tower Rawley was speaking of, an odd blue object and a flotilla of [[Aggressor Sentinel|floating robotic automatons]] descend from the mist. The robots begin to slice away at any nearby Flood with [[Sentinel beam|built-in energy beams]], avoiding the Marines. After a few seconds of fighting around the base of the tower, the screen fades to white.'' | ||
===343 Guilty Spark=== | ===343 Guilty Spark=== | ||
[http://www.youtube.com/watch?v=7NVtAPwE7Fc '''{''Original Cutscene''}'''] | [http://www.youtube.com/watch?v=7NVtAPwE7Fc '''{''Original Cutscene''}'''] | ||
[http://www.youtube.com/watch?v=RzZsrfYu0ZI '''{Anniversary ''Cutscene''}'''] | [http://www.youtube.com/watch?v=RzZsrfYu0ZI '''{Anniversary ''Cutscene''}'''] | ||
[[File:ChiefSparkCEA.png|thumb | [[File:ChiefSparkCEA.png|thumb|300px|The Chief and 343 Guilty Spark meet for the first time.]] | ||
''John-117 suddenly finds himself enveloped in [[Teleportation grid|a bright gold light]], and then appears on top of one of the legs of the tower. The blue object hovers in front of him. The Chief instinctively points his weapon at it.'' | ''John-117 suddenly finds himself enveloped in [[Teleportation grid|a bright gold light]], and then appears on top of one of the legs of the tower. The blue object hovers in front of him. The Chief instinctively points his weapon at it.'' | ||
| Line 315: | Line 334: | ||
*'''[[343 Guilty Spark]]''': "Greetings. I am the [[Monitor]] of [[Installation 04]]. I am 343 Guilty Spark." | *'''[[343 Guilty Spark]]''': "Greetings. I am the [[Monitor]] of [[Installation 04]]. I am 343 Guilty Spark." | ||
''The Chief slowly lowers his | ''The Chief slowly lowers his assault rifle. Gunfire is still heard below, and bright beams slice through the dark swamp. The Chief and the Monitor ignore the commotion.'' | ||
*'''343 Guilty Spark''': "Someone has released the Flood. My function is to prevent it from leaving this installation. But I require your assistance. Come. This way." | *'''343 Guilty Spark''': "Someone has released the Flood. My function is to prevent it from leaving this installation. But I require your assistance. Come. This way." | ||
| Line 326: | Line 345: | ||
''Level ends.'' | ''Level ends.'' | ||
==Achievements== | |||
The following [[achievement]]s can be unlocked on 343 Guilty Spark across the [[Xbox 360]] and ''[[Halo: The Master Chief Collection]]'' editions of ''Halo: Combat Evolved Anniversary''. The original [[Xbox]] and [[Halo: Combat Evolved (PC port)|PC]] and [[Halo: Combat Evolved for Macintosh|Macintosh]] releases of ''Halo: Combat Evolved'' did not contain achievement unlocks. | |||
{| class="wikitable" | |||
|- | |||
! scope="col" style="width:135px;text-align:center;" |'''''Halo: Combat Evolved Anniversary'' (Xbox 360)''' | |||
! scope="col" style="width:135px;text-align:center;" |'''''Halo: MCC'' (Xbox One, Xbox Series X|S)''' | |||
! scope="col" style="width:135px;text-align:center;" |'''''Halo: MCC'' (Steam)''' | |||
! scope="col" style="width:175px;height:20px;text-align:center;" |'''Title''' | |||
! scope="col" style="width:350px;height:20px;text-align:center;" |'''Unlock requirement''' | |||
! scope="col" style="width:200px;height:20px;text-align:center;" |'''Games''' | |||
|- | |||
|[[File:HCEA Achievement 343 Guilty Spark.png|center|64px]] | |||
|[[File:HTMCC HCEA Achievement 343GuiltySpark.png|center|114px]] | |||
|[[File:HTMCC HCEA Achievement Steam 343GS.jpg|center|64px]] | |||
|<center>'''[[343 Guilty Spark (achievement)|343 Guilty Spark]]'''</center> | |||
|Complete 343 Guilty Spark on any difficulty. | |||
|<center>''[[Halo: Combat Evolved Anniversary]]''<br/>''[[Halo: The Master Chief Collection]]''</center> | |||
|- | |||
|[[File:ACH28.png|center|64px]] | |||
|<center>N/A</center> | |||
|<center>N/A</center> | |||
|<center>'''[[This One's for Jenkins!]]'''</center> | |||
|Kill 50 Flood Combat Forms on the level 343 Guilty Spark on Heroic difficulty or higher. | |||
|<center>''[[Halo: Combat Evolved Anniversary]]''</center> | |||
|- | |||
|[[File:ACH29.png|center|64px]] | |||
|<center>N/A</center> | |||
|<center>N/A</center> | |||
|<center>'''[[Breaking Quarantine (achievement)|Breaking Quarantine]]'''</center> | |||
|Escape the Forerunner facility on the level "343 Guilty Spark" in 21 minutes. | |||
|<center>''[[Halo: Combat Evolved Anniversary]]''</center> | |||
|- | |||
|<center>N/A</center> | |||
|[[File:HTMCC HCEA Achievement LightninginaBottle.png|center|114px]] | |||
|[[File:HTMCC HCEA Achievement Steam LightningInABottle.jpg|center|64px]] | |||
|<center>'''[[Lightning in a Bottle]]'''</center> | |||
|Beat the par time on 343 Guilty Spark. | |||
|<center>''[[Halo: The Master Chief Collection]]''</center> | |||
|- | |||
|<center>N/A</center> | |||
|[[File:HTMCC HCEA Achievement CircuitBreaker.png|center|114px]] | |||
|[[File:HTMCC HCEA Achievement Steam CircuitBreaker.jpg|center|64px]] | |||
|<center>'''[[Circuit Breaker]]'''</center> | |||
|Beat the par score on 343 Guilty Spark. | |||
|<center>''[[Halo: The Master Chief Collection]]''</center> | |||
|- | |||
|<center>N/A</center> | |||
|[[File:HTMCC HCEA Achievement BearlyContained.png|center|114px]] | |||
|[[File:HTMCC HCEA Achievement Steam BearlyContained.jpg|center|64px]] | |||
|<center>'''[[Bearly Contained]]'''</center> | |||
|Find the [[Terminal (Halo: Combat Evolved Anniversary)|Terminal]] on 343 Guilty Spark. | |||
|<center>''[[Halo: The Master Chief Collection]]''</center> | |||
|- | |||
|<center>N/A</center> | |||
|[[File:HTMCC HCEA Achievement SkulltakerRecession.png|center|114px]] | |||
|[[File:HTMCC HCEA Achievement Steam SkulltakerRecession.jpg|center|64px]] | |||
|<center>'''[[Skulltaker Halo: CE: Recession]]'''</center> | |||
|Find the [[Halo: Combat Evolved Anniversary skulls#Recession|Recession Skull]] on 343 Guilty Spark. | |||
|<center>''[[Halo: The Master Chief Collection]]''</center> | |||
|- | |||
|<center>N/A</center> | |||
|[[File:HTMCC HCEA Achievement GetMeOutofHere.png|center|114px]] | |||
|[[File:HTMCC HCEA Achievement Steam GetMeOutofHere.jpg|center|64px]] | |||
|<center>'''[[Get Me Out of Here!]]'''</center> | |||
|Ride in a Pelican for several seconds on the level 343 Guilty Spark. | |||
|<center>''[[Halo: The Master Chief Collection]]''</center> | |||
|} | |||
==Production notes== | |||
{{Main|Development of Halo: Combat Evolved}} | |||
The design of ''343 Guilty Spark'' was initially developed by [[Bungie]] designer [[Paul Bertone]], but it was eventually given to fellow designer [[Jaime Griesemer]], who also addded splattered blood decals and the barricaded rooms.{{Ref/YouTube|Id=IGN|9ndZbg8Mr-Q|IGN|Halo: Combat Evolved Devs React to Speedrun (Martin O’Donnell, Marcus Lehto)}} Artists [[Justin Hayward]],{{Ref/Reuse|IGN}} [[Michael Wu]], and Eric Arroyo were responsible for the external environment; artist [[Shi Kai Wang]] also created concept art for the exterior swamp area.{{Ref/Book|AoH|Page=82-83}} | |||
There was an idea for the Paranoid Marine earlier in the development of this level in which he will stay alive, and when the player walks a distance away from him there was going to be a loud bang. If the player comes back, he would be found dead on the floor.{{Ref/Film|Id=Commentary|[[Halo 3 Legendary Edition|''Halo 3'' Legendary Edition]], Halo: Combat Evolved developer commentary}} | |||
According to Director of Cinematics [[Joseph Staten]], the creation of the mid-level cinematic was very time-consuming, as he needed to record every character's movement separately. The music playing during the Pelican ride with Sergeant Johnson and the Marines is known as "flip music", titled [[Shreddin']], from the game ''Marathon: Durandal'', another Bungie creation rather than their previously planned licensed song which was going to be "Paint it Black" by the Rolling Stones. The pilot of the Pelican was voiced by [[Lorraine McLees]].{{Ref/Reuse|Commentary}} The dead Sangheili seen in the recording was specifically made for the cutscene due to it having its own file and model. Similarly, there is a unique Flood Pod infector used for Jenkin's recording cutscene. In the game's code, it is called a "nopop" and is specifically designed not to pop in the cutscene. | |||
The events of the level were later expanded in the novel ''[[Halo: The Flood]]'': | |||
*The Pelican, ''Victor 933'' have been only one of the many UNSC forces sent to investigate the alleged "weapons cache," thus explaining the reason for the large numbers of human [[Combat Forms]]. | |||
*John-117 took away the Crazed Marine's pistol and ordering him to calm down before returning the pistol to him. Although, the Marine never followed the orders. | |||
*After encountering the Crazed Marine, John-117 also found the Elite later seen in Jenkins' helmet recording. | |||
*The Corporal calling to Johnson and Keyes for help (voiced by [[Chris Carney]]) was identified as Corporal [[Lovik]]. | |||
*In the novel, Jenkins was the one who tried to run instead of Mendoza. | |||
*John-117's initial encounter with human combat forms had the Spartan meeting an infected Mendoza and trying to communicate with the combat form, before being forced to defend himself from the aggressive combat form. | |||
*When escaping from the facility, John-117 was noted to have been amazed to see that two to three marines were actually still present inside of the facility. | |||
Avery Johnson's escape from the facility was depicted in ''[[Breaking Quarantine]]'' from the ''[[Halo Graphic Novel]]'', while ''[[The Last Voyage of the Infinite Succor]]'' briefly depicted John-117 in the swamp during the events of this level. | |||
==Trivia== | ==Trivia== | ||
| Line 331: | Line 437: | ||
{{Main|Glitches}} | {{Main|Glitches}} | ||
*If the players play in co-op and use the [[Riding a Pelican#343 Guilty Spark|stay on Pelican]] glitch, then leave one player in the upper swamp and the other player walks along the tree trunk, then the player that is above can see the Flood up close and kill them easier. | *If the players play in co-op and use the [[Riding a Pelican#343 Guilty Spark|stay on Pelican]] glitch, then leave one player in the upper swamp and the other player walks along the tree trunk, then the player that is above can see the Flood up close and kill them easier. | ||
*When the Covenant run away from the structure early in the level, there are [[MA5B | *When the Covenant run away from the structure early in the level, there are [[MA5B assault rifle|assault rifle]] shots coming from the structure. To see this fully, use the "Stay in Pelican Trick" to get to the higher level of the swamp. Walk towards the entrance and slide down. They will see three MA5Bs floating in the air pointing at different angles firing wildly for a few seconds before disappearing. | ||
*If look closely at the dead Marine before John-117 lays him on the floor in the cutscene, one can see that the Marine will blink about two to four times despite the fact that he's supposed to be dead. | *If look closely at the dead Marine before John-117 lays him on the floor in the cutscene, one can see that the Marine will blink about two to four times despite the fact that he's supposed to be dead. | ||
*If the player pushes the Shade turret in the way of Jenkins's scripted walk path prior to entering structure beforehand, he will get stuck in the spot where the turret was placed but continue his scripted movement while the rest of the squad moves ahead of him into the structure due to the fact that the recording takes place in the exact same places that the player previously traveled. This is because the game doesn't "clear out" the room and return it to the state that it was in when Jenkins and his companions were in it. | *If the player pushes the Shade turret in the way of Jenkins's scripted walk path prior to entering structure beforehand, he will get stuck in the spot where the turret was placed but continue his scripted movement while the rest of the squad moves ahead of him into the structure due to the fact that the recording takes place in the exact same places that the player previously traveled. This is because the game doesn't "clear out" the room and return it to the state that it was in when Jenkins and his companions were in it. | ||
*It is possible to skip the entire Flood reveal and progress through the level directly from the first room after the first elevator. To do this when the player first enters the room they must drop down to the lower level and go left to the column with a light past the locked door. There the player must grenade jump and move back but stop moving just in time; this allows the player to end up in the floor above and if done correctly the player should land on the beam. The player must then move past a bit of geometry (there is a line in the floor) but taking care not to move too far towards the wall or else the player will fall back down. From here the player must crouch, quickly release crouch and jump forward, then time the release of forward and crouch again; done correctly the player will land on another beam. The player must then move straight towards the back wall (where the door that later allows the player to progress is). Finally near the wall the player needs to jump diagonally through the wall and possibly crouch, avoiding the glass window at the right but not going too far left. From here the level can be continued as normal as despite the door to get in being locked the door to the electric room and the door after are not. | |||
*It is possible to return to the room where the Paranoid Marine was after watching Jenkin's helmet recording.{{Ref/YouTube|S1fm41ouBfI&t=700s|Generalkidd|Secret Mangled Elite Bodies}} | |||
*Sometimes, if the player moves through the swamp at the end of the mission too quickly, the Marines will get stuck near the exit of the containment facility and not follow any further. | |||
===Mistakes=== | ===Mistakes=== | ||
*Sometimes, after the Master Chief has left | *Sometimes, after the Master Chief has left dropship V933's crash site, the emergency distress call will start again prematurely, causing the message to overlap on itself. | ||
* | *The door that the Flood breaks open during the helmet camera cutscene is closed before triggering that cutscene. This can be seen through a window from the room before the cutscene triggers. If the player skips the cutscene before it gets to the part where the infection forms burst out, it will still be intact. | ||
* | *The dead Marine in the recording cutscene has a boonie hat on during the cutscene, though during gameplay he doesn't. | ||
*The date on the timestamp of [[Private Jenkins]]' footage is May 27, 2552; months before the game actually takes place, which is September. This is due to the Private not calibrating his helmet cam. | *The date on the timestamp of [[Private Jenkins]]' footage is May 27, 2552; months before the game actually takes place, which is September. This is due to the Private not calibrating his helmet cam. | ||
*In Jenkins' helmet cam, the Marines exit the Pelican from at least 10 feet off the ground. | *In Jenkins' helmet cam, the Marines exit the Pelican from at least 10 feet off the ground. | ||
* | *The spoofer, which the Master Chief uses to open the door, only appears in the cutscene and not during actual gameplay. | ||
*Sometimes, Sergeant Johnson will be in the surviving second squad, even though he escaped the structure by himself.{{Ref/Comic|HGN|Story=Breaking Quarantine}} | |||
*Sometimes Sergeant Johnson will be in the surviving second squad, even though he escaped the structure by himself. | |||
*During the ending cutscene, the Monitor can be seen flying around the tower as well as talking to the Chief. Similar to the previous error, this is because the Monitor is in the level before the cutscene, but isn't removed when the cutscene starts. | *During the ending cutscene, the Monitor can be seen flying around the tower as well as talking to the Chief. Similar to the previous error, this is because the Monitor is in the level before the cutscene, but isn't removed when the cutscene starts. | ||
*A flashing red light can be seen attached to one of the trees surrounding the tower where the mission ends at. It is identical to the same red lights on the tower itself. This appears to be a placement mistake. | |||
===Easter | ===Easter eggs=== | ||
{{Main|Easter | {{Main|Easter eggs}} | ||
*There is a hidden [[Active Camouflage]] in this level. After killing the Kig-yar on the tree trunk that goes to the next part of the level, get onto the tree trunk. Once in the middle, stop and turn right. Jump down. There is a pipe leading up to a small ledge that is too high to jump to. There is a ramp. Go up it. Go as far back as one can on the ledge, and inside a bush there is an Active Camouflage power-up. | *There is a hidden [[Active Camouflage]] in this level. After killing the Kig-yar on the tree trunk that goes to the next part of the level, get onto the tree trunk. Once in the middle, stop and turn right. Jump down. There is a pipe leading up to a small ledge that is too high to jump to. There is a ramp. Go up it. Go as far back as one can on the ledge, and inside a bush there is an Active Camouflage power-up. | ||
*Private | *Private Jenkins' chip says "Do Not Eat". However it is only visible if the map is opened with HMT and look at the Bitmaps tab. | ||
* | *Sangheili Combat Forms can occasionally be seen up in the cliffs, and on top of fallen tree trunks during the initial outdoor part of the level. They cannot be killed, but body parts can be shot off, and they show as friendly on the radar. | ||
*This level makes several references to the movie ''Aliens'', such as the banter between the marines witnessed by observing Jenkin's recording. | *This level makes several references to the movie ''Aliens'', such as the banter between the marines witnessed by observing Jenkin's recording. | ||
* | *Inside the structure, in the room with the Shade turrets, throw a plasma grenade under one of the turrets. If you get it just right it will blast up to the higher level of the room. After you've gotten past the Crazed Marine and you're on the higher level, melee the turret over to the door that you just came out of and get the back leg in the door. Proceed with the level. When you come back, the door you meleed the Shade turret into will be partially opened. Give the Shade one more melee and it will start shaking. Get into the turret and turn it so that the right is facing the door, then exit it and you will be in a hallway (this might take a few tries). Go through the hallway to enter the room that contains the unique dead Sangheili model. (Warning: there are Flood Combat Forms in here). | ||
* The [[Halo: Combat Evolved Anniversary skulls#Recession skull|Recession skull]] is located to the left of the facility in a little drop behind a shade turret. When the player crosses the fallen tree, they'll see a shade turret blow up and assault rifle fire coming from the structure. Instead of going inside, immediately go to the left and keep against the back wall. You will come to a turret with a small drop behind it. Slide down the drop carefully; the skull is at the bottom. | |||
* The [[Terminal (Halo: Combat Evolved Anniversary)#The Terminals|sixth Terminal]] is found while riding the third elevator that leads out of the underground facility. The terminal is above the doorway leading into the elevator room. It can be reached by activating the elevator, then timing it correctly and jumping off onto the platform below (there is only one possible attempt due to the lack of elevator controls on the top floor). | |||
===References=== | ===References=== | ||
*In the ''[[Halo 3]]'' level, [[Floodgate]], there is [[Suicidal Marine|another]] [[Crazed Marine]], though this one won't shoot at the player. Instead, he points the [[M6G | *In the ''[[Halo 3]]'' level, [[Floodgate]], there is [[Suicidal Marine|another]] [[Crazed Marine]], though this one won't shoot at the player. Instead, he points the [[M6G magnum|pistol]] at his head occasionally, contemplating suicide. | ||
*The line "I have a bad feeling about this" is another homage to ''Aliens'' or ''Star Wars''. | *The line "I have a bad feeling about this" is another homage to ''Aliens'' or ''Star Wars''. | ||
*The swamps are covered by some kind of glowing plants. Similar plants may be seen in ''[[High Charity]]'' in ''[[Halo 2]]''. | *The swamps are covered by some kind of glowing plants. Similar plants may be seen in ''[[High Charity]]'' in ''[[Halo 2]]''. | ||
===Miscellaneous=== | ===Miscellaneous=== | ||
[[File:MarinePicture.jpg|thumb|150px|Mendoza standing in the upper area of the swamp.]] | |||
* | *Mendoza can be found as a [[Hidden Marine]] in the upper area of the swamp if the player prevents the scripted exit from the Pelican by continuously throwing grenades out of the Pelican. | ||
*This is one of three levels in the entire Halo trilogy where Needler ammunition magazines can be seen and used, the others being the ''Halo 2'' [[multiplayer]] map ''[[Uplift]]'', and the level ''[[Quarantine Zone | *This is one of three levels in the entire Halo trilogy where Needler ammunition magazines can be seen and used, the others being the ''Halo 2'' [[multiplayer]] map ''[[Uplift]]'', and the level ''[[Quarantine Zone]]''. | ||
*At the start of the level, the [[Flood]] that run into the mist at the big tree and the hill will appear as yellow blips, indicating that they are allies. This may be an error by the motion sensor, as later on in the game, they become enemies. Another possible explanation is that the Friend-Or-Foe tags that are still embedded inside the [[Flood]] forms, which could possibly be mutated [[Marines]], however on closer inspection, all of the [[Flood]] forms encountered are [[Elite]] [[Combat Forms]]. This adds to the mystery and tension of the setting, creating an atmosphere of fear in the player, as well as a foreshadowing of things to come. Of course, it could also have been made that way so they would not attack the player. | |||
*During the first chapter of the level, corpses will spawn in the swamp when the player is at some point of the inside of the installation. Walk back outside before the Private Jenkins helmet cam cutscene and bodies of Marines will be scattered through the lower level of the swamp. If one can make it to the upper level of the swamp (around Mendoza and such), one will find corpses of Covenant and Human Flood Combat Forms. | |||
*At the start of the level, the [[Flood]] that run into the mist at the big tree and the hill will appear as yellow blips, indicating that they are allies. This may be an error by the motion sensor, as later on in the game, they become enemies. Another possible explanation is that the Friend-Or-Foe tags that are still embedded inside the [[Flood]] forms, which could possibly be mutated [[Marines]], however on closer inspection, all of the [[Flood]] forms encountered are [[Elite]] [[Combat Forms]]. This adds to the mystery and tension of the setting, creating an atmosphere of fear in the player. Of course, it could also have been made that way so they would not attack the player. | |||
* | |||
*If players examine the floor to the right of the unlocked containment door, the player can find the neural chip that the Master Chief tossed aside after the "last recording" cutscene. However, it will disappear as if it was a particle over a short period of time. | *If players examine the floor to the right of the unlocked containment door, the player can find the neural chip that the Master Chief tossed aside after the "last recording" cutscene. However, it will disappear as if it was a particle over a short period of time. | ||
*If the player doesn't enter the installation in this level and choose to linger in the swamps, they can hear in the background Flood gurgles and howls. | |||
*This level is one of the few rare campaign levels with red team and blue team [[List of Forerunner Symbols|symbols]]. They can be found near the first Flood encounter area and at any similar areas in the level. | |||
*If the player doesn't enter the installation in this level and choose to linger in the swamps, | *If the player returns to the elevator they entered the structure after meeting the Flood, looking up to where the elevator is, the player can clearly observe that it is on fire and damaged. Activating it will result in debris of it falling down to the shaft, and the Halo soundtrack [[Lament for Pvt. Jenkins]] will play again. | ||
*This level is one of the few rare | *It is possible to save the marines at the facility's bottom level from being killed. However, they will not follow the player any further. Instead, they will run in circles, occasionally dropping to one knee for a moment, and repeat the phrases: "I'm not sticking around to get killed.", "I'm gone, man!", "I'm out of here!", "You can't stop them!", "Forget this!", "Later, dude." and "This is suicide, man!" These lines are said by the Crewmen on {{UNSCShip|Pillar of Autumn}}. On a rare occasion, the surviving Marines will follow the player into the next room, but immediately retreat following a brief moment. | ||
*This is the final level of ''Halo: Combat Evolved'' in which Marines are seen alive (with the exception of the non-canon Legendary ending on [[The Maw]] featuring [[Avery Junior Johnson|Johnson]]). | |||
*If the player returns to the elevator | |||
*This is the final level of ''Halo: Combat Evolved'' in which Marines are seen alive (with the exception of the non-canon Legendary ending on [[The Maw]] featuring [[Avery Junior Johnson|Johnson | |||
*The swamp area in the end of the level was later re-used for the multiplayer map ''[[Backwash]]'' in ''Halo 2''. | *The swamp area in the end of the level was later re-used for the multiplayer map ''[[Backwash]]'' in ''Halo 2''. | ||
*Playing the level with the [[Halo: Combat Evolved Anniversary | *Playing the level with the [[Halo: Combat Evolved Anniversary skulls#Grunt Funeral skull|Grunt Funeral Skull]] active in ''Halo Anniversary'' causes the Grunt corpses to detonate immediately after they spawn. This results in the player hearing explosions as they proceed further into the complex. | ||
*This, and the subsequent level ''[[The Library]]'', are the only levels where the player will not encounter any Covenant Elites. | |||
==Gallery== | ==Gallery== | ||
===Halo: Combat Evolved=== | ===''Halo: Combat Evolved''=== | ||
<gallery> | <gallery> | ||
File:Fleeing.jpg|[[Kig- | File:HCE Menu 06 343 Guilty Spark.png|Preview of the level in ''Halo: Combat Evolved'' menu. | ||
File:Fleeing.jpg|[[Kig-Yar]] and [[Unggoy]] fleeing from [[the Flood]]. | |||
File:Swamps.jpg|[[John-117]] standing in the swamps of [[Installation 04]]. | File:Swamps.jpg|[[John-117]] standing in the swamps of [[Installation 04]]. | ||
File:Crazed Marine.jpg|John-117 being attacked by the [[Paranoid Marine]]. | File:Crazed Marine.jpg|John-117 being attacked by the [[Paranoid Marine]]. | ||
File:Jackal blooshed.png|A corridor of the facility, drenched with Unggoy and Kig-Yar blood. | File:Jackal blooshed.png|A corridor of the facility, drenched with Unggoy and Kig-Yar blood. | ||
File:HCE Marines Attacked by Flood.png|Marines being attacked by [[Pod infector|Flood infection forms]]. | |||
File:Flood attack.jpg|John-117 being attacked by [[Flood combat form]]s. | File:Flood attack.jpg|John-117 being attacked by [[Flood combat form]]s. | ||
</gallery> | </gallery> | ||
===Halo: Combat Evolved Anniversary=== | |||
===''Halo: Combat Evolved Anniversary''=== | |||
<gallery> | <gallery> | ||
File:HCEA-Concept-Chief-Flood.jpg|Concept art of the level for ''[[Halo: Combat Evolved Anniversary]]''. | File:HCEA-Concept-Chief-Flood.jpg|Concept art of the level for ''[[Halo: Combat Evolved Anniversary]]''. | ||
File:HCEA-pavel-belov-343gs-concept.jpg|Concept art of the containment facility's interior. | |||
File:Anniversary 343GS.png|The swamps of Installation 04. | File:Anniversary 343GS.png|The swamps of Installation 04. | ||
File:343Anniversary.png|The swamps seen from the player's view. | File:343Anniversary.png|The swamps seen from the player's view. | ||
| Line 406: | Line 508: | ||
==Sources== | ==Sources== | ||
{{Ref/Sources}} | |||
{{Succession box | before = ''[[Assault on the Control Room]]'' <br />| title = [[Halo: Combat Evolved#Campaign|''Halo'' Campaign Missions]] | years = '''''343 Guilty Spark''''' |after = ''[[The Library]]''}} | {{Succession box | before = ''[[Assault on the Control Room]]'' <br />| title = [[Halo: Combat Evolved#Campaign|''Halo CE'' Campaign Missions]] | years = '''''343 Guilty Spark''''' |after = ''[[The Library]]''}} | ||
{{Levels|H1}} | {{Levels|H1}} | ||
Latest revision as of 01:51, March 13, 2024
|
Prev: |
|
|
Next: |
|
| 343 Guilty Spark | |
|---|---|

| |
|
Game: |
|
|
Map file name (?): |
|
|
Player: |
|
|
Date: |
|
|
Location: |
On the surface of Installation 04 |
|
Objective(s): |
|
|
Par Time: |
00:15:00 (Master Chief Collection-only) |
|
Par Score: |
17,000 (Master Chief Collection-only) |
 |
Halopedia has a walkthrough guide for this level; see 343 Guilty Spark (level)/Walkthrough. |
| “ | Creep through a swamp to meet the only enemy the Covenant fear. | ” |
343 Guilty Spark is the sixth campaign level in Halo: Combat Evolved.
In the swamps near a Flood containment facility on the surface of Installation 04, John-117 is dropped from Echo 419 to search for Captain Jacob Keyes who has been out of contact for over 12 hours. Soon, the Master Chief stumbles upon a structure and ventures within it, only to find out that the Marines accompanying the Captain have been slaughtered by an unknown force. After realizing the fate of the Marines, John fights his way out to the swamp and encounters a questionable ally.
Transcript[edit]
Well Enough Alone[edit]

{Original Cutscene} {Anniversary Cutscene}
View flies over a group of Kig-Yar and Unggoy running through a swamp, panicky and obviously in retreat. As it pans over them, the outline of a Pelican dropship can be seen through the fog and rain, which further materializes as the view draws closer.
- Flight Captain Carol Rawley (COM): "The last transmission from the Captain's dropship was from this area. That was over twelve hours ago."
NOTE: In the Anniversary subtitles, Rawley adds, "...and we've been unable to reestablish contact with the Captain or his team."
{Gameplay}
- Rawley (COM): "When you locate Captain Keyes, radio in, and I'll come pick you up."
In certain parts of the level, the player can hear a radio transmission coming from a crashed human dropship and a Covenant communications terminal. As it repeats, static pervades the transmission, and the signal fades in and out of clarity.
- Dropship Victor 933's Pilot (Recording): "Dropship Victor 933-(static)-Pillar of Autumn-(static)-need assistance. We are under att-(static)-attack by some new kind of hostile-(static)-isn't Covenant. (Static) Captain Keyes has been captured by hostiles. (static) -dug in at a large structure in a swamp-(static)-We need to pull out. Please-(static)-I will set this message to repeat at-(static)-regular intervals. Dropship Victor 933, clear."
John-117 quickly finds the crashed dropship sending the message. There are weapons and supplies piled nearby, but no signs of life. An explosion in the distance throws the bodies of an Unggoy and a Kig-Yar through the air. He heads off to investigate and finds a crashed Covenant Spirit.
The Chief also encounters a small group of Unggoy and Kig-Yar, which he quickly eliminates, before crossing a log bridge. As he moves across the bridge, he sees several shadowy figures running around on the top of the cliff to the right. Also, his motion tracker shows seemingly friendly units in the swamp not too far from his location, but they suddenly disappear off radar.
When he reaches the other side, he hears assault rifle fire nearby. He investigates and sees a mob of Unggoy and Kig-Yar fleeing from a large entrance. A frag grenade explosion throws a Shade turret through the air. The fleeing Covenant regroup nearby and attack him out of fear.
John-117 kills the Covenant and hurries to the entrance, but finds no one there. A lift arrives for him. He takes the lift down into the depths of the structure.
John-117 passes through several large rooms and many smaller ones inside the structure, filled with Unggoy, Kig-Yar, empty Shade turrets, discarded weapons, and dead bodies - both Marine and Covenant. Curiously there is no sign of any Sangheili, alive or dead. In some rooms, Kig-Yar and Unggoy gather at the doorways as if expecting an attack. In one room, the Chief discovers a strange green-yellow substance falling from the ceiling.

As the Chief comes into an area blasted with gunfire and scorch marks, there is the sound of shattering glass. A lone Marine sits leaning against a wall, M6D magnum pointed at him. The Marine shoots at the Spartan if the Chief comes too close, while screaming at the top of his lungs the following phrases. He also fiddles around with his pistol a lot, checking to see if the magazine is full.
- "Stay back! Stay back, you're not turning me into one of those things! I'll blow your brains out! Get away from me!"
- "Gaaaaahh! Aaaaaahh! Don't touch me, you freaks! I won't be like you, I'll die first! Find your own hiding place, the monsters are everywhere!"
- "Play dead! That's what I did...played dead. They took the live ones... Oh God, I can still hear them!"
- (sobbing) "Monsters... Ahhhhhh! Ahhhhaaahhh..."
- "Just leave me alone!"
- "Sarge? Mendoza? Bisenti? Oh God...the things took them. Away, away, away, they went away... (mumbles and cries) They're gone! Get it? Gone!"
- "They won't get me! Oh God... Oh God, I don't want to be like them. Please, please no, nooo..."
John-117 leaves him, and makes his way into the room, which is covered in dead Covenant bodies, blood, bullet holes and plasma scoring. Some areas of the floor are blackened with blasts from explosions. In some areas, small flecks of a greenish substance are found on the floor. The Chief finds a partially shattered walkway and ascends to the second floor. An assault rifle lies on the ground, pointing like an arrow towards the entrance of a room marked with ominous red Forerunner glyphs. The door appears to have been forced open. The Chief goes in, passes a dead Marine, and walks down a ramp.
The Chief comes down one of two ramps on either side of a doorway, which has been recently been forced open by a UNSC spoofer.
{Original Cutscene} {Anniversary Cutscene}

John-117 approaches the door cautiously and listens for any movement inside. Just as he is about to type a command into the spoofer, there is a noise behind him. He turns around, gun ready to shoot, but sees nothing. After a moment, he turns back to the door, places his gun on his shoulder and opens the door. When it opens, the body of a Marine falls into his arms. He advances a few paces, places the body on the floor gently while making sure nobody follows him through. He sweeps his assault rifle about the room.
The floor is covered in human blood. Discarded UNSC weapons litter the floor. John-117 also notices a helmet lying on the floor, and, crouching, moves swiftly towards it. Once there, he surveys the room one more time, places his rifle on the floor, and picks up the helmet. The name "JENKINS" is stamped across it. There is a large, jagged hole punched through the top of it. The Master Chief shakes his head. He then examines the helmet more closely and notices that the helmet recorder, near the Heads-up display, is still intact. He retrieves the M4 field disk and inserts it into a socket in his helmet.
> OPEN RECORD VIEW [2552.5.27.5:52:56 L]
> Pvt. Jenkins, Wallace A.
> PLAY >

The view switches to a night vision-enabled recording. Jenkins looks around the inside of a Pelican. There are several other Marines seated in the dropship with him. Flip music, Johnson's favorite genre, blares over the cabin speakers.
- Private Manuel Mendoza: "Why do we always have to listen to this old stuff, Sarge?"
- Staff Sergeant Avery Junior Johnson: "Watch your mouth, son. This "stuff" is your history. It should remind you grunts what we're fightin' to protect."
- Mendoza: "Hey... if the Covenant wanna wipe out this particular part of my history, that's fine by me."
- Private Bisenti: "Yeah... better it than us."
- Johnson: "You ask 'em real nice next time you see 'em, Bisenti. I'm sure they'll be happy to oblige."
- Pelican dropship pilot (COM): "LZ looks clear! I'm bringing us down!"
The Pelican descends to the ground.
- Johnson: "Go, go, go!"
Fade to black.
> FFW >>
> PLAY >
The Squad advances through the swamp towards the same structure the Chief is in.
- Johnson: "Stay close, Jenkins!"
They reach the entrance and sweep their weapons across it, wary.
- Johnson: "Mendoza! Move it up!"
Mendoza advances in a crouch, gun at the ready.
- Johnson: (to Jenkins) "Wait here for the Captain and his squad, then get your ass inside."
Jenkins look behind the squad.
- Private Wallace A. Jenkins: "Sir!"
- Johnson: "Okay, let's move!"
The fireteam heads into the structure.
Fade to black.
> FFW >>
> PLAY >

Inside the room where John-117 encountered the Paranoid Marine, the squad stands around a Sangheili carcass. Its chest is torn wide open. Private Mendoza is examining a similar corpse on the left hand side of the screen.
- Private Kappus: "--which is weird, right? I mean...look at it."
Bisenti prods the Sangheili with his foot.
- Private Kappus: "Something...scrambled the insides."
NOTE: In the Anniversary subtitles, Kappus says, "Something tore open its chest and scrambled the insides."
- Johnson: "What's that? Plasma scoring?"
- Kappus: "Yeah... I dunno. Maybe there was an accident. You know, friendly fire or something?"
Captain Keyes approaches the squad.
- Captain Jacob Keyes: "What do we have here, Sergeant?"
- Johnson: "Looks like a Covenant patrol. Badass Elite units, all KIA."
Keyes looks down at the dead Sangheili.
- Keyes: "Real pretty... Friend of yours?"
- Kappus: "Nah, we just met."
Fade to black.
> FFW >>
> PLAY >
The squad, along with Captain Keyes and his own squad, stand outside a locked door - the one the Chief has just come through.
- Keyes: "Right. Well, let's get this door open."
- Kappus: "I'll try, sir... But it looks like these Covenant worked pretty hard to lock it down."
- Keyes: "Just do it, son!"
- Kappus: "Yes, sir."
Kappus removes a spoofer from his pocket and sticks it to the door. He punches a few keys, and the door opens. He waves the squad through. Bisenti takes point through the door, Jenkins close behind him, and the rest of the squad fans out around him. An odd rumbling sound is heard.
- Mendoza: "I've got a bad feeling about this..."
- Johnson: "Boy, you always got a bad feelin' about something-"
- Keyes: "What's going on, soldier?"
- Lovik (COM): (panicked) "We've got contacts - lots of 'em - but...they're not Covenant... They're just tearing through us - what the?! Oh, nooooo...!"
The same hissing noises can be heard in the background.
- Johnson: "Corporal? Do you copy, over?"
No response is given.
- Johnson: "Mendoza, get your ass back up to Second Squad's position, and find out what the hell is goin' on."
- Mendoza: "But sir-"
- Johnson: "I don't have time for your lip, soldier! I gave you an order!"
The same noise that John-117 heard before entering the room is heard.
- Kappus: "Sarge! Listen!"
The odd hissing noise grows louder and louder. Everyone scans the room, trying to find the source of the strange sounds.
- Jenkins: "What is that?"
- Johnson: "Where's that coming from, Mendoza?"
- Mendoza: "Everywhere... I don't - there! (Spanish) ¡Mira!" (Look!)
Mendoza points to a nearby door, which has just exploded outwards. Small squid-like creatures swarm from it.
- Private Riley: "Ahh...augh! Get it out! Get it out- augh!"
Riley lies on the ground, one of the Pod infectors attached to his chest. Bisenti tries to pull it off him.
- Bisenti: "Hold still, hold still!"
Bisenti pulls the creature off of Riley, who goes limp. Bisenti struggles with the creature, which is now trying to infect him.

- Johnson: "Let 'em have it!"
The Marines and Captain Keyes open fire, to little effect. Pod infectors swarm them with overwhelming numbers.
- Keyes: "Sergeant, we're surrounded!"
- Johnson: "God dammit, Jenkins! Fire your weapon!"
- Mendoza: "There are too many, Sarge!"
- Johnson: "Don't even think about it, Marine!"
As the chaotic firefight continues, Mendoza dashes for the exit, abandoning his fireteam.
- Mendoza: "Yo, this is loco!"
- Keyes: "Get back here, Marine! That's an order!"
The Marine squad is overtaken, still firing, while their blood sprays as Pod infectors continue to crawl onto them. Another group of infectors drop from the ceiling, right between Johnson, Keyes and Jenkins.
- Johnson: "Jenkins!"
Several infectors attack Jenkins, blocking out his helmet cam. The screen cuts to black.
> UNEXPECTED HALT X [WND/INCAP/KIA? Ref.a4 3d.3]
> END RECORD VIEW [2552.5.27.6:39:23 L]
John-117 removes the chip from his helmet, shakes his head, and tosses the chip to the ground. The noises begin again. He readies his assault rifle.
The Flood[edit]
{Gameplay}
The door John-117 came through is now locked. Three doors holding dozens of Pod infectors break open one at a time, their inhabitants attacking him.
The entrance breaks open. Massive amounts of infectors skitter inside, followed by unarmed Sangheili combat forms.
John-117 escapes the facility, encountering Flood forms and some Covenant infantry struggling to survive.

John-117 tries to take the elevator he entered with, but while he waits for it to come down, it suddenly falls down and crashes down to the bottom of the facility.
After some fighting, John-117 arrives at another elevator, but it goes deeper underground and Unggoy blood is seen painted on the elevator's shaft. At the bottom of the shaft, he's attacked by armed combat forms - both infected Sangheili and humans. This detour forces him to fight his way back up.
John-117 eventually sees two (three on Easy/Normal difficulty) Marines armed with shotguns and assault rifles fighting the Flood.
Although their weapons give them a distinct advantage, a single Pod infector or a single combat form attack can kill them.
If they survive, they hold their position inside the room, saying the following in random order:
- "This is suicide (man)!"
- "I'm gone, man!"
- "I'm not sticking around to get killed!"
- "We/I can't stop them!"
- "Forget this!"
- "Later, dude!"
- "I've had enough of this crap!"
- "I'm outta here!"
John-117 reaches the final elevator and rises to an exit from the structure.
- Rawley (COM): "This is Echo 419. Chief, is that you? I lost your signal when you disappeared inside the structure. What's going on down there? I'm tracking movement all over the place!"
John-117 reaches the top where a trapped group of 10 Marines are holding out.
It is obvious they used a lot of ammo to escape, and it is all stacked in a pile. Most Marines hold shotguns and assault rifles, one or two have plasma rifles.

- Chips Dubbo: "Sir! Thank God you're here. We've been lost out here for hours. After we lost contact with the rest of the mission, we, we headed for the RV point, and then these-these....these things...they ambushed us. We've gotta get out of here!"
- Flight Captain Rawley (COM): "There's a large tower a few hundred meters from your current position. Find a way above the fog and foliage canopy and I can move in and pick you up."
The Marine squad eagerly follows John-117 outside, where the Flood close in from all sides. Some Marines are attacked by Pod infectors, and their allies are forced to shoot them.
As John-117 comes near the tower Rawley was speaking of, an odd blue object and a flotilla of floating robotic automatons descend from the mist. The robots begin to slice away at any nearby Flood with built-in energy beams, avoiding the Marines. After a few seconds of fighting around the base of the tower, the screen fades to white.
343 Guilty Spark[edit]
{Original Cutscene} {Anniversary Cutscene}

John-117 suddenly finds himself enveloped in a bright gold light, and then appears on top of one of the legs of the tower. The blue object hovers in front of him. The Chief instinctively points his weapon at it.
- 343 Guilty Spark: "Greetings. I am the Monitor of Installation 04. I am 343 Guilty Spark."
The Chief slowly lowers his assault rifle. Gunfire is still heard below, and bright beams slice through the dark swamp. The Chief and the Monitor ignore the commotion.
- 343 Guilty Spark: "Someone has released the Flood. My function is to prevent it from leaving this installation. But I require your assistance. Come. This way."
John-117 and the Monitor vanish in another series of gold flashes.
- Rawley (COM): "Chief, I've lost your signal! Where'd you go? Chief? Chief!"
Fades to black.
Level ends.
Achievements[edit]
The following achievements can be unlocked on 343 Guilty Spark across the Xbox 360 and Halo: The Master Chief Collection editions of Halo: Combat Evolved Anniversary. The original Xbox and PC and Macintosh releases of Halo: Combat Evolved did not contain achievement unlocks.
| Halo: Combat Evolved Anniversary (Xbox 360) | Halo: MCC (Xbox One, Xbox Series X|S) | Halo: MCC (Steam) | Title | Unlock requirement | Games |
|---|---|---|---|---|---|
 |
 |
 |
Complete 343 Guilty Spark on any difficulty. | Halo: The Master Chief Collection | |
 |
Kill 50 Flood Combat Forms on the level 343 Guilty Spark on Heroic difficulty or higher. | ||||
 |
Escape the Forerunner facility on the level "343 Guilty Spark" in 21 minutes. | ||||
 |
 |
Beat the par time on 343 Guilty Spark. | |||
 |
 |
Beat the par score on 343 Guilty Spark. | |||
 |
 |
Find the Terminal on 343 Guilty Spark. | |||
 |
 |
Find the Recession Skull on 343 Guilty Spark. | |||
 |
 |
Ride in a Pelican for several seconds on the level 343 Guilty Spark. |
Production notes[edit]
- Main article: Development of Halo: Combat Evolved
The design of 343 Guilty Spark was initially developed by Bungie designer Paul Bertone, but it was eventually given to fellow designer Jaime Griesemer, who also addded splattered blood decals and the barricaded rooms.[2] Artists Justin Hayward,[2] Michael Wu, and Eric Arroyo were responsible for the external environment; artist Shi Kai Wang also created concept art for the exterior swamp area.[3]
There was an idea for the Paranoid Marine earlier in the development of this level in which he will stay alive, and when the player walks a distance away from him there was going to be a loud bang. If the player comes back, he would be found dead on the floor.[4]
According to Director of Cinematics Joseph Staten, the creation of the mid-level cinematic was very time-consuming, as he needed to record every character's movement separately. The music playing during the Pelican ride with Sergeant Johnson and the Marines is known as "flip music", titled Shreddin', from the game Marathon: Durandal, another Bungie creation rather than their previously planned licensed song which was going to be "Paint it Black" by the Rolling Stones. The pilot of the Pelican was voiced by Lorraine McLees.[4] The dead Sangheili seen in the recording was specifically made for the cutscene due to it having its own file and model. Similarly, there is a unique Flood Pod infector used for Jenkin's recording cutscene. In the game's code, it is called a "nopop" and is specifically designed not to pop in the cutscene.
The events of the level were later expanded in the novel Halo: The Flood:
- The Pelican, Victor 933 have been only one of the many UNSC forces sent to investigate the alleged "weapons cache," thus explaining the reason for the large numbers of human Combat Forms.
- John-117 took away the Crazed Marine's pistol and ordering him to calm down before returning the pistol to him. Although, the Marine never followed the orders.
- After encountering the Crazed Marine, John-117 also found the Elite later seen in Jenkins' helmet recording.
- The Corporal calling to Johnson and Keyes for help (voiced by Chris Carney) was identified as Corporal Lovik.
- In the novel, Jenkins was the one who tried to run instead of Mendoza.
- John-117's initial encounter with human combat forms had the Spartan meeting an infected Mendoza and trying to communicate with the combat form, before being forced to defend himself from the aggressive combat form.
- When escaping from the facility, John-117 was noted to have been amazed to see that two to three marines were actually still present inside of the facility.
Avery Johnson's escape from the facility was depicted in Breaking Quarantine from the Halo Graphic Novel, while The Last Voyage of the Infinite Succor briefly depicted John-117 in the swamp during the events of this level.
Trivia[edit]
Glitches[edit]
- Main article: Glitches
- If the players play in co-op and use the stay on Pelican glitch, then leave one player in the upper swamp and the other player walks along the tree trunk, then the player that is above can see the Flood up close and kill them easier.
- When the Covenant run away from the structure early in the level, there are assault rifle shots coming from the structure. To see this fully, use the "Stay in Pelican Trick" to get to the higher level of the swamp. Walk towards the entrance and slide down. They will see three MA5Bs floating in the air pointing at different angles firing wildly for a few seconds before disappearing.
- If look closely at the dead Marine before John-117 lays him on the floor in the cutscene, one can see that the Marine will blink about two to four times despite the fact that he's supposed to be dead.
- If the player pushes the Shade turret in the way of Jenkins's scripted walk path prior to entering structure beforehand, he will get stuck in the spot where the turret was placed but continue his scripted movement while the rest of the squad moves ahead of him into the structure due to the fact that the recording takes place in the exact same places that the player previously traveled. This is because the game doesn't "clear out" the room and return it to the state that it was in when Jenkins and his companions were in it.
- It is possible to skip the entire Flood reveal and progress through the level directly from the first room after the first elevator. To do this when the player first enters the room they must drop down to the lower level and go left to the column with a light past the locked door. There the player must grenade jump and move back but stop moving just in time; this allows the player to end up in the floor above and if done correctly the player should land on the beam. The player must then move past a bit of geometry (there is a line in the floor) but taking care not to move too far towards the wall or else the player will fall back down. From here the player must crouch, quickly release crouch and jump forward, then time the release of forward and crouch again; done correctly the player will land on another beam. The player must then move straight towards the back wall (where the door that later allows the player to progress is). Finally near the wall the player needs to jump diagonally through the wall and possibly crouch, avoiding the glass window at the right but not going too far left. From here the level can be continued as normal as despite the door to get in being locked the door to the electric room and the door after are not.
- It is possible to return to the room where the Paranoid Marine was after watching Jenkin's helmet recording.[5]
- Sometimes, if the player moves through the swamp at the end of the mission too quickly, the Marines will get stuck near the exit of the containment facility and not follow any further.
Mistakes[edit]
- Sometimes, after the Master Chief has left dropship V933's crash site, the emergency distress call will start again prematurely, causing the message to overlap on itself.
- The door that the Flood breaks open during the helmet camera cutscene is closed before triggering that cutscene. This can be seen through a window from the room before the cutscene triggers. If the player skips the cutscene before it gets to the part where the infection forms burst out, it will still be intact.
- The dead Marine in the recording cutscene has a boonie hat on during the cutscene, though during gameplay he doesn't.
- The date on the timestamp of Private Jenkins' footage is May 27, 2552; months before the game actually takes place, which is September. This is due to the Private not calibrating his helmet cam.
- In Jenkins' helmet cam, the Marines exit the Pelican from at least 10 feet off the ground.
- The spoofer, which the Master Chief uses to open the door, only appears in the cutscene and not during actual gameplay.
- Sometimes, Sergeant Johnson will be in the surviving second squad, even though he escaped the structure by himself.[6]
- During the ending cutscene, the Monitor can be seen flying around the tower as well as talking to the Chief. Similar to the previous error, this is because the Monitor is in the level before the cutscene, but isn't removed when the cutscene starts.
- A flashing red light can be seen attached to one of the trees surrounding the tower where the mission ends at. It is identical to the same red lights on the tower itself. This appears to be a placement mistake.
Easter eggs[edit]
- Main article: Easter eggs
- There is a hidden Active Camouflage in this level. After killing the Kig-yar on the tree trunk that goes to the next part of the level, get onto the tree trunk. Once in the middle, stop and turn right. Jump down. There is a pipe leading up to a small ledge that is too high to jump to. There is a ramp. Go up it. Go as far back as one can on the ledge, and inside a bush there is an Active Camouflage power-up.
- Private Jenkins' chip says "Do Not Eat". However it is only visible if the map is opened with HMT and look at the Bitmaps tab.
- Sangheili Combat Forms can occasionally be seen up in the cliffs, and on top of fallen tree trunks during the initial outdoor part of the level. They cannot be killed, but body parts can be shot off, and they show as friendly on the radar.
- This level makes several references to the movie Aliens, such as the banter between the marines witnessed by observing Jenkin's recording.
- Inside the structure, in the room with the Shade turrets, throw a plasma grenade under one of the turrets. If you get it just right it will blast up to the higher level of the room. After you've gotten past the Crazed Marine and you're on the higher level, melee the turret over to the door that you just came out of and get the back leg in the door. Proceed with the level. When you come back, the door you meleed the Shade turret into will be partially opened. Give the Shade one more melee and it will start shaking. Get into the turret and turn it so that the right is facing the door, then exit it and you will be in a hallway (this might take a few tries). Go through the hallway to enter the room that contains the unique dead Sangheili model. (Warning: there are Flood Combat Forms in here).
- The Recession skull is located to the left of the facility in a little drop behind a shade turret. When the player crosses the fallen tree, they'll see a shade turret blow up and assault rifle fire coming from the structure. Instead of going inside, immediately go to the left and keep against the back wall. You will come to a turret with a small drop behind it. Slide down the drop carefully; the skull is at the bottom.
- The sixth Terminal is found while riding the third elevator that leads out of the underground facility. The terminal is above the doorway leading into the elevator room. It can be reached by activating the elevator, then timing it correctly and jumping off onto the platform below (there is only one possible attempt due to the lack of elevator controls on the top floor).
References[edit]
- In the Halo 3 level, Floodgate, there is another Crazed Marine, though this one won't shoot at the player. Instead, he points the pistol at his head occasionally, contemplating suicide.
- The line "I have a bad feeling about this" is another homage to Aliens or Star Wars.
- The swamps are covered by some kind of glowing plants. Similar plants may be seen in High Charity in Halo 2.
Miscellaneous[edit]

- Mendoza can be found as a Hidden Marine in the upper area of the swamp if the player prevents the scripted exit from the Pelican by continuously throwing grenades out of the Pelican.
- This is one of three levels in the entire Halo trilogy where Needler ammunition magazines can be seen and used, the others being the Halo 2 multiplayer map Uplift, and the level Quarantine Zone.
- At the start of the level, the Flood that run into the mist at the big tree and the hill will appear as yellow blips, indicating that they are allies. This may be an error by the motion sensor, as later on in the game, they become enemies. Another possible explanation is that the Friend-Or-Foe tags that are still embedded inside the Flood forms, which could possibly be mutated Marines, however on closer inspection, all of the Flood forms encountered are Elite Combat Forms. This adds to the mystery and tension of the setting, creating an atmosphere of fear in the player, as well as a foreshadowing of things to come. Of course, it could also have been made that way so they would not attack the player.
- During the first chapter of the level, corpses will spawn in the swamp when the player is at some point of the inside of the installation. Walk back outside before the Private Jenkins helmet cam cutscene and bodies of Marines will be scattered through the lower level of the swamp. If one can make it to the upper level of the swamp (around Mendoza and such), one will find corpses of Covenant and Human Flood Combat Forms.
- If players examine the floor to the right of the unlocked containment door, the player can find the neural chip that the Master Chief tossed aside after the "last recording" cutscene. However, it will disappear as if it was a particle over a short period of time.
- If the player doesn't enter the installation in this level and choose to linger in the swamps, they can hear in the background Flood gurgles and howls.
- This level is one of the few rare campaign levels with red team and blue team symbols. They can be found near the first Flood encounter area and at any similar areas in the level.
- If the player returns to the elevator they entered the structure after meeting the Flood, looking up to where the elevator is, the player can clearly observe that it is on fire and damaged. Activating it will result in debris of it falling down to the shaft, and the Halo soundtrack Lament for Pvt. Jenkins will play again.
- It is possible to save the marines at the facility's bottom level from being killed. However, they will not follow the player any further. Instead, they will run in circles, occasionally dropping to one knee for a moment, and repeat the phrases: "I'm not sticking around to get killed.", "I'm gone, man!", "I'm out of here!", "You can't stop them!", "Forget this!", "Later, dude." and "This is suicide, man!" These lines are said by the Crewmen on UNSC Pillar of Autumn. On a rare occasion, the surviving Marines will follow the player into the next room, but immediately retreat following a brief moment.
- This is the final level of Halo: Combat Evolved in which Marines are seen alive (with the exception of the non-canon Legendary ending on The Maw featuring Johnson).
- The swamp area in the end of the level was later re-used for the multiplayer map Backwash in Halo 2.
- Playing the level with the Grunt Funeral Skull active in Halo Anniversary causes the Grunt corpses to detonate immediately after they spawn. This results in the player hearing explosions as they proceed further into the complex.
- This, and the subsequent level The Library, are the only levels where the player will not encounter any Covenant Elites.
Gallery[edit]
Halo: Combat Evolved[edit]
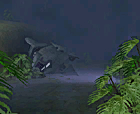
Preview of the level in Halo: Combat Evolved menu.
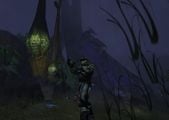
John-117 standing in the swamps of Installation 04.
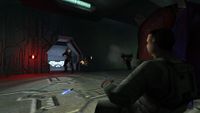
John-117 being attacked by the Paranoid Marine.

A corridor of the facility, drenched with Unggoy and Kig-Yar blood.
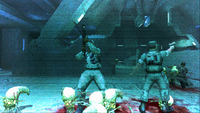
Marines being attacked by Flood infection forms.
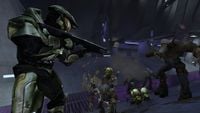
John-117 being attacked by Flood combat forms.


Halo: Combat Evolved Anniversary[edit]

Concept art of the level for Halo: Combat Evolved Anniversary.
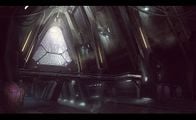
Concept art of the containment facility's interior.
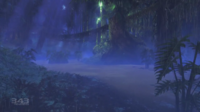
The swamps of Installation 04.
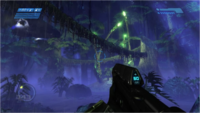
The swamps seen from the player's view.
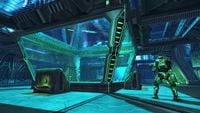
The containment facility's interior.


Sources[edit]
- ^ Halo: Combat Evolved Editing Kit, game file
HCEEK\tags\levels\c10\c10.scenario - ^ a b YouTube - IGN, Halo: Combat Evolved Devs React to Speedrun (Martin O’Donnell, Marcus Lehto)
- ^ The Art of Halo, page 82-83
- ^ a b Halo 3 Legendary Edition, Halo: Combat Evolved developer commentary
- ^ YouTube - Secret Mangled Elite Bodies, {{{VideoName}}}
- ^ Halo Graphic Novel - Breaking Quarantine
| Preceded by Assault on the Control Room |
Halo CE Campaign Missions 343 Guilty Spark |
Succeeded by The Library |
| |||||||||||||||||||||||


