New Alexandria
From Halopedia, the Halo wiki
Template:Level Infobox Template:Article Quote "New Alexandria" is the eighth level in the campaign of Halo: Reach. The level has a unique structure: the three main objectives may be assigned to the player in any order, and the minor objectives between these are randomly selected from a larger pool every time the mission is played. The mission requires the player to fly a Falcon, and the player is able to call in a new one should they lose theirs.
Upon completing this level on Normal, Heroic, or Legendary the player will unlock the "Dust and Echoes" achievement and 10 Gamerscore.
Plot
The level takes place on August 23, 2552, several hours after Exodus, in the airspace above the embattled city of New Alexandria. Noble Six meets up with the rest of Noble Team and is informed that the Covenant are jamming all communications to Command. He/she mounts a Falcon and assists Kat in destroying the jamming devices.
NOTE: All encounters in this level are randomized. The three jammers are the only consistent parts, and the order in which they need to be destroyed may change between playthroughs.
- One jammer is located at the New Alexandria Hospital. The troopers sent to destroy it are locked in a fight with the Brutes before Noble Six arrives and destroys the jammer.
- Another jammer is located at Club Errera in the Vyrant Telecom Tower. Two pairs of Mgalekgolo stop the troopers, and Noble Six must deal with them before destroying the jammer.
- A jammer is also located in a penthouse at the Sinoviet Center. Troopers assigned to destroy it were killed by Drones (save for a single survivor) and Noble Six must finish the job.
As Noble Six destroys the jammers, Covenant Battlecruisers arrive at New Alexandria and start glassing the city's outskirts.
Between destroying the jammers, Noble Six must also complete secondary objectives which revolve around assisting the UNSC forces in the city. In single player and 2-player co-op there is one task between each jammer, while 3 and 4 player co-op have two objectives simultaneously assigned to the players. These objectives include:
- Gunnery Sergeant Edward Buck requests assistance. Buck's exact task varies; he may be rescuing his men from various danger or on a classified mission. In any case, Noble Six is instructed by Kat to escort Buck’s Falcon to its destination.
- A team of troopers is under a Covenant attack and requests assistance. Kat instructs Noble Six to kill the Covenant forces in question. The targets may be Jackal infantry, Hunters, Jackal Snipers, Brutes or Banshees. A Pelican extracts the troopers after the enemies have been killed.
- Elites and Engineers are attempting to breach into the Misriah Complex from the rooftop. Kat orders Noble Six to take them out before they succeed.
- A Pelican evacuating civilians cannot take off due to Covenant Shade turrets on the nearby rooftops. Noble Six has to destroy the Shades.
- Two Fuel-Rod Cannon Shade Turrets along with numerous Brutes are preventing Pelicans from escaping on top of the oval-like building. Kat orders Noble Six to eliminate them so evacuation operations can resume.
- A mobile jammer is found in an exposed rooftop location. Noble Six must eliminate Covenant forces guarding it and take the jammer out.
After the last jammer is destroyed, Kat receives orders from Colonel Urban Holland that all personnel are to be evacuated through the ONI Headquarters building. However, a group of Shade turrets stationed around the building are preventing any evacuation craft from escaping.
After Noble Six destroys all of the turrets, he/she meets up with the rest of Noble Team at the ONI HQ. However, they receive an urgent hail from Colonel Holland, informing them that they are being redeployed to Sword Base. Just then, the Covenant begin glassing the city, and the signal is cut off. As Noble Team flees to a radiation bunker, Kat is shot through the back of the head by a Needle Rifle round fired from a Phantom overhead. Her body is dragged into the bunker by Noble Six as the doors close. Three days later on August 26, after the Covenant forces are gone, Noble Team walks outside to be picked up by a Pelican, with Kat’s dead body in Carter’s arms.
Transcript
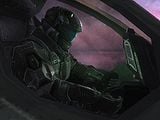
Fades in to Noble Six, alone, sitting inside the troop bay of a Pelican.
New Alexandria, Eposz
August 23, 2552, 18:57 Hours
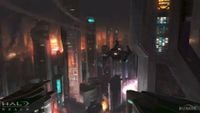
View switches to the open rear door of the Pelican. Burning skyscrapers and building lights fill the night sky. After staring out for a long time, Six stands up and holsters an M392 Designated Marksman Rifle. The Pelican slows down above a rooftop with two Falcons parked on top. Six steps out and meets Carter while the Pelican flies away.
- Commander Carter-A259: "Your report will have to wait, Lieutenant. The Covenant are jamming all comms to Command. Kat needs your help running a counter-op."
The two Spartans walk to the Falcons, with one already taking off.
- Carter-A259: "It’s good to have you back."
- SPARTAN-B312: "Sorry I came alone."
- Carter-A259: "Make him proud."
Carter turns and slowly walks away as Six stops in front of the Falcon.
{Gameplay}
Fly By Night
- Lieutenant Commander Catherine-B320 (COM): "Get your wings back on, Lieutenant. You’re flying this Falcon."
Six gets in the Falcon and lifts off. A burning skyscraper nearby collapses. The dialogue below will be spoken by Kat if Six hasn't entered the falcon yet
- Catherine-B320 (COM): "Here's the situation. Covenant have deployed multiple long ranged comm jammers at high-rises across the city. We can't hear Holland, and he can't hear us. We're totally cut off. Trooper squads have been trying to take the jammers out, but the Covies have dug in tight. When I confirm targets, I need you to hit them - hard.
The following dialogue will be spoken if Six enters the falcon right away.
- Catherine-B320 (COM): "The Covenant have deployed comm jammers in high rises across the city. When I find them, you hit them - hard.
Throughout the level, the player is assigned three jammer locations that they must go to: the New Alexandria Hospital, the Sinoviet Center, and the Vyrant Telecom Tower. There are also "emergency missions" given out after destroying the first and second jammer. The order of all major and emergency missions are randomized.
After giving details on the first objective:
- Catherine-B320 (COM): "Oh, and don't fall in love with my voice. The closer you are to the jammer, the worse our reception is going to get. Kat out."
New Alexandria Hospital
- Catherine-B320 (COM): "Stand by, Six... One of our Trooper squads went silent after the hospital got hit. I'll mark the location. Complete their mission, and take out that jammer."
Six flies to the hospital, sets down on an open landing, and goes inside where he/she finds a small group of Grunts, Jackals and Brutes, supported by an Engineer. As Six fights through them, he/she picks up radio transmissions from troopers in the next room.
- Trooper #1 (COM): "Contacts, two at ten o'clock! I'll hold them off 'til you can get to the other side!"
- Trooper #2 (COM): "Through that doorway! Move, move, move!"
Six reaches the hospital's concourse. He/she engages the Brutes cornering the troopers.
- Trooper #1: "More Brutes! Stay back, you stinking bastards!"
More and more Brutes fall to Noble Six's assault.
- Trooper #1: "I said back off, you nasty son of a bitch!"
- Trooper #2: "Go ahead and try it!"
Six finally reaches the troopers, having defeated all the Brutes.
- Trooper #1: "Thanks for the assist, Spartan. Jammer's right over here."
Six overloads the jammer and heads back to the stairs.
- Catherine-B320 (COM): "Noble Two to Noble Six: I'm showing the hospital jammer offline - nice work. Soon as you can, I need you back in your Falcon."
Suddenly, a group of Elite Rangers fly in and engage Six and the Troopers.
- Catherine-B320 (COM): "Noble Two to Noble Six: you've got incoming tangos!"
- Trooper #1: "We've got jumpers!"
- Trooper #2: "Damn! Look at 'em move!"
Six and the Troopers defeat the Elites. They then move back up to the stairs, engaging an Ultra Elite and some Skirmishers. They eventually neutralize these hostiles.
- Trooper #1/#2: "We're good here, sir/ma'am. You can head back to your bird."
Six gets back upstairs and into the Falcon. As it takes off, another skyscraper collapses while a CCS-class Battlecruiser flies overhead. After stopping above the city's outskirts, the cruiser starts to glass the area.
Sinoviet Center
- 7 Delta 19 (COM): "Mayday! Mayday! 7 Delta 19 to all UNSC forces!"
- Catherine-B320 (COM): "What's your status, 19?"
- 7 Delta 19 (COM): "We found the jammer, but we're getting hit! Request immediate assistance! Sinoviet Center is-arggh!"
- Catherine-B320 (COM): "You still with me, 19? 7-Delta 19, do you copy?"
No response.
- Catherine-B320 (COM): "Six, I'm uploading coordinates now - get to Sinoviet Center. Help those troopers if you can, but get that jammer offline either way."
Six flies the Falcon to Sinoviet Center, fending off some Banshees along the way.
- Catherine-B320 (COM): "Approaching the objective, Six. Watch for hostile fire."
Noble Six lands the Falcon on the Center's helipad and eliminates some moderate Covenant resistance.
- Catherine-B320 (COM): "Noble Two to Noble Six, I'm still getting nothing from those troopers. You may have to take care of this jammer yourself."
Six continues his/her way up, passing by a hologram of a UNSC Frigate.
- Catherine-B320 (COM): "Six, I'm accessing building schematics. There's an elevator on the North landing."
Six finds the elevator and takes it up the building. When the elevator reaches its destination, Six steps out and finds the troopers dead. No Covenant are present, however.
- Catherine-B320 (COM): "Schematics show alternate routes to either sides, Six."
If Six walks to the uppermost level, he/she can find a shell-shocked trooper cowering in a corner.
- Shell-shocked Army trooper: "Oh, God! I didn't sign up for this! Not aliens, man! That's it, I am out! Seriously, we're fighting aliens now? Innies were bad enough, now we got freakin' aliens? Not me man. I'm out! O-U-T, out! Lemme tell you, whatever you do, don't let them bite you. I hear if one of those little ones bites you, you turn into one! Imagine it, man, we're all going to turn into little methane-sucking freaks! They're going to strap us up with tanks and have us fighting on their side! Not me, man, I'm out! They're not going to get me. No way I'm turning into no squid-faced alien freak! I bet that's what those big monkey-looking Brute things are! They're us, man! They're us, turned Covie and fighting ourselves, man! Oh, God! No way, not me. No way, no way, no way, oh, God, no, no, no, no!"
Six approaches the jammer.
- Catherine-B320 (COM): "You're close to the jammer. Destroy it."
Six destroys the jammer, triggering a swarm of hidden Drones.
- Catherine-B320 (COM): "It's a trap! Get the hell out of there!"
Noble Six either kills or evades the Drones and gets back to the elevator.
- Catherine-B320 (COM): "Thermal looks clear for now, Six. Return to your Falcon and stand by for instructions."
Six takes the elevator back down to the landing platform and returns to the Falcon. Another CCS-class battlecruiser flies overhead and begins glassing the outskirts area after arriving at the region's airspace.
Vyrant Telecom Tower
- 4 Charlie 27 (COM): "4 Charlie 27 to Command: request immediate assistance!"
- Catherine-B320 (COM): "Go ahead, 27."
- 4 Charlie 27 (COM): "We're at the Vyrant Telecom tower! Got Hunters between us and the jammer!"
- Catherine-B320 (COM): "Copy, 27 - help is on the way. Noble Six, I'm sending you coordinates for the Vyrant tower. Go get those Troopers unstuck."
If this is the last jammer (applies to the other two locations as well):
- Catherine-B320 (COM): "This is the last jammer, Six. You're almost there."
Noble Six flies to the Vyrant Tower and neutralizes the Covenant on the landing platform outside. Six then lands the Falcon, gets off, and heads into the Tower itself.
Inside the tower, UNSC Troopers are fighting four Hunters in Club Errera.
- Trooper #3: "Fall back, four Delta, fall back!"
- Trooper #4: "Defensive positions! Go, we'll cover you!"
- 4 Charlie 27: "Stay down! We've just got to hold out a little longer!"
Six, with some support from the troopers, eliminates the Hunters.
- 4 Charlie 27: "Over here, Spartan. Thanks for the hand, almost out of ammo. Jammer's on the upper level."
If the player stalls:
- 4 Charlie 27: "Jammer's above you, sir."
If all the troopers are dead:
- Catherine-B320 (COM): "Scannings show the jammer is close by, above your position."
Noble Six overloads the jammer.
- Catherine-B320 (COM): "Jammer offline. Well done, Noble Six. Head back to your Falcon."
- 4 Charlie 27: "We got things under control, Lieutenant. Head on out."
Emergency Missions
Assist the Pelican
- Whiskey 039 (COM): "Whiskey 39, requesting immediate assistance!"
- Catherine-B320 (COM): "Copy, 39. Go ahead."
- Whiskey 039 (COM): "Just picked up some evacuees, but we're surrounded by long-range Shade turrets!"
- Catherine-B320 (COM): "Solid copy, 39. Lieutenant, proceed to the waypoint and eliminate those Shade turrets."
Six eliminates the Shade turrets.
- Whiskey 039 (COM): "Path looks clear, Spartan. Much obliged."
Defend Marines against Brutes
- 1 Alpha 3 (COM): "1 Alpha 3 to Command: Covies got us pinned down on a rooftop. We need help, pronto! Uploading waypoint now, over."
- Catherine-B320 (COM): "Copy, 1 Alpha 3. Noble Six, proceed to waypoint and give those troopers a hand."
Six kills the Brutes. A Pelican arrives and picks up the troopers.
- 1 Alpha 3 (COM): "We're clear. Thanks for the help, Sierra!"
Defend Marines against Hunters
- Foxtrot 21 (COM): "This is Foxtrot 21, on the DNBM Financial Tower! Anybody out there?"
- Catherine-B320 (COM): "Copy, 21. Go ahead."
- Foxtrot 21 (COM): "We got Hunters tearing us a new one!"
- Catherine-B320 (COM): "Hang on. Noble Six, uploading coordinates."
Noble Six kills the Hunters. A Pelican lands and picks up the troopers.
- Foxtrot 21 (COM): "Thanks a million, Sierra! Thought we were dead for sure."
Defend Marines against Jackals
- 7 Charlie 40 (COM): "7 Charlie 40 to HQ, we've got incoming hostiles on top of the Maines-Traiger building. Requesting immediate assistance!"
- Catherine-B320 (COM): "Copy, 40. Noble Six, you're not far from Maines-Traiger. See what you can do for those troopers."
Six eliminates the Jackal squad. A Pelican picks up the troopers.
- 7 Charlie 40 (COM): "That should do it, Spartan. You got here just in time."
Destroy the Anti-Air and Infantry
- Catherine-B320 (COM): "Noble Six, we've got an evac op being harassed by Covenant Shade turrets. Neutralize it so we can get those people out of there."
Six eliminates the Covenant detachment above a skyscraper's rooftop.
- Catherine-B320 (COM): "Evac clear. Well done, Spartan."
Destroy the Banshees
- Golf 27 (COM): "Golf 27 to HQ: we're on the Jotun building; we got Banshees all over us!"
- Catherine-B320 (COM): "Lieutenant, I'm sending you Jotun's coordinates. Neutralize those Banshees."
Six destroys the Banshees. A Pelican arrives and picks up the troopers.
- Golf 27 (COM): "Banshees down! Appreciate the hand, Spartan."
Destroy the Jammer and Infantry
- Catherine-B320 (COM): "Six, Covies brought out a mobile jammer to mess with our short-range. Sending you the waypoint; go deal with it."
Six finds and destroys the mobile jammer, along with the Covenant guarding it.
- Catherine-B320 (COM): "Good work, Six."
Escort the Falcon
- Gunnery Sergeant Edward Buck (COM): "Command: this is Gunnery Sergeant Buck with the 11th ODST, over."
- Catherine-B320 (COM): "Copy, Gunnery Sergeant. Go ahead."
- Buck (COM): "My guys got caught in a firefight in the Nomolos Tower, roof collapsed. I gotta get over there and get them out."
- Catherine-B320 (COM): "Solid copy. Noble Six will escort your Falcon to the tower."
or
- Buck (COM): "Need escort on a classified op. Send someone who knows how to fly a tight formation."
or
- Buck (COM): "Phantom's got one of my squads pinned. I need to take it out and evac my troopers."
Noble Six completes the emergency mission.
- Buck (COM): "I owe you one, Spartan... I'll see you in hell."
Kill Jackal Snipers
- Oscar 18 (COM): "Oscar 18, reporting: just took out a jammer and we're waiting for evac, but taking sniper fire!"
- Catherine-B320 (COM): "Understood, 18. Lieutenant, proceed to these coordinates; clear that LZ."
Six proceeds to eliminate the snipers. A Pelican arrives and secures the troopers.
- Oscar 18 (COM): "Thanks, Spartan - those snipers had our number."
Neutralize Elites and Engineers
- Catherine-B320 (COM): "Noble Six, we're getting reports of Elites and Engineers trying to break into the Misriah Complex. I want them taken out."
Six eliminates the strike force.
- Catherine-B320 (COM): "Way to shoot, Lieutenant."
If all troopers are killed in a mission:
- Catherine-B320 (COM): "Troopers are dead, Six... Nothing we can do."
or
- Catherine-B320 (COM): "Troopers down... Nothing we can do."
Last One Out...Turn Out the Lights
- Catherine-B320 (COM): "Noble Two to Noble Leader. All jammers are down."
- Carter-A259 (COM): "Solid copy, Noble Two. New orders: all personnel are to be evacuated from ONI HQ. Say confirm."
- Catherine-B320 (COM): "Confirm, ONI tower evacu--!"
An explosion is heard over the COM, followed by static.
- Carter-A259 (COM): "Noble Two! Noble Two, sitrep!"
- Catherine-B320 (COM): "Covies are hitting the HQ in force! They must have zeroed my signal!"
- Carter-A259 (COM): "Get that evac started!"
- Catherine-B320 (COM): "Roger that. Noble Six, get over here and cover our evac Pelicans. I need you overhead, now!"
Noble Six arrives at Olympic Tower.
- Whiskey 35 (COM): "Command, this is Whiskey 35. I've got my eyes on six long range Shade turrets in the vicinity of the ONI tower. Making life pretty tough on our evac birds!"
- Catherine-B320 (COM): "Copy, Whiskey 35. Noble Six, take out those heavy Shades."
If the player stalls:
- Whiskey 35 (COM): "Whiskey 35 to Command, we need those Shade turrets gone."
- Catherine-B320 (COM): "Copy, 35. Go, Lieutenant! Shade turrets are Priority One."
If the player further stalls:
- Whiskey 35 (COM): "Whiskey 35 to Command - we can't hold out much longer!"
- Catherine-B320 (COM): "Understood, 35. Noble Six, you have to take out those turrets!"
Six eliminates one of the anti-air Shades.
- Catherine-B320 (COM): "That's one."
Six eliminates a second Shade.
- Catherine-B320 (COM): "Another Shade turret down."
One of the Pelicans takes off from the tower.
- Catherine-B320 (COM): "Noble Six, lose those other Shade turrets so the Pelicans can get out of here."
Six eliminates the third Shade.
- Catherine-B320 (COM): "Third turret is down."
Six eliminates the fourth Shade.
- Catherine-B320 (COM): "That's the fourth Shade."
Another Pelican takes off.
- Catherine-B320 (COM): "Noble Six, you've got to neutralize the remaining Shades for our evac birds."
Six eliminates the fifth Shade.
- Catherine-B320 (COM): "Five down, one to go."
Upon the destruction of the second, fourth, and sixth Shade turrets, a Pelican will be cleared to depart. The order in which they leave depends on which turrets are eliminated.
Whiskey 35 is cleared:
- Catherine-B320 (COM): "Whiskey 35, you're clear to proceed with evac."
- Whiskey 35 (COM): "Copy, Command. Much obliged."
Whiskey 36 is cleared:
- Catherine-B320 (COM): "Whiskey 36, proceed with evac."
- Whiskey 36 (COM): "I copy, Command. Thanks."
Whiskey 37 is cleared:
- Catherine-B320 (COM): "Whiskey 37, you may proceed with evac."
- Whiskey 37 (COM): "Solid copy, Command. Appreciate the help."
After all six Shade turrets are eliminated, and all three Pelicans have departed:
- Catherine-B320 (COM): "Noble Six, you are one steely-eyed Spartan. I'm extending the landing pad now. Come home, Lieutenant."
A VTOL landing platform is extended. Six lands the Falcon on the pad.
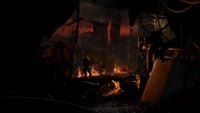
Inside the heavily damaged Olympic Tower, Noble Six joins up with the rest of Noble Team. Kat is fixing a comm unit, with her helmet on the floor. Jun looks out with a pair of binoculars. Emile sits at the side, sharpening his kukri, and Carter stands against a crashed Banshee tangled up in some wiring.
- Warrant Officer Jun-A266: "Look at this place. Used to be the crown jewel... Not anymore. (turns and notices Six) Hey, you made it."
- Warrant Officer Emile-A239: "It's a regular family reunion..."
Six looks at him, and loosens his/her hand to show Jorge’s dog tags dangling from it.
- Emile-A239: "Keep ‘em. He gave them to you. (points at himself with his kukri) I'll honor him my own way."
- Jun-A266: "Jorge always said he would never leave Reach."
Emile laughs. The rest of the squad stares at him.
- Emile-A239: "The big man was sentimental..."
- Carter-A259: "He gave his life thinking he just saved the planet. We should all be so lucky."
Carter walks toward the window, beside Jun.
- Jun-A266: "Sir, that true about Gauntlet, Red and Echo Teams assigned to civilian evac ops?"
Carter rounds on Kat, annoyed, knowing she is responsible for the leak.
- Carter-A259: "Those are senior-level communiques..."
- Catherine-B320: "I hear what I hear. Point is, why put Spartans on defensive deployments?"
- Cater-A259: "I need that link to SATCOM, Kat."
- Catherine-B320: "Chasing it, but this console has more shrapnel than transceivers... You didn’t answer my question."
- Carter-A259: "You want to know if we're losing?"
- Catherine-B320: "I know we're losing! I want to know if we've lost."
Carter looks out to the city and doesn't answer. The console suddenly beeps.
- Catherine-B320: "Colonel Holland. Hailing us! What's he doing on an open channel?"
- Carter-A259: "Let’s hear it."
- Colonel Urban Holland (COM): "--near the southwest quadrant of the city, over? Sierra Two-Five-Nine, if you are receiving, I am authorizing override of radio security protocols to link with this channel."
- Carter-A259: "How long for a secure link?"
- Catherine-B320: "I can’t guarantee secure anymore."
- Carter-A259: "Could the Covenant trace it to us?"
- Catherine-B320: "I could."
- Colonel Holland (COM): "Noble Leader, this is a Priority One hail. If you are receiving, acknowledge immediately."
Carter turns away, deliberating on whether to take the message. Kat hands Carter the communicator.
- Catherine-B320: "Keep it brief."
- Carter-A259: "Carter here... Yes, sir."
Carter walks toward the window as Jun notices something through his binoculars, and leans forward.
- Jun-A266: "We’ve got movement. Multiple Covenant vehicles vacating the area...and they’re in a hurry."
- Emile-A239: "How often do you see Covenant retreat for no reason?"
- Catherine-B320: "Radiation flare! Big! Forty million roentgens!"
- Carter-A259: "Just lost Holland. What’s going on?"
- Catherine-B320: "Atomic excitement scrambled the signal. Ninety million now!”
- Carter-A259: "Source?"
- Catherine-B320: "Airborne. Close!"
- Carter-A259: "How close?"
A massive plasma blast lights up the room as a Covenant warship opens fire on the area. The resulting shockwave shatters the windows, and the team dives or is thrown to the floor. A powerful wind howls through the room.
- Catherine-B320: "That close!"
The Spartans get on their feet, and Kat is helped up by Six and picks up her helmet. They run towards two elevators, as a CSS cruiser engaged in glassing passes over the window. Carter, Emile and Jun take one while Kat and Noble Six take the other one. Kat closes the elevator door and starts it, missing the button on the first try. The elevators rush down the building as Kat puts on her helmet.
- Catherine-B320: (To Six) "First glassing? Me too. Don’t worry, I’m on it. Our best option is a fallout bunker on Sublevel 2, ninety-six metres northeast. We get orders from Holland, sir?"
- Carter-A259 (COM): "We’re being redeployed to Sword Base."
- Jun-A266: "Sword?! Covenant own it now!"
- Carter-A259: "Which is why they want us for a torch-and-burn op. Keep Dr. Halsey's excavation data from falling into enemy hands."
Carter’s elevator stops first and the three Spartans rush out, dashing across an area with the roof destroyed.
- Catherine-B320: "If it hasn’t already."
Six and Kat rush out from their elevator as the first three approach the bunker’s entrance.
- Carter-A259: "Maybe, but according to Holland, the Covenant are still hunting for something."
Carter, Jun and Emile reach the bunker’s entrance with Six and Kat close behind.
- Catherine-B320: "Where does he get off calling a demolition op Priority One--"
Kat's sentence is cut off as a Needle Rifle round hits the back of her helmet from above. The round punches straight through the helmet and exits through her visor. Kat crumples to the floor, killed instantly. Six catches her body as she falls, takes her holstered pistol and begins to shoot at the sniper, a Sangheili Field Marshal standing in the previously unnoticed Phantom hovering above them. The others come to assist with Assault Rifles, but the Phantom flies away. Six throws away the emptied pistol and drags Kat’s body into the bunker.
- Carter-A259: "Come on! Come on! Get in!"
- Jun-A266: "Let’s go, come on!"
- Civilian: "Close the doors! Faster!"
Six rests Kat’s body on the floor. The bunker’s door closes, nudging her foot as it shuts. Fade to black.
Note: At this point, the game's subtitles show several lines of dialogue being said by civilians in the darkness, but none of them are heard in-game. They are seen as followed:
- Civilian: "What's happening? No!
- Civilian: "It's going to be alright, we're safe here. Stay calm."
- Civilian (screaming): "Here it comes!"
- Civilian: "I don't want to die! Please, let me live!"
- Civilian: "Shh, I'm here, it's OK."
The unspoken conversation ends here.
August 26, 2552 03:00 Hours
Fades in to Noble Team, led by Jun, walking out to the destroyed city. The ground is now a river of molten glass. Kat's body is cradled in Carter’s arms. Jun throws a signal flare to the ground, and waves as a Pelican slowly comes into view for extraction.
Fade to black.
Level ends.
Trivia
Mistakes
- The elevator in Sinoviet Center has walls which can be fired through. During co-op, a player in one elevator can injure a player in the other elevator.
- As 500 Röntgens of radiation over a period of five hours is fatal, receiving 90 million Röntgens of radiation, even for a relatively short period, should certainly be fatal, especially for Kat, Jun and Carter who were not wearing helmets; this is almost certainly a simple oversight. It is possible that the radiation was far enough from Noble Team that the dose was not fatal or, more likely, that Kat's Geiger counter malfunctioned, reading far beyond the normal scale (possibly due to the same "atomic excitement" that scrambled the signal to Holland).
- When the slide on Kat's M6G locks back it can be seen that there is simply another slide over top of the existing one, but in the locked back position. What makes this obvious is the pistol has two rear sights at that point.
- If the player stands in the doorway of the elevators in Sinoviet Center, sometimes when the elevator is activated the character will be pushed on top of the elevator.
- The side mission objectives incorrectly describe the army troopers as "marines."
Easter Eggs
- The Flyable Pelican and Phantom can be found in this level by activating a switch on one of the buildings near Club Errera. After this is done the player must fly either a Falcon or Banshee through a second building resembling the Shanghai World Financial Center to fly the Pelican or Phantom respectively.
- This is the first level in the entire Halo series in which the player can pilot a Phantom without the use of modifications.
- If a player is flying a Pelican with 3 players either riding in it or in the gunner seat and the driver gets out, the Pelican will fall out of the map with the players inside of it unharmed. The players may then get out and explore the bottom of the map.
- The Shell-shocked Army trooper can be found on this level.
- The soundtracks Never Surrender and Siege of Madrigal are included in the Club Errera easter egg in this level.[1]
- A cut easter egg would have parodied the 1982 game Joust, which featured a knight riding a flying ostrich, by allowing players to ride Moas with jetpacks while wielding energy swords.[2]
- A BOB in a Banshee will spawn every five to seven minutes at one of four spawn sites in the city. This Banshee will not attack, but fly at a low altitude on constant boost in a scripted path leading out of the city. The Daily Challenge "Golden Tree City" rewards the player for killing this Banshee on Legendary.[3]
References
- The level is an homage to Halo 3: ODST, with a similar score, mood, and a brief cameo appearance by Gunnery Sergeant Edward Buck. At the portion of the level involving Gunnery Sergent Buck, "The Menagerie" a song from the Halo 3: ODST Original Soundtrack plays. This is further supported by how the random order of receiving missions in the level echoes players can play Halo 3: ODST levels in a random order, depending which beacon they inspect first.
- To be more specific, the level is extremely similar to the ODST level Kikowani Station, both requiring the player to pilot an aerial vehicle and protect friendly forces.
- The layout of Club Errera, where the two pairs of Hunters are fought, is identical to the layout of the Firefight map Crater.
- The elevator music heard in the Sinoviet Center elevator is actually from one of Martin O'Donnell's old commercial jingles.[4]
- The final chapter, Last One Out... Turn Out the Lights is an obvious reference to Halo 3's level Crow's Nest's chapter Last One Out, Get the Lights and a Red vs Blue episode.
- Noble Six fires 7 shots from Kat's pistol before running out of ammo.
- If the player sees a CCS-class battlecruiser in the sky and pays attention to its movement, it will drift around 117 degrees to the point where it will begin glassing. Uniquely, this is the only level where you can see a Cruiser drift in the same manner as a player is able to drift when steering a Warthog or Mongoose.
Miscellaneous
- Early on in the game's development process, before the level took its current form, Bungie considered the possibility of having the level be set after the city's glassing, with the player controlling a Scarab in the ruins of New Alexandria. While the designers created a gameplay prototype of this concept, the idea was scrapped due to the technical difficulties of successfully implementing a drivable Scarab while keeping the gameplay sustainable.[4][5]
- There are several different random support objectives involving the use of the Falcon (i.e. assisting Buck, destroying a Covenant rooftop transmitter, or helping a group of Troopers kill a group of randomly generated Covenant teams on a rooftop or protect them from Banshees), but only two will be given per playthrough. The random nature of this mission is most likely why there are no Rally Points available, such that it can only be played from the beginning of the mission.
- In the hospital, the cornered troopers are heard fighting the Brutes on comms. However, as revealed in Theater mode, the four troopers are lying on the floor, seemingly incapacitated. The Brutes in the area do not react to the troopers' presence until Noble Six approaches the area, which prompts the troopers to stand up and fire at the Brutes. Occasionally, one trooper would remain in the incapacitated animation, even after the jammer is deactivated.
- This is the first and only level (excluding the Falcon glitch on Winter Contingency) that the player gets the chance to fly a Falcon.
- This is the only level in Halo: Reach that doesn't involve the player(s) to defend the area they are positioned in. However, it can be said that the player(s) are, in fact, protecting the entire playable area, defending the UNSC forces from the Covenant.
- If the player is stranded in an outdoors area, he/she has the option to call for a transport to pick him/her up to replace the lost or destroyed Falcon. The player will be teleported back to the starting platform, and a new falcon will land.
- This is one of the two levels in the Halo games that shows Elite Ultras wielding Fuel Rod Guns.
- The Banshees of this level have no pilots; this can be easily seen when hijacking one. Still, the player can get a Bone Cracker Medal or a Splatter Medal by flipping the Banshee immediately when he/she hijacks one.
- If this level is played on Co-op, the second player will be given a Falcon of their own. The Falcon given to the second player is armed with grenade launchers instead of machine guns.
- This level has the most armor abilities in the Halo: Reach campaign, with six of the seven of them available, the last one being "Evade", which is not available in the campaign at any point.
- Oddly enough, when the Falcon is on the ground, it is possible to rotate the turret far enough to damage the Falcon itself.
- A section of the final cutscene for this level is featured in The Battle Begins trailer. It is however, altered such that Carter is not carrying Kat's body, but an assault rifle. This was likely due to the trailer being released before the game, and the revealing of Kat's death had to be avoided.
- Although the glowing orb in the center of Club Errera appears to be a hologram, it in fact acts exactly the opposite of a shield door: grenades and small arms fire pass through it, but a player cannot. It can be stood upon by a player using a jet pack.
- Killing enemy vehicles (Banshees, Phantoms and Shades) on this level awards vehicle kills and points, but does not contribute to the player's killing spree.
- When in the hospital, on very rare occasions, there will be soldiers with animations in which they will remain laying on the floor holding their sides as if they are too injured to stand up.
- One can actually land a Falcon in the lobby of Sinovet Center before going up in the elevators to disable the jammer if they fly up the right spot.
- This is the only Halo: Reach level where all enemy species of the game are present.
- However, it is the only Halo level were all combatable species are present, as San'Shyuum are never fought aside from the Prophet of Regret's boss fight in Halo 2.
- Edward Buck claimed he never saw a Huragok prior to the Battle of Earth yet there are multiple Huragok in the level. This does not mean he could have never seen one however.
Gallery
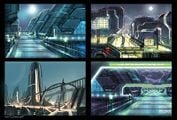
Early concept art of New Alexandria's urban landscapes.
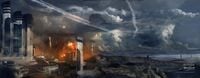
Early concept art of the city's glassing.
- Reach-Concept-CCS-Glassing.jpg
Early concept art of CCS-class battlecruisers firing upon New Alexandria.
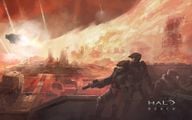
Concept art of the city under siege during the Fall of Reach.
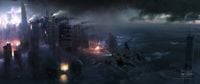
Concept art of the ruined city at night.
Concept art of New Alexandria's skyscrapers.
Noble Six inside the Pelican dropship.
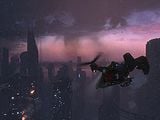
A Falcon flying through the city.
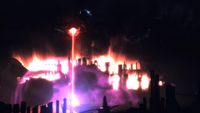
CCS-class Battlecruiser glassing New Alexandria.
Edward Buck piloting a Falcon.
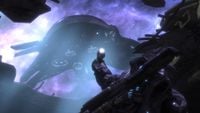
Noble Six firing at a Phantom.
Noble Team looking at the glassed city.


Sources
| Preceded by Exodus |
Halo: Reach Campaign Missions New Alexandria |
Succeeded by The Package |
| ||||||||||||||||||||||||||||||||||||||||||


