|
Prev: |
|
|
Next: |
|
| Assault on the Covenant Landing Zones | |
|---|---|

| |
|
Game: |
|
|
Player: |
|
|
Date: |
|
|
Location: |
|
| Spartan Assault scores | |
 |
Halopedia doesn't currently have a walkthrough for this level; could you write one? |
Assault on the Covenant Landing Zones is the eighteenth mission of Halo: Spartan Assault.
IntroductionEdit
Draetheus V was ill-prepared for a full evacuation. Many ships had been destroyed in the initial Covenant assault. UNSC command estimated that at best, 40 percent might reach safety. The rest would die. Spartan Palmer declared those odds unacceptable and hatched a plan to abuse the rapidly degrading Covenant morale to overrun their landing zones and confiscate their spacecraft.
The Covenant forces stationed at the landing zones were completely surprised by the bold attack. Already displaying cracks in their morale due to earlier losses, the Covenant forces quickly gave up the landing zones.
ObjectivesEdit
Destroy all Covenant Fuel Rod TurretsEdit
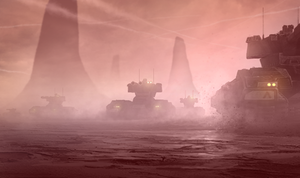
Spartan Sarah Palmer and several UNSC Marines stand nearby a single M850 Grizzly, two M9 Wolverines, and two heavily damaged M808 Scorpions. Palmer enters the Grizzly, and moves forward into battle with the two Scorpions, while the Wolverines remain behind to fire at Covenant air forces. Palmer must destroy five fuel rod turrets. As the tanks move forward, they are approached by two Zurdo-pattern Wraiths. After destroying the Wraiths, the tanks continue to the right and engage and destroy two more Wraiths. As Palmer and the tanks continue to the right, they encounter several destroyed Wraiths and Scorpions, with Marine survivors nearby. In the distance, a Mamua'uda-pattern Shade operated by an Unggoy Minor fires at the tanks, but it is quickly destroyed. A Karo'etba-pattern Ghost, controlled by a Sangheili Minor, engages the tanks, but Palmer easily destroys the vehicle. Continuing right, the tanks encounter another Ghost and Wraith, but all Covenant vehicles are eventually destroyed.
Palmer, her Grizzly, and any surviving Marines or Scorpions move forward. She encounters numerous Covenant forces nearby. Eventually, Palmer comes across Covenant rock blocks protected by a Sangheili Major and two Shades operated by Unggoy Minors. After killing them, Palmer is forced to abandon her tank and navigate through the road blocks to the fuel rod turrets. The Spartan enters the Covenant landing zone, filled with Covenant forces and Spirits. Palmer destroys the nearest one and a Dextro Xur-pattern Spirit arrives over her and deploys Covenant troops. In the center of the air base, a Shade fires at Palmer. The Spartan continues right in the landing zone and destroys a second turret, protected by Shades, Unggoy, and Kig-Yar Minors. After, a second Spirit arrives and deploys Unggoy and Sangheili forces. Continuing on her way, two fuel rod turrets fire at the Spartan, along with a Ghost. She destroys both turrets and the vehicle. The final turret is protected by a large amount of Kig-Yar and Unggoy, led by Sangheili Majors. Palmer fights through the Covenant forces and destroys the turret.
Regroup with UNSC forcesEdit
With all turrets destroyed, Palmer retraces her steps through the base and retreats. While retreating, she fights through the remaining Covenant forces, consisting of Sangheili, Kig-Yar, and Unggoy. Eventually, she returns to the roadblocks and awaits the arrival of UNSC forces.
| |||||||||||||||||||||||||||||||||||
