|
Prev: |
|
|
Next: |
|
| Superstructure Stand-off | |
|---|---|

| |
|
Game: |
|
|
Player: |
|
|
Date: |
|
|
Location: |
|
|
Objective(s): |
Defend the engineer while he deactivates the Forerunner structure. |
| Spartan Assault scores | |
 |
Halopedia doesn't currently have a walkthrough for this level; could you write one? |
Superstructure Stand-off is the fifteenth mission of Halo: Spartan Assault. This is the last mission with the Spartan Edward Davis as playable character. Completing this mission unlocks the Switched Off achievement.[1]
IntroductionEdit
Spartan Davis and the remaining Marines assisted the combat technicians securing the Forerunner structure while the Covenant reinforcements did everything in their power to stop the technicians.
With supporting sniper fire from higher grounds, Davis and his men were able to buy the technicians just enough time to do their work. However, even with their job complete, it was too late for Draetheus V. In the sky they could see the planet had already begun to violently break apart.
ObjectivesEdit
Clear the areaEdit
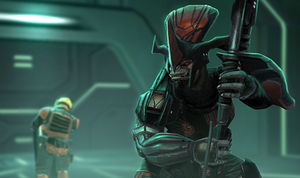
Spartan Edward Davis is standing in the middle of a Forerunner structure, with a terminal nearby. Three Unggoy Minors attack him, but the Spartan quickly kills them all. Suddenly, a Jiralhanae Chieftain rushes out from the south and attacks Davis, but the Spartan succeeds in eliminating the Brute. With all nearby enemies eliminated, an engineer and two UNSC Marines come to the terminal and the engineer begins to work on activating it.
Defend the engineer until the Forerunner structure is openedEdit
Davis must wait one minute and thirty seconds until the engineer is able to activate the terminal. Sniper fire occasionally assists Davis and the Marines. A swarm of Yanme'e Minors arrive from the east and attack the engineer. Davis and the Marines quickly dispatch them. From the west, a Sangheili Minor leads a lance of Unggoy, but Davis is able to kill them all. Shortly after, two more Sangheili-led lances appear from the west and attack the Marines and engineer, but they are eventually killed. As hordes of Unggoy Minors arrive from the west, a second swarm of Yanme'e comes from the east and attacks the engineer. Davis is eventually able to protect the engineer and, with the help of the Marines, kills the Covenant personnel.
Survive until the Forerunner device is disabledEdit
The engineer succeeds in activating the terminal and moves south towards a large wall. Davis must wait two minutes for the engineer to disable the planet-destroying device. As he works on the device, Davis and the Marines are attacked by large amounts of Sangheili and Unggoy soldiers. More lances of Unggoy, both Minors and Majors, led by Sangheili Majors, arrive from the west, while lone Sangheili Majors occasionally charge at Davis from the north. With less than a minute left, numerous Sangheili Minors come in from the north, while a second Jiralhanae Chieftain arrives from the west and charges at Davis. Davis and the surviving Marines attempt to hold them off. With approximately twenty seconds left, a lance of Kig-Yar Minors arrives from the north-west and north, while several suicidal Unggoy come in from the west and north. Davis eventually eliminates most of them. Shortly after, the engineer succeeds in disabling the device.
TriviaEdit
StrategyEdit
- There are two Covenant turrets to the left and right. Hopping in the one on the right allows the player to eliminate most of the initial wave without any difficulty, particularly the Jiralhanae Chieftain. Any Unggoy that are missed will most likely be picked off by the snipers.
- When the Drones start arriving, the player can use the turret to kill a few of them, but it is best to jump out and protect the engineer at close range from the Drones. When Unggoy and Sangheili lances start arriving, the player can use the turret on the left against them with great success if they so wish, but should return to directly defending the engineer when some more Drones arrive.
- For the last part of the mission, the best tactic for survival is to return to the right turret. The range of fire grants the player the ability to shoot targets charging from both sides while avoiding anyone who is not a direct threat.
SourcesEdit
| |||||||||||||||||||||||||||||||||||
