Control Room (Installation 03)
From Halopedia, the Halo wiki

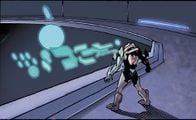
Installation 03's Control Room was the site that controlled all of the Installation's operations. The facility was similar in design and layout to the control room of Installation 08, featuring a hologram of the ring and nearby astronomical objects; after the ring's relocation at the behest of the Ur-Didact, this hologram showed the Halo above a Forerunner planet that harbored the Composer manufacturing installation known as the Composer's Forge.[1]
History
- Main article: Skirmish on Installation 03
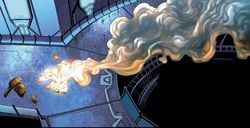
Following the New Phoenix Incident, the Ur-Didact plotted to fire Halo Installation Gamma at Earth. Spartan Blue Team, aided by the betrayed monitor 859 Static Carillon, attempted to stop the Didact. During their battle, Static Carillon teleported the Didact to the Installation's control room in order to aid Blue Team. Determined to confront and kill the Promethean warrior, John-117 arrived in the control room and after a brief exchange of words, inserted the ring's Activation Index into the installation's Core. The Didact was puzzled and asked why the Spartan would activate the ring just to eliminate him. John informed the Didact that he did consider it, but was reminded by the monitor that firing the ring would also kill every living creature within 25,000 light years of the installation. So instead, John did not activate the ring's weapon, but instead disabled its safety protocols; this allowed the monitor to eject a large section of the ring containing the Control Room toward the Composer's Forge below. The monitor rescued the Spartan, while the Didact was disintegrated by the over-lapping pulses released by the Composers, which were presumably destroyed upon impact with the control room. The explosion left behind the Didact's smoldering remains on the control center's floor; the chamber itself remained seemingly intact.[1]
Gallery
List of appearances
- Halo: Escalation (First appearance)
Sources


