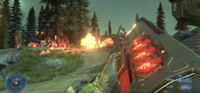
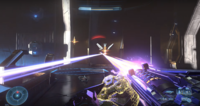
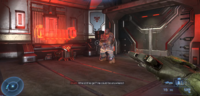
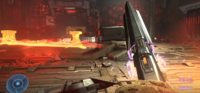
Category:Images of energy shields
From Halopedia, the Halo wiki
Images featuring UNSC, Covenant and Forerunner Energy shielding.
Media in category "Images of energy shields"
The following 163 files are in this category, out of 163 total.
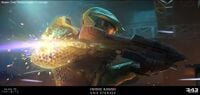
 Charging Zealot.png 1,412 × 1,080; 903 KB
 Elite PDG.jpg 1,060 × 674; 284 KB
 H1 Library assault.jpg 1,280 × 800; 646 KB
 H2 Headlong OutOfBounds.jpg 3,840 × 2,160; 1.47 MB
 H2 Sangheili Shielding.jpg 1,040 × 1,680; 1,020 KB
 H2 Wall Shield.png 2,559 × 1,251; 3.48 MB
 H2A CTF.jpg 1,920 × 1,080; 391 KB
 H3 - Elite Energy Shield.jpg 1,536 × 1,152; 123 KB
 H3 Sentinel Shielding 2.jpg 1,024 × 768; 109 KB
 H3 Sentinel Shielding.jpg 1,536 × 1,152; 259 KB
 H3ODST Huragok Overshield.jpg 1,536 × 1,152; 135 KB
 H3ODST Jiralhanae Shields.jpg 1,536 × 1,152; 136 KB
 H4 Exile SAWFirstPerson.jpg 1,280 × 720; 303 KB
 H4-Raider-Grifball-02.jpg 1,280 × 720; 222 KB
 H5G - Elite Officers.png 1,920 × 1,080; 2.53 MB
 H5G-Assassination-HelpingHands.png 1,920 × 1,080; 2.24 MB
 H5G-Assassination-Liftoff.png 1,920 × 1,080; 2.58 MB
 H5G-Fred&TJoM.png 1,920 × 1,080; 2.8 MB
 H5G-Knight-Assassination3.png 1,920 × 1,080; 2.05 MB
 H5G-Overshield-Campaign.png 1,920 × 1,080; 2.54 MB
 Halo3 Snowbound-3rdperson-01.jpg 1,728 × 972; 299 KB
 HCE SangheiliShield.jpg 640 × 480; 183 KB
 HCE ShieldStation.gif 526 × 714; 5.2 MB
 HCE ShieldTest.jpg 1,366 × 720; 447 KB
 HCE TaR Moa Statue9.png 1,794 × 1,009; 1.6 MB
 HCEA Lat'RavameeSlash.png 3,840 × 2,160; 9.07 MB
 HCEA-EnergyShieldTestStation-Screen.jpg 1,920 × 840; 294 KB
 HCEA-SangheiliShieldsFlicker.jpg 1,140 × 1,320; 492 KB
 HI Screenshot Gameplay-Bulldog1.png 553 × 610; 488 KB
 HINF Achievement MTHBF.jpg 2,560 × 1,440; 171 KB
 HINF Annex Ridge Silo control room entrance.png 2,848 × 1,510; 4.93 MB
 HINF Annex Ridge tunnels.png 2,410 × 1,298; 3.13 MB
 HINF AoR underground.png 2,844 × 1,554; 5.52 MB
 HINF Ardent Hunter auditorium.png 2,438 × 1,288; 2.45 MB
 HINF Banished Shade damaged.png 1,544 × 1,290; 3.01 MB
 HINF Banished Spec Ops Elites.png 3,840 × 2,160; 14.4 MB
 HINF Bassus throws plasma grenade.png 2,018 × 1,086; 2.03 MB
 HINF Bassus vs Rocket Launcher.png 2,422 × 1,348; 3.91 MB
 HINF BipbapShielded.png 3,840 × 2,160; 12.54 MB
 HINF Brute Berserkers Shielded.png 3,840 × 2,160; 16.6 MB
 HINF CampaignOverview.gif 800 × 449; 27.89 MB
 HINF CGP MA40 firing at elite.png 2,560 × 1,440; 2.98 MB
 HINF Command Spire Banished troops.png 2,862 × 1,516; 3.53 MB
 HINF Command Spire disintegrating grunt.png 2,420 × 1,336; 3.68 MB
 HINF Concept JohnDefendingInfinity.jpg 1,824 × 862; 280 KB
 HINF Concept S1ShieldFlare.jpg 1,920 × 1,611; 423 KB
 HINF Concept ShieldsFailing.jpg 1,920 × 939; 358 KB
 HINF Concept ThroneRoom2.jpg 3,840 × 2,303; 1.09 MB
 HINF Concept ThroneRoom3.jpg 3,840 × 2,303; 1.05 MB
 HINF Conservatory Sangheili Warlord.png 2,338 × 1,506; 3.67 MB
 HINF Conservatory Warlord Chieftain duo.png 2,258 × 1,340; 3.36 MB
 HINF Diminisher Ultra.png 2,836 × 1,494; 4.08 MB
 HINF Disruptor vs Tremonius.png 2,004 × 1,318; 2.27 MB
 HINF Elite Brute Banished Shield.png 1,918 × 1,014; 2.5 MB
 HINF EliteUltras.png 3,840 × 2,160; 13.11 MB
 HINF Escharum Shield.png 2,560 × 1,440; 6.79 MB
 HINF Foundation Chief with plasma turret.png 1,796 × 1,324; 2.88 MB
 HINF Grappleshot Banshee.png 2,838 × 1,086; 2.5 MB
 HINF Grappleshot Berserker close range.png 2,858 × 1,502; 4.09 MB
 HINF Grappleshot Chosen Warrior.png 2,016 × 1,272; 3.82 MB
 HINF grappleshot kig yar raider kill.png 2,814 × 1,306; 3.4 MB
 HINF Grappleshot warrior defensive posture.png 1,374 × 912; 1.4 MB
 HINF Grappleshot warrior not affected.png 1,736 × 1,290; 3.18 MB
 HINF HoR 1st floor fighting.png 1,942 × 1,364; 2.61 MB
 HINF Horn of Abolition control room exterior.png 1,646 × 890; 2.08 MB
 HINF House of Reckoning berserkers.png 2,438 × 1,338; 3.83 MB
 HINF Hyperius S7 Shot.png 1,602 × 1,330; 1.87 MB
 HINF Iknovus Firing.png 3,840 × 2,160; 13.3 MB
 HINF Jiralhanae Chosen Warrior Flame Bore.png 1,490 × 688; 850 KB
 HINF Jiralhanae Chosen Warrior M41 rocket launcher.png 1,826 × 1,604; 4.83 MB
 HINF Jiralhanae Chosen Warrior SB Fire.png 1,232 × 1,056; 1.52 MB
 HINF Jiralhanae Chosen Warrior shields up.png 3,840 × 2,160; 17.2 MB
 HINF Jiralhanae Warrior Shielded.png 3,840 × 2,160; 14.25 MB
 HINF Kig Yar Raider melee attack.png 3,840 × 2,160; 16.56 MB
 HINF M41 Tracker locking on.png 2,394 × 1,380; 5.12 MB
 HINF M41 Tracker target hit.png 2,148 × 1,546; 5.46 MB
 HINF Mangler melee attack 1.png 2,378 × 1,292; 3.28 MB
 HINF Mangler melee attack 2.png 2,378 × 1,292; 2.53 MB
 HINF Needler melee attack 2.png 1,508 × 1,260; 2.72 MB
 HINF Nexus hunter vaporized.png 2,378 × 1,286; 3.16 MB
 HINF Outpost Tremonius Firefight Lower Level.png 2,828 × 1,294; 4.59 MB
 HINF Outpost Tremonius Landing Platform.png 2,876 × 1,336; 5.58 MB
 HINF Pelican Down Tovarus defeated.png 1,996 × 1,348; 3.33 MB
 HINF Pelican Down western gun shade no shields.png 2,162 × 1,340; 4.37 MB
 HINF plasma pistol normal fire.png 1,286 × 1,190; 1.15 MB
 HINF Ravager AOE fire.png 2,840 × 1,316; 5.27 MB
 HINF Repository Sentinel fight.png 2,858 × 1,512; 4.11 MB
 HINF Riven Gate Central Gate controls.png 2,802 × 1,340; 4.68 MB
 HINF Riven Gate generator room.png 2,832 × 1,310; 4.31 MB
 HINF Riven Mangler melee Kig Yar.png 2,786 × 1,568; 4.07 MB
 HINF Riven Mangler.png 2,248 × 1,352; 3.58 MB
 HINF Road 5 Gatehouse Warlord.png 2,736 × 1,316; 4.55 MB
 HINF Rohakadu overcharge side.png 2,800 × 920; 3.48 MB
 HINF Sangheili Enforcer BR75.png 3,840 × 2,160; 10.03 MB
 HINF Sangheili Enforcer heavy weapons battle.png 2,870 × 1,330; 4.74 MB
 HINF Sangheili Mercenary BR75.png 3,840 × 2,160; 7.44 MB
 HINF Sangheili Mercenary plasma grenade.png 1,920 × 1,080; 4.53 MB
 HINF Sangheili Mercenary Shotgun.png 3,840 × 2,160; 17.12 MB
 HINF Sangheili Warlord Ravager fire.png 3,840 × 2,160; 17.35 MB
 HINF Sangheili Warlord ravager.png 1,688 × 1,124; 2.25 MB
 HINF SentinelShield.jpg 1,920 × 1,080; 305 KB
 HINF sequence hammer vs sword.png 2,430 × 1,408; 5.27 MB
 HINF shielded brute warrior firing shotgun.png 2,090 × 1,330; 2.78 MB
 HINF shielded brute warrior melee.png 1,850 × 1,376; 3.43 MB
 HINF Shock rifle reloading.png 2,368 × 1,184; 1.72 MB
 HINF Skimmer Melee Attack.png 2,800 × 1,506; 3.75 MB
 HINF Spec Ops Elite grappled.png 1,804 × 1,188; 2.74 MB
 HINF stalker rifle overheating fp pov.png 2,120 × 1,248; 2.8 MB
 HINF Thav 'Sebarim Ghost.png 1,506 × 718; 1.51 MB
 HINF Threat Sensor deployed.png 1,428 × 1,342; 2.12 MB
 HINF Throwing Dynamo grenade.png 1,748 × 1,208; 2.89 MB
 HINF Tower side entrance.png 1,774 × 1,306; 2.35 MB
 HINF Tremonius battle - explosion.png 2,820 × 1,324; 3.83 MB
 HINF Tremonius battle - incoming.png 2,820 × 1,324; 2.91 MB
 HINF Tremonius battle - smash.png 2,836 × 1,352; 3.23 MB
 HINF Tremonius Energy Barrier.png 2,742 × 1,506; 3.79 MB
 HINF UltraGrunts.png 1,920 × 1,080; 3.48 MB
 HINF Ultras.png 1,920 × 1,080; 4.22 MB
 HINF Unggoy Bouncer.png 550 × 650; 793 KB
 HINF Warlord Captain duo.png 2,400 × 1,476; 5.69 MB
 HINF Warlord Chieftain Reachfall stunned.png 1,606 × 1,340; 3.07 MB
 HINF Warship G main hangar elevator.png 2,464 × 1,316; 3.15 MB
 HINF Zeretus.png 551 × 556; 667 KB
 HINF-AngryAxe.png 3,840 × 2,160; 9.23 MB
 HINF-Banished@RivenGate.png 3,840 × 2,160; 14.55 MB
 HINF-Banished@Teash.png 3,840 × 2,160; 13.79 MB
 HINF-BreakerBondBroken.png 3,840 × 2,160; 11.78 MB
 HINF-FeelFreeToScreenshot.png 3,840 × 2,160; 10.74 MB
 HINF-FF KOH PK-83.jpg 1,920 × 1,080; 1.58 MB
 HINF-FragmentationFriends.png 3,840 × 2,160; 15.25 MB
 HINF-Overshield.png 3,840 × 2,160; 9.02 MB
 HINF-S5PK2.jpg 1,920 × 1,080; 1.48 MB
 HINF-ScarrFighties.png 3,840 × 2,160; 13.46 MB
 HINF-TremoniusDeadlock.png 3,840 × 2,160; 13.3 MB
 HINF-UnggoyBouncer.png 842 × 473; 422 KB
 HLW-Block.png 325 × 300; 148 KB
 HR BeachFight1.jpg 1,920 × 1,080; 525 KB
 HR BeachFight2.jpg 1,920 × 1,080; 500 KB
 HR BoneyardBattle1.jpg 1,920 × 1,080; 456 KB
 HR Elite Shield.jpg 653 × 1,145; 221 KB
 HR EliteShield Animation.gif 320 × 320; 6 MB
 HR LabDefense.jpg 1,920 × 1,080; 458 KB
 HR NewAlexandria HospitalJammer.png 3,840 × 2,160; 9.26 MB
 HR NobleAgainstGeneral.jpg 1,920 × 1,080; 504 KB
 HR SabreChasingSeraph.jpg 1,920 × 1,080; 330 KB
 HR Six&EmileAgainstDrones.jpg 1,920 × 1,080; 390 KB
 HR SixShootsZealot.jpg 1,920 × 1,080; 333 KB
 HR Spartan ShieldFlare.jpg 1,536 × 1,152; 176 KB
 HR SpecOpsElites.jpg 1,920 × 1,080; 392 KB
 HRBeta Sangheili EnergyShield Flicker.jpg 1,536 × 1,152; 198 KB
 HRBeta Sangheili Shields.jpg 1,536 × 1,152; 177 KB
 HReach-LNoS-Shielded-Unggoy.jpg 1,920 × 1,080; 814 KB
 HRMPB SwordbaseStockpile.jpg 1,920 × 1,080; 840 KB
 HTV-energyshields.png 841 × 589; 716 KB
 HW DomeOverlook.png 1,920 × 897; 2.22 MB
 HW DomeOverview.png 1,920 × 897; 2.55 MB
 HW GremlinNotM6Laser.png 2,400 × 1,350; 4.67 MB
 HW2 Blitz Ghost.png 1,389 × 1,000; 1.46 MB
 HW2 PhoenixLog Idle Hands.png 1,898 × 345; 1,022 KB
 HW2 PhoenixLog Tread Carefully.png 1,898 × 345; 1,019 KB
 HWG RasusInterdictor Side.jpg 1,122 × 364; 78 KB
 Shield wave 1.jpg 1,368 × 1,080; 1.77 MB
 Spops Zealot.jpg 3,840 × 2,160; 8.37 MB


